SlideShare a Scribd company logo
High Tunnel Construction
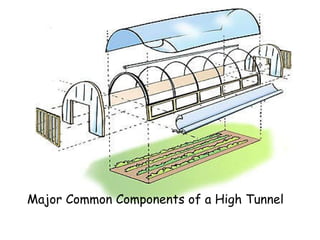
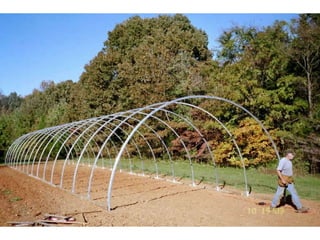
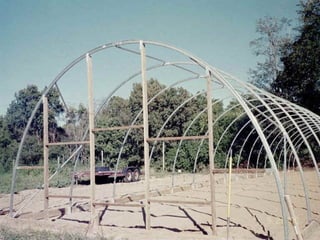
Major Common Components of a High Tunnel
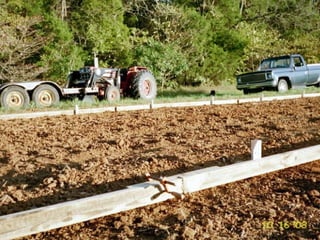
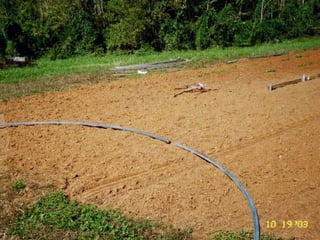
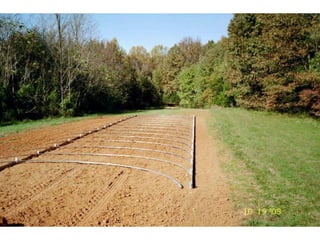
First things first – Site Selection Fertile, well drained soil Full day of sun Proper orientation No persistent perennial weeds
 
Squaring the high tunnel 4 x 5 = 20 3 x 5 = 15 5 x 5 = 25 4 3 5 Pythagorean theorem
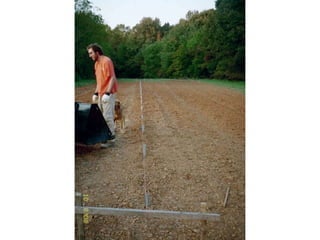
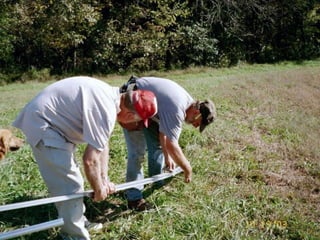
Square up the corners, or make sure the 2 distances between corners is the same, and the frame will be square! Tip – When working with a second person, always have the same person looking at the tape measure when taking the measurement!
 
But what   if instead of being flat, your land lays…
like this…
 
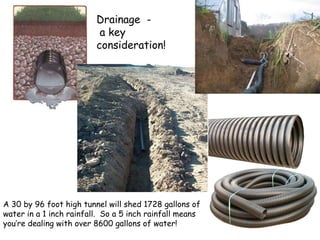
Drainage  - a key consideration! A 30 by 96 foot high tunnel will shed 1728 gallons of water in a 1 inch rainfall.  So a 5 inch rainfall means you’re dealing with over 8600 gallons of water!


Note the use of galvanized carriage bolts.


Here I’m attaching a channel to hold the poly with wiggle wire to the first and last frame of the high tunnel before it’s erected.


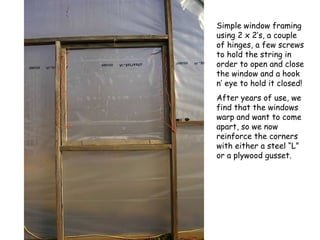
Simple window framing using 2 x 2’s, a couple of hinges, a few screws to hold the string in order to open and close the window and a hook n’ eye to hold it closed! After years of use, we find that the windows warp and want to come apart, so we now reinforce the corners with either a steel “L” or a plywood gusset.
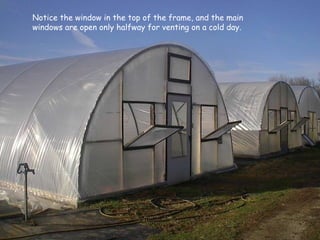
Notice the window in the top of the frame, and the main windows are open only halfway for venting on a cold day.
Here the windows have been opened all the way as the day has begun to warm up.
 
 
Roll up end walls Courtesy University of Arkansas
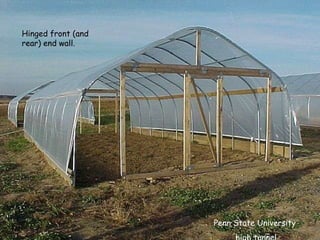
Hinged front (and rear) end wall. Penn State University  high tunnel
Rutgers University
Pictures courtesy Rutgers University A hinged front & rear wall allows the use of larger equipment.
 
Another low tech alternative for an end wall. This type of end wall could allow tractor access if there was no toeboard.
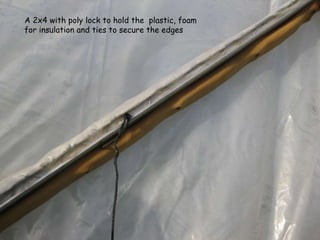
A 2x4 with poly lock to hold the  plastic, foam for insulation and ties to secure the edges
Securing the edges for the evening. Note that when tied, the foam compresses and locks out most cold air.
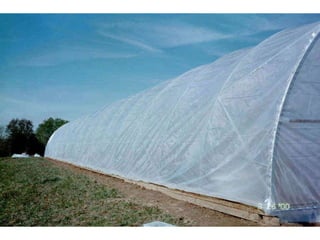
Poly going on a high tunnel
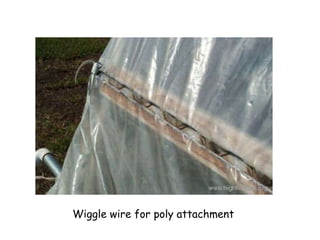
Wiggle wire for poly attachment


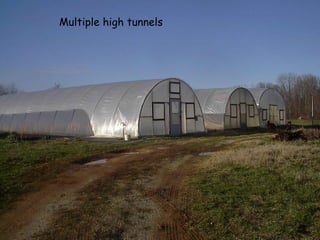
Multiple high tunnels
The distance between high tunnels should be 2 and a half times the height. Here we have covered the area between high tunnels with a weed barrier.
What will it cost?
Manufacturer Dimensions Cost (US $/ft 2 ) Atlas Greenhouses 30 ft. x 96 ft. Conley Greenhouse Mfg 24 ft. x 96 ft. FarmTek 26 ft. x 96 ft. Harnois Greenhouses 20 ft. x 96 ft. Haygrove Tunnels 24 ft. x 200 ft. Stuppy Greenhouse 20 ft. x 96 ft. Zimmerman Welding 30 ft. x 96 ft. Average 25 ft. x 96 ft.  (2400 ft 2 ) ($1.50-$3.00)/ft 2
New vs. Used Things to consider: What am I paying for and what’s the condition? Are the bolts rusted, are the bows bent or missing, what shape are wooden parts and ground anchors in?  What kind of poly attachment system, if any, is there?  Usually the poly covering is not reusable. Can I find replacement parts if needed? Am I required to take everything away ? Are the ground anchor stakes in concrete? How much time and what equipment will be required? Is electricity available at site – power tools make job easier Trips to haul everything back home
Okay, so you decide to buy it First, take detailed pictures before de-constructing Number all parts – attachment of bows may be different, bow to bow For example, label first bow, if three piece, B1L, B1C, B1R As you disassemble, think about safety Put all small pieces – bolts, etc, in labeled boxes or buckets to keep them together and easy to find when re-erecting. Make note of fasteners that will not be reusable so you can purchase BEFORE you are on that ladder needing it. Try to load as you go – not handling more times than necessary When unloading, try to keep pieces together in some order that makes it easy to find Try to re-erect as soon as possible – forgetting comes easy!
Maintenance & Up Keep So we think check your poly for splits and for how fragile it feels, but you may not have to replace it at 4 years.
Keep poly patch on hand to repair tears and punctures Keep a few extra C-clips on hand for your roll-up sides Keep an extra inflation blower fan on hand if you’re  using double poly Remember to check door and window hinges at least  once a year – are they still firmly anchored and  do they move freely Also check doors and windows to make sure they close Make time to walk around your high tunnel in the fall  and make any necessary repairs so that they go  into the winter in the best condition possible.  We suggest doing this in early to mid October so  you avoid doing it during an unexpected  snowstorm in early December.
Any questions?

More Related Content

High tunnel 2 construction

  • 2. Major Common Components of a High Tunnel
  • 3. First things first – Site Selection Fertile, well drained soil Full day of sun Proper orientation No persistent perennial weeds
  • 4.  
  • 5. Squaring the high tunnel 4 x 5 = 20 3 x 5 = 15 5 x 5 = 25 4 3 5 Pythagorean theorem
  • 6. Square up the corners, or make sure the 2 distances between corners is the same, and the frame will be square! Tip – When working with a second person, always have the same person looking at the tape measure when taking the measurement!
  • 7.  
  • 8. But what if instead of being flat, your land lays…
  • 10.  
  • 11. Drainage - a key consideration! A 30 by 96 foot high tunnel will shed 1728 gallons of water in a 1 inch rainfall. So a 5 inch rainfall means you’re dealing with over 8600 gallons of water!
  • 12.  
  • 13.  
  • 14.  
  • 15.  
  • 16.  
  • 17.  
  • 18.  
  • 19.  
  • 20. Note the use of galvanized carriage bolts.
  • 21.  
  • 22.  
  • 23.  
  • 24.  
  • 25. Here I’m attaching a channel to hold the poly with wiggle wire to the first and last frame of the high tunnel before it’s erected.
  • 26.  
  • 27.  
  • 28.  
  • 29.  
  • 30.  
  • 31.  
  • 32.  
  • 33.  
  • 34.  
  • 35.  
  • 36.  
  • 37.  
  • 38.  
  • 39.  
  • 40.  
  • 41.  
  • 42.  
  • 43.  
  • 44. Simple window framing using 2 x 2’s, a couple of hinges, a few screws to hold the string in order to open and close the window and a hook n’ eye to hold it closed! After years of use, we find that the windows warp and want to come apart, so we now reinforce the corners with either a steel “L” or a plywood gusset.
  • 45. Notice the window in the top of the frame, and the main windows are open only halfway for venting on a cold day.
  • 46. Here the windows have been opened all the way as the day has begun to warm up.
  • 47.  
  • 48.  
  • 49. Roll up end walls Courtesy University of Arkansas
  • 50. Hinged front (and rear) end wall. Penn State University high tunnel
  • 52. Pictures courtesy Rutgers University A hinged front & rear wall allows the use of larger equipment.
  • 53.  
  • 54. Another low tech alternative for an end wall. This type of end wall could allow tractor access if there was no toeboard.
  • 55. A 2x4 with poly lock to hold the plastic, foam for insulation and ties to secure the edges
  • 56. Securing the edges for the evening. Note that when tied, the foam compresses and locks out most cold air.
  • 57. Poly going on a high tunnel
  • 58. Wiggle wire for poly attachment
  • 59.  
  • 60.  
  • 61.  
  • 62.  
  • 63.  
  • 64.  
  • 65.  
  • 66.  
  • 68. The distance between high tunnels should be 2 and a half times the height. Here we have covered the area between high tunnels with a weed barrier.
  • 69. What will it cost?
  • 70. Manufacturer Dimensions Cost (US $/ft 2 ) Atlas Greenhouses 30 ft. x 96 ft. Conley Greenhouse Mfg 24 ft. x 96 ft. FarmTek 26 ft. x 96 ft. Harnois Greenhouses 20 ft. x 96 ft. Haygrove Tunnels 24 ft. x 200 ft. Stuppy Greenhouse 20 ft. x 96 ft. Zimmerman Welding 30 ft. x 96 ft. Average 25 ft. x 96 ft. (2400 ft 2 ) ($1.50-$3.00)/ft 2
  • 71. New vs. Used Things to consider: What am I paying for and what’s the condition? Are the bolts rusted, are the bows bent or missing, what shape are wooden parts and ground anchors in? What kind of poly attachment system, if any, is there? Usually the poly covering is not reusable. Can I find replacement parts if needed? Am I required to take everything away ? Are the ground anchor stakes in concrete? How much time and what equipment will be required? Is electricity available at site – power tools make job easier Trips to haul everything back home
  • 72. Okay, so you decide to buy it First, take detailed pictures before de-constructing Number all parts – attachment of bows may be different, bow to bow For example, label first bow, if three piece, B1L, B1C, B1R As you disassemble, think about safety Put all small pieces – bolts, etc, in labeled boxes or buckets to keep them together and easy to find when re-erecting. Make note of fasteners that will not be reusable so you can purchase BEFORE you are on that ladder needing it. Try to load as you go – not handling more times than necessary When unloading, try to keep pieces together in some order that makes it easy to find Try to re-erect as soon as possible – forgetting comes easy!
  • 73. Maintenance & Up Keep So we think check your poly for splits and for how fragile it feels, but you may not have to replace it at 4 years.
  • 74. Keep poly patch on hand to repair tears and punctures Keep a few extra C-clips on hand for your roll-up sides Keep an extra inflation blower fan on hand if you’re using double poly Remember to check door and window hinges at least once a year – are they still firmly anchored and do they move freely Also check doors and windows to make sure they close Make time to walk around your high tunnel in the fall and make any necessary repairs so that they go into the winter in the best condition possible. We suggest doing this in early to mid October so you avoid doing it during an unexpected snowstorm in early December.