Tuesday, March 12, 2013

Essex Man


OK, so I am now in Essex. But it is not all bad as I am in Colchester, which has a University, lots of Roman wall and the Parachute Regiment. Two out of three is not bad.

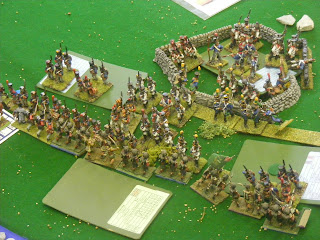
It also has a small wargames club, and I have already pottered over to see what is going on. It is a bit of a mixed bag, from what I could work out, with some periods and styles I do like the look of and some that seem to me screaming heresy. Of the former there looks to be an interesting Crossfire stream with several club members having WW2 forces. I am left wondering whether this would work for WW1 Eastern Front as someone has started bringing out some interesting-looking Austro-Hungarians and Russians are available too. Of the latter, units that are made up of eight 15mm figures on two 1-inch by 1-inch bases might as well be just counters. I do like units to look like units.

The club meets once a week with a larger game once a month. This seems ok and I am already thinking about what I may want to do. There are several projects and ideas that I could either run again or try to get finished for the club entire...

1792


The most obvious is the 1792 figures I have. At my old club of Guildford I ran a series of computer-moderated battles from the French offensive into Belgium: Quaregnon and Marquain and a couple of others. This led to a fully fledged 1792 campaign. I have the figures and have all the research. In fact I have run this campaign twice. In both cases the Austrians had fairly low expectations of their army and were pleasantly surprised that it actually managed to perform adequately. The real laugh were the French players who were all to a man locked in a Napoleonic mindset and assumed their army was the Grande Armee from around 1806. In fact it was the Armee du Nord from 1792. So the complex operational plans soon fell apart whilst on the field the brittle Garde Nationale soon proved to be of questionable value. The key French strategy in 1792 is numbers and attrition, to force the Austrians to 'win themselves to death'.

Camposanto


I can also plan to run Camposanto. This project has been underway for some time but has been moving forward slowly as I have been focussed on troops for bigger games at Liphook. But it would make a good Sunday game for the club, whilst in the interim the units will gradually get to a level when evening games are feasible. What I really need to start thinking about is rules. I have toyed with using Computer Moderated rules, but these may not be granular enough for Camposanto and are not good for large multi-player games. I have bought 'Maurice' and could use that, with some modification for the game itself. The third is to write some rules myself specifically for Camposanto. So far I do not have enough units for a realistic game of any size, only half a dozen battalions per side. But I have the figures to improve that and get to the stage where smaller games are possible. Certainly the units are very pretty, both are very colourful armies and the battle itself is evenly matched so it would make a really good club Sunday game.

 
28mm Napoleonics

OK, so I am now developing serious numbers of these. The main focus at the moment is finishing my French Division, and I am only 3 battalions, a cavalry regiment and a battery away from that. This would give me 15 infantry battalions, three cavalry regiments and three batteries, basically a useable single-player force to which could be tacked on fourth battalions or whatever. After that I can carry on with the Wurttembergers, of which two regiments are now painted but more to do. Also, Front Rank now produce cavalry, light troops and so on which would complete the project nicely. Ultimately this should give a fairly sizeable Franco-Wurttemberg force. The thing is I will need to expand my French, although the more greatcoats the better as all that bloody piping is driving me up the wall...

The Austrians still potter on. They are my passion and I think I will always have some whitecoats on the go. Currently I need to rebalance my force with a lot more German infantry, but my aim at the moment is to complete Hessen-Homburg's Reserve-Abteilung from Leipzig. Yes, I know, it is the one with all the Grenadiere and Kurassiere and 12 battalions of Hungarians, but looking at the battle itself only it and IV Abteilung really did anything of note on day one. II Abteilung was given an impossible task whilst III Abteilung, 1st Light Division and Streifkorps von Thielmann were opposite Lindenau.

Most of IV Abteilung I can field already, ok much of it in raupenhelm but I am not that much of a purist. If Liphook ask I will be able to field IV and Reserve Abteilung by October with a bit of luck. I am not sure the same will be true of my other allied project, Kleist's II Prussian Korps. True I have a large slice of this, but I cannot see me getting it all completed as well as the Reserve Abteilung. One possible club game for a Saturday would be Teugn-Hausen in 1809.

This is not to forget my 1806 Prussians who are now pretty much completed, with 13 battalions and an awful lot of cavalry.

Other things


Yes, there are other things: 20mm Winter War Finns, unpainted 15mm SYW, 15mm Marlburians, 20mm Fictitious wars, 1/6000 WWI Naval, and a lot of 15mm Napoleonics that have not seen the light of day for over a decade. You lose track...On top of this are things that I would like to do: 10mm 1848/9 in Italy (there is a nice Italian manufacturer) is one that I have always wanted to try out. The Western Desert 1941: a refight of Beda Fomm for example.

Anyhow, lets just say that I have more than enough unpainted metal to last me for a while yet. I will keep you all nicely fed with eye candy until the next large Saturday game with the Colchester club: the last one was Austerlitz. I do not know about the next.


Monday, March 11, 2013

Have moved


Just a short post...I have moved out to Colchester in North Essex and have joined the local club. Sort of stimulated me to start painting again and possibly start gaming again too.

Watch this space

K

Sunday, June 19, 2011

The Battle of Bautzen


The Allied Plan

This was a curious battle, as it was going to be successfully won by the allies by retreating. The basic principle was the withdrawal from the trap created by Ney's force arriving on the Allied right. I was playing Blucher, with David Shepherd as Barclay. In effect the Prussians were facing the 'main body' of the French, whilst the 3rd Army of the West under Barclay found themselves in the path of Ney. Operationally the big challenge was the withdrawal of the three Prussian 'brigades' (in effect divisions) from the cul de sac formed by the Boserwasser and the fishponds along the Kleine Spree. This meant that there were only really two bridges that were available to pull them out over, Klein Bautzen and Preititz. 


The overall plan, then, would mean that Barclay and Yorck would have to hold on whilst the bulk of the Prussian army pulled out, and once intact it could take up more credible defensive positions. Tactically the Allies were heavily outnumbered in infantry, but placed their faith in their more numerous cavalry to delay the French while the infantry and artillery made its escape.

The battle

The battle opened with the French attacking the village of Pleiskowitz. This was held by a fairly weak Russian Division, Insov's 9th, but the Russian cavalry, active to the rear of the village, prevented the French from outflanking the place and committed them to some costly frontal assaults. In this fashion Pleiskowitz held on longer than the Allies had any reason to expect, but it was crucial as it prevented the French from taking the bridge at Klein Bautzen. Meanwile the Russians lined the Boserwasser with artillery in the expectation that the area between Klein Bautzen and Preititz would become a killing zone when the French eventually broke through.


Meanwhile the Prussians were moving. Starting with the Brandenburg Reserve Brigade they started pulling out of their position along the road between Doberschutz and Pleiskowitz. The French cavalry had effectively made the bridge at Preititz unsafe, as they had entered along the road south of Malschwitz towards Preititz. Unsafe; basically infantry in march column would be too vulnerable to risk a sudden French breakthrough. So that left one bridge at Klein Bautzen. York, comfortably ensconced in his redoubts had also placed a forward garrison at Kreckwitz, which was a very fortuitous move. This effectively prevented French attacks on his main position and cut off any prospect of the French outflanking his redoubts or passing troops over the Boserwasser.


Further French columns made their appearance. Before  Doberschutz the Wurttemberg Division made an appearance. A Further French force, Delmas' Division, began arriving over the Spree having thrown over a pontoon bridge and yet another (Albert's Division) from Sarchen having skirted round the back of Plieskowitz. A luckily drawn 'impassable' card was played by Blucher on one of the Pontoons (it 'collapsed') reducing Delmas' Division to one bridge. Still, the Prussian brigades in the centre began closing up in defensive postures, backed up by the Guard Cavalry.


The most dangerous French column was undoubtedly that of Rochambeau's Division and Chastel's Light Cavalry  on the extreme Allied left. Driving for Baruth and Rackel, thinly held by Illowaisky's Cossacks and Lansky's 'mobile corps', with no infantry at all. But, by skilful handling of the cossacks, the French were reduced to a crawl. The Prussians quickly realised that the Russians here had to be reinforced. Whilst the Brandenburg Reserve escaped over the bridge at Klein Bautzen and made for the space east of Preititz to draw up, the Lower Silesian Brigade (next out) was detailed to withdraw to Belgern and occupy the heights there, cutting off any French effort to sever the Allies' line of retreat.


The French were just not able to move fast enough. Two main obstacles confronted them: the ubiquitous Allied cavalry and the 'channelling' effect of the various streams. The French, once they had finally taken Pleiskowitz found themselves funnelled into the killing zone that Barclay had created with his artillery lined up behind the Bosenwasser. The Prussian reserve cavalry got out having lost one regiment to the French, and several infantry battalions as well whilst the survivors of Von Zeithen's Upper Silesian Brigade struggled over the Bosserwasser and formed up behind Yorck around Purschwitz before themselves starting out in the direction of Wurschen.


Aftermath

This had only brought the French up to the Bosserwasser itself, marshy and difficult to cross, it had been identified by the Allies as their main line of defence. But, with a Prussian Brigade comfortable positioned at Belgern, another on its way and the Brandenburg Reserve plugging the hole between Preititz and Belgern the Allies had effectively escaped the trap relatively unscathed. Indeed the French were pretty much intact too, as units of infantry in the open had either formed square when charged or simply dissolved. Most remaining units on the table were pretty much intact.

From the Allied perspective they could probably have comfortably sat behind the Bosserwasser all day, with Yorck withdrawing to a position parallel to Preititz and the Prussians spoiling to put in an attack against the fairly isolated Rochambeau, who was going to prove hard to reinforce.


The Allies had ruthlessly exploited the rule which said that no infantry unit was able to advance against a cavalry unit unless in square. A single regiment could not hold up a brigade, but the Allies had plenty of cavalry to spare, whilst often individual French units not in square or disordered were picked out and dissolved in the face of a charge. This caused considerable irritation to Ney (Steve Clubley) who complained loudly to anyone prepared to listen, and even those that weren't.  Not prepared to change a rule in the middle of a game, which would be madness, I still think that there should be a tweak to cover cavalry exhaustion. Whether this is through 'blown' markers or taking longer to recover disorder I do not mind. But it has to be noted that multiple charges by Heavy Cavalry in particular were pretty rare in a battle, they seem to have been a 'one shot' weapon!

K

Thursday, February 24, 2011

For Sale: Bavarian Generals

For Sale


A few months ago I bought one sample from each of the range of Front Rank's Bavarian Generals. I had hoped that they may prove suitable for my Wurttembergers in some way, and a couple are as ADC figures from the Guard Infantry Regiment. The remaining three I painted up as Bavarians, and if anyone is interested in them drop me a line at [email protected]. I was thinking around £5 sterling each plus whatever the postage costs...


K


Refight of Fuentes de Onoro


Fuentes de Onoro

Another holiday in Spain

This is just a brief summary of the latest 200-ers battle, Fuentes de Onoro, that took place on the 20th February. As it was a Peninsular game, and the Peninsular bores me to tears, I was umpiring. In fact, we were so short of players (and one did not turn up on the day either) that I was the only umpire, although two other players were designated player umpires, and one (David) was commanding the British cavalry. He managed to get virtually all of it destroyed within the first 90 minutes of play and reverted to a full umpiring role.

The opposing plans

The British plan was a classic Peninsular one: stand on the defensive. Indeed, given that they were supposed to be covering the siege of Almeida, it made perfect sense in the context of the game. The overall command was taken by Haim, his first time in overall command, and it was a big ask. Basically the French had an overall superiority of 5000 infantry and 2000 cavalry.


The French plan was considerably more complex and comprehensive. The sheaf of orders was considerable, primarily because the French CinC was Peter, an ex-Gunner and staff officer so it was all very Nato-inspired. You can get a flavour of this from his Jena orders back in 1806 that are on this blog for that year. The French plan, in essence, was to use their numerical superiority to 'fix' the British in the centre, while enveloping the flanks. Particularly important was the considerable French advantage in cavalry: 2000 does not sound like that much, but at our ratio that is an extra 40 figures, maybe half a dozen units.

The battle

The battle very quickly broke down into three separate combats. The first was around Fuentes itself, the second in the centre, and the third being the envelopment around the British right flank and the Almeida road.


The Centre battle initially was where the action was. The French looked very threatening as the bulk of 9th Corps plunged quickly towards the isolated 7th Division along with the single division 8th Corps. To stave off this rapid advance the British sacrificed their cavalry, and this bought some time for 7th Division to gradually withdraw, although they lost one isolated battalion and the vast majority of Wellington's slender cavalry force had gone. Meanwhile, the remainder of 7th Division pulled back and anchored itself on 1st Division with the Light Division on its right. Left behind in the woods near Pocovelho were the Brunswick-Oels Jager. With no orders to do anything (even general ones) they confined themselves to roadwatching and hiding in the woods. The Centre then became more static as the French 9th Corps faced off against the British, who put in a couple of sharp charges in line to spoil the French deployments. Despite this neither side looked like making a breakthrough here: although it must be remembered that the French were not tasked to do so.


Then the French triggered their next move: the march of 8th Corps' single division and the Army of the North's cavalry around the British right flank. This was partially disrupted by some irregular Spanish cavalry under Sanchez above the Almeida road, but this was really just an irritant. By launching this left hook the French forced the British to deploy their sole remaining reserve, Pack's Portuguese, to extend their line. Wellington was now committed to his uttermost limit, with no reserves left.  Meanwhile the French cavalry superiority now came wholly into its own as Marshal Bessieres led his cavalry along the Almeida road towards Villa Formosa, deep in the British rear and their supply nexus. Along with the cutting of the road to Almeida this would leave one remaining road open to the British.


Over in Fuentes de Onoro the French 6th Corps under Richard Shilvock faced off against Asher Ben-Zion, Haim's son and on his second game. Richard had been told to hold until the British were wholly committed. Once this had happened he launched a division-level attack north of Fuentes de Onoro against a scanty British defence. The British had five battalions tied up in Fuentes itself, which could have been successfully held by two, and as the British started running out of men to stop Richard's attack they eventually started pulling them out. This was helped by a sharp attack that Asher had put in against a French division south of Fuentes which had been very successful. With no pressure on that road at least they could withdraw in safety. Equally, Asher's defence around the walled area immediately to the north of the village was trenchant and held off the French. But Richard's attack on the heights north of the village had swept aside the British, and one French brigade and the 6th corps cavalry plunged towards the last remaining British escape route, cutting it and sealing Wellington in. At this stage the British capitulated. The only non-prisoners were the Brunswick-Oels Jager, who slipped away quietly to join the partisans.


Post battle analysis

This had been a pretty one-sided affair. The overall French superiority of numbers, a highly experienced French CinC versus a tyro British one and a Peninsular battlefield where cavalry were actually useful made it a bit of a walk in the park for the French. The first thing to note, and as I said to Haim, is that a good catastrophe is always instructive and best to get out of the way early. My first time in the big chair was Eylau and I was captured by turn 10. Ideally the British needed at least another division in order to hold their position, and Haim was right when he put his finger on the British lack of cavalry as a main reason for his defeat. But there were others, smaller factors, that contributed too. One was the understandable draw of being bogged down in the tactical, rather than looking 'up from the mud' and seeing the bigger picture. Haim, like many others, was guilty of this, but that is a matter of experience. His decision to defend all of Fuentes how he did with the numbers that he did is also open to question. A more economical defence would have been to abandon most of the town and pull back to the churchyard, and defend the walled area to the north only along the exit side rather than man the garden itself like a redoubt. This could have freed up three or four battalions, enough maybe to stop Richard's attack to the north of the village.

Personally, and I mentioned this to Trevor, the two commanders should have been swapped over, giving the veteran Peter the far harder challenge. But, again, like Hohenlinden everyone ended up doing something, rolling dice and moving troops. This level of activity is good in a big game, where often one sector stays pretty quiet. A comprehensive French victory, and the capture of Wellington and his entire army.
K

Wednesday, February 2, 2011

The Art of Command


The Two Hundreders
I have been thinking for some time about battle management, specifically in relation to the big games that we do. In many ways this is a true life test, involving various levels and types of management that are often confronted in many other environments. So I thought that a short essay describing my thoughts, now I have personally commanded several major battles and participated in more, would act as a good basis for discussion. For the record I have taken the big chair at Eylau (a catastrophe), Sacile (stumbled to victory), Aspern-Essling (a very clear victory), Auerstadt (slightly less of a catastrophe than Eylau) and Hohenlinden (a victory). In other words my efforts have veered between total disaster and outright victory.

The nature of our battles

Ours are not standard wargamers' battles, with maybe one or two players per side at corps level. We undertake very large projects, with between six and ten players per side, sometimes more, fighting very large battles on a large scale. Played with 25/28mm figures, with the figure scale at between 1:40 to 1:60, these are complex undertakings. The very scale of the things goes some way to preclude the 'helicopter General' approach, but we also always have one to three umpires, plus Trevor who builds the terrain and acts as a sort of Ringmaster, keeping us moving and trying to stop things getting bogged down.

Restrictions

Each battle is a stand-alone and is hedged in with restrictions. It is these restrictions that a CinC must first consider when embarking on the battle. These may be related to terrain, weather, formation arrival times or communications to name but four. In other words no CinC confronts some sort of Tabula Rasa when approaching the battle itself. In some cases these restrictions are open to adjustment, as I did at Aspern-Essling based on the terrain, in some cases they have overbalanced the game, as they did at Auerstadt. In other words a balance has to be correctly struck, and, of course, players usually want as few restrictions as possible! But these restrictions have to be incorporated in any initial thoughts about the game and really have to be nailed down before effective planning can take place.

Planning

Players map for Auerstadt
The first rule here is to have one. A bad plan is better than no plan at all. Taking a step back from the situation as it stands will provide certain parameters that give any plan its initial shape or provide a series of options. One of the first issues any general will face is considering his army's attitude: 'will this be an attacking plan, a defensive plan or a combination of the two?'  It is very rare, in my experience, for players to adopt a purely defensive stance unless the enemy is compelled to attack. In some games, such as several Peninsular games, this is the case. Far rarer in my traditional stomping ground of central Europe and Italy, but Jena was a case in point. More frequent is the plan that involves attack with pretty much everything. This was the principle I adopted at the recent Hohenlinden game. Here the Austrians had no choice but to attack, given the structure of the battle and the context it should have sat in.

More likely a general chooses to attack along some part of his line and defend somewhere else, maybe adding complications like feints and outflanking moves into the mix. This was my eventual choice at Eylau, opting for a right hook rather than defence all along the line. At Sacile my decision to attack with my right was changed due to the circumstances of the table and I started to back my victorious left: in other words do not let your plan become your gaoler.

Colin Boulain at Austerlitz
So, once you have decided on your overall attitude and taken into account objectives, timetables, the weather and a whole host of other factors you can attempt to draw up a plan that looks workable, but with enough slack in it to deal with unforseeable circumstances. In this plan you will take into account given objectives and the terms of victory. Layered on top of that is the 'art of the possible'; what you actually think is realistic. Orders should be clear and precise leaving no room for doubt. I am still developing my skills here, often using convoluted language and refusing to call a spade anything other than a broad bladed digging implement. They should be despatched, with a map, well in advance of the game to the appropriate subordinates.

Personalities

Aspern-Essling underway
Unlike smaller games, larger ones involve lots of people management. Once you have hit on a plan you consider workable you then need to consider its implementation. As CinC you are not going to be doing this; your subordinates are.  In other words this is not a role that lends itself to control freakery. A lot depends on how well you know your subordinates as individuals. In a club you are far more likely to know your opponents than your historical counterparts did, and possibly less likely to know your own subordinates. Still, it is often worthwhile to look at the subordinates that you have been allocated, or have signed up for your side. I am unusual as a player as I do not play French. Even more so in that I am now almost totally socialised into thinking and behaving like an Austrian general! Most players are not that unfortunate.

Players may be good or bad, be aggressive or defensive, thoughtful or rash, willing to exceed their orders or rigidly obey them. Trying to fit round pegs into round holes is quite important and can give your plan a better chance of success. I have never been keen on the long screwdriver, so I like to issue mission or objective related orders and leave it to the players to carry them out. I have seen plans that specify the disposition of individual battalions, robbing players of their initiative, something I categorically refuse to do.


Counter-Intuition

It is important not to get too bound up in this. While it is clearly of value to put yourself in the opposing general's shoes and try to consider what options are open to him, it is an approach that has clear weaknesses. The more options your opponent has the less valuable this exercise will be. If you know where your enemy will be, and that he has a limited range of opportunities, counter-intuition can yield positive dividends. A good example is the plan I wrote for Aspern-Essling; I knew exactly where the French were due to be and that they had three effective options. But at the opposite end of the spectrum would be Hohenlinden; I had no idea where the French were, what freedom of redeployment they had been allowed and what restrictions they were operating under. The only things I did know was that I was looking for 5 divisions and that in order to win they needed to seriously maul me. The only response here, given the other restrictions and expectations, was to draw up a plan that attacked everywhere in the hope that enough attacking formations would succeed to bring victory. Both approaches were successful in their given context. The trap that you must never fall into is to allow this process to paralyse you into 'what if he does this? What if he does that?' and use it as an excuse for inactivity. 

Archduke Charles and staff
Objectives and Intelligence

Some battles we play have clearly defined pre-game objectives, such as towns, villages or geographical features. These would have been taken into account when drawing up the battle plan. Beyond this there will be objectives that may reveal themselves during the game, such as enemy lines of communication or objectives which unhinge an enemy position.

As well as what may look like obvious positions for the enemy to be, or head for, the pre-game emails may reveal additional intelligence. This may be incorporated into the plan, or may be unveiled during the 'approach' to the table itself. For Hohenlinden we were all mystified by sounds in the forest, tracks in the snow and various ambuscades along the line of march. Potentially more reliable than counter-intuition, the bumping in to real enemies may build on growing doubts, could be wholly misleading and rob the CinC of common sense in favour of firefighting.

Briefings

Sometimes we hold pre-game briefings. This very much depends on the nature of the game itself. These are very useful insofar as they allow players to clarify their individual orders and understand how they fit into the greater whole. These must not, however, dissolve into a discussion of the validity of the plan itself: this is not a Council of War. You cannot expect to rewrite a whole battle plan in the 5 minutes before a game starts.

In-game intervention

I managed to create a traffic jam at Eylau
You can generally tell how well a game is going, as CinC, dependant on how many orders you issue. If your plan is going smoothly then your need to intervene should be limited. If, however, things start going off the rails then you need to start despatching orders redeploying and realigning as well as using the potential of the CinC to give direct orders to formations. By far the worst defeats I have seen is when the loser moves in an apparent fog of battle, seemingly unaware of an impending catastrophe, intervening far too late or not at all. On the other side is the habit of creating traffic jams, especially at the point of attack. My own personal weakness, demonstrated at Eylau, Sacile and Auerstadt, is the ability to overload an area with troops who simply get in the way of each other. This, in my case, is where I really have to sit on my hands in a big way. The concept of reinforcing victory, not defeat, is a principle that can be taken too far.

So, to sum up:

  • Be clear about restrictions and on-map objectives
  • Decide on the overall attitude your force will adopt
  • Draw up a plan reflecting that attitude
  • Fill roles as best you can with players that fit the plan
  • Be counter-intuitive if possible, but do not become its prisoner
  • Be aware that pre-game intelligence is only a snapshot of the true situation
  • Use briefings to illuminate the orders and the overall plan
  • Do not intervene in-game unless you have to

K