How to Repoint Brick Veneer Walls
EducationHow to Repoint Brick Veneer Walls

One of the most common problems with brick veneer walls occurs along the mortar joints. It is unlikely you will have problems with the bricks themselves unless they are defective, extremely old, or are not appropriate for brick veneer walls. If mortar is poorly applied or contains substandard ingredients, it will eventually crumble. Even the best mortar wears away eventually as the mortar shrinks and cracks open. Freeze-thaw cycles in cold-winter climates, heavy rain, settling, and earthquakes also result in mortar problems.
Heavy rain and dampness can also cause brick to lose its effectiveness as insulation and may eventually affect the finish of interior surfaces. Check to make sure that your brick veneer has sufficient weep holes installed along the base of the wall. They are normally found in the bottom course at 2 foot intervals at the brick ledge. A brick ledge is a shelf created in the foundation wall that supports the weight of the brick.
Weep holes can either be drilled into the mortar joints, a small plastic tube that looks like a straw, a hollowed out vertical mortar joint, an oiled cotton wick, or a honeycomb matrix that is inserted into a vertical mortar joint. In modern brick veneer walls, there is also a drainage matrix that is installed between the brick and the exterior sheathing to allow the flow of water and air behind the brick. Weep holes are also installed above window and doors along the steel brick shelf called a lintel.

Lintel Detail Above Window
Older brick is soft and modern mortar is hard. Repointing old brick with Portland-cement based mortar will cause the face of the brick to fracture and flake off as the wall expands and contracts in temperature changes and settling. You may need to have a mason come out and inspect your brick veneer to determine what the best way to repoint the wall is. Most brick made before 1930 will be soft brick for use in walls with lime mortar.
Repointing is a process where mortar is first removed from the brick joints and then new mortar is applied. Here’s how to do it:
1) Buy dry, weather-resistant Type N ready-mixed mortar at your home improvement center and mix it according to the label directions. The mortar should stick to the bottom of the trowel when ready.
2) Using a cold chisel and hammer, chip out the crumbling mortar to a depth of 1/2 inch and then brush the joint vigorously with a wire brush. If you have a lot of mortar to remove over a large area, consider purchasing or renting a special grinding tool called a tuckpoint grinder. (Even though tuckpoint means adding mortar over existing mortar joints, this grinder removes the mortar from the brick joints.)

Tuckpoint Grinder (Bosch Tools)
3) Dampen the cleared joints to accept the new mortar, and, using a small trowel, pack the new mortar into the joints. Tamp the mortar with the flat of the trowel to make sure the mortar completely fills the joint. You can also purchase a pointing trowel to make the job easier. Hold a large trowel upside down with mortar against the mortar joint and then use a jointer or pointing trowel to push the mortar into the joints.
Pushing Mortar into the Joints
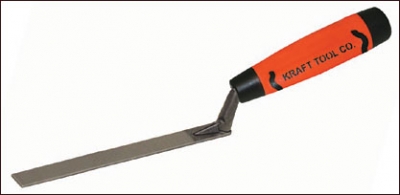
 Caulking Trowel
4) Allow the mortar to set up until it’s somewhat firm and then finish the joints to match the existing joints by striking the joints with a jointer. Most often, the object is to give the joint a slightly concave profile. Most jointers have two sizes, use the size that best matches your brick profile. Make sure that the mortar does not stick out past the face of the brick. This will trap water and damage the brick.

Jointer
5) Remove excess mortar from the surface of the brick using a clean trowel.
6) Allow the mortar to set up and then sweep it with a stiff brush.
7) Use a damp rag or sponge to keep the mortar joints moist for about four days. This ensures that the mortar will cure properly so that it doesn’t crack.
Repointing with Lime Mortar
• You can purchase pre-mixed lime mortar at some home centers or masonry suppliers. You may need to use tinted mortar to match the mortar on your home. The lime mortar, or putty as it is often called, needs to be kept damp for at least 3 days after it is applied. You may need to dampen the wall with a light spray of water and then cover with plastic.
• Once ¼ inch of the mortar has been lost, it is time to repoint the wall.
• It is better to apply lime mortar in 2 or 3 passes instead of one thick application.
• After the mortar has set, 30 minutes to 1 day, scrape off any protrusions with your trowel and then use a stiff brush to match the rest of the wall. Test the mortar by pressing your thumb into the mortar, if it doesn’t show a mark, then it is ready for another application of mortar or brushing.
• Repoint only when temperatures remain between 40 and 90 degrees Fahrenheit, even at night. Cold makes mortar brittle and heat dries it out and prevents hardening.
• Be careful not to chip or damage the surface of the old brick. The face is fired and the center is soft, like a tooth with a hard enamel surface. If the face is damaged, water will be able to get into the brick and weaken it.

