
Crochet a purse, the Portable ribbed bag pattern – here is a free crochet purse pattern on how to crochet this ribbed purse. The ribbed crochet bag is not only portable, but it is also very easy to crochet.
Incase you are also looking for a large crochet bag, the “fit all” kind of bag you can check out the Mellow tote bag or the Japanese knot bag.
This crochet purse is crocheted in two parts, the handle and the bag. The stitch terminology is used in US terminology. Only slip stitch and single crochet are used to crochet this purse.

Skills required for the crochet ribbed bag
To crochet this ribbed bag, one has to know how to crochet the basic single crochet in the back loop and slip stitch.
Material list
- Crochet Hook size 6mm
- Rope or t-shirt yarn or any other yarn that is about 3mm thick
- Meters used – 200 meters / 218 yards
- Scissors
- 1 Stitch marker
Gauge: 4″ = 10 rows x 11 stitches in single crochet in the back loop only with 6mm hook.
Finished crochet ribbed bag measurements – 11 inches width x 7 inches height
Crochet Terms for the crochet purse in US Terminology
• inc – increase (add one or more stitches) in this pattern add 2 more stitches so that the stitch has a total of 3 stitches.
• dec – decrease (eliminate one or more stitches) in this pattern eliminate 2 stitches by single crocheting 3 st together to remain with one
• turn – turn your work so that you can work back for the next row
• join – join two stitches together , done by working a slip stitch in the top of the next stitch
• rep – repeat (do it again)
• bl – back loop
• st (s) – stitch(es)
Stitch guide:
• ch – chain
• sl st – slip stitch
• sc – single crochet
Pattern notes:
• When starting a new row do not crochet in the turning chain.
• You can change the size of the bag by adjusting the number of the foundation chain, just make sure that you have odd number of chains so that you can have a middle stitch.
Instructions: Crochet a purse pattern
Row 1: Chain 17, put the stitch marker into the 9th ch, (total 17) ch 1 and turn.
Skip the first ch, slip stitch in the next 3 ch, sc in the following chains until you reach the stitch marker. In the marked ch that is ch number 9, inc with 2 st (that is put 3 sc in that ch and put back the stitch marker in the 2nd ch of the inc as shown in the image below). Continue with sc into the following chains, slip stitch into the last 3 chains. (Total stitches 19), chain 1 and turn

Row 2: From this row until you finish crochet in the back loop (as shown in the image below). Slip stitch in the first 3 sts, sc in the following sts until you reach the stitch marker. In the marked st inc with 2 sts (that is put 3 sc in that st and put back the stitch marker in the 2nd st of the inc). Continue with sc into the following sts, slip stitch into the last 3 sts (Total sts 21), chain 1 and turn

Row 3 – Row 10: Repeat row 2 (each row should increase the total number of stitches by 2. Therefore row 10 should have 37 stitches).
Row 11: sl st into the first 3 sts, sc into the following sts, sl st into the last 3 sts (total st 37) ch 1 and turn.
Row 12 to Row 22:
Repeat row 11 (each row will maintain 37 stitches)
Row 23: count stitches and put a stitch marker into the middle stitch or stitch number 19. Slip st in the first 3 sts, sc into the following sts until you reach the stitch before the stitch marker. Decrease the st before the st marker, the st with the st marker and the st after the st marker, that is dec stitch number 18, 19 and 20 to remain with one st (that is single crochet together 18,19and 20 as shown below). Sc in the following sts, sl st into the last 3 sts, (total sts 35) chain 1 and turn
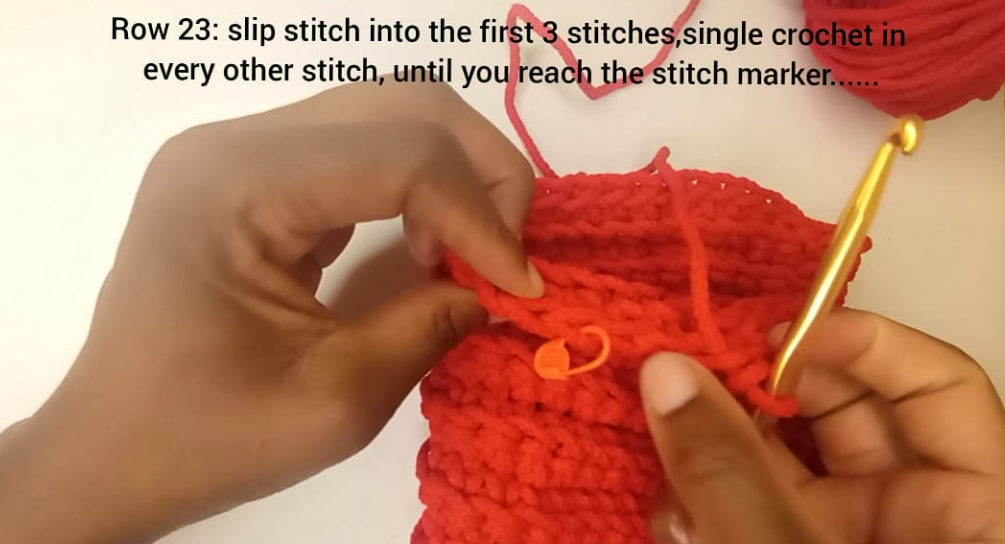
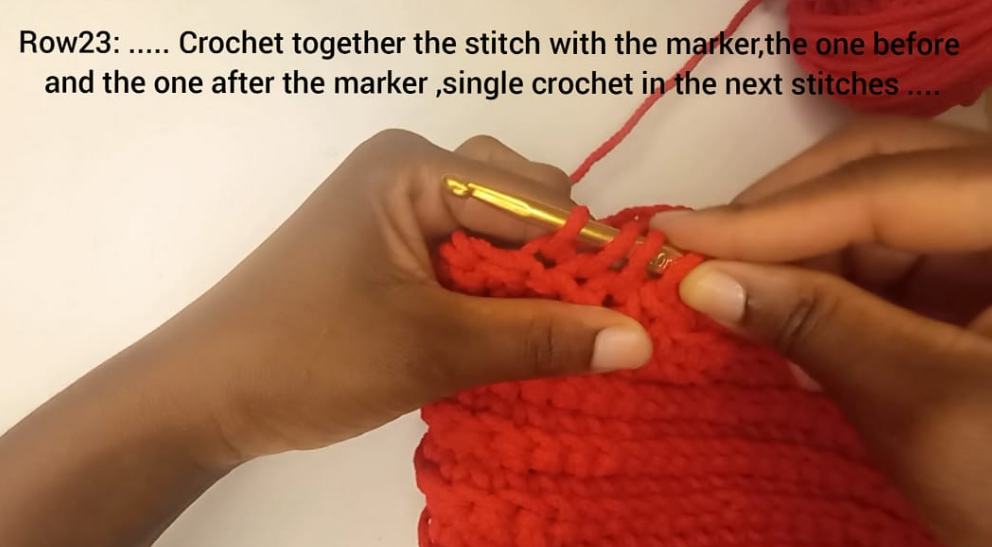
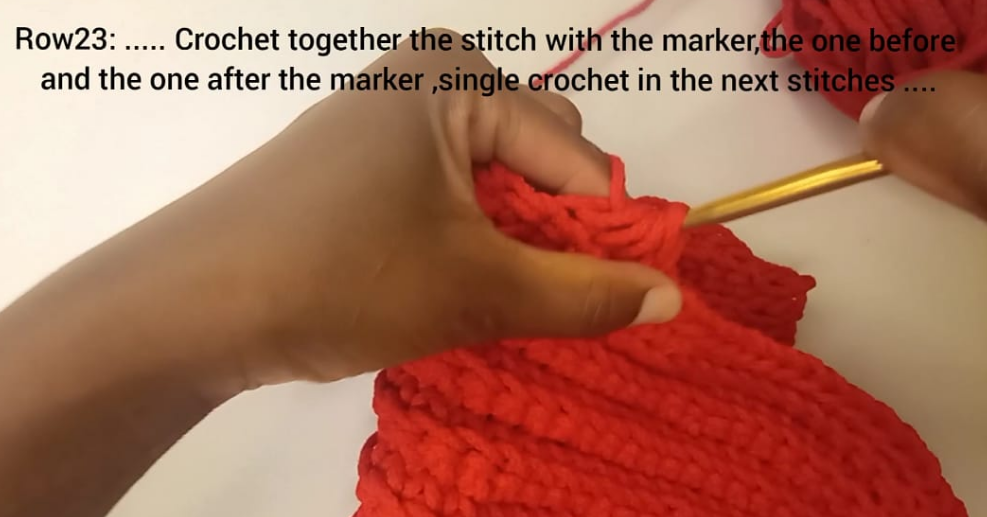

Row 24 – Row 32: repeat row 23 (each row should decrease stitches by 2 therefore row 32 should have 17 sts)
Row 32 is the final row then we move to the handles.
Crochet a purse Handles x2:
For the first handle: Ch 33, join the last and the first chain with a slip st to form a ring or circle. Slip stitch into every ch. Join the handle to the bag with single crochet (as shown below)
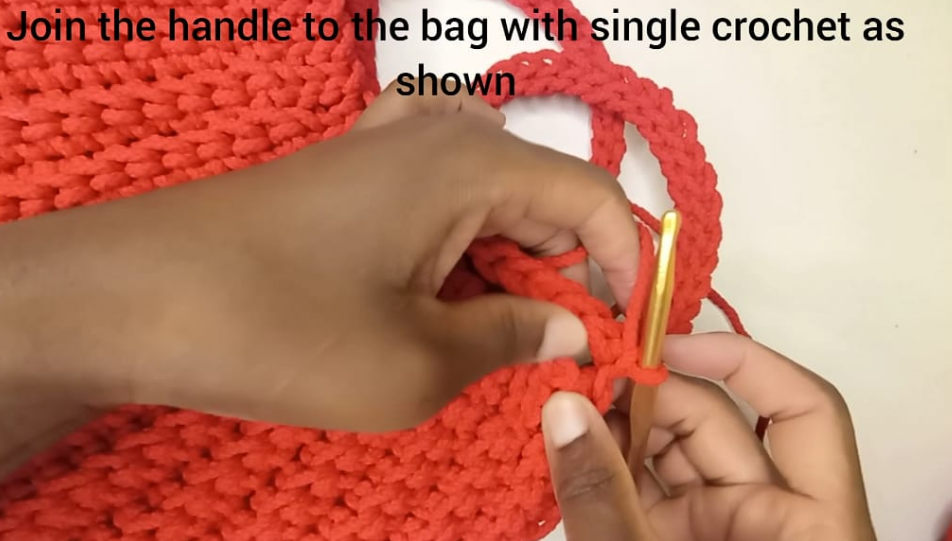
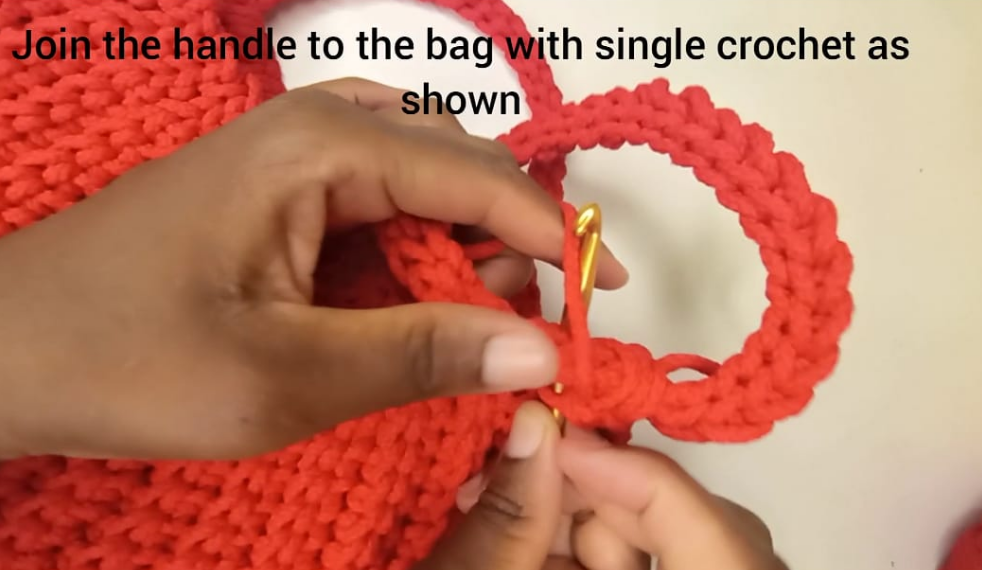
Continue with single crochet until the handle is firmly attached to the bag.
Repeat as instructed on the first handle and crochet the second handle.
Finishing off:
After attaching the handles to the bag crochet slip stitch right round the edge of the bag. Cut and fasten off the ends to finish the bag.
Your crochet ribbed bag is done.
Here is the link to the video tutorial
