How to Install A Custom Paver Patio
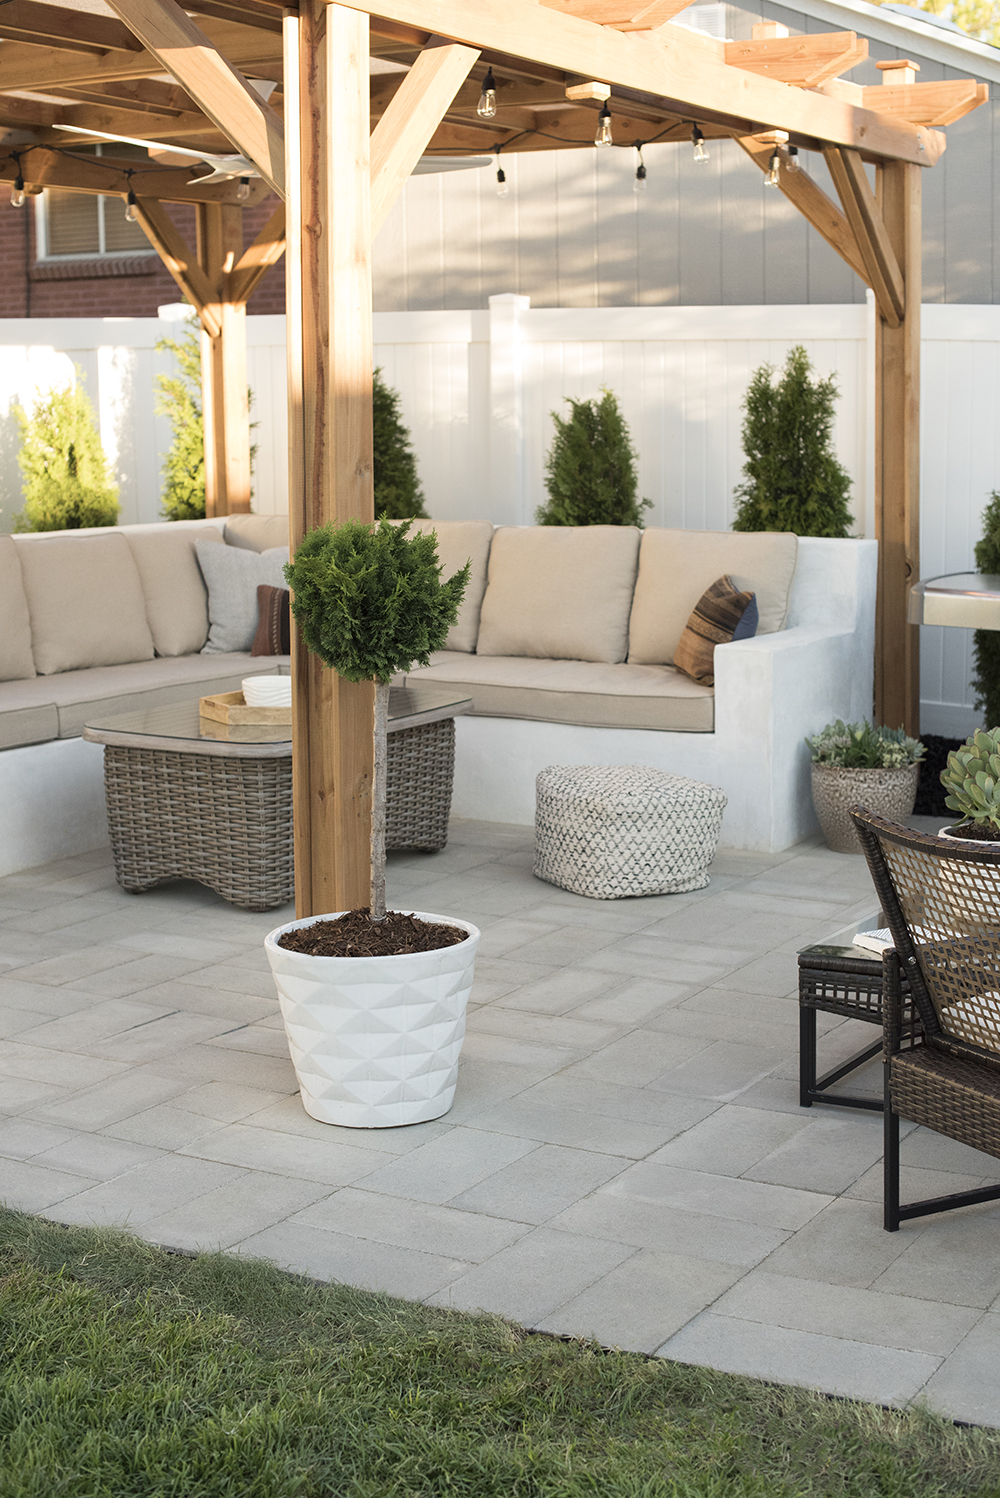
Paver Patio DIYTo kick off the second day of Backyard Week, I’m bringing you everything you need to know about installing a paver patio… the good, the bad- and the ugly. Trust me when I say you can save a TON of money by doing this yourself. It’s an easy project once you’re prepped and ready. Click through for a detailed tutorial…

I’ll preface this post by saying this project is a lot of work, but it’s not difficult work. I’d also recommend tackling this in cooler temperatures or of an evening. We basically worked through 100+ degree weather and it was a bit miserable at times. So why would anyone want to attempt a DIY paver patio? You could save an upwards of $10,000 – $30,000 depending on the size. I’m not even joking. I tried to hire certain things out and it just wasn’t in the cards for our timeline or budget.

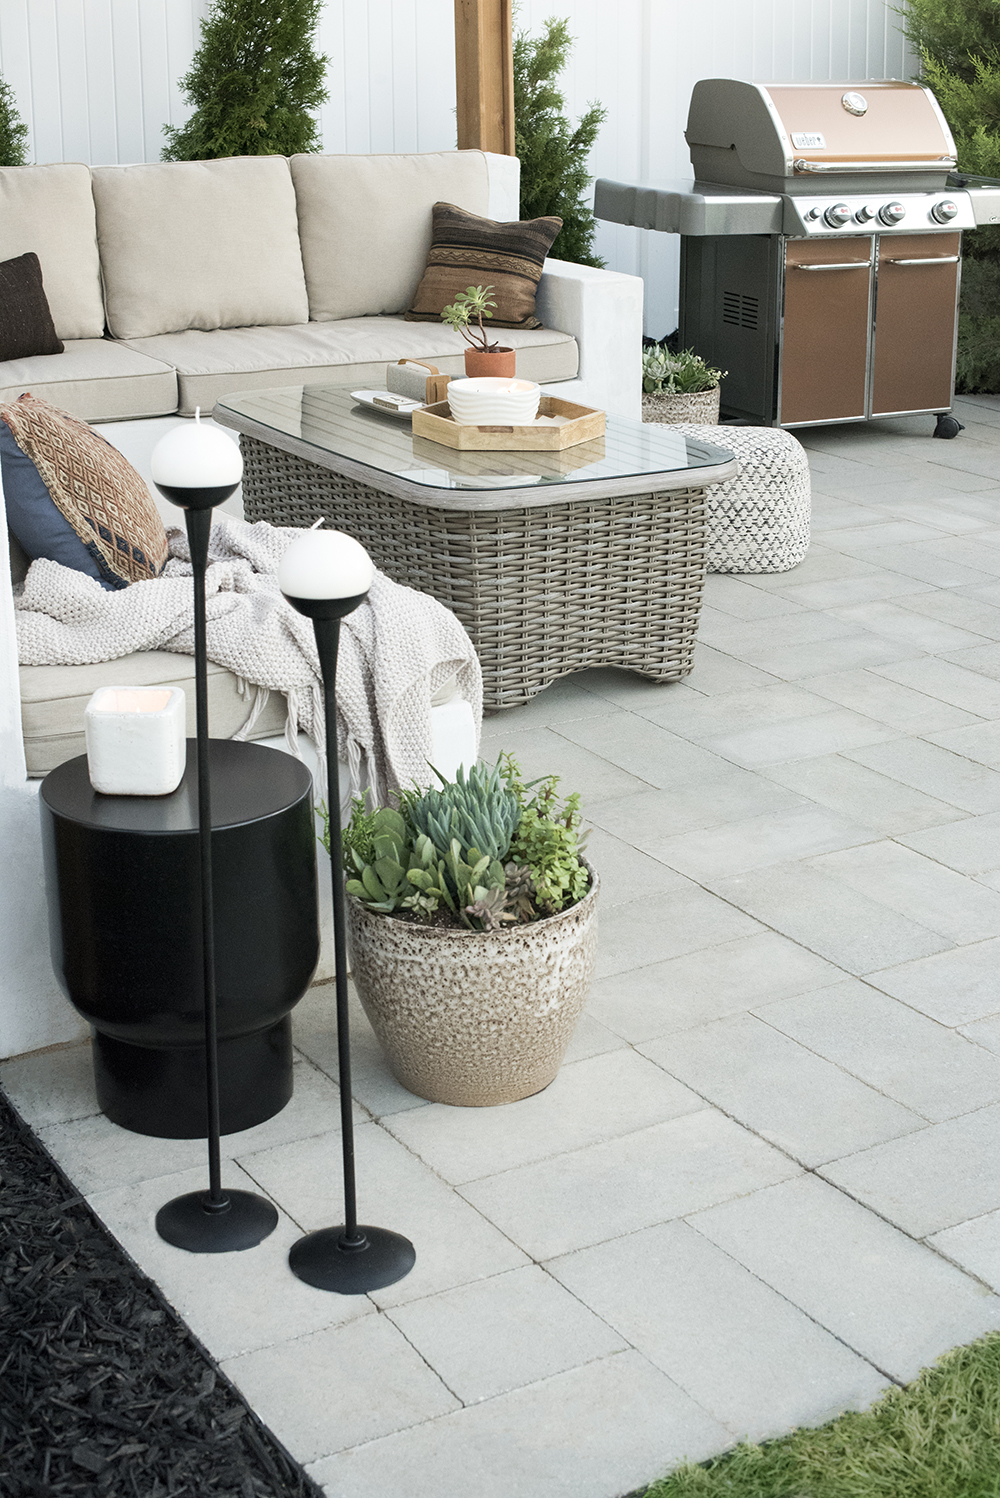
Paver patios look amazing and are super functional for seating, entertaining, and hanging out in the yard. Here’s everything you’ll need to get started. Hover over the images for the specific product links…

Step 1 // Plan and dig. Before diving in you’ll need to do a little math. Figure out how large you’d like your paver patio to be, choose your material, and decide on a pattern. We opted for standard rectangular cement pavers and we laid the pavers in a basketweave pattern (against popular demand). I polled the audience on Insta stories and 99% of you voted for herringbone. My reasoning for laying the pavers in a basketweave pattern is because 1.) it’s easier / less cutting, and 2.) I feel like it’s a timeless pattern. Don’t get me wrong- I love herringbone, but it’s anywhere and everywhere these days… it’s sort of becoming the chevron of the early 2000’s. I preferred the road less traveled this time.

Next, mark the size and begin to dig out the area. We marked the area using 2 x 4 boards, but you can also use chalk or paint. Depending on the height of your pavers, you’ll want to dig 3-5″ inches deep. Basically the end goal is for the pavers to sit flush with the grass / ground.
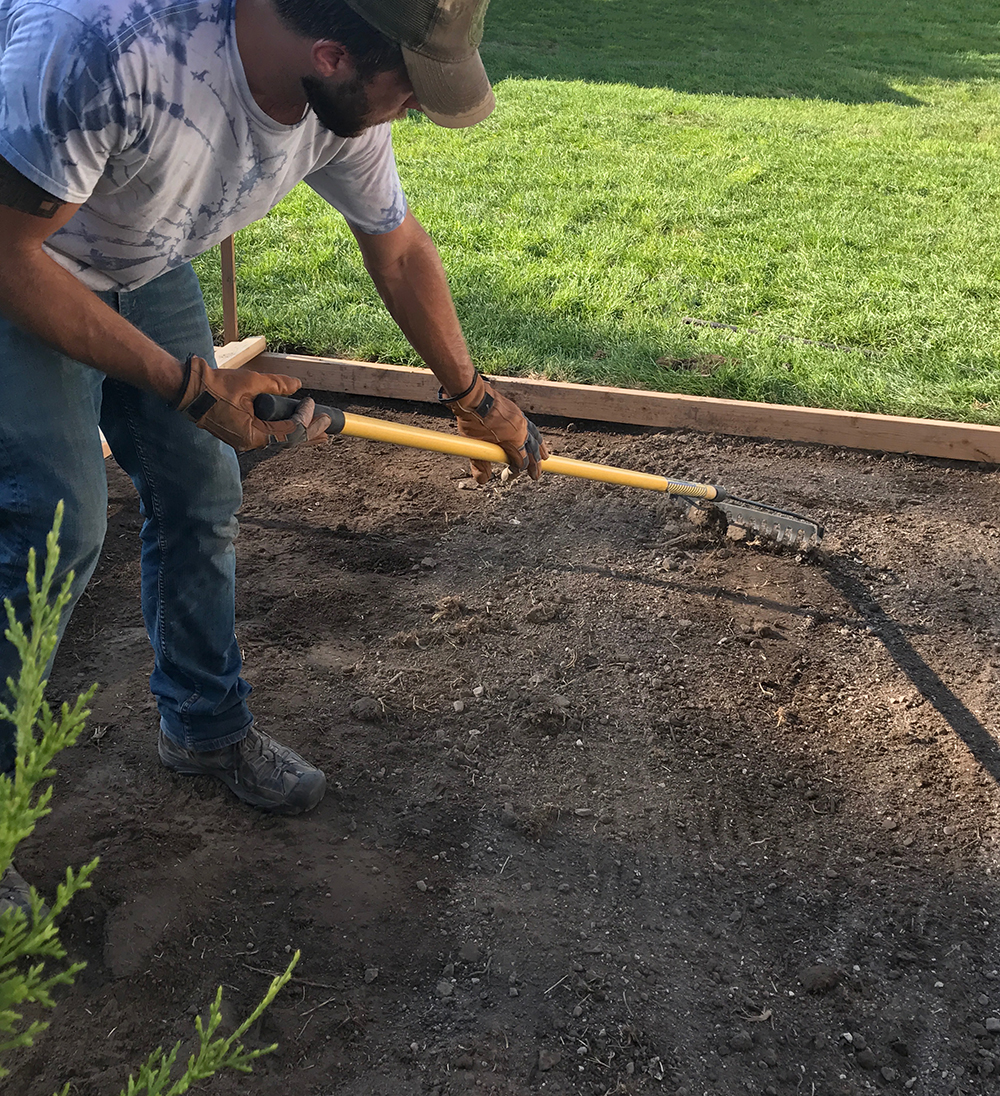
Paver Patio InstallationStep 2 // Tamp the dirt. Once the dirt has been removed, rake the area eyeballing as close to level as possible. Take the tamper tool and compact the dirt making sure there isn’t any loose soil. Tamping throughout this process prevents the patio from becoming uneven due to ground leveling post install.
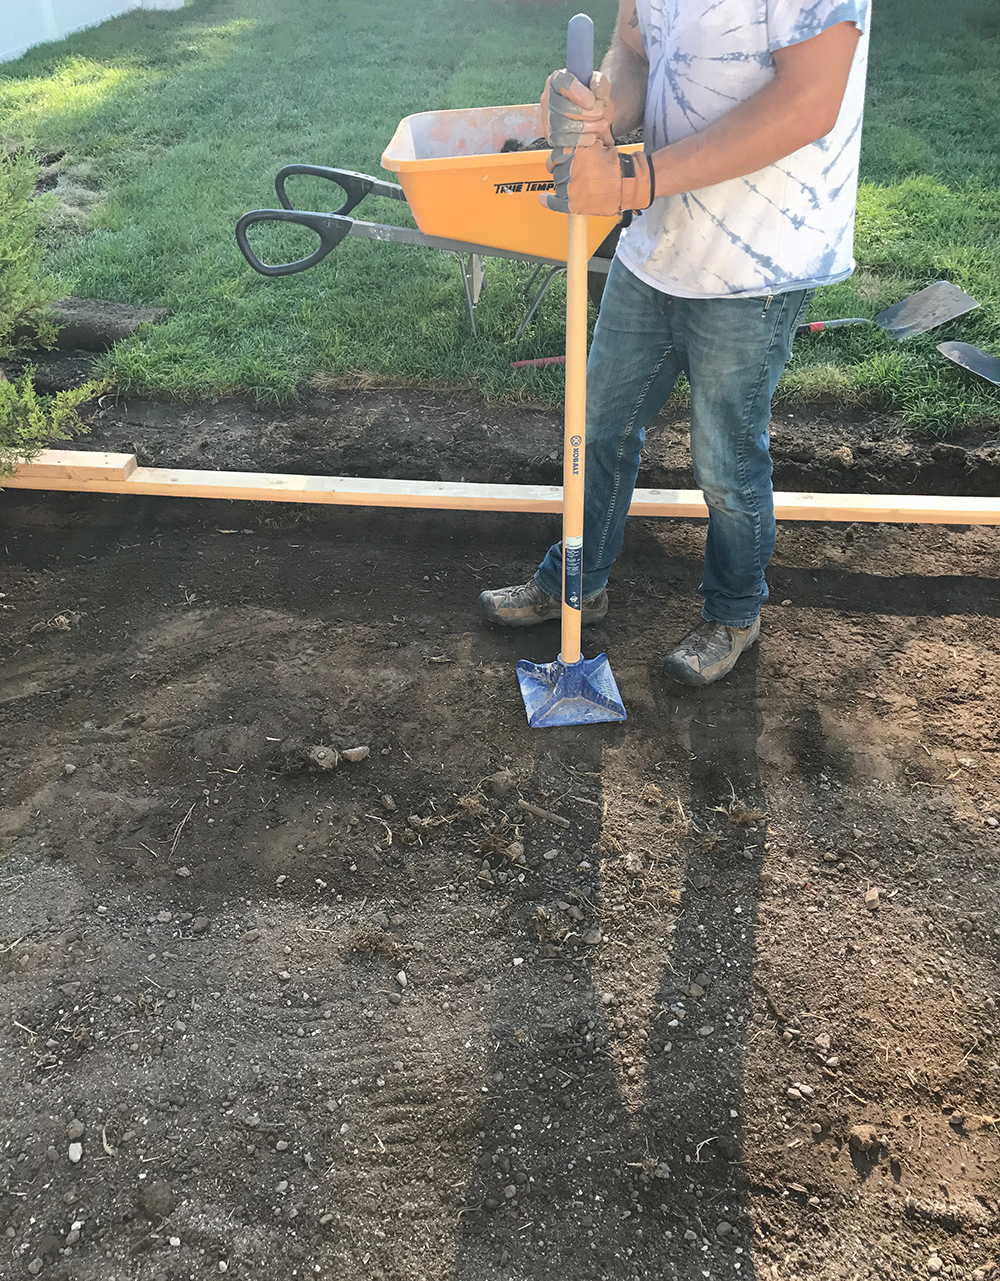
Tamping DirtStep 3 // Add the paver base. Your surface should look like compacted dirt at this point. Next, add multiple bags of paver base until the area is completely covered. This mixture is made up of sand, dirt, and rock. It’s the base layer for your patio.

Installing a Paver PatioStep 4 // Tamp the paver base. Just like you did previously with the dirt, using the tamper tool, compact the paver base. This step is super important if you want an even and level patio that will withstand the test of time. Ground settling ruins so many paver patios, and this step prevents that from occurring.

Paver Patio Installation GuideStep 5 // Add the paver sand and level. Next, add multiple bags of paver sand, raking it out as you go. You’ll want to add as many bags as it takes for the surface to be level.
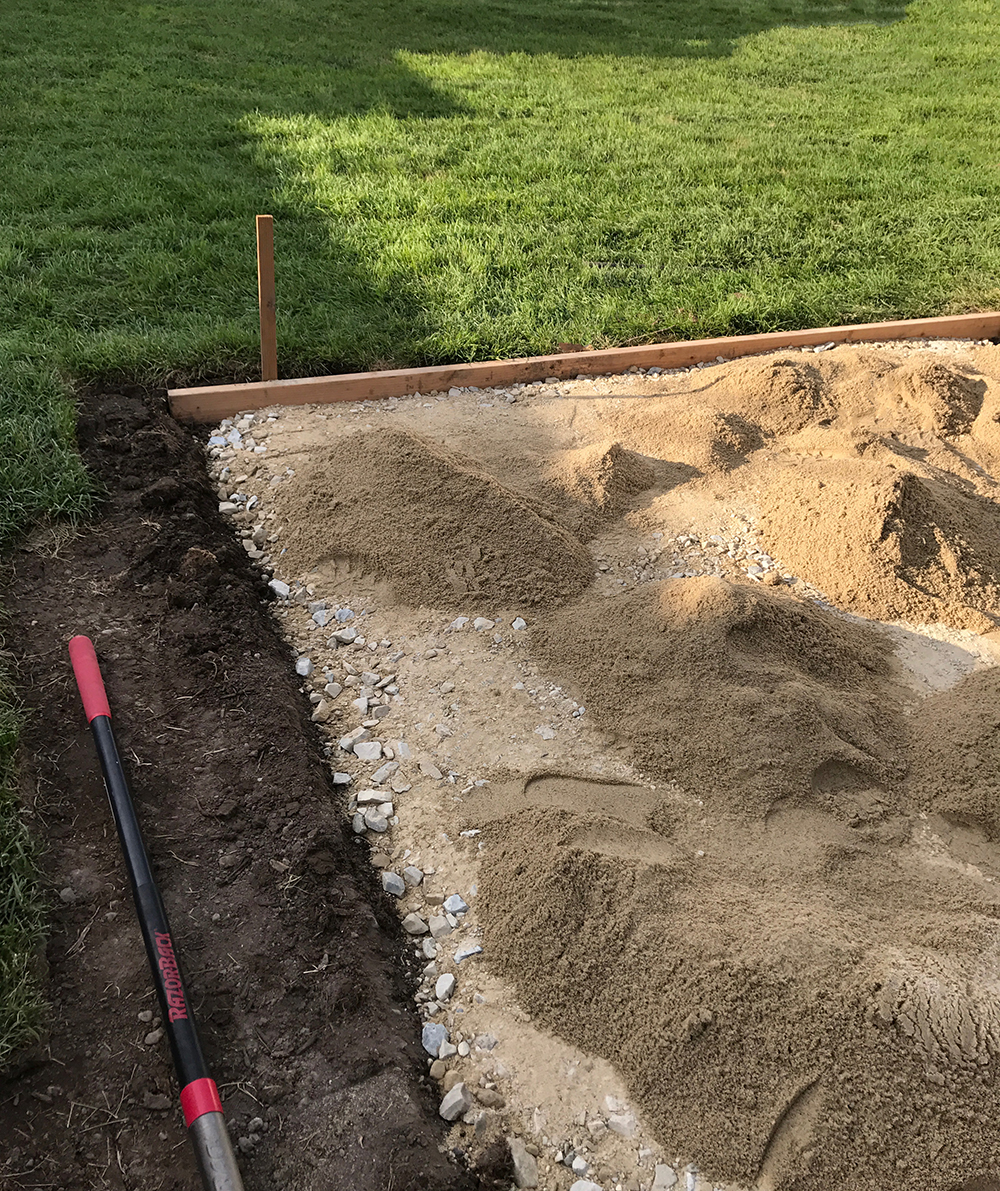
Paver Patio DIYWe used a method of skimming a 2 x 4 over the top to achieve a perfectly level surface. This process is called screeding. Here’s someone else doing this in a video… in case you’re having trouble visualizing how it works. There’s no need to tamp the sand, because it will be perfectly level and packed at this point.
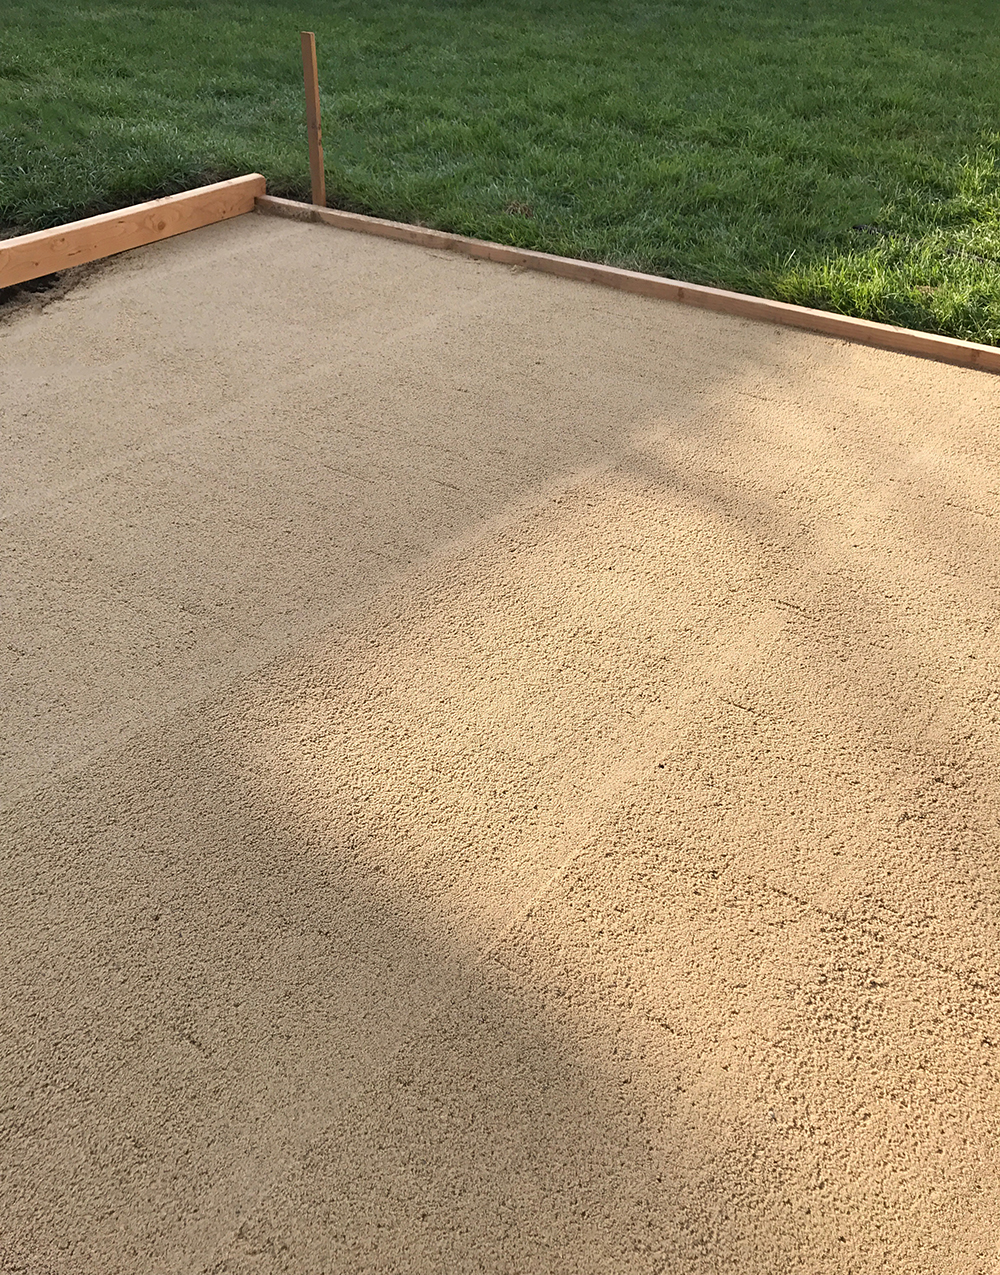
DIY Paver PatioStep 6 // Begin laying the pavers. Now for the fun part! Begin laying the pavers in your desired pattern, using a level to ensure accuracy as you go.

How to Build a Paver PatioRepeat the pattern until you’ve filled the entire area. You can cut pavers if needed with an angle grinder. However, it’s much easier to plan in advance to avoid making cuts.
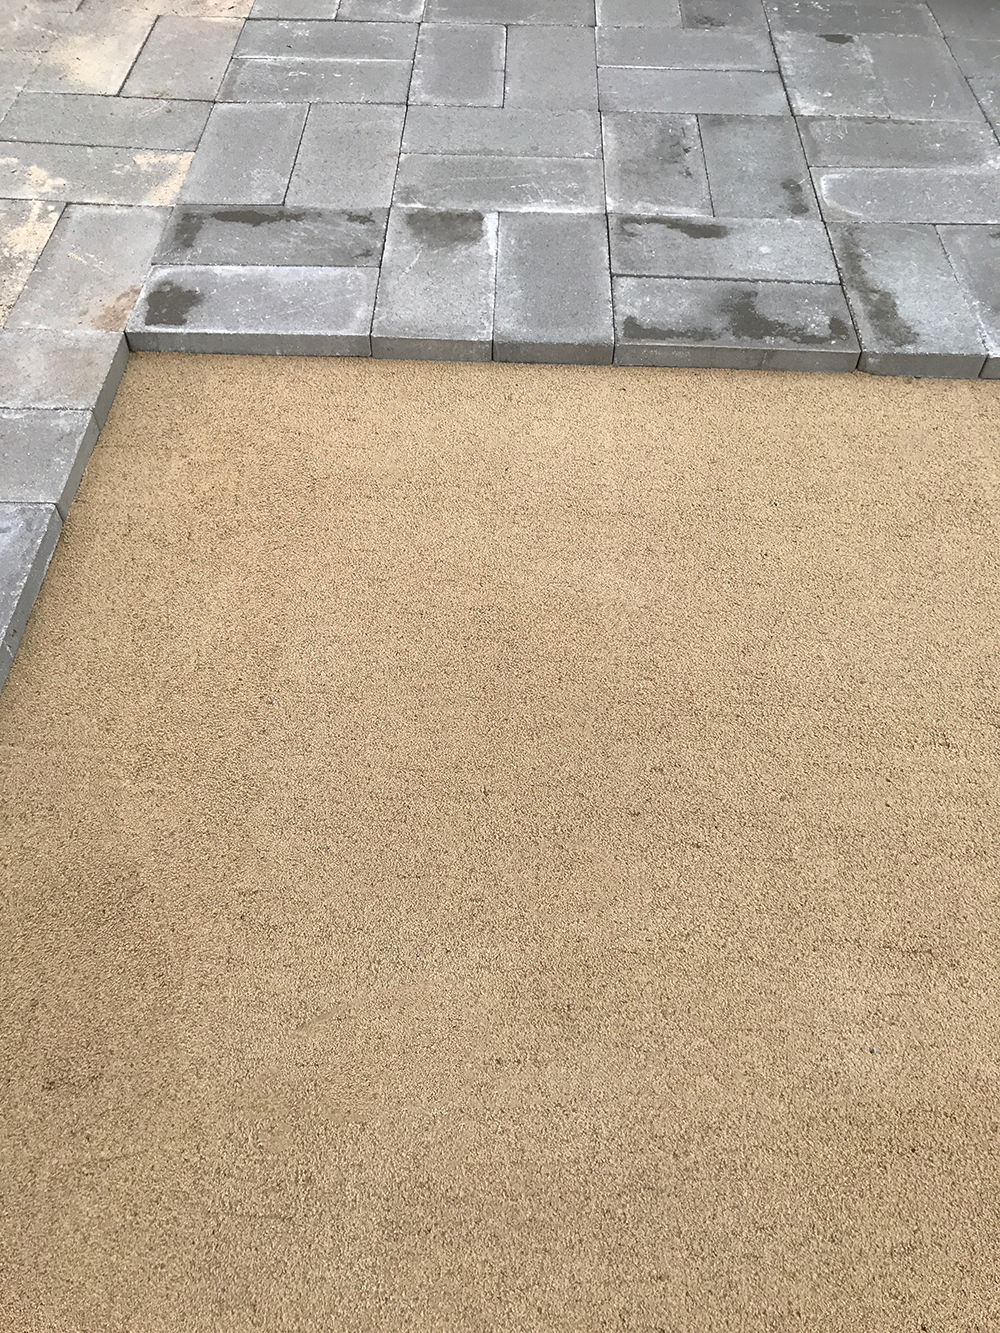
Paver Patio InstructionsStep 7 // Compact the pavers. This step will actually require a tool rental, unless you have a plate compactor machine sitting around. Ha! We rented one from a local company and it was really easy to find and less than $70. Run the compactor over the pavers, vibrating the material flat and level. We used the compactor on low speed to prevent the pavers from cracking under the pressure and vibration. If a couple pavers do crack… don’t panic- this can be normal. We ended up replacing a few (that’s what overage is for)! To lessen the chance of cracking, adding consistent space between each paver during installation helps. I preferred a tighter look with minimal grout / sand lines, so our pavers were touching. Therefore, their risk for cracking was a lot higher.

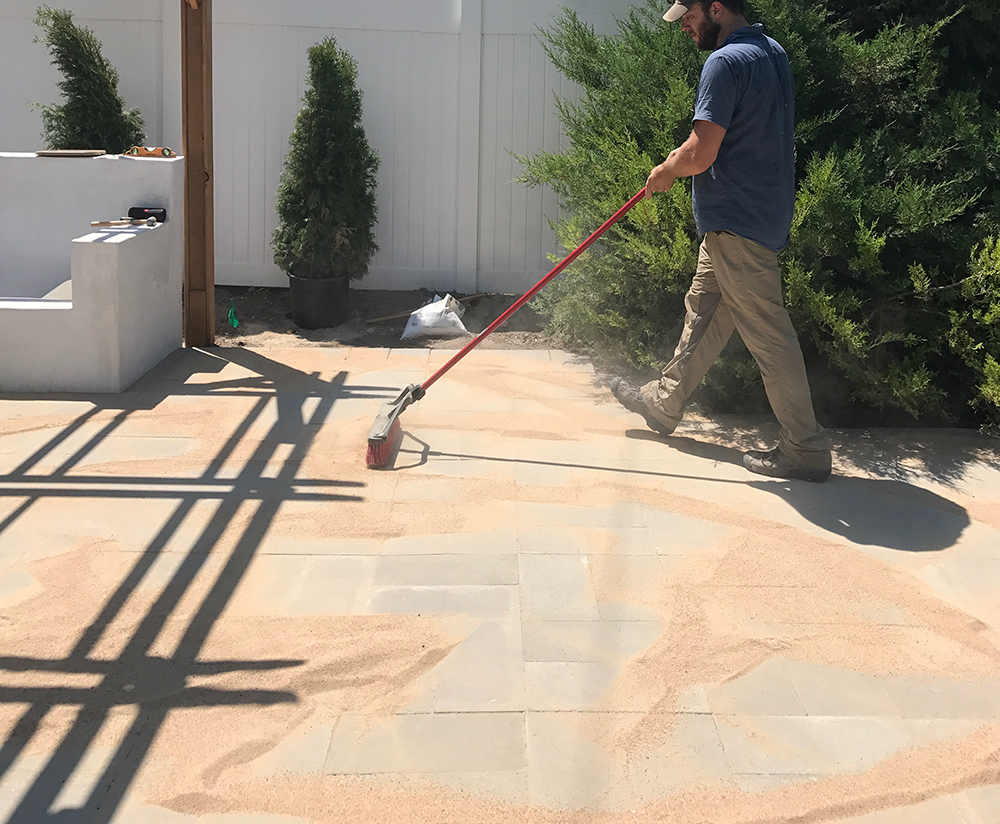
Your Guide to Installing a Paver PatioStep 8 // Add the polymeric sand. This last step is so important! This product is also called paver set and it ensures your paver patio stays put. This sand is very similar to grout, once it gets wet- it hardens, solidifying to keep everything in place and creates a barrier to keep weeds from growing in between the stones. Dump the sand directly onto the pavers, brush into the cracks with a broom, remove ALL excess sand (make sure you get it all because it stains), then wet the entire surface to set the pavers. There are detailed instructions on the packaging, but basically just hose it down with a spray setting, then you’re done! We allowed the patio to harden overnight before using it.
Paver Patio DIY GuideSee… it’s not as difficult as you expected, right? The hardest part is digging and moving heavy pavers, but even still- it’s an easy process. Well worth it in my opinion! It’s nice to have a clean and level designated area for furniture and entertaining.
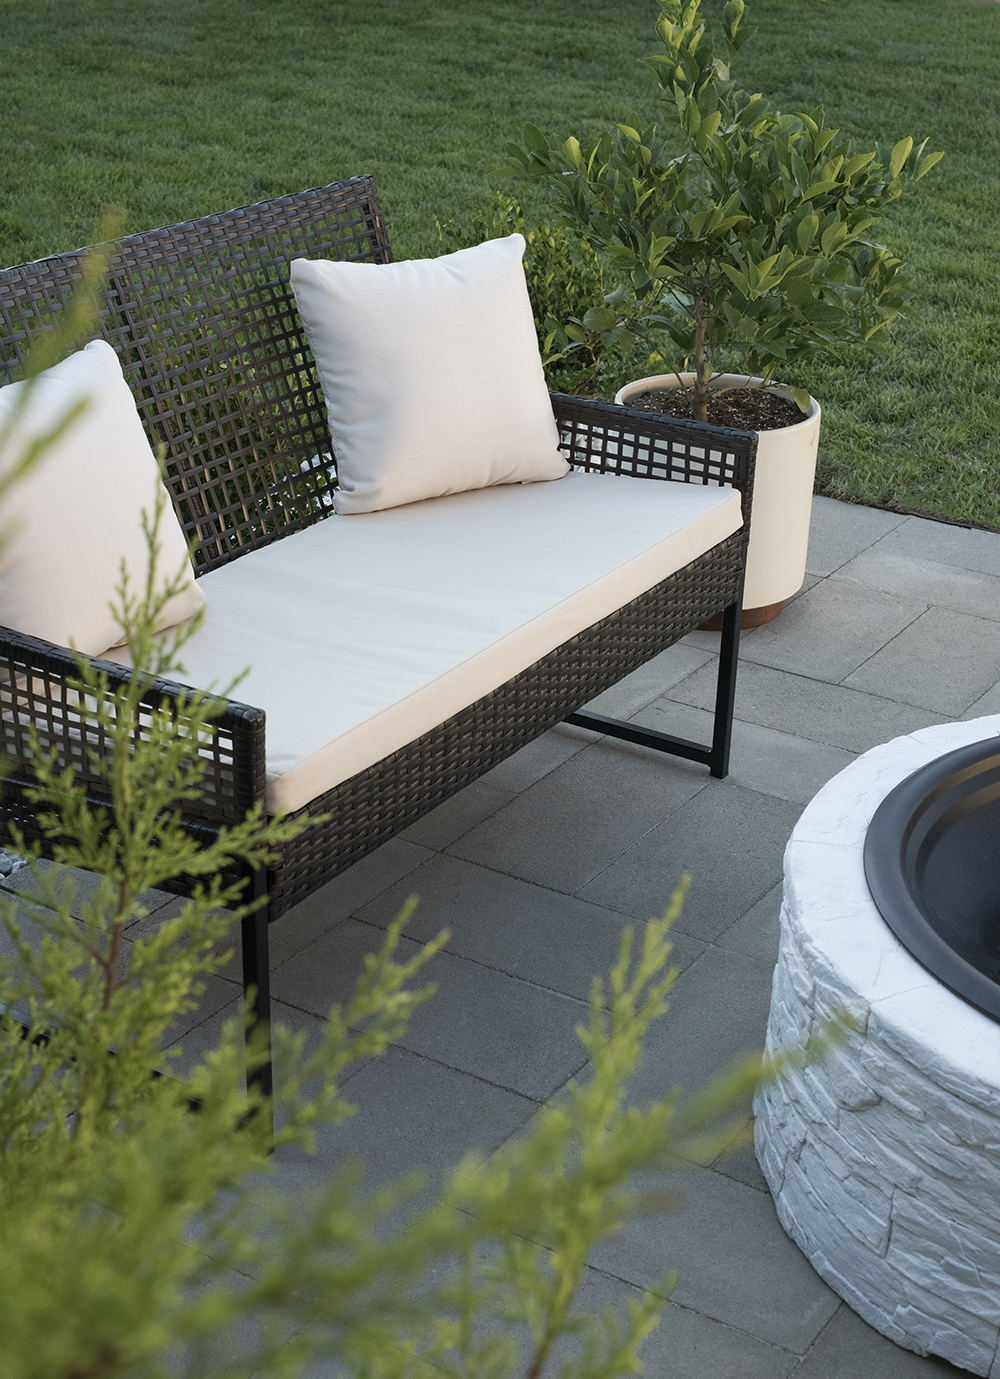
Paver Patio TutorialWhat do you guys think? Are you going to give this a try or would you hire it out? If you already have a paver patio, do you love using it? I’m happy to answer any questions below in the comments!

If anyone has a fashion question about Emmett’s uber cool tie dye shirt, I made it for him about 10 years ago. Ha!
Paver Patio*This post is brought to you in collaboration with Lowes. All content, ideas, and words are my own. Thank you for supporting the sponsors that allow us to create unique content while featuring products we truly use and enjoy! 

Leave a Reply

Your email address will not be published. Required fields are marked *

69 Comments

  1. Thank you so much for this tutorial. It seems much easier than I was thinking it would be! It looks beautiful.

    1. It really isn’t a difficult project! It just takes some elbow grease. Thank you, Marie! xo

      1. Sarah, what are the light gray pavers that you are showing above? And where can I get them?

    2. Hi Sarah,
      All I can say is wow! Because of your tutorial, this is a project I definitely want to tackle!
      Your finished product is Beautiful and similar to what I’m looking to do – just a smaller footprint because we already have a full patio and deck and we are looking for space for grilling.
      Thank you!

      1. I love hearing that, Darcy! You can do it! It will make a great addition to your grilling space. Let me know if you have any questions :)

        1. Amazing! What pavers did you use for this project!?

          1. Thank you! They are linked in the post, Paula.

    1. Thanks so much, Marti!! Yours turned out beautiful. It was definitely a lot of physical labor, but in the end- it was the best option for our project, budget, and deadline. Appreciate your kind words!! xo

  2. This looks beautiful, Sarah! I’m totally using this as a guide for when we tackle this at my house. Thank you so much for sharing your tutorial. The pictures and your instructions are very helpful!

    1. So glad you’re going to give it a try, Robyn! Let me know how it turns out :) xo

  3. Grissel Guerra says:

    do you have a post on the sectional? I noticed its not an actual sofa but instead built in.

  4. Pedro Costa says:

    Hi Sarah! Thank you for sharing your project with all the details.

    I’m planning to build a patio on my little backyard.
    I thought about doing exactly like you did or combining pavers with pea gravel.

    I have one question though: What kind of work did you guys do in regards to rain and drainage? Should we worry too much about it or the paver base + sand levels will take care of it without causing erosion?

    Thank you,

    Pedro Costa

    1. Hi Pedro! In regards to drainage, we leveled the dirt in our yard at a tiny slight slope. That way the water isn’t retained in the patio. Erosion shouldn’t be an issue if you dig out the ground where the material will be laid. Our goal was to have the patio slightly above the grass, rather than sunken in. I hope this helps! Good luck!

      1. Pedro Costa says:

        Got it!
        Thank you so much for your tips!

  5. Oscar O'Malley says:

    I like that you mention using a level while laying the pavers down to ensure accuracy. My dad and I are going to lay some down in his yard this weekend, and I want to make sure we do it right the first time since I don’t live close by. Thanks for the tips-I’ll be sure to keep them in mind when we get started on the project.

  6. Hi Sarah! Do you mind sharing the information on the pavers and where you purchased them? What are the dimensions of each paver? I couldn’t agree more on your reasoning for pattern choice! Love the basketweave!

    1. Thanks, Jessica! The pavers came from Lowes, find them here. They measure roughly 8″ x 16″.

      1. You’re the best! Love the 8”x16” size! Thank you very much!!

  7. This has been on my dream to-do list forever, and I’m hoping to tackle it this spring! Your post definitely helps me feel more confident in doing it myself.

    Here’s an INCREDIBLY basic question: what did you do with all the dirt you excavated? And, it looks like you removed the 2×4 frame once you were done? I’ve seen some other tutorials that use a metal edge to hold pavers in place, so I’m curious if you noticed any shifting over the summer?

    1. It’s easier than it looks! There has been zero shifting, which is really great news. We used the excavated dirt to fill other places in the yard. We really tried to focus on getting the entire lawn (in addition to the paver patio) really flat and level. Hope this helps!

    2. Lorian Bartle says:

      Liz,

      We pile our spare dirt in the front of our house, take a picture of it, and post it on Craigslist. In a week or two it’s completely gone. The best part is that no additional shoveling is required on our end; strangers just show up with a pickup truck and do all the work themselves.

      Lorian Bartle

      1. We did that with our existing paver patio! We listed it for free… had people come dig it out, and the demo was done for us. So nice!!

      2. Funny enough, one of my neighbors had a big dirt pile on the curb strip – and now I know why! Thank you both!

  8. Lupe soto says:

    I love the look! You did a great job. We want to put pavers on our backyard but have a problem with gophers. What do you suggest? Should we lay down some chicken wire before the sand?

    1. Thanks Lupe! Honestly, we haven’t had any issues with rodents or animals like that, so I’m not much help in that area. You could definitely add a wire barrier though! I’d just be extra careful to make sure it’s level and tamped out. Hope this helps!

  9. What a beautiful patio! Did you use any edging? We are planning to put in a patio this spring (this is very helpful) and are debating whether some type of edging is necessary.

    Thank you!
    Diana

    1. Thank you, Diana! We did use a plastic edging. It goes directly in between the pavers and the sod. It pretty much goes unnoticed because the sod grows right up against it. Hope this helps! xo

  10. Looks great! How thick did you lay the paver base and paver sand?

  11. How much did it cost? Not including the furniture, just the actual foundation patio?

  12. Hi Sarah,

    After reading about your beautiful patio my family decided to build our own instead of forking over $3500. My wife loves what you did pattern wise but the pavers you used are no longer for sale and I can’t seem to find 8″x16″ anywhere. Any suggestions? We are doing an 8’x16′ patio so it would work great if the size wasn’t so hard to find. May have to go to 4’x8′ :/

    1. Hi James, so excited to hear you guys are taking on your own DIY paver patio. It looks like it’s still showing up available here: https://www.lowes.com/pd/Rectangle-Gray-Patio-Stone-Common-8-in-x-16-in-Actual-7-7-in-x-15-6-in/3018997?cm_mmc=SCE_PLA-_-LawnGarden-_-PatioHardscape-_-3018997:Oldcastle&CAWELAID=&kpid=3018997&CAGPSPN=pla&store_code=342&k_clickID=c08b17a0-460a-4191-ad68-865763dc508d&gclid=CjwKCAjw_tTXBRBsEiwArqXyMoGNKkZcxgpDswjh0AZIDM2Yq69PSLGOHgLXQ8rm0wXv27ejTiZfThoCFlsQAvD_BwE You could also run into your local Lowes and see if they can order it for you! They delivered ours on a palette. Hope this helps!

  13. Hi Sarah,

    Would you be willing to share the dimensions on some of your backyard projects? Judging by the pictures posted, I think my yard is similar in size and I’m specifically interested in the total square footage covered by the pavers (ie: 10’x12′) and the cinder block seating area. Also, is your pergola free-standing? Thank you in advance.

    1. Hi Jordan, our paver patio is about 16 x 20′ … and the pergola is “freestanding” but all four legs are anchored into the ground with concrete. Hope this helps to answer your questions! xo

      1. Stephanie Dameron says:

        Hello, we just finished doing our own patio! We are completely stumped on how to put a pergola or something similar onto our pavers. Can you tell me how you installed your pergola on your pavers?

        1. Hi Stephanie! We installed our pergola BEFORE the paver patio because our posts had to be anchored into the ground with concrete.

  14. All those levels and tamping will make sure that there’s no heaving and shifting from freezing and thawing?I’m asking this because my husband says that’s why a paver patio is not a good idea for our area,(northern Indiana)…please help!!??I really would love a patio!!😃

    1. Hi Rosanna, Emmett and I are both Hoosiers!! We’re actually from southern Indiana, but our family now lives in the Indianapolis area. They have a paver patio and it looks PERFECT- using the same method I learned from my step-dad. If you’re worried, check out this article that also includes an added step (fabric barrier): http://www.brockpaverbase.com/2017/07/install-paverbase-freezethaw-climates/ Hope this helps! xo

  15. Hi Sarah,

    After getting some quotes for paver patio installation in our backyard we are leaning towards doing it ourselves to save some money. I really love the pavers and design you used and am going to try to do something similar. Did you dig 5″ deep for these pavers? I know you mentioned digging between 3″ and 5″ depending on the pavers and these say they are 2″ high so I am thinking 1.5″ of base and 1.5″ sand and then the pavers?

    Also, can you tell me which plastic edging you used? Did you put it down first, and then frame the wood around it while installing the patio?

    Thanks so much! Love your blog!

  16. Love your outcome!! In the middle of our project and since our yard isn’t already flat this has become a laargerrrr project than anticipated! Hope it comes out as lovely as yours

    1. Thanks so much, Nicole! Good luck with your project :) It really is a ton of work, but it will be so worth it! Keep going, you can do it!

  17. What size is your patio?

    1. It was roughly 14 feet x 25 feet.

  18. Basil Tselentis says:

    Dear Sarah,
    THANK YOU for a very informative article.
    One question please.
    Do you think it is necessary to place a geomaterial (landscape fabric) under the sand layer ??
    Some people think it is necessary (for the drainage ? or keeping the sand from being take away by water, coming through ?).
    Thank you once again for your great site and in advance for your kind response.
    Yours
    BAsil

    1. It really depends on your area and the type of soil in your location! For our paver patio, it wasn’t necessary. We didn’t have any preexisting grass, plants, etc…. and we live in Utah where the soil is pretty sandy by nature. It’s mostly used for a weed and plant barrier. Hope this helps!

  19. Viviana Nunez says:

    Sarah,
    At what point do you think it’s best to lay down the weed barrier? I think I will need this for my soil.

    1. I would actually advise against using a weed barrier, if you’re following our tutorial. Weeds and plants cannot grow through the compacted soil and gravel. If weeds are going to grow, they are going to grow in the dirt that gets caught in between the pavers once it’s installed… so it’s essential to use polymeric paver sand to fill the joints because it compacts and hardens like concrete, which prevents dirt from getting in the joints / cracks (and thus weeds growing). Hope this better helped to explain! If you’re set on the weed barrier, I’d put it against the dirt before the gravel. Hope this helps :)

  20. Hi I was wondering if u built the bench first then did your paver?

    1. Yes! We built the sofa first, then installed the paver patio :)

  21. Gina D from Texas says:

    I’ve read some posts that says to use 6” of gravel before the sand. I see you didn’t do that. I’m wondering does it make a difference?

  22. Hi, do you have a source you could share for the edging you used with this project and if you have liked it so far?

    Thank you in advance this tutorial has been so helpful as we are working to build a paver patio!

    1. Hi Hilary! I’m so happy to hear that. Absolutely can share the edging products… you can either use something like this or this.

  23. Eswaran Selvarajah (Boston) says:

    Sarah:
    One of the best DIY presentations. Simple, affordable and instructive for self-help. Please share more on self-help improvements for home and yard. Thanks.

  24. Very nicely done! Good pics and simple instructions without all the extra commentary. I’ve done a lot of projects, finished basements, decks, etc but never a paver project. But I’m ready to build my new grilling area now! Thx for the instructions!

    1. Thank you, Greg! I love hearing this. Good luck creating your perfect grilling area :)

  25. This is a GREAT step-by-step post! My question is, did you put a border to prevent pavers from moving over time or does that last step with the paver set prevent this and eliminate the need for a border?

    1. Thanks Crystal! We actually ended up adding a border on the last row, and one after-the-fact… just to help with the division / separation of grass and gravel. Since the pavers are inset, whatever material (dirt, gravel, grass, etc) is on the edge should keep them in place along with the paver set. I’d think you could do with or without- we just liked the clean look (you can see it in the last photos).

  26. I hope no one has already asked this in the comments… I didn’t see it. Do you know if you can lay pavers over a concrete patio? (You don’t have to rip it up, do you?) I know that’s not what you did, but just wondered if you know. Thank You!

    1. Hi Christy! Technically speaking, you could install new pavers over existing pavers, but you’d want to install the sand, tamp it, and follow the same process to ensure it is perfectly level. My concern would be the height (not flush with ground level) and ensuring proper drainage. It’s definitely better to replace, but I suppose you could install on top of as well. Hope this helps!

  27. I just discovered your page on Pinterest and I am now convinced I should do the same Adobe style seating!! I just bought my first house and am single!😬 do you think it’s still a feasible project on your own? Also how long did the whole think (excluding fencing and running electricity, irrigation and sod)?

    1. I’m so glad to hear that, Libby! Congrats on your first house- so exciting! It’s feasible, but it’s a lot of heavy lifting. Our neighbors even came over and offered to lend a hand… it’s just a lot of cinder blocks. Our entire yard took a solid month. We finished the sofa in a long weekend, but I’d say a week (maybe even two) is more realistic. I hope that’s helpful!

  28. Joseph Smyth says:

    Great job really liked what you did! You are right you save a ton of money, and well worth it. I did one myself (120 square ft). It’s a lot of manual labor, but you’re right, definitely worth the satisfaction of doing it yourself. It was my second retirement project; took me a month to do, but I wasn’t in a hurry. I don’t know if I would do it again, but I’m in my sixties. Having said that, I do plan on two smaller projects. One to hold a bench by the garden for reading with the grandbabies. Actually fun to do. Your directions are spot-on, very good job. I’m glad you showed people it can be a DIY job.

    1. Thanks so much, Joseph! I hope you enjoy your retirement :) Keep up the fun and rewarding DIY projects!

  29. I apologize if this was covered elsewhere in your blog. How long did the patio take you to install? From start to finish? And did you do all the work just the two of you? I own a second home / investment property on Cape Cod. My backyard seriously needs a makeover. But I need to be mindful of costs. I’m thinking about tackling this project myself and want to be realistic about how long it might take me to complete! (i.e. make sure the dang thing is done before my renters arrive in the summer season 😂)

    1. Hi Niki! It has been years since we’ve tackled this project, so I’m not entirely sure how many hours it took us. Just the two of us worked on it, and I want to say we finished it over a weekend. It was an easy project to DIY! I definitely get wanting to make sure it gets finished before your peak season.

  30. Hey! How is the pergola secured? Is it installed beforehand?

    1. Hi Meg! The pergola was installed before the paver patio. We poured concrete footers and the pergola posts were secured on the footers. We cut the pavers to fit around the posts. I hope that helps!