Spice up your outdoor space with your very own DIY table top concrete tabletop fire bowl! This is a great way to help turn your drab patio table into a tropical paradise.
Today we’re making a DIY fire bowl that you can use on your patio or other outdoor space!
You might also want to check out our tabletop tiki torches. They’ll surely help keep the bugs away!
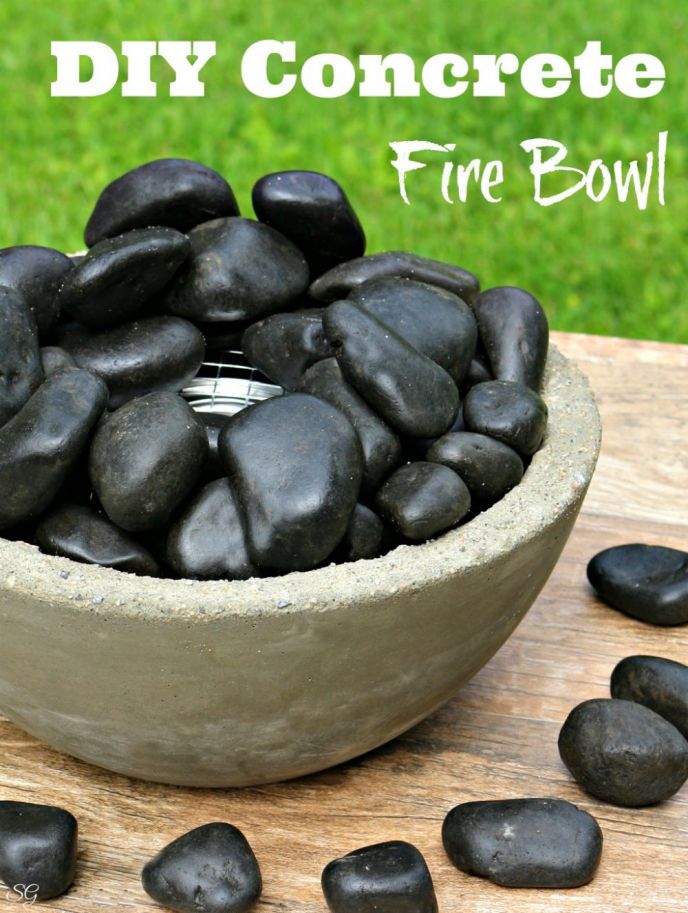
Everyone dreams of a big fire pit, waterfall backdrops, huge grilling kitchen and more for their backyard. But seriously, who has the time or space for that?
It’s okay to want something smaller, more intimate, and still have that wow factor of fire! Enjoying a nice little tabletop fire bowl long after the sun goes down sets the mood, and makes for a nice night of conversation.
DIY Fire Bowl for Pool
Enjoy relaxing by the pool with this fire bowl. Make several DIY outdoor fire bowls and easily add them to your hardscape areas. Then, enjoy the ambiance it creates!
Fire bowls for your pool area will look brilliant and add that final touch you’ve been looking for. Light them up when you have guests visiting or wish to spend an intimate evening with loved ones.
DIY Concrete Fire Bowl
You can make your own table top concrete fire bowl. Just take your time, don’t rush the dry time on the concrete and you’ll be all set!
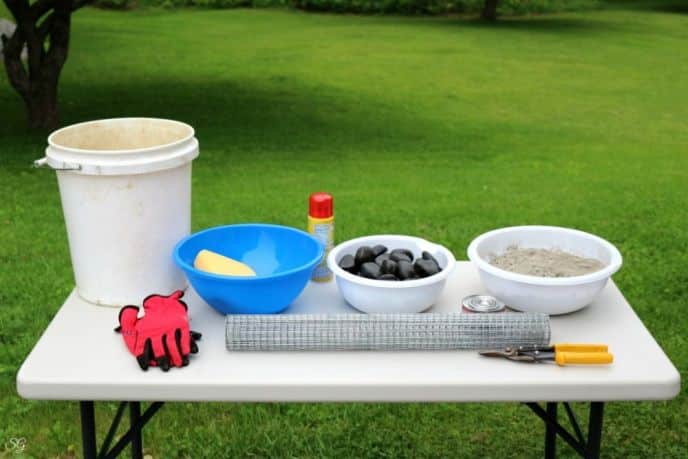
Materials
- Quick/Fast setting concrete
- Chafing fuel
- River Rocks
- Grout sponge
- 1/2 inch mesh wire
- 3 or 5 gallon bucket
Additional Tools
- Non-stick kitchen spray
- Water
- Two large bowls, one 2″ larger than the other
- Electric sander (to vibrate the bowl, releasing the air from the concrete)
- Stick or masonry trowel to mix concrete
- Tin snips
- Gloves, Goggles, Dust Mask, Proper Clothing & other PPE
Instructions
Let’s jump in and make these home decor pieces, what do you say!
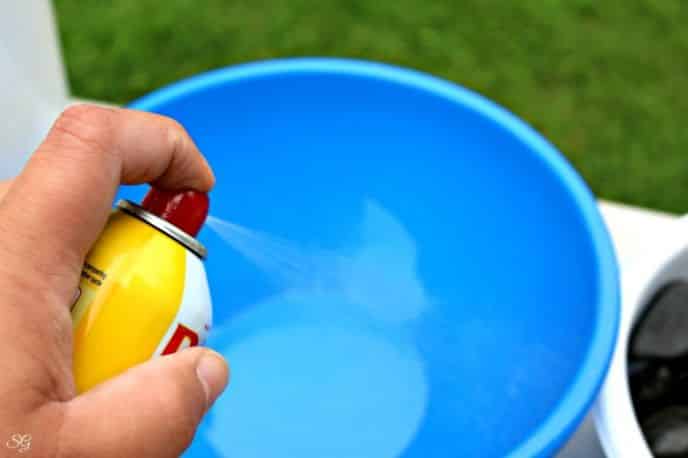
Spray Bowls With Non-Stick Cooking Spray
First;y, grab your non-stick kitchen spray and your bowls. One bowl should be larger than the other by about an inch all the way around. (Check these out.)
Then, spray the inside of the large bowl and the outside of the smaller bowl with the non-stick kitchen spray. This will allow the concrete to release once it’s set.
Mix The Concrete
Next, let’s mix our concrete in a bucket. Add water to your concrete a little at a time until you have the right consistency.
You want the concrete to be loose, but not sloppy. More or less the consistency of peanut butter.
I’m using concrete with a lot of larger chunks of stone in it, your concrete may be different depending on the brand. So, make sure to use your judgment.
It should be not runny, not too thick!

Add Concrete To Large Bowl
Immediately, do another quick spray of non-stick into your large bowl. Then, pour your concrete into the bowl.
Fill the largest bowl about 2/3 to 3/4 full.

Press Small Bowl Into Concrete
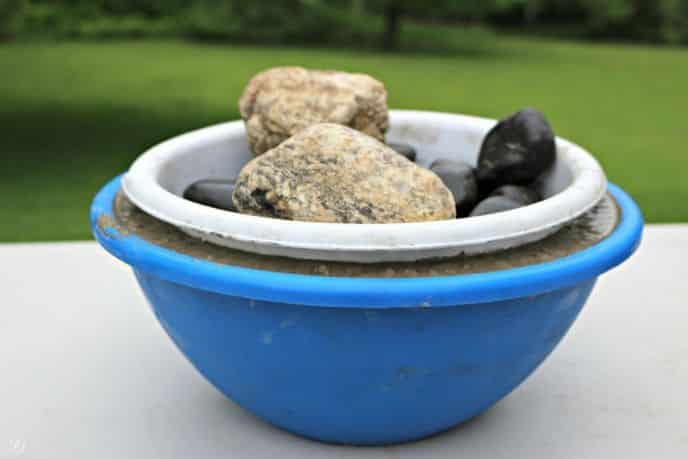
Next, spray the outside of the smaller bowl again and press it into the center of the wet concrete.
You may need to apply a good bit of pressure and wiggle it around, but the concrete should move up between the bowls and fill the larger bowl to the rim.
Add Weights
Now, add stones to the smaller bowl to weigh it down and keep it from floating to the top.
If you don’t add weights to the inner bowl, the bowl will begin to float and the concrete will slip back down under the inner bowl.
Remove Air Bubbles
Next, grab your orbital sander and turn it on (no sandpaper needed). Vibrate the outside of the large bowl to help any air bubbles work their way out.
If needed, smooth down the concrete with paper towels to get your top edge looking nice again.
Now we wait for the concrete bowl to set. Our concrete bag says it will set in 20 minutes, and be hard in 2 to 4 hours.
Remove Inner Bowl
At approximately the 40-minute mark, we’ll pop our inner bowl out. At the 1-hour mark, we’ll pop the outer bowl closer to the 1-hour mark.
Make sure your concrete is set before removing the bowls or you’ll have a mess on your hands.
Smooth Inside Of Fire Bowl
Once we remove the inner bowl, we can smooth the inside using a wet grout sponge.
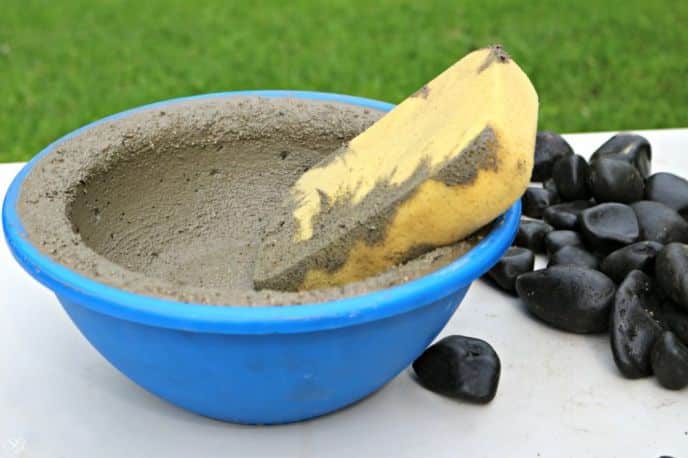
Remove Outer Bowl
Next, and once the concrete is set, remove the outer bowl.
You can tell if the concrete has set as it will change color, and you will not be able to flex the outer rim of the bowl.
Smooth Outside Of Fire Bowl
Smooth the outer rim of the concrete fire bowl with your wet grout sponge.

Cut Wire Mesh
Our next step is to cut the mesh wire to fit inside the bowl.
You want your wire to sit inside the bowl, just above the height of the chafing fuel can, measure accordingly. I measured across the bowl, cut a square piece of wire and folded the corners in before placing the wire mesh in the bowl.
The mesh should fit clear over the chafing fuel can.

Now that we have our wire cut, we just need to let the concrete dry completely. 24-48 hours should do well for most fast-setting concrete. Read the instructions on your bag and you be the judge!
Light The Fire Bowl
Once dry, we can have our first fire in our table top concrete fire bowl!
Always follow all safety instructions on the fuel can and adhere to local fire ordinances. If you’re unsure of your town’s local regulations, contact your local fire department before lighting an outdoor fire.
Remove the lid of the chafing fuel by following the instructions on the can. Place it into the bowl. Position the wire mesh over top of the can and pile your rocks on top of the wire mesh.
Do not place the rocks over the chafing fuel can or flame. Simply allow the flame to come up between the rocks in the center!
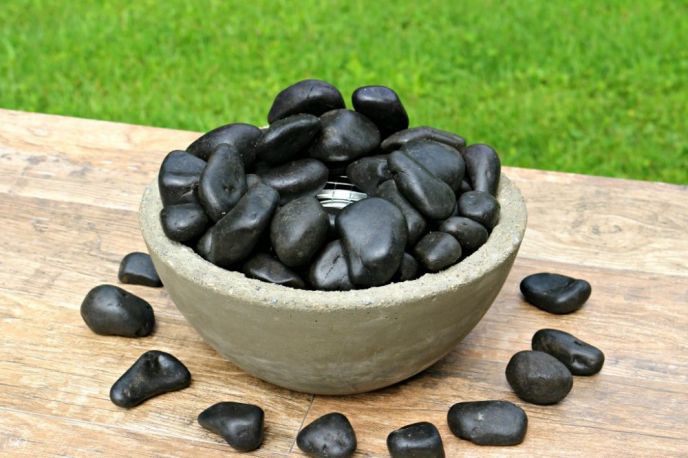
I’m using 1-hour chafing fuel because that’s as long as I want my fire to burn. This will allow time for everything to cool down before packing in for the evening.
Follow all instructions and safety precautions that came with the chafing fuel and never touch the hot rocks or wire cage before everything has cooled completely.
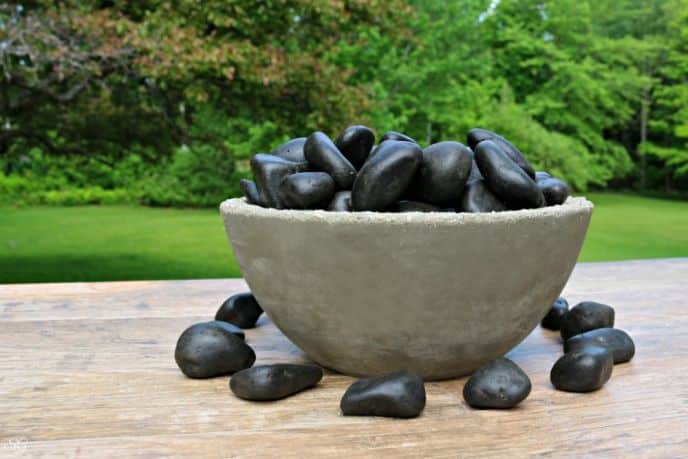
Related Projects
- DIY Patio Installation
- How To Install A Paver Walkway
- Outdoor DIY Projects
- Flower Pot Decoration
- The Ultimate Backyard BBQ Pizza Party

Tabletop Fire Bowl
Equipment
- Tin snips to cut wire mesh
Ingredients
- 1 bag quick set concrete
- 1 piece bucket for mixing (3 or 5 gallon bucket)
- water for mixing concrete
- 2 piece plastic bowls one larger than the other
- non-stick cooking spray
- 1 piece stick or trowel to mix concrete
- 1 piece grout sponge any sponge will work
- 1 piece wire mesh cut to fit into the bowl, see instructions
- 1 can 1-hour chafing fuel
- 1 bag river rocks
- Personal Protective Equipment Dust mask, gloves, goggles, etc…
Instructions
- Spray outside of small bowl and inside of large bowl with non-stick cooking spray.
- Mix concrete to peanut butter consistency.
- Add concrete to large bowl, about 2/3 to 3/4 full.
- Press small bowl into concrete using a wiggling action; add rocks or heavy objects into the small bowl to weight it down and prevent it from 'floating' back up.
- Vibrate the outside of the large bowl to help remove any air bubbles in the concrete.
- Allow concrete to set (not dry) but set, read the instructions on the bag.
- Once set, remove the small bowl and smooth out the concrete with a sponge and water.
- Wait for the concrete to dry a little longer and remove the concrete bowl from inside the large bowl. Use your judgement, removing the bowl too early will cause the concrete to crack and break. Wiggle the edges of the bowl to see if there's any flex. If there is, wait longer…
- Once the concrete bowl is removed, smooth out the outside edge and rim with a sponge and water.
- Cut wire to as to make a 'table' inside the bowl for the chafing fuel to sit under and rocks to sit on top.
- Add chafing fuel to the middle of the bowl.
- Add the wire over top.
- Fill around the chafing fuel with stones.
- Light your fire and enjoy!
Video
- Like
- Digg
- Del
- Tumblr
- VKontakte
- Buffer
- Love
- Odnoklassniki
- Meneame
- Blogger
- Amazon
- Yahoo Mail
- Gmail
- AOL
- Newsvine
- HackerNews
- Evernote
- MySpace
- Mail.ru
- Viadeo
- Line
- Comments
- Yummly
- Send in Text
- Viber
- Telegram
- Subscribe
- Skype
- Messenger
- Kakao
- LiveJournal
- Yammer
- Edgar
- Fintel
- Mix
- Instapaper
- Copy Link
This fire bowl is so easy to make, anyone can do it. And it’s pretty cheap home decor if you ask me! Have fun and enjoy your project.