When I shared my French Provincial Chair Makeover recently, I had several people interested in seeing how I did it. It seems there are a lot of upholstery projects waiting for their big makeovers out there! I am not a professional. In fact this was my first upholstery project of this magnitude, so if I can figure it out, you definitely can too!
Today I am sharing how I made the welting that finishes off the edges so nicely. Then I will soon follow up with the chair upholstery. There are too many photos to combine the two into one post.
There is such a thing as double welting cord. I found it online for around 55¢/yard. However I figured there had to be a way to make single cording work. Whenever I add piping to a project, like my dining room chairs, I always use good ole clothesline cording from the hardware department at Walmart.
I used two of these to complete two chairs and a King Size Headboard.
If it’s good enough for piping, it must be good enough for welting!
Let’s get started…
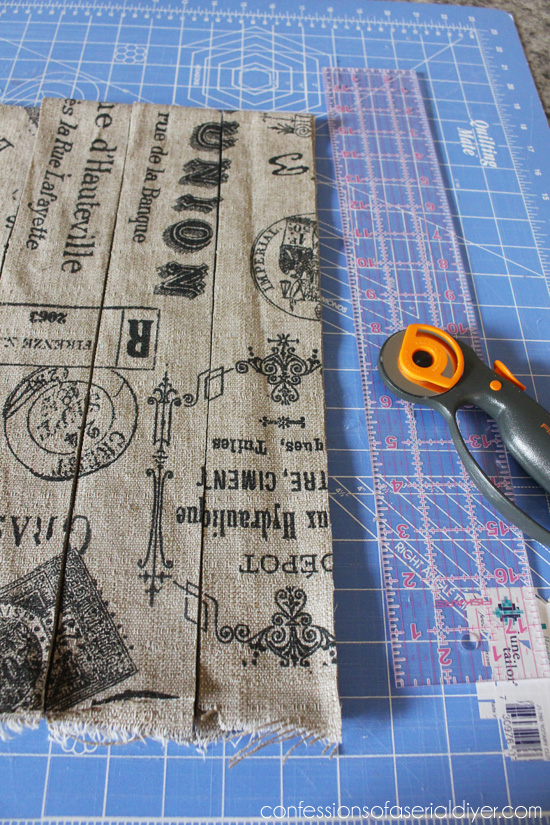
- Cut your fabric into 2 1/2″: strips. Professionals encourage cutting on the bias (diagonal), but I did not. (Rebel, see I told you I wasn’t a professional.) I used the old welting as a guide to determine how much I would need.

- Overlap two pieces end over end.
- Cut on the diagonal.
- Position like so and sew right sides together. (Cutting on the diagonal prevents having a bump in the welting where the two pieces meet. For single piping, just sew end to end straight across.)
- Iron seams flat:
- Continue to connect your strips until you have one long piece.
- Place the cording like so. If the end of your welting will be seen, this will help create a finished edge.
- Fold the fabric snuggly over the cording and sew along the edge. Notice I didn’t mention to run and get your zipper foot. I can’t find mine, so I just used my regular old sewing foot. (If you have one and can find it, feel free to use it.):
- Next, add your second piece of cording…
- Fold the fabric over that piece.
- Then flip it over, fold the top edge down, and sew down the center:
- Trim the excess fabric on the back:
That’s all there is to it! Double welting without double welting cord:
The end of the welting will be unfinished, but you should be able to tuck it behind the finished starting piece. Start and end it in an inconspicuous place.
I used hot glue to attach the welting.
I used this method for my chairs:
French Provincial Chair Makeover
And for my headboard makeover:
Hope this was helpful. I’ll be back soon to share how I reupholstered the chairs. 🙂
BOOM! Here it is:
Upholstering French Provincial Chairs
And here is a much more recent chair upholstery project I did that required double welt trim:
See the AFTER of this chair HERE!
XO,
Don’t Miss a Thing!
If you like what you see, there are several ways to follow along!


Lo @(A Lo and Behold Life) says
ummmm can you please come over to my house and re-upholster all of my furniture for me??! 😉 Fabulous job. Looks super professional!
Christy K. James says
Ha ha…my husband said the same thing. He wanted to know why I only did pieces I was selling when I could be redoing ours lol! XO
Marie@The Interior Frugalista says
Yeah the long awaited double welting cord tutorial! Really, that’s all there is to it? Well I think I just might be able to do this thang! Pinned it for an upcoming upholstery project waiting for after the holidays. Thanks Christy – much appreciated!
P.S. Sad I wasn’t the winner of that gorgeous little trunk 🙁
Christy K. James says
Yep, that’s it! Not hard at all. Wish you could have won the giveaway, but the young gal that one seemed very sweet. 🙂
Terry says
This is the way I always make mine but ALWAYS cut fabric on the bias, this allows the welting and piping to have a bit of stretch and it lays so much nicer…though yours looks like it lays nice even around the corners where the bias is key!
Christy K. James says
I actually didn’t have enough fabric left to cut it on the bias, but it did just fine. I never do it for my piping either. Such a rebel I am ha ha. 😉
Beth Ivey says
Could you please tell me where you got your French script fabric that you used on the chair and headboard?
Christy K. James says
Hi Beth,
I found it at Hancock Fabrics 🙂
Lucy @ Patina Paradise says
What a great tutorial Christy. I will have to pin this for future reference. You could be a professional upholsterer you know. Was wanting to buy a sewing machine for Xmas and was wondering what you would recommend. I just want something basic. Doesn’t have to have anything fancy. Just a few different stitches and button holes. Thanks.
Lucy
Christy K. James says
Thanks so much, Lucy! I have a Kenmore machine, but I’ve also owned a Singer. I liked them equally. There is so much you can do with just a straight stitch and a zigzag stitch, so I don’t think it’s necessary to get a machine with all the bells and whistles. My Kenmore is about 13 years old and is still going strong! Wish I could be more help, but I haven’t had to purchase a machine in a while. Good luck with your purchase! XOXO
Lucy says
Thanks for getting back to me. I will probably search a Singer Sewing Machine out on Craigslist. Good to know that they should last a few years. Blessings!
Christy K. James says
Your welcome! Good luck with your search 🙂
Anne says
Hi I’m a new fan started following you about a couple weeks now. I love everything!!! Your finished projects look absolutely professional. I’m a newbie want to start by redoing a small stool. One question where do you find all the French print material? I love it and want to use that patten on my stool. Can you offer any suggestions on where to look. Thanks Anne
Christy K. James says
Hi Anne! I’m so happy to have you following along! I buy the French fabric at Hancock fabrics. It’s one of my favorites! Good luck with your stool.:)
Laureen O' (@ViBarkley) says
Love this! And BTW I also love your pretty scissors!
Christy K. James says
Thanks, Laureen! I dared my boys to touch those scissors, but there was no need because they refuse to use scissors with flowers on them. 🙂
Samantha says
You did a fantastic job on this! My father was an upholsterer, and he taught me that cutting the fabric on the bias is necessary if you want to ensure that it does not “coil” after it is sewn. It makes for easier application. Though I must say, yours does look fantastic. That fabric must be forgiving.
Great job.
Christy K. James says
Thanks, Samantha! That is good information to know…at least I know the why behind it now. Thanks for sharing! 🙂
Mary Taylor says
I absolutely LOVE this chair!! Where did you get that burlap?? I would love to make one of these!! thanks Christy! You are GREAT!! I appreciate all that you share!
Mary
Christy K. James says
So glad you like it, Mary! This fabric is a drapery/decorator fabric I found at Hancock Fabrics. You can find it on their site here: http://hancockfabrics.com/postage-and-script-on-tan-cotton-fabric-3669926.html Hope this helps!
24/7 in France says
Stunning chair! Merci for the great tutorial too and bonne continuation!
Christy K. James says
Thanks again! These chairs were one of my favorite makeovers. 🙂
James says
It’s very nice..so glad u took the time to show how to do it….I think you need to do a bench using the sign..I really liked it.
Patricia says
thank you so much for this easy to follow simple tutorial. I am reupholstering an antique chair and needed to make double welting and you were a perfect find. Blessings to you in your DIY ventures.
Christy says
I’m so happy you found this helpful, Patricia! XO
Creatively Living - Holly says
Thanks for sharing! I’m working on my first (real) upholstery project in nearly 10 years. I’m trying to decide if I want to make welting or buy trim! I’m upholstering 2 chairs, so it’s over 14 yrs of trim (even with a coupon that adds up!$). I’m glad you didn’t cut your fabric on the bias, that adds a lot of cost too and it seems to have worked out fine. Your tutorial has tempted me to make it 🙂
Christy says
Ooh yes…make it!! It isn’t that difficult at all and looks so professional! Good luck!! XO