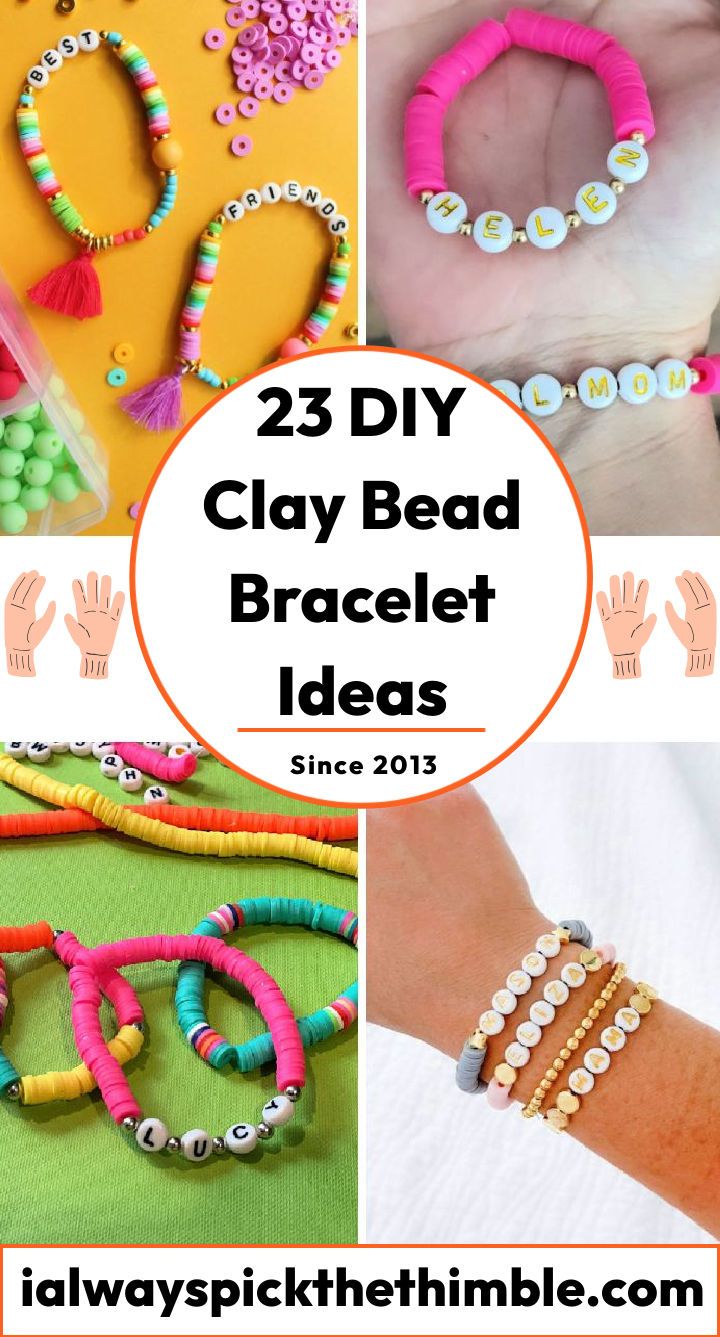
Learn how to make clay bead bracelets with these 23 cute clay bead bracelet ideas, including step-by-step instructions. Clay bead bracelets are perfect for anyone who likes DIY projects and wants to show off their personality. These ideas include everything from the classic DIY clay bead bracelet to customized friendship bracelets made with care. Each tutorial has clear instructions, with simple steps to help you make a beautiful accessory.
Some of the best clay bead bracelet ideas are the personalized clay bead bracelet, where you can carve your name or initials into colorful clay beads, and the polymer clay heart bracelets – a great gift for someone special. For Mother’s Day, how about making the matching mother and daughter clay bracelet set? Or maybe the easy polymer clay bracelet tutorial will inspire you to start working with clay. There’s also a basic clay bead bracelet tutorial, ideal for kids who want to have fun with their creativity.
Clay bead bracelets let you show your unique style. You can pick from different colors, sizes, and shapes to make your bracelet truly yours. Plus, they’re a fun and rewarding way to spend your spare time. Begin your DIY adventure today with these awesome clay bead bracelet ideas. Let’s unleash our creativity and craft some gorgeous clay bead bracelets today!
Clay Bead Bracelets: Learn the Basics
Clay bead bracelets are a type of jewelry that consists of small beads made from clay that are strung together on a cord or wire. The clay beads can be shaped, textured, colored, and decorated in various ways to create different effects and styles. Clay bead bracelets are unique because they allow you to customize your jewelry according to your preferences and mood. You can make clay beads in any shape, size, color, and pattern you want and mix and match them with other beads and charms to create your own designs. Clay bead bracelets are also fun to make with friends and family, as you can share ideas and materials and enjoy the creative process together.
Materials Needed to Make Your Own Clay Bead Bracelets.
To make your own clay bead bracelets, you will need the following materials:
- Clay: You can use any type of clay that can be baked or air-dried, such as polymer clay, air-dry clay, or oven-bake clay. Polymer clay is the most popular choice for making clay beads, as it comes in a wide range of colors and can be easily molded and baked in a regular oven. Air-dry clay is another option that does not require baking, but it may take longer to dry and may not be as durable as polymer clay. Oven-bake clay is similar to polymer clay, but it requires a higher temperature and a shorter baking time.
- Tools: You will need some basic tools to shape, cut, pierce, and decorate your clay beads, such as a rolling pin, a knife, a toothpick, a needle, a cookie cutter, a stamp, a mold, or anything else that can create interesting patterns and textures on your clay. You can also use some specialized tools for working with clay, such as a clay extruder, a bead roller, or a texture sheet.
- Paints and glazes: You can use acrylic paints or water-based paints to add color and detail to your clay beads after they are baked or dried. You can also use metallic paints or mica powders to create shiny or sparkly effects on your beads. To protect your beads from scratches and fading, you can apply a layer of glaze or varnish over them after they are painted. You can use either glossy or matte glaze, depending on the finish you want.
- Cord or wire: You will need some cord or wire to string your beads together and make your bracelet. You can use any type of cord or wire that is strong enough to hold your beads and comfortable enough to wear on your wrist, such as elastic cord, nylon cord, leather cord, cotton cord, hemp cord, silk thread, beading wire, memory wire, or chain.
- Clasp and findings: You will need some clasp and findings to secure your bracelet and add some extra flair to it. A clasp is a device that allows you to open and close your bracelet easily. There are many types of clasps available, such as lobster clasps, toggle clasps, magnetic clasps, hook clasps, or button clasps. Findings are metal components that connect your beads and clasp them together, such as jump rings, crimps, headpins, eye pins, or spacers. You can choose a clasp and findings that match the color and style of your beads and cord or wire.
Choosing the Right Clay:
The type of clay you choose for your bracelet project will affect the appearance and durability of your beads. Here are some factors to consider when choosing the right clay for your bracelet project:
- Color: Clay comes in many different colors that you can mix and match to create custom shades. You can also paint your beads after they are baked or dried if you want more variety in color. Some clays have special effects such as glitter, glow-in-the-dark, translucent, or marbleized, which can add more interest to your beads.
- Texture: Clay can have different textures depending on how you shape it and what tools you use on it. You can create smooth or rough surfaces on your beads by using different rolling pins or texture sheets. You can also create patterns or designs on your beads by using stamps, molds, cookie cutters, or other objects that can imprint on the clay.
- Shape: Clay can be shaped into any form you want by using your hands or tools. You can make round, oval, square, or irregular-shaped beads by rolling, cutting, or molding the clay. You can also make hollow or solid beads by using different techniques. Hollow beads are lighter and use less clay, but they may be more fragile than solid beads. Solid beads are heavier and use more clay, but they may be more durable than hollow beads.
- Size: Clay can be shaped to any desired size by adjusting the amount used and bead thickness. Vary the amounts of clay and roll it into different diameters to create small, medium, or large beads. Flatten or stretch the clay to make thin or thick beads before shaping. The bead size impacts the weight and length of the bracelet, so consider measuring your wrist for planning.
- Baking or drying time: Clay for jewelry making must be baked or dried first. Baking time depends on clay type, bead size, and oven temperature (typically 110°C to 130°C) for 10 to 30 minutes. Air-dry clay needs 24 to 48 hours in a dry, well-ventilated place. Follow package instructions and monitor beads to avoid overbaking or underbaking.
Making Clay Beads: Get Step-By-Step Instructions
Once you have chosen the right clay for your bracelet project, you can start making your own clay beads by following these steps:
- Condition your clay: Conditioning your clay means kneading it until it becomes soft and pliable. This will make it easier to work with and prevent it from cracking or breaking. You can condition your clay by hand or by using a pasta machine or a clay extruder. You should condition each color of clay separately before mixing them together.
- Mix your colors: If you want to create custom colors or effects on your clay, you can mix different colors of clay together by kneading them until they are well blended. You can also add some glitter, mica powder, or other additives to your clay to create sparkly or shiny effects. Be careful not to overmix your clay, as this may cause it to become muddy or dull.
- Shape your beads: You can shape your beads by using your hands or tools. You can roll your clay into balls, ovals, squares, or any other shape you want by using your palms or fingers. You can also cut your clay into shapes by using a knife, a cookie cutter, a mold, or any other object that can cut through the clay. You can also create hollow beads by using a straw, a needle tool, or a bead core to poke holes through the center of your clay shapes.
- Texture your beads: You can texture your beads by using different tools or objects that can create patterns or designs on the surface of your clay. You can use a rolling pin, a texture sheet, a stamp, a mold, or any other object that can imprint on the clay. You can also use a toothpick, a needle tool, a carving tool, or any other sharp object that can scratch or poke the clay. You can also use sandpaper, a nail file, or any other rough object that can smooth or roughen the surface of the clay.
- Pierce your beads: You need to pierce holes through your beads so that you can string them together later. You can pierce your beads by using a toothpick, a needle tool, a bead reamer, or any other thin object that can poke through the clay. You should pierce your beads before they are baked or dried, as they will become harder and more brittle afterward. You should also pierce your beads from both sides to avoid distorting their shape.
- Bake or dry your beads: You need to bake or dry your beads according to the type of clay you use and the instructions on the package. You should place your beads on a baking sheet lined with parchment paper or aluminum foil and bake them in a preheated oven at a low temperature for a certain amount of time, depending on their size and thickness. You should check your beads regularly to avoid overbaking or underbaking them. Alternatively, you should place your beads on a paper towel or a wire rack and leave them in a dry and well-ventilated place for a certain amount of time, depending on the humidity and temperature of the environment. You should check your beads regularly to make sure they are completely dry.
- Paint and glaze your beads: If you want to add more color and detail to your beads, you can paint and glaze them after they are baked or dried. You can use acrylic paints or water-based paints to paint your beads with a brush or a sponge. You can also use metallic paints or mica powders to create shiny or sparkly effects on your beads. To protect your beads from scratches and fading, you can apply a layer of glaze or varnish over them after they are painted. You can use either glossy or matte glaze, depending on the finish you want. You should let your beads dry completely before stringing them together.
Designing Your Clay Bead Bracelets
Designing your bracelet is the most fun and creative part of making clay bead bracelets. You can design your bracelet according to your personal style, mood, occasion, or theme. Here are some tips on how to design your bracelet and choose the right colors and patterns:
- Choose a color scheme: You can choose a color scheme for your bracelet based on the color wheel, the seasons, the holidays, or your favorite colors. You can use complementary colors, analogous colors, triadic colors, or monochromatic colors to create different effects and moods on your bracelet. You can also use neutral colors such as black, white, gray, or brown to balance out your color scheme.
- Choose a pattern: You can choose a pattern for your bracelet based on the shape, size, texture, and arrangement of your beads. You can use symmetrical patterns, asymmetrical patterns, random patterns, or repeating patterns to create different styles and looks on your bracelet. You can also use spacers, charms, or other beads to add some variety and interest to your pattern.
- Choose a length: You can choose a length for your bracelet based on your wrist size and preference. You can measure your wrist with a tape measure or a string and add some extra length for the clasp and findings. You can also try on your bracelet as you string it to see how it fits and feels on your wrist. You can make your bracelet longer or shorter by adding or removing beads as needed.
Stringing Your Bracelet:
Stringing your bracelet is the final step of making clay bead bracelets. You will need some cord or wire, some clasp and findings, and some pliers or scissors to string your beads together and create a beautiful bracelet. Here are the steps on how to string your bracelet:
- Cut your cord or wire: You will need to cut a piece of cord or wire that is long enough to fit around your wrist, plus some extra length for the clasp and findings. You can use pliers or scissors to cut your cord or wire. You should leave about 10 cm (4 inches) of extra length on each end of your cord or wire for attaching the clasp and findings.
- Attach one end of the clasp: You will need to attach one end of the clasp to one end of your cord or wire using a finding, such as a jump ring, a crimp, or a headpin. You can use pliers to open and close the finding and secure it to the clasp and the cord or wire. You should make sure that the clasp and the finding are aligned with the cord or wire and that there are no gaps or loose ends.
- String your beads: You will need to string your beads onto your cord or wire following the pattern you have designed for your bracelet. You can use a needle or a bead reamer to help you thread the beads onto the cord or wire if they have small holes. You should make sure that the beads are arranged in the order and direction you want them to be on your bracelet.
- Attach the other end of the clasp: You will need to attach the other end of the clasp to the other end of your cord or wire using another finding similar to the one you used for the first end of the clasp. You can use pliers to open and close the finding and secure it to the clasp and the cord or wire. You should make sure that the clasp and the finding are aligned with the cord or wire and that there are no gaps or loose ends.
- Trim any excess cord or wire: You will need to trim any excess cord or wire that is sticking out from the ends of your bracelet using pliers or scissors. You should be careful not to cut too close to the clasp or findings, as this may cause them to come loose or fall off.
Avoiding Common Mistakes: When Making Clay Bead Bracelets
Making clay bead bracelets is an easy and enjoyable hobby, but it may also involve some challenges and difficulties along the way. Here are some common mistakes beginners make when making clay bead bracelets and how to avoid them:
- Choosing the wrong type of clay: Some types of clay may not be suitable for making jewelry, as they may be too soft, too hard, too brittle, or too sticky. You should always choose a type of clay that can be baked or air-dried, such as polymer clay, air-dry clay, or oven-bake clay. You should also check the instructions on the package of your clay and follow them carefully to avoid damaging your clay or your oven.
- Overbaking or underbaking your beads: Baking or drying your beads is an important step to make them hard and durable, but it can also be tricky to get the right temperature and time. Overbaking or underbaking your beads can cause them to crack, burn, melt, or crumble. You should always preheat your oven to the recommended temperature and check your beads regularly to avoid overbaking or underbaking them. You should also use a baking sheet lined with parchment paper or aluminum foil to prevent your beads from sticking to the surface or scorching.
- Piercing your beads unevenly: Piercing holes through your beads is necessary to string them together, but it can also be challenging to pierce them evenly and cleanly. Piercing your beads unevenly can cause them to look crooked or distorted on your bracelet. You should always pierce your beads from both sides to avoid distorting their shape. You should also use a toothpick, a needle tool, a bead reamer, or any other thin object that can poke through the clay without breaking it.
- Choosing the wrong cord or wire: Choosing the right cord or wire is crucial for stringing beads. It should be strong, comfortable, and suitable for jewelry making. Options include elastic cord, nylon cord, leather cord, cotton cord, hemp cord, silk thread, beading wire, memory wire, or chain. Match the color and style of the cord or wire with your beads and clasp. Avoid using an unsuitable cord or wire that may cause breakage, fraying, stretching, or skin irritation.
- Choosing the wrong clasp and findings: Choosing the wrong clasp and findings for your bracelet can lead to issues like it coming undone, falling off, or having a mismatched look. Ensure ease of use and compatibility with your cord or wire. Opt for suitable options like lobster clasps, toggle clasps, magnetic clasps, hook clasps, button clasps, jump rings, crimps, headpins, eye pins, or spacers, considering color and style coordination with your beads and cord or wire.
Troubleshooting: When Making Clay Bead Bracelets.
Even if you avoid common mistakes when making clay bead bracelets, you may still encounter some problems that may affect the quality and appearance of your bracelet. Here are some common problems that may arise when making clay bead bracelets and how to troubleshoot them:
- Your beads are too big or too small for your wrist: If your beads are too big or too small for your wrist, you may need to adjust the length of your bracelet by adding or removing beads as needed. You can measure your wrist with a tape measure or a string and add some extra length for the clasp and findings. You can also try on your bracelet as you string it to see how it fits and feels on your wrist.
- Your beads are not smooth or shiny: If your beads are not smooth or shiny after they are baked or dried, you may need to sand them with sandpaper, a nail file, or any other rough object that can smooth or roughen the surface of the clay. You can also paint them with acrylic paints or water-based paints and apply a layer of glaze or varnish over them after they are painted to make them more colorful and glossy.
- Your beads are not secure on your cord or wire: If your beads are not secure on your cord or wire and move around too much, you may need to tighten the knots on the ends of your cord or wire or use crimps to secure them in place. You can also use spacers, charms, or other beads between your clay beads to fill in the gaps and prevent them from sliding around.
- Your clasp is not working properly: If your clasp is not working properly and does not open or close easily, you may need to adjust it with pliers or replace it with a new one. You can also use a different type of clasp that is easier to use and more reliable, such as a magnetic clasp, a toggle clasp, or a button clasp.
Tips and Tricks: Make Your Clay Bead Bracelet Project a Success.
Making clay bead bracelets is a fun and rewarding hobby that can unleash your creativity and express your personality and style. Here are some tips and tricks from experts on how to make your clay bead bracelet project a success:
- Experiment with different types of clay, tools, colors, and patterns to create unique and original beads. You can also look for inspiration from online tutorials, magazines, books, or other sources of jewelry making ideas.
- Store your clay in a cool and dry place, preferably in an airtight container or a ziplock bag. This will prevent your clay from drying out, cracking, or becoming contaminated by dust or dirt.
- Clean your tools and work surface after each use to avoid transferring colors or residues from one clay to another. You can use baby wipes, rubbing alcohol, or soap and water to clean your tools and work surface.
- Wear gloves when working with clay to avoid staining your hands or nails. You can also use a hand cream or a barrier cream to protect your skin from the clay.
- Use a bead board, a ruler, or a tape measure to plan and measure your bracelet before stringing it together. This will help you achieve the desired length and design for your bracelet.
- Use a bead stopper, a paper clip, or a safety pin to secure one end of your cord or wire while stringing your beads. This will prevent your beads from falling off the other end of your cord or wire.
- Use a jewelry pliers set to open and close your findings and attach your clasp. You can also use a crimping tool to crimp your crimps securely and neatly.
- Use a jewelry glue or a clear nail polish to seal the knots on the ends of your cord or wire. This will prevent them from unraveling or slipping out of the findings.
- Use a jewelry polishing cloth or a soft cloth to polish your beads and clasp after they are finished. This will remove any fingerprints, dust, or dirt from your bracelet and make it shine.
We hope you are inspired to start making your own clay bead bracelets.
1. DIY Clay Bead Bracelet
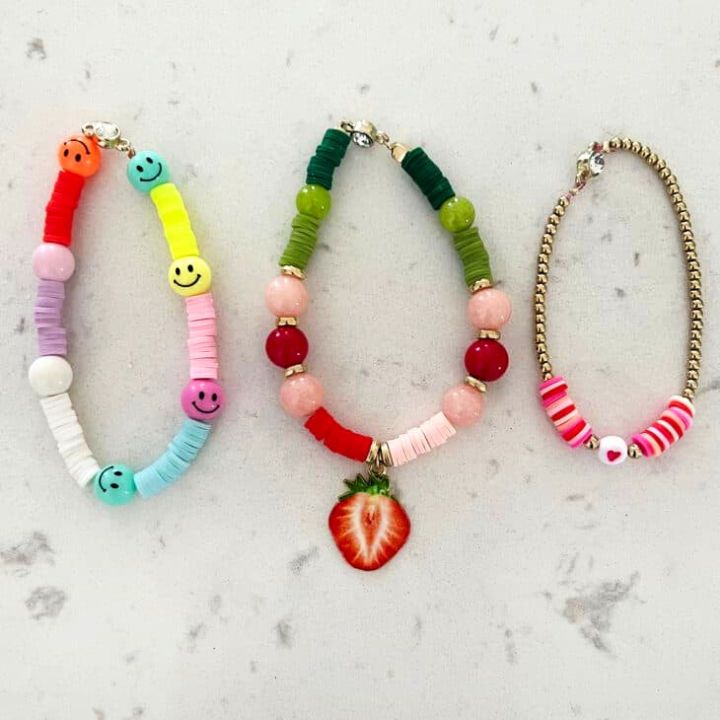
Mesmerize yourself with the endless possibilities of DIY clay bead bracelets! You can easily make fabulous jewelry for all ages with a few basic supplies and beginner-friendly techniques. There is something for everyone, from polymer clay beads in various colors to elastic cord or crystal string, acrylic letter beads, accent beads or charms, crimping beads, connectors, and more.
Discover the versatility of this craft with this guide that includes tips on how to customize your creations with different designs and closures. Get creative now and explore the exciting world of clay bead bracelet making! abeautifulmess
2. Make Your Own Clay Disc Bead Bracelets
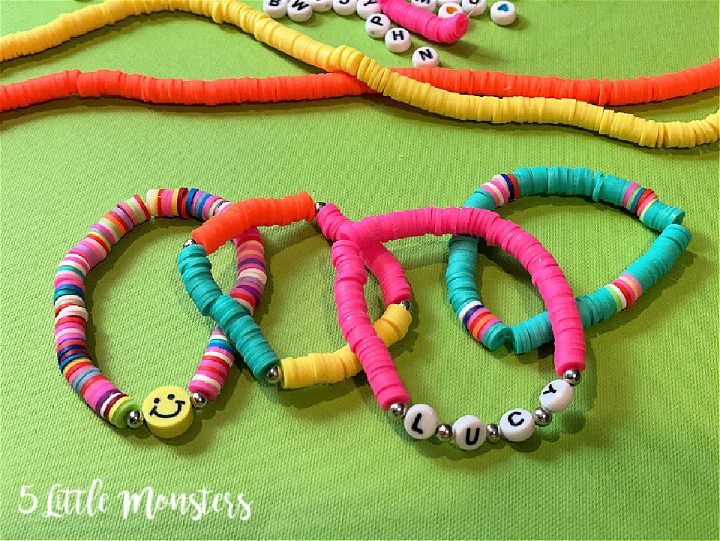
Marvelously crafty clay disc bead bracelets! Let your imagination soar, and make personalized jewelry with these plastic beads. Mix them with round metal beads, letter beads, or even shaped clay beads for an explosion of possibilities. Then thread the mix together using elastic beading string and extra security with a dab of superglue to finish off.
Have fun mixing colors and arrangements to make unique clay disc bead bracelets that everyone will love! 5littlemonsters
3. Easy Clay Bead Bracelets Tutorial
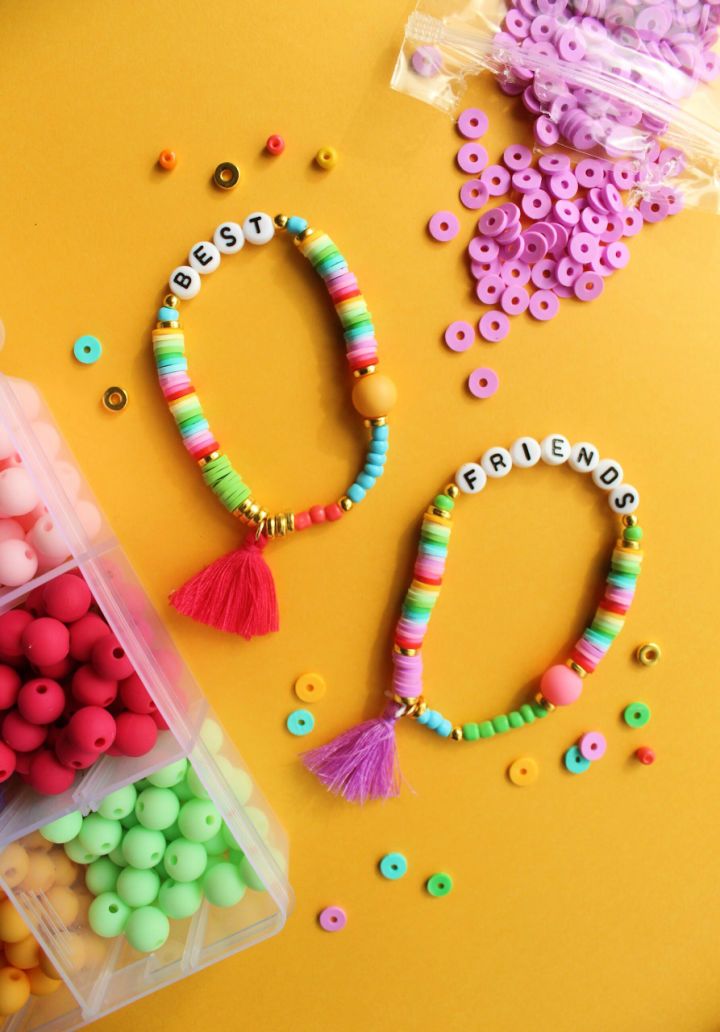
Fabulous DIY clay bead bracelets are now within reach! Get your jewelry supplies like elastic cord, clay beads, jewelry glue, and other various beads ready to make these personalized pieces of arm candy. Mix and match different combinations for a one-of-a-kind craft. Tools such as the bead stopper, tray, and crimp covers help make crafting easier.
This featured tutorial provides step-by-step instructions for making stylish accessories both adults and kids can wear with pride. Level up your fashion game today with these fun and meaningful DIY clay bead bracelets! prettylifegirls
4. Make Your Own Clay Bead Bracelet
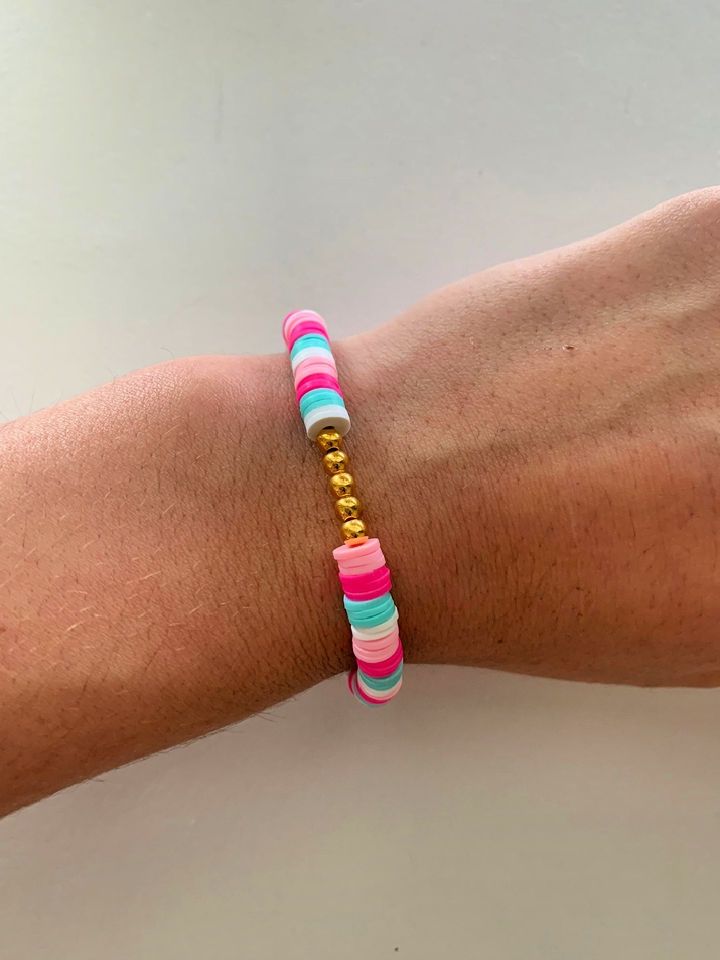
Unlock the mysticism of clay bead bracelets with this comprehensive guide. From expressing individual style to symbolizing cultural heritage, these bracelets provide a distinctive way to accessorize. Delve into the symbolic meaning behind wrist beads and their varied interpretations across different cultures. Discover how many clay beads are typically needed for a bracelet, depending on size.
Follow along with a step-by-step tutorial on makingpolymer clay disc beads and explore the potential of crafting your jewelry pieces. Revel in the beauty and significance of beaded bracelets as an empowering form of self-expression and mindfulness practice. bayofclay
5. DIY Clay Bead Personalized Bracelets
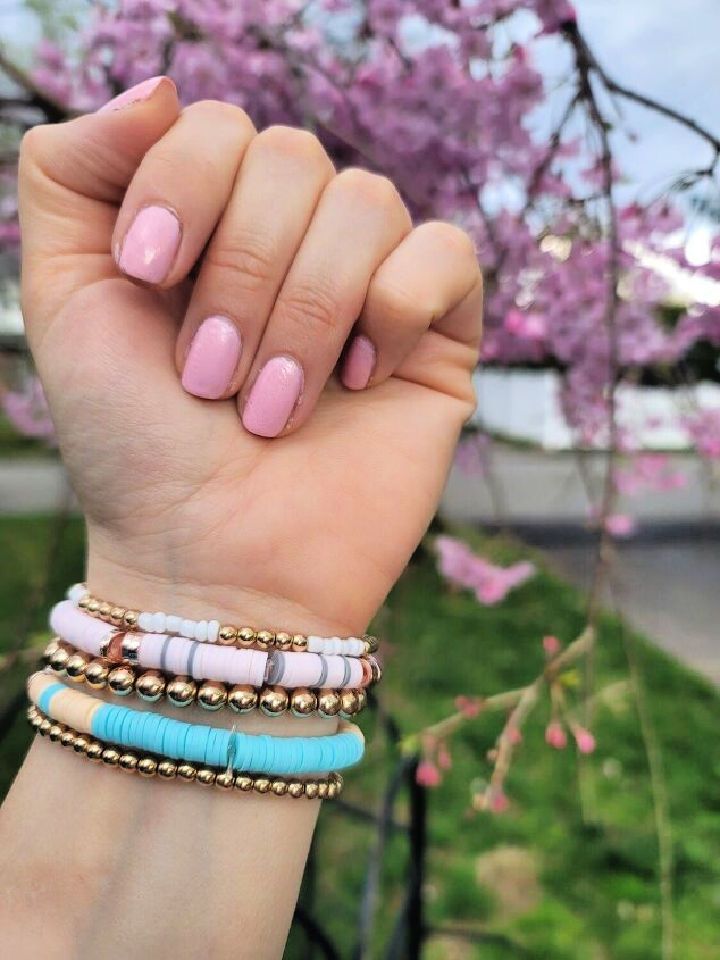
These clay bead bracelet ideas will add some charm and personality to your wrist. Make stylish and personalized bracelets with flat clay beads that are gentle on the skin. Mix and match round letter and gold ring beads for a unique touch. Design bracelets for yourself or your little ones, customizing them with names and vibrant colors. Attractively pair them with other gold beaded bracelets to achieve a trendy look. These clay bead personalized bracelets make an ideal gift for Mother’s day or any special occasion!
Gather elastic, letter beads, and clay/rubber beads to bring your creative vision to life – it only takes minutes of fun crafting time! Create the perfect accessory for yourself or a loved one with unique bead combinations, giving a lasting and memorable gift! upstyledaily
6. Free Polymer Clay Bead Bracelet Tutorial
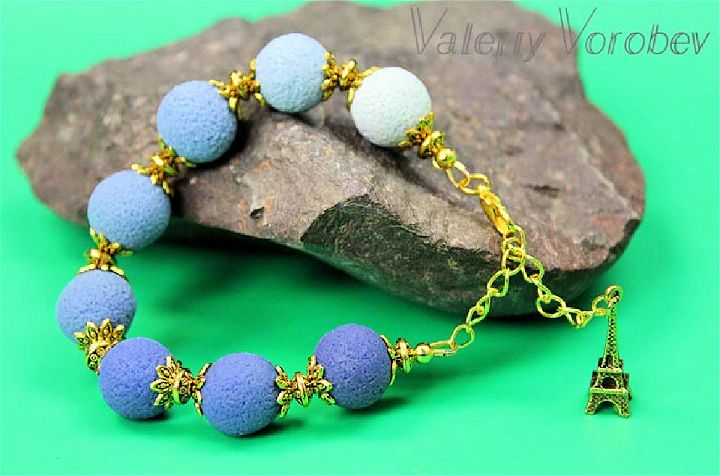
Enamored with the idea of crafting your own dazzling polymer clay bead bracelet? Look no further! This free tutorial teaches you how to make a stunning bracelet. Master the salt texture technique, skinner blend color blending, and baking instructions for perfect bead setting.
You only need blue and white polymer clay, a paste machine, an oven, a rolling pin, various fittings (bead cups and jewelry cord), and clasps, chains, and pendants. Begin makingyour personalized piece today! ideas-crafts
7. Personalized Friendship Clay Bracelets – Step by Step

Unlock the power of friendship and show your loved ones how much you care with these DIY personalized bracelets! You can make beautiful beads using white oven-baked clay with embossed letters of your friend’s name. Add color by painting the beads with acrylic paints and sealing them with varnish for extra protection.
This is enhanced with a 1.5mm leather cord, 2mm cord ends with loops, instant adhesive, 4mm jump rings, and 14mm lobster clasps. These accessories provide the perfect finishing touch for handmade gifts.
Make meaningful memories while involving your kids in the creative process – what better way to celebrate friendships? yourdiyfamily
8. How to Make Polymer Clay Heart Bracelets
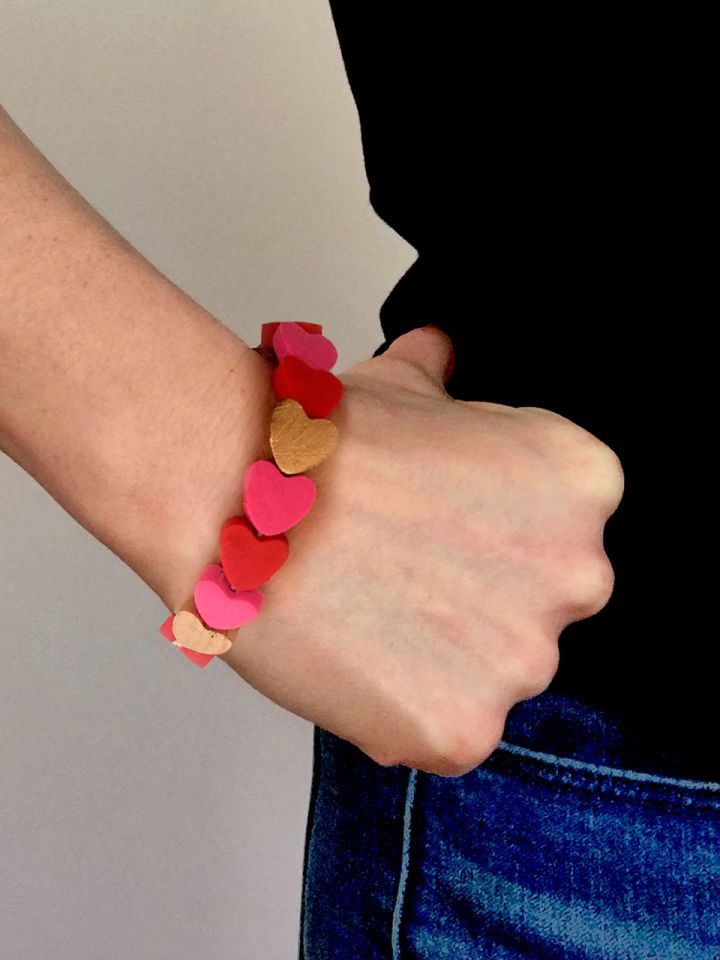
Splendidly make special polymer clay heart bracelets for Valentine’s day or any festive occasion! Use craft sticks to roll the clay to a consistent thickness and cut heart shapes. Follow baking instructions carefully, then drill or needle holes in the hearts for stringing.
For added flair, paint some hearts with gold enamel paint and string them onto bracelets using a cord or chain. Surprise your loved ones with these personalized yet thoughtful gifts this season! mugmakes
9. Matching Mother and Daughter Clay Bracelet Set
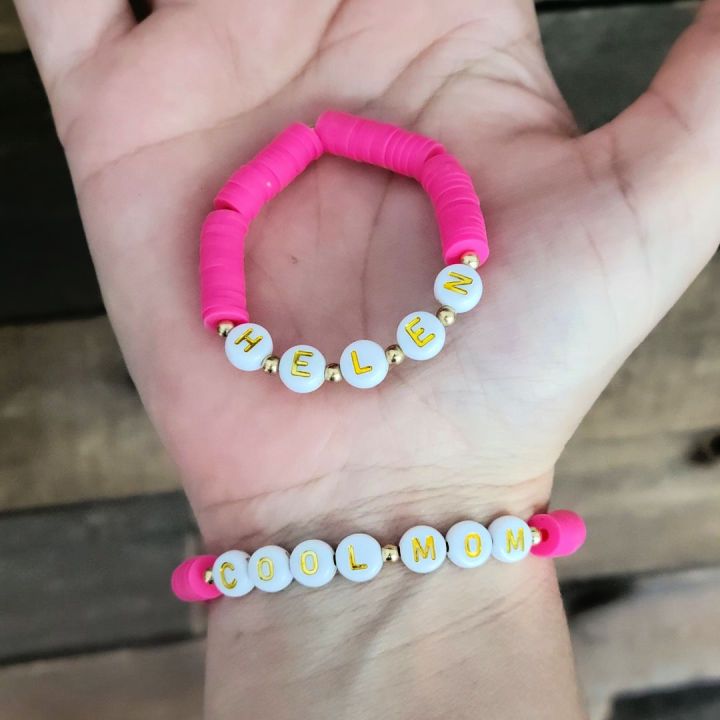
Adorn your wrists with this captivating mother-and-daughter matching name and polymer clay bead bracelet set! Handcrafted in the USA with ethically sourced, recycled materials, these waterproof, hypoallergenic bracelets are fully customizable with any name or color you choose.
Made with polymer clay colored beads, letter beads, and 100% 14kt gold filled spacer beads on strong 1mm thick stretch wire – perfect for everyday wear. Layer it up to add a unique style to your look for only $15 each. Take advantage of this special matching bracelet set! saltyreignjewelry
10. Easy DIY Name Clay Bead Bracelet
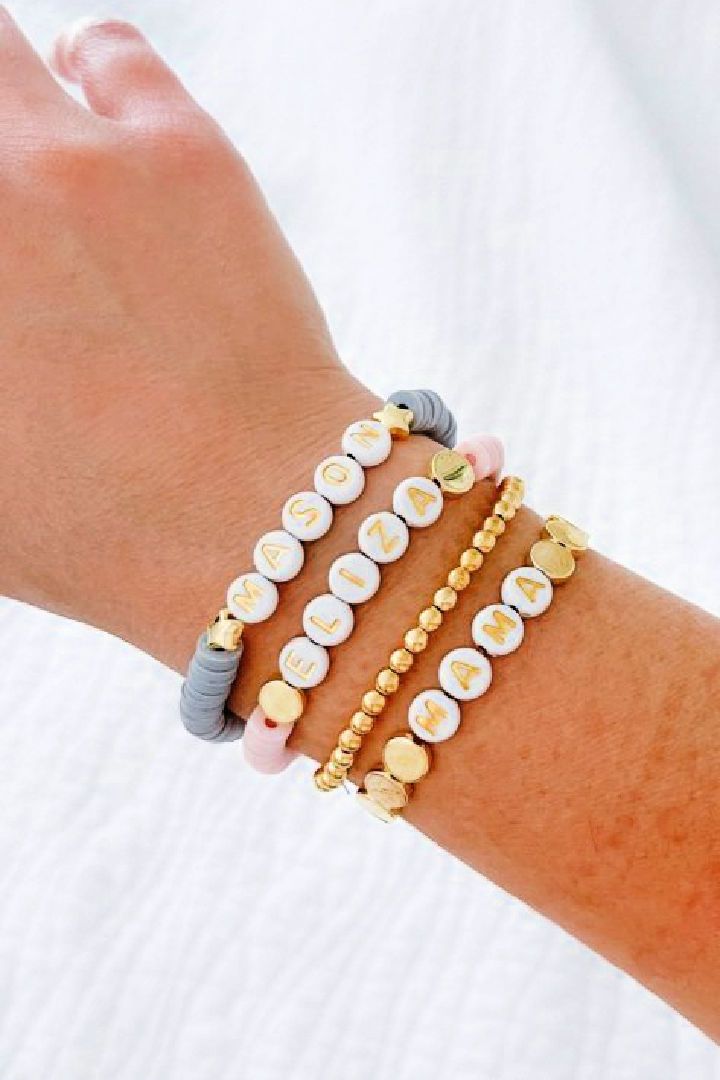
Crafting your own DIY name bead bracelet has never been easier! Gather all the necessary supplies from your local store, including flat clay beads, gold spacers, and letter beads. Secure one end of a 5mm stretch string to a tray with tape. Thread the chosen beads onto the string using a beading needle, then tie knots at both ends for strength.
Use g-s hypo cement to keep it secure and prevent them from coming undone – now you’re ready for some creative arm candy! Have fun exploring different colors and designs for stylish bracelets that are unique to you. made2style
11. Clay Bead Bracelet Step-by-Step Tutorial
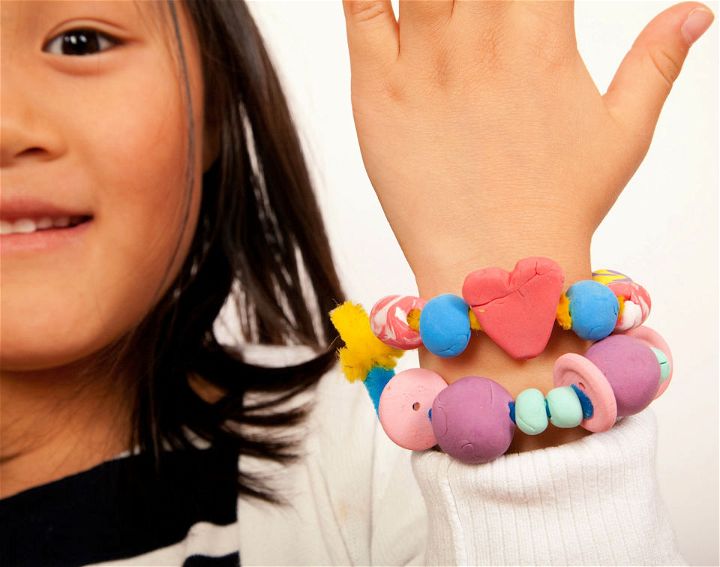
Imaginative fun awaits with this captivating DIY clay bead bracelet crafting experience. Kids aged 3-8 can get creative using air dry clay to mold unique beads, then thread them onto colorful pipe cleaners. Adorn your creation with buttons and add the perfect personal touch by decorating it with paint – endless possibilities.
Not only is this a messy craft that will provide hours of enjoyment, but it also encourages creativity and independent play. So grab some supplies and work on your little one’s next masterpiece! kiwico
12. Make Clay Bracelets for Mother’s Day
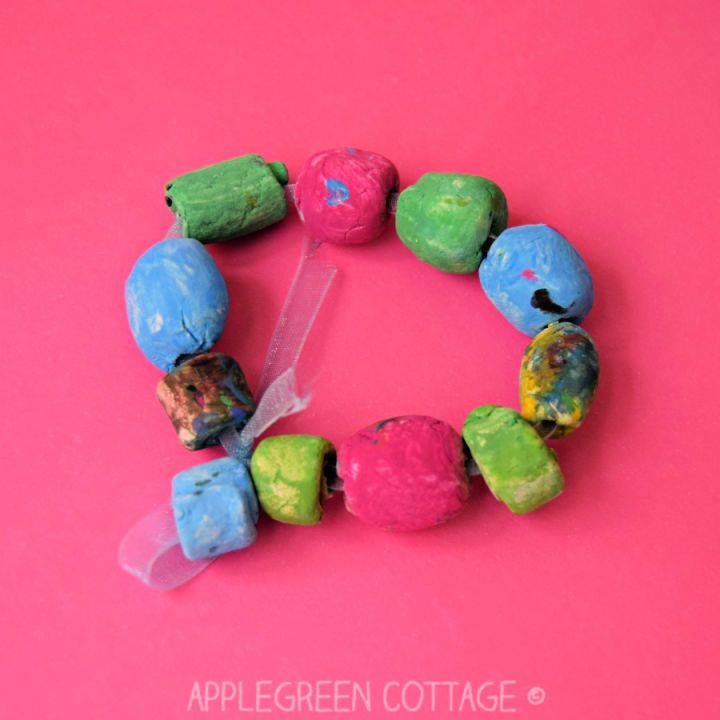
Fabulously craft stunning and effortless DIY bracelets with air-dry clay beads! This fun Mother’s day DIY project is ideal for children and adults alike. Air-dry clay offers the perfect material to craft, as it does not require heat treatment and can be painted easily.
Make lightweight beads of various sizes and colors for a unique touch. Make a stunning bracelet by assembling beads and adding a ribbon or twine. Perfect for Mother’s Day or teacher appreciation! applegreencottage
13. How to Make Clay Bead Bracelets
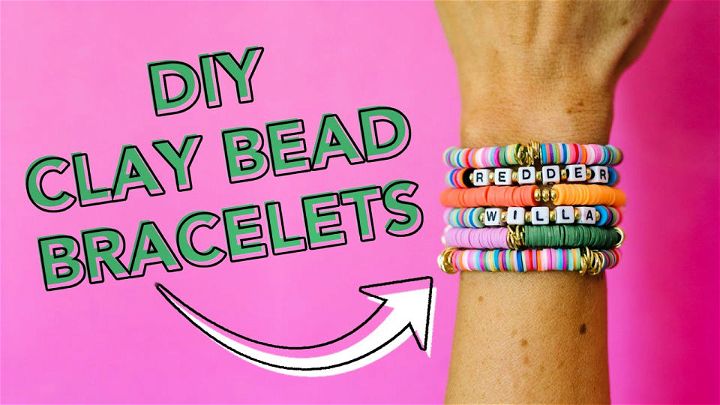
Artfully craft your personalized clay bead bracelets at home with this simple, step-by-step video tutorial! Get started with our all-in-one kit! It includes letter beads, gold accents, jump rings, glue, and more. Customizing these beautiful accessories is a breeze for both adults and kids.
Get ready to embark on a fun summer project and unleash your creativity with clay bead bracelets. The endless possibilities make makingsomething truly special a breeze. Start today and experience the joy of crafting cute and chic jewelry pieces.
14. DIY Heishi Clay Beads Bracelet Tutorial
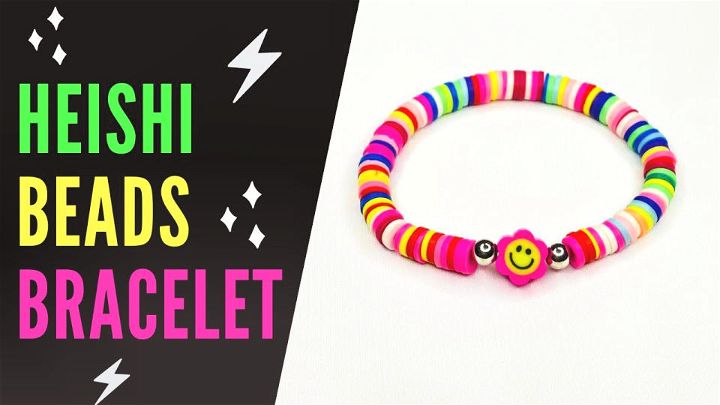
These clay bead bracelet ideas are fun and simple to make with kids or friends. In this tutorial, capture your creativity by learning how to make a unique clay bead bracelet! This DIY tutorial demonstrates the step-by-step process using 6mm clay heishi, silver, flower, and 0.6mm elastic thread beads. Make exquisite jewelry with smile beads and showcase your DIY skills.
Looking for a fun, stylish way to express yourself through crafting? Get ready to start weaving a gorgeous bracelet today!
15. Making Gelang Clay Bead Bracelet
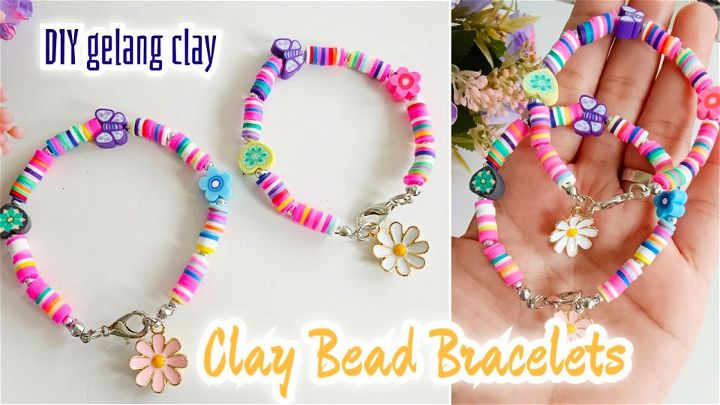
These clay bead bracelet ideas are a great way to use up your leftover clay and beads! Learn the art of makingpersonalized accessories with clay beads through this beginner-friendly tutorial. You only need polymer clay or clay beads, 3mm silver beads, a stringing cable, a clasp, jump rings, and pliers to craft these stylish and easy-to-make bracelets for kids.
Follow the comprehensive instructions step-by-step through this exciting crafting journey – unleash your imagination and get creative while doing those beaded wonders!
16. How to Make Clay Bead Bracelet at Home
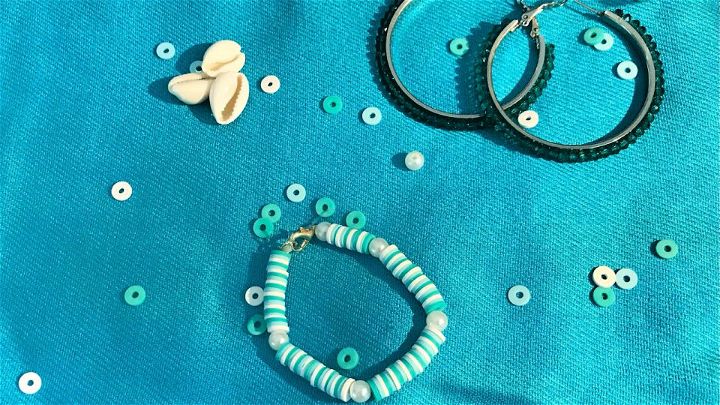
Astonishingly easy and fun, this video tutorial will show you how to craft your special clay bead bracelet. You can unleash your creativity to make stunning DIY accessories with just a few supplies – including clay beads, a stringing cord, spacer beads, a clasp, and jewelry tools.
This DIY tutorial will walk you through the step-by-step process from start to finish so that anyone can easily make beautiful bracelets. Try it for yourself; learn about making unique clay bead bracelets now!
17. DIY Heishi Clay Bead Stretch Bracelet
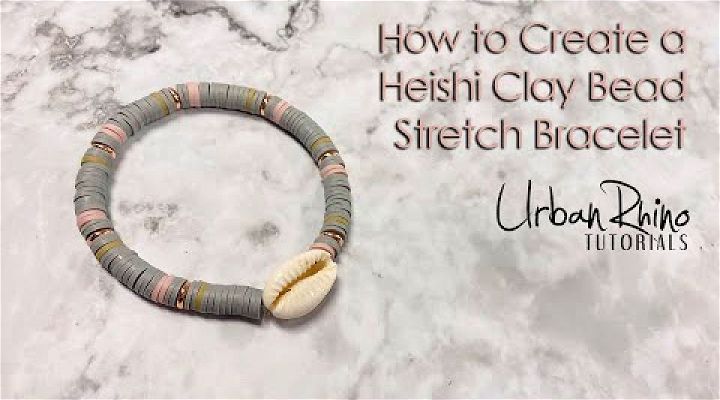
Unearth your inner creativity with this fun and easy DIY project! This video tutorial teaches you how to make a trendy heishi clay bead stretch bracelet.
Get your materials ready, including 1mm stretch cord and clay heishi disc beads, and follow the step-by-step process for assembling an effortlessly fashionable accessory. You’ll be wowing everyone with your newfound knowledge in no time! So why not give it a try? Put on some music, grab your supplies, and start crafting today!
18. Simple DIY Polymer Clay Beads Bracelet
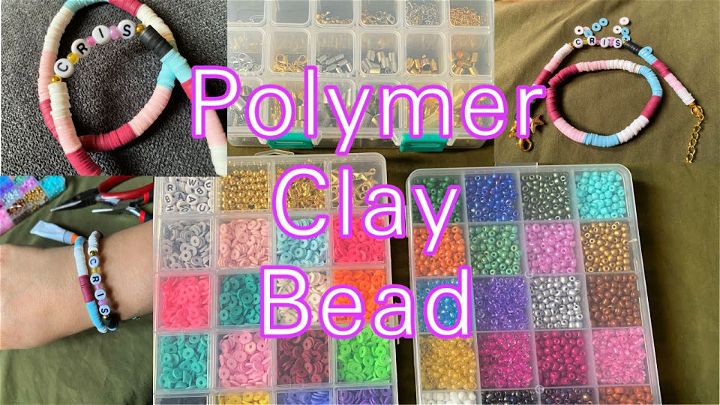
Exquisitely craft your one-of-a-kind jewelry with this easy-to-follow video tutorial on how to make a stunning polymer clay beads bracelet. With no prior experience required, follow the step-by-step process and learn how to make beautiful personalized beads using simple materials. Ignite your creativity and be inspired!
This tutorial is perfect for beginners looking for a fun way of designing unique jewelry pieces. Take advantage of this must-try polymer clay crafts project – start making your bespoke bracelets today!
19. Cute DIY Polymer Clay Bracelet for Beginners
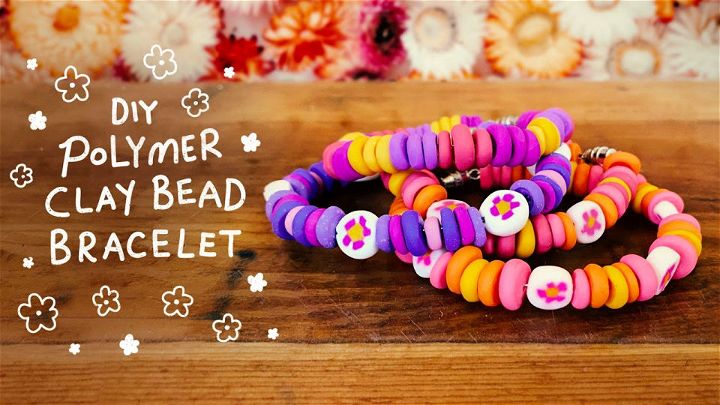
These clay bead bracelet ideas are so cute, you’ll want to make one for every outfit. Immerse yourself in makingyour own divine DIY polymer clay bracelet with this beginner-friendly tutorial. With no special equipment or prior experience, you can craft unique beads using ditto oven-baked clay and simple tools such as a knife, thin wire, jewelry pliers, clasps, tin foil, and a bead hole tool.
The step-by-step instructions outline how to make flower, lettered, and disk beads that can be assembled into an eye-catching bracelet. Finish by baking your colorful creation in the oven – truly expressing your individuality through personalized jewelry!
20. Beginner-Friendly Polymer Clay Bracelet Tutorial
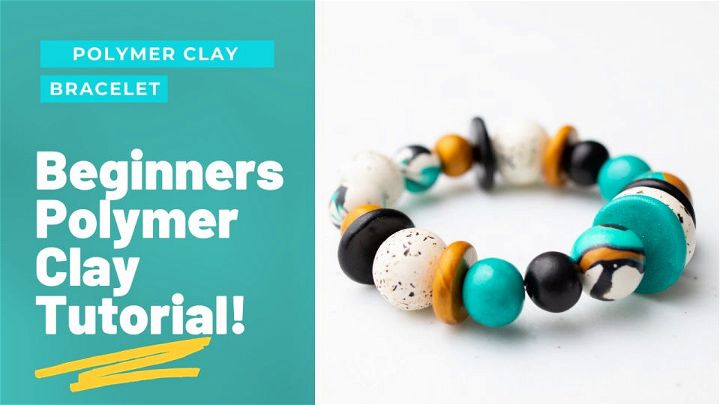
Excitingly explore the world of handmade jewelry with this comprehensive beginner’s tutorial on making a polymer clay bracelet from scratch! Learn essential techniques and tips for working with polymer clay, such as adding color and texture using pepper and glitter. This detailed guide covers everything from makinghandmade turquoise, white, gold, and black beads to making a marble cane for extra flair. Additionally, discover recommended supplies like cornstarch, toothpicks, and a blade – all necessary for achieving clean bead holes.
Furthermore, investigate different glue and sealer options while understanding why mod podge isn’t recommended for polymer clay creations. Perfectly suited for the craft enthusiast or first-time crafter looking to make beautiful accessories!
21. Making Bracelets From Clay Beads
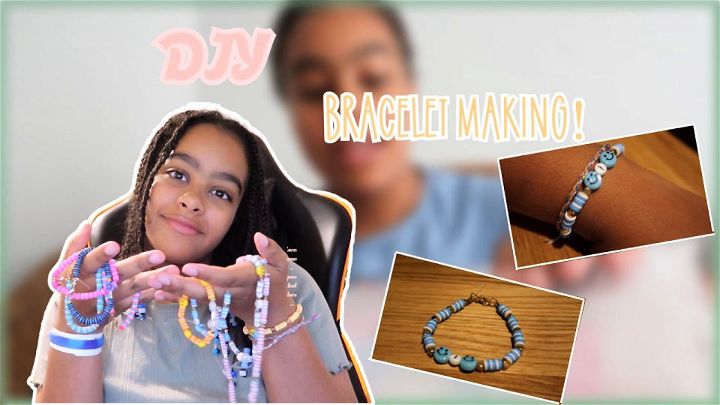
An impressive crafting journey awaits! Join this unboxing and crafting video to learn how to make stunning beaded bracelets with polymer clay. Not only are these bracelets straightforward to make, but they also give you a sense of fun and joyfulness.
Personalize your bracelet with unique elements like shells, gold accents, and more. Make sure to notice the adorable smiley face beads that add charm to your creation. Get inspired and start makingbeautiful polymer clay bracelets today!
22. DIY Stretch Bracelet With Multi Colored Polymer Clay Beads
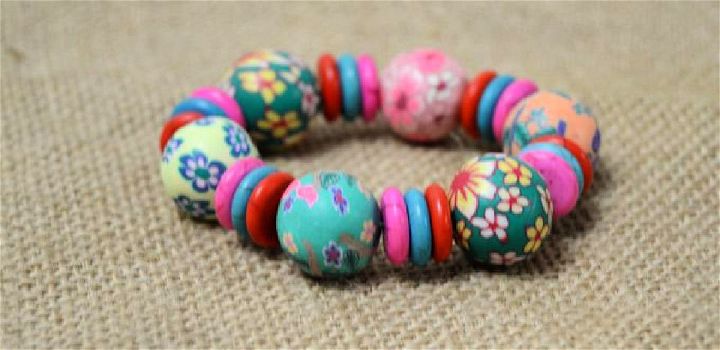
With this quick tutorial, fashionably craft a custom-made polymer clay bracelet in no time! Discover how to create a vibrant and stylish stretch accessory using polymer clay beads and gorgeous round flat turquoise beads. Without the need for any tools, you can assemble your one-of-a-kind item.
Gather your materials – crystal thread, scissors, polymer clay beads, and round flat turquoise beads. Then, follow the guide to thread them together. Make a unique bracelet that easily complements any outfit using this step-by-step approach! pandahall
23. How to Make Clay Beads Bracelet for Kids
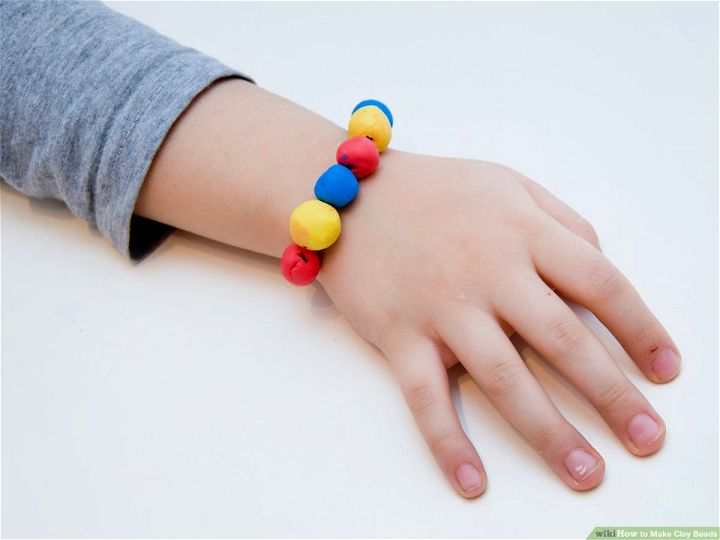
Awe-inspiring crafts await! Learn how to make clay beads with these easy-to-follow steps and accompanying pictures. Creating beautiful handmade beads is fun and simple whether you prefer air-dry or polymer clay.
Before beginning, protect your work surface with a newspaper or plastic tablecloth. Cut off the desired amount of clay, shape it into cubes, or roll it into tubes, and refine any imperfections with water. Make holes in the bead using a tapestry needle or toothpick, then let them dry for an appropriate length based on size and environment. Crafting unique clay beads has never been easier! wikihow
Conclusion:
Clay bead bracelets are a wonderful way to express your creativity and style. They are easy to make, fun to wear, and perfect for gifting. You can customize your bracelets with different colors, shapes, and patterns of clay beads and add letter beads, metallic beads, or other accents.
Whether you want to create an ombre effect, a minimalist look, or a colorful statement, clay bead bracelets are the ideal DIY jewelry project. All you need are some clay beads, elastic cord, jewelry glue, and your imagination. Let’s explore our list of more inspiration and tutorials on how to make clay bead bracelets at home above.

