If you’re creating a document, such as a flyer, brochure, calendar, or sign-up sheet, you may want something besides a plain, white background. In Microsoft Word, you can use a solid color, gradient, texture, pattern, or picture as your document background. This tutorial shows you the various ways to add a background in Word.
Tip: you can also insert a PDF document into Word.
How to Add a Background in Word
When you’re ready to add a background in Word, you can do so in just a few steps. The background you select applies to your entire document.
Go to the “Design” tab to get started and choose one of the options below.
Use a Solid Color Background
You can choose a single color from Word’s color palette or a custom color as your background.
Note: while you can use this and the options below in Word on Windows, a color background is currently the only available option in Word on Mac. As of this writing, you cannot add a document background in Word on the Web.
- In the “Design” tab, select the “Page Color” drop-down box in the Page Background section of the ribbon.
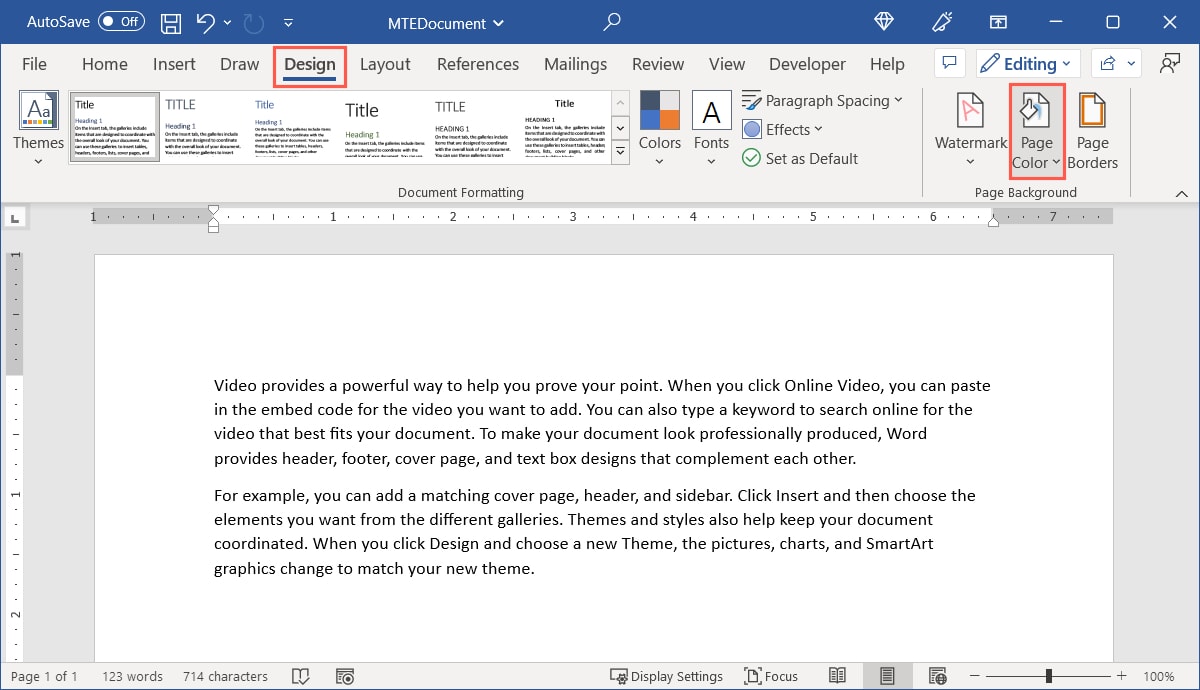
- If you see the color you would like from the basic palette, select it to apply it to your document.
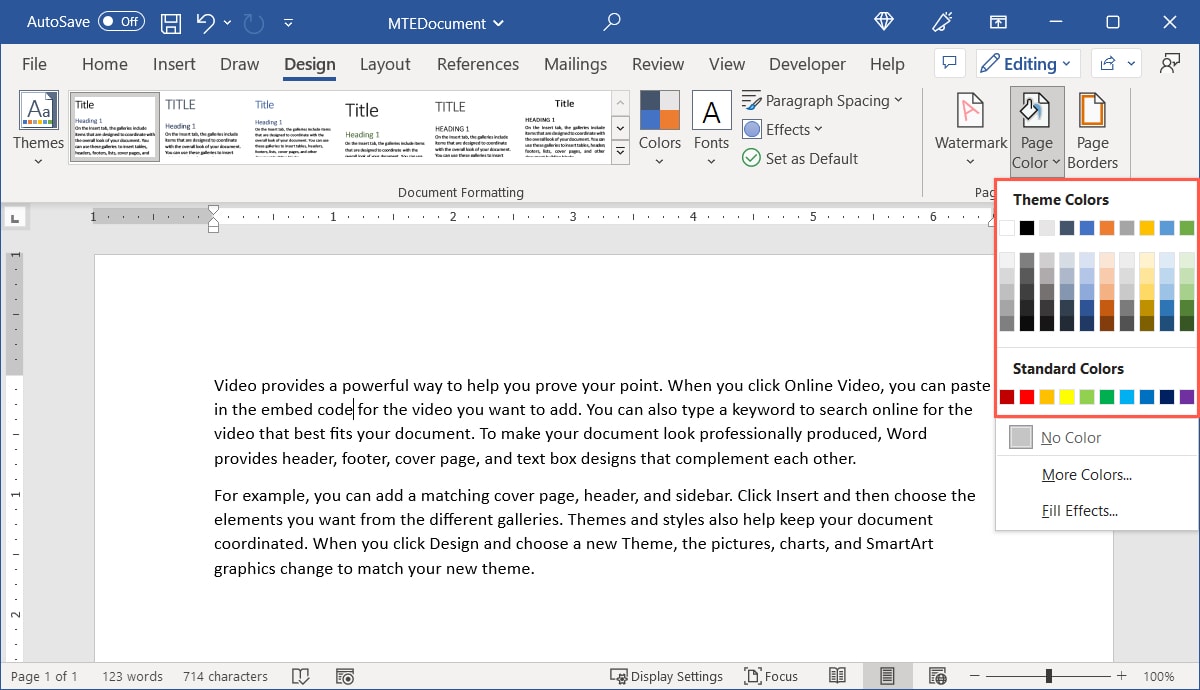
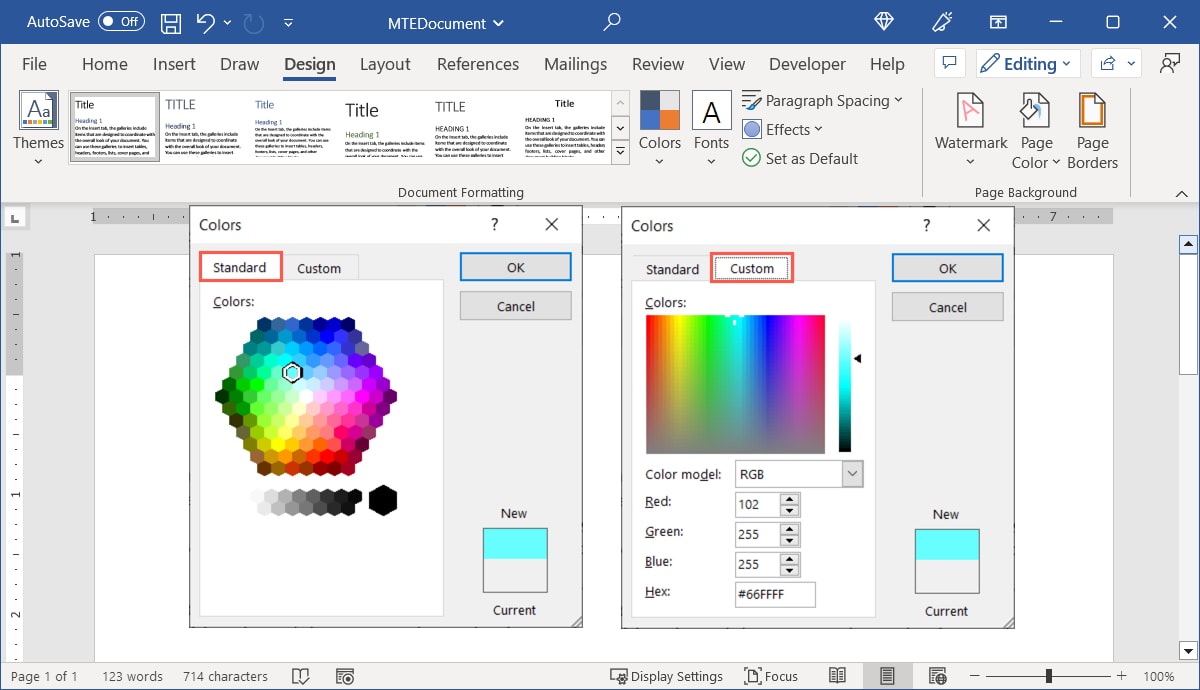
- If you prefer to use a custom color, choose “More Colors” in the drop-down list.

- Use the “Standard” tab to pick the exact color and shade you want. To enter Hex, RGB, or HSL color codes, head to the “Custom” tab. When you see the color you want below “New” on the bottom right, click “OK.”
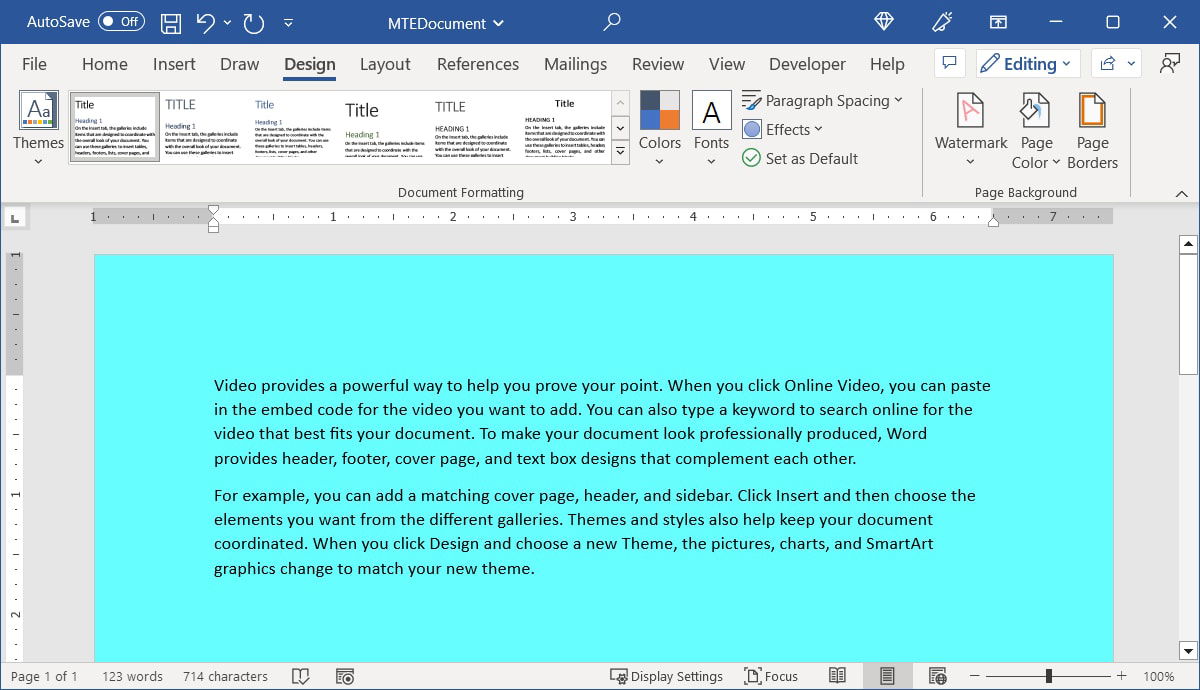
- Your document will update with your new color background.
Use a Gradient Background
Perhaps you would like to add a bit of color to your background but make it more eye-catching than a single color. Why not use a gradient, which offers a color-changing effect?
- In the “Page Color” drop-down list, select “Fill Effects.”
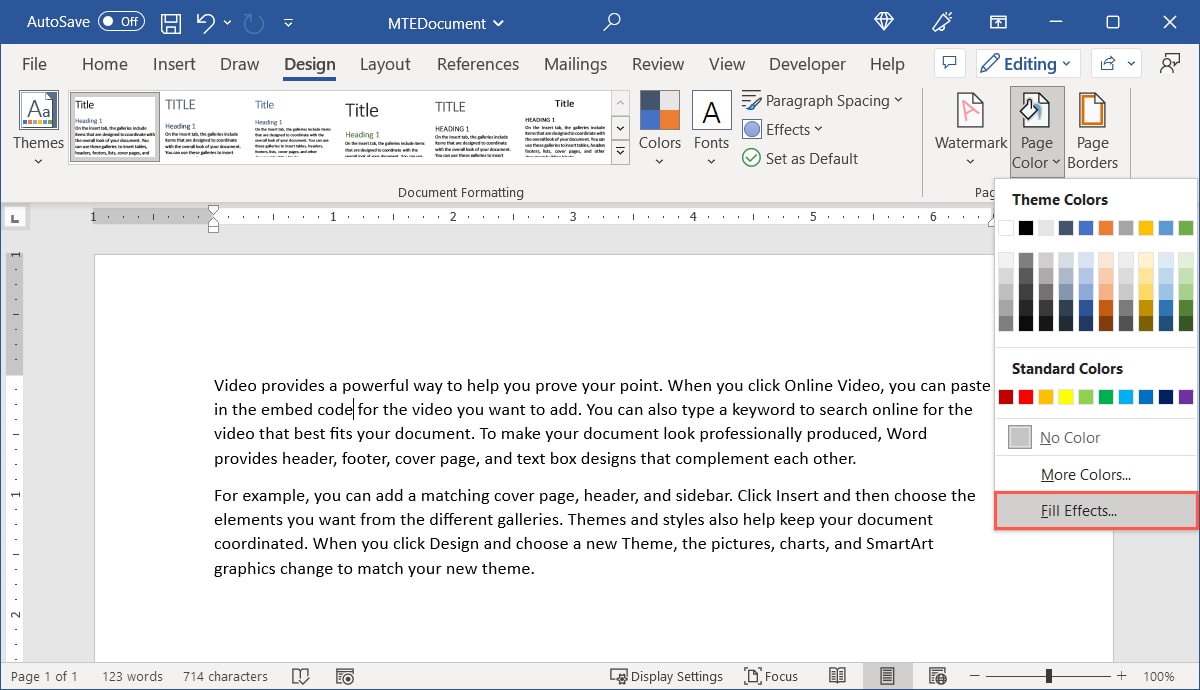
- Go to the “Gradient” tab in the Fill Effects pop-up window. Choose the design of the gradient using the various sections.
- Colors: use one color, two colors, or a preset theme. After you choose an option, use the drop-down box(es) to the right to pick the color(s). If you choose one color, you can also use the slider to make it darker or lighter.
- Shading Styles: select the style you want to use for the gradient, such as horizontal, vertical, or from the center.
- Variants: after you select the Shading Style, choose the design in the “Variants” section.
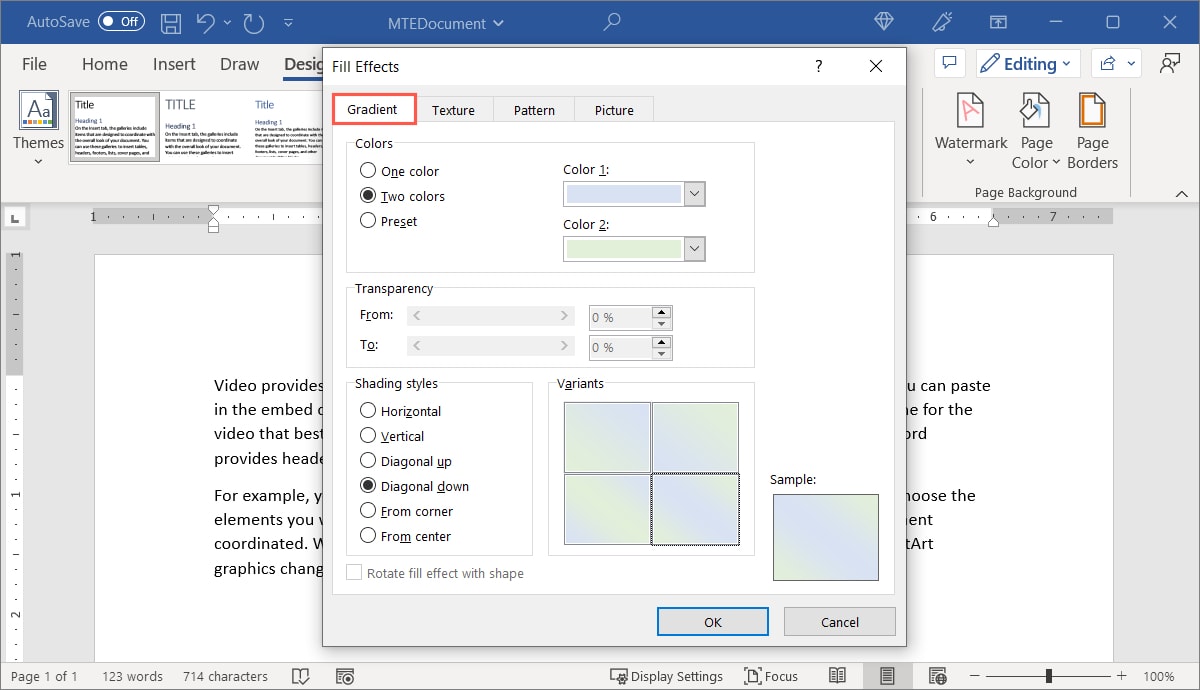
Note: the Transparency and Rotate Fill settings are unavailable for page backgrounds.
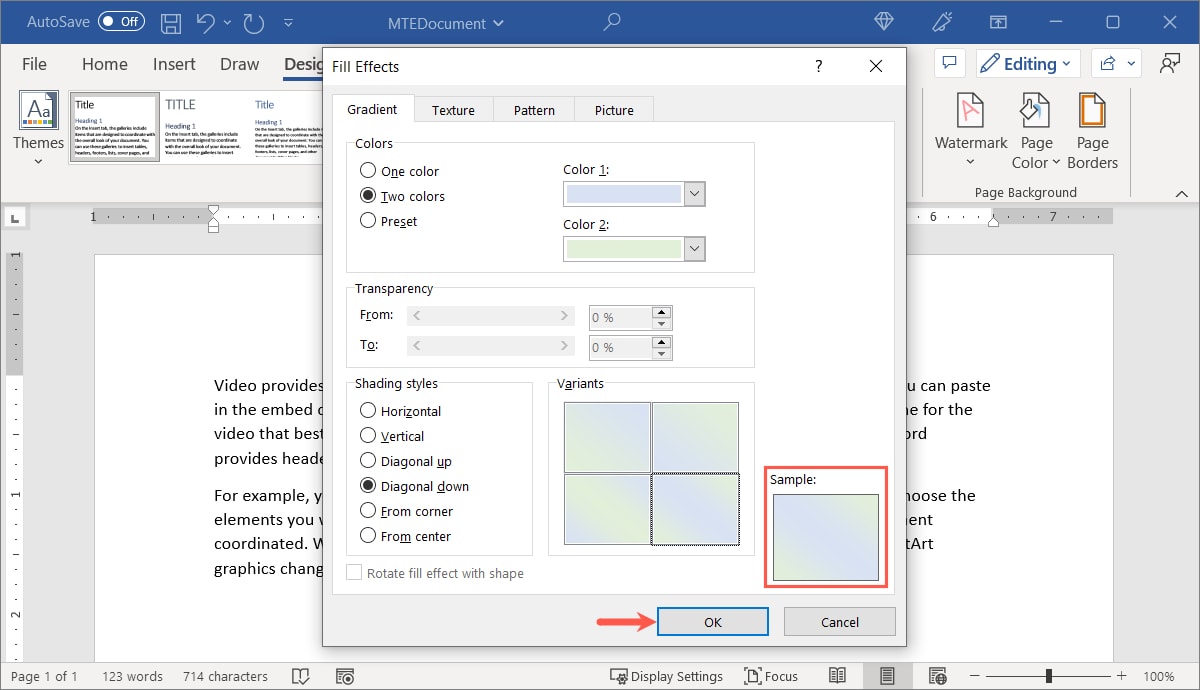
- As you make the above selections, you’ll see a preview of the gradient below “Sample” on the bottom right. Choose “OK” when you are finished.
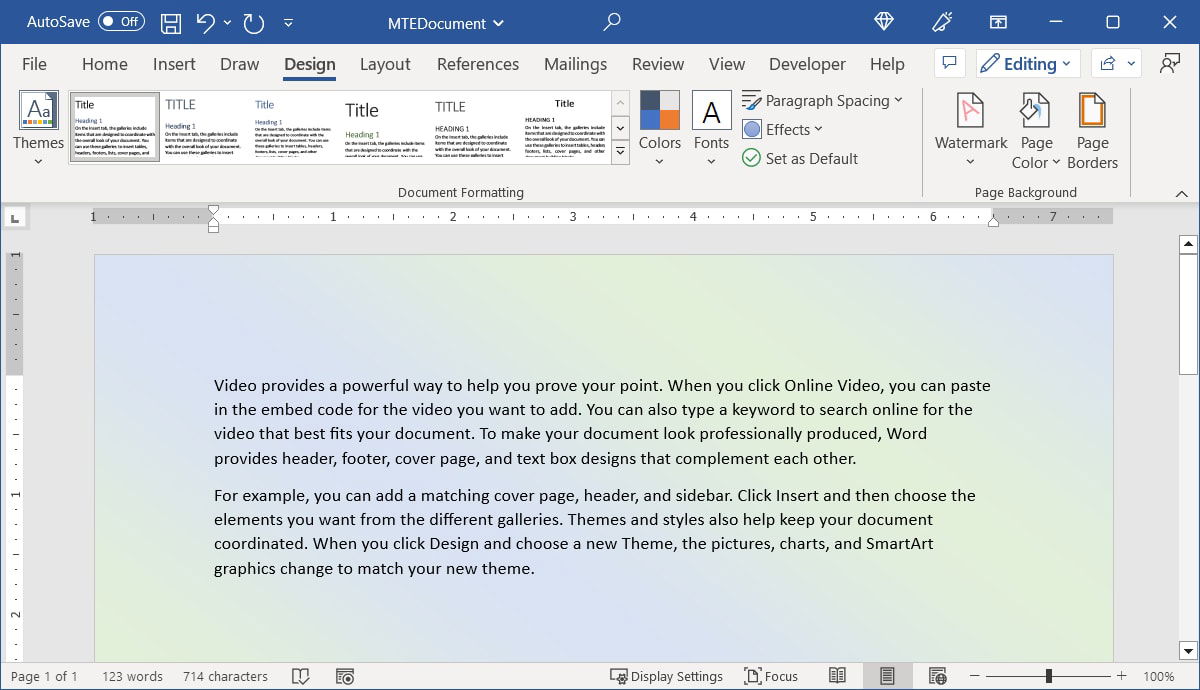
- The gradient background will appear in your document.
Use a Texture Background
Would your document look nice with a texture background, such as wood grain, marble, or paper? Use a built-in texture background or one of your own.
- In the “Page Color” drop-down list, select “Fill Effects.”
- Go to the “Texture” tab in the Fill Effects window, then choose the texture you would like to use in the selection box. You’ll see a brief description of the texture below the box.
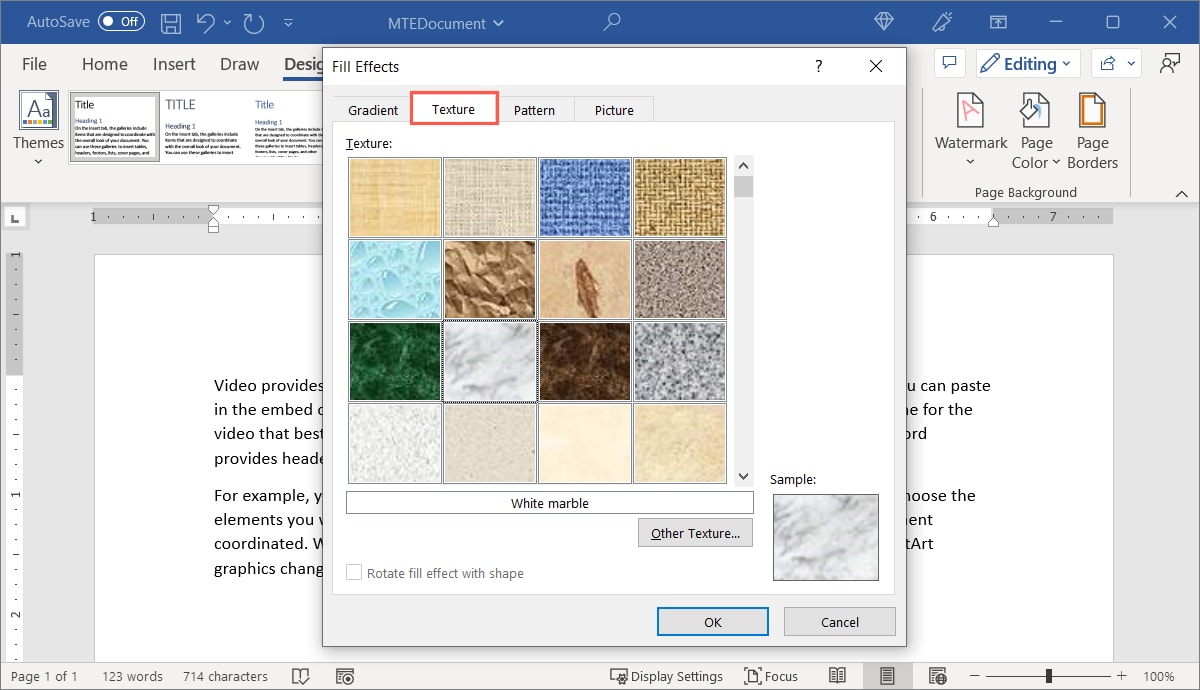
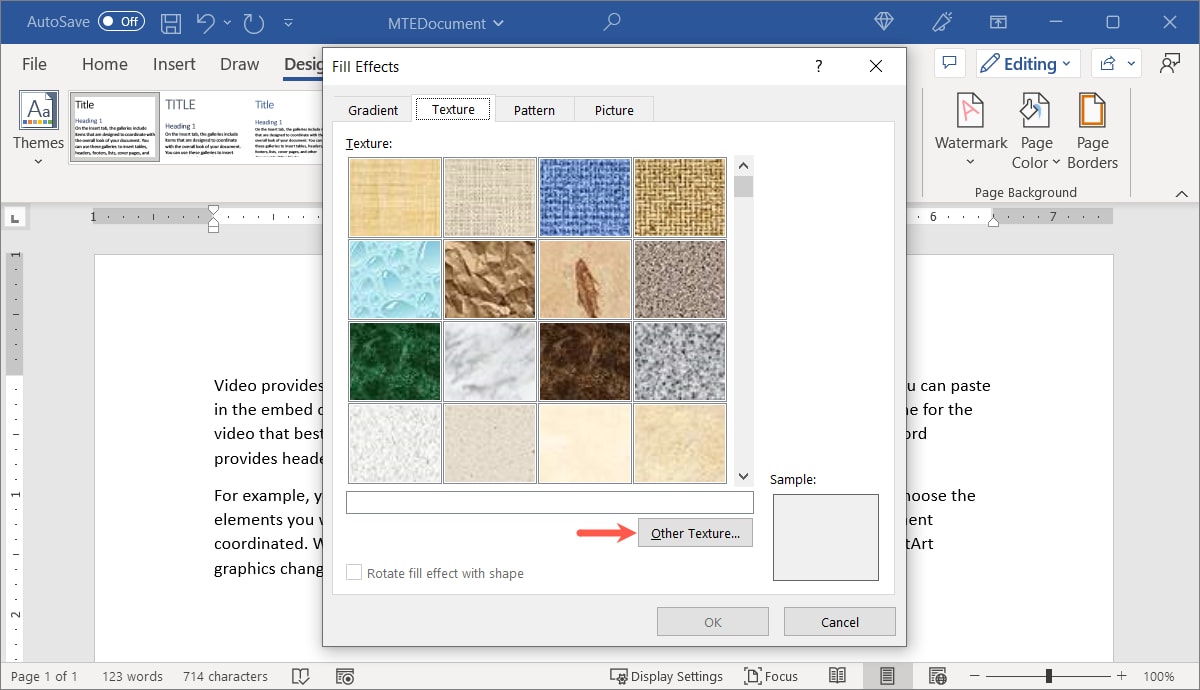
- To use your own texture, click “Other Texture.” Select the location, browse for, and select your textured image.
- Like the backgrounds above, you’ll see a preview below “Sample” on the bottom right. Click “OK” to apply the background.
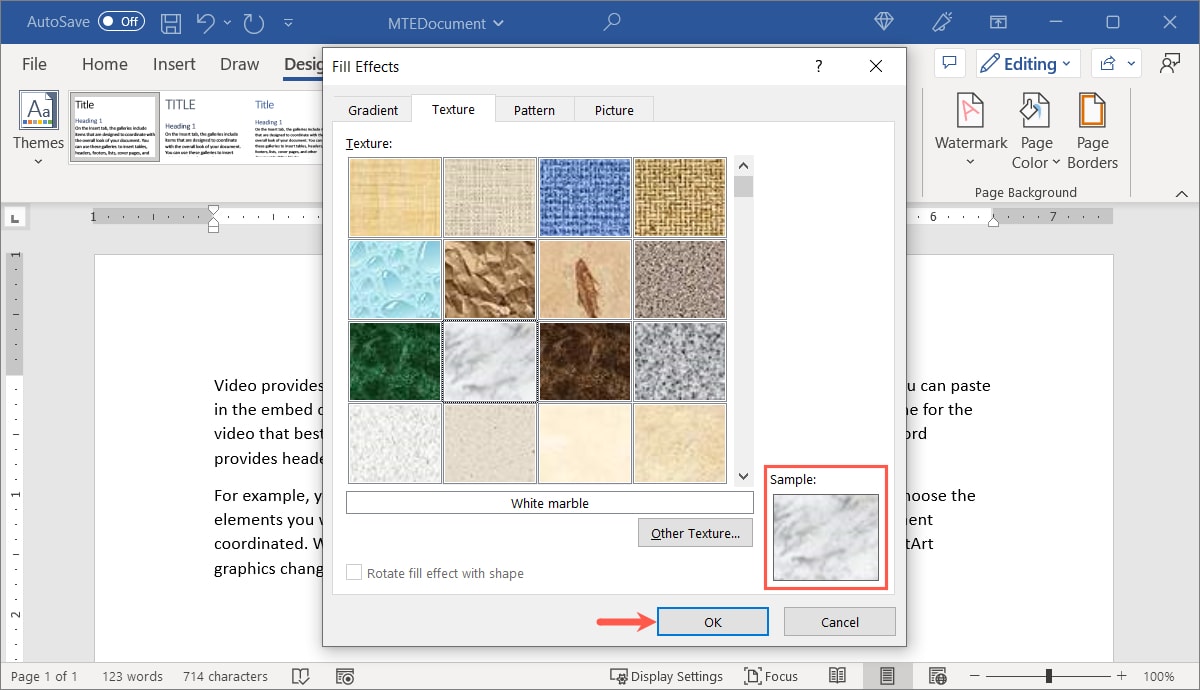
Note: the Rotate Fill setting is unavailable for page backgrounds.
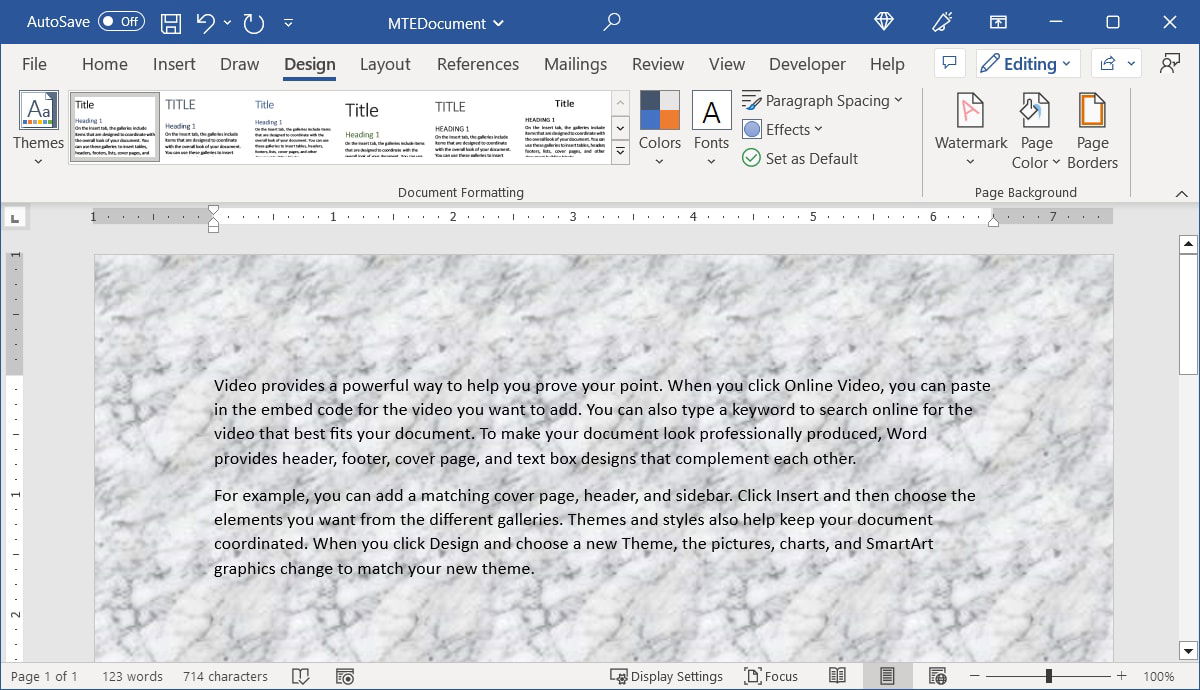
- Your document background will update with the texture you select.
Use a Pattern Background
If you’d like more than a solid color, such as something with polka dots, lines, or a grid, you can use a pattern background in Word.
- In the “Page Color” drop-down list, select “Fill Effects.”
- Go to the “Pattern” tab in the Fill Effects window. Choose the pattern you would like to use in the selection box. Its description will appear directly beneath it.
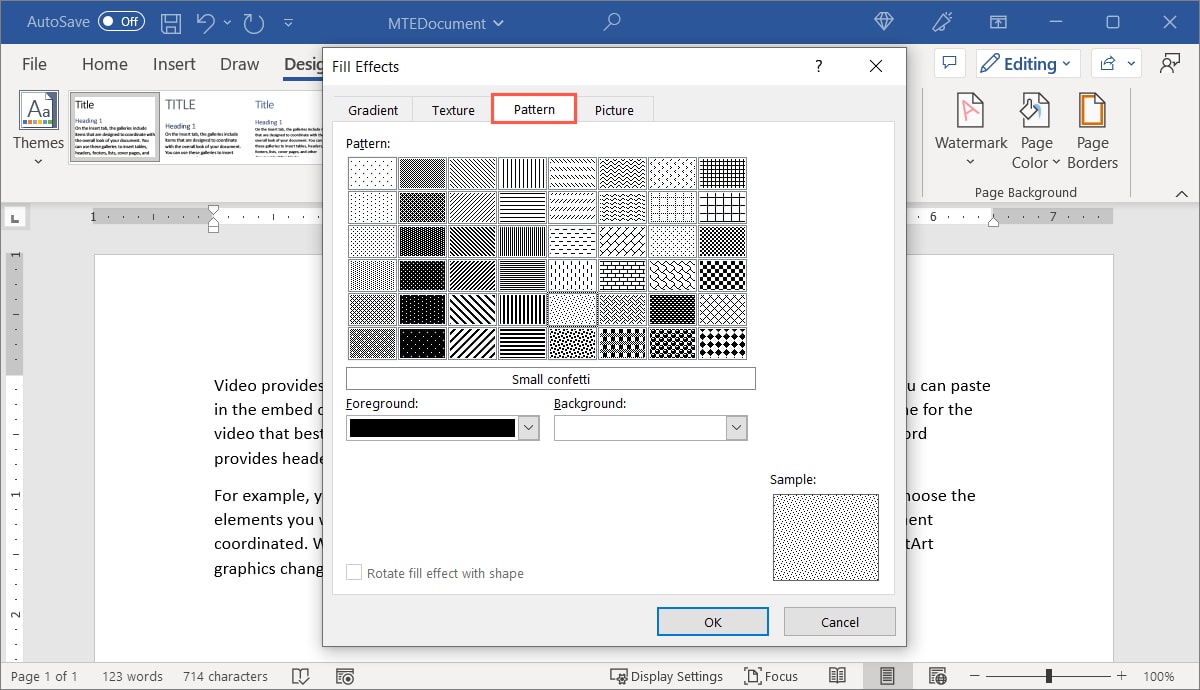
- You can use the “Foreground” and “Background” drop-down boxes to select the colors for your pattern.
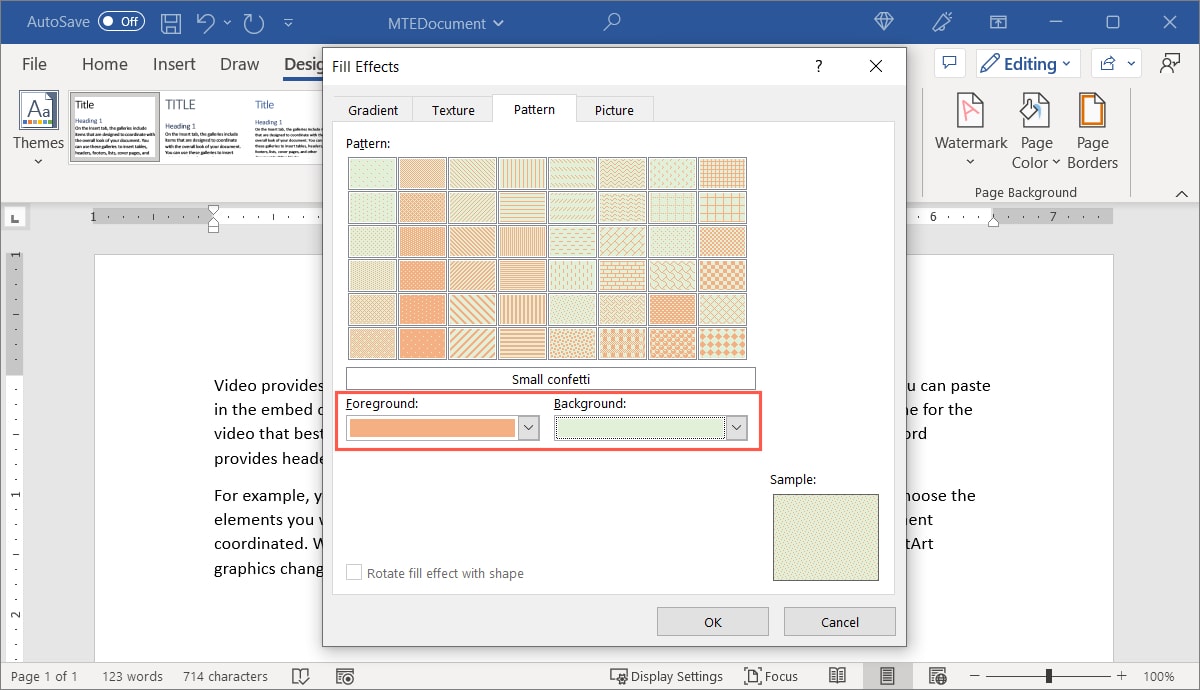
Note: the Rotate Fill setting is unavailable for page backgrounds.
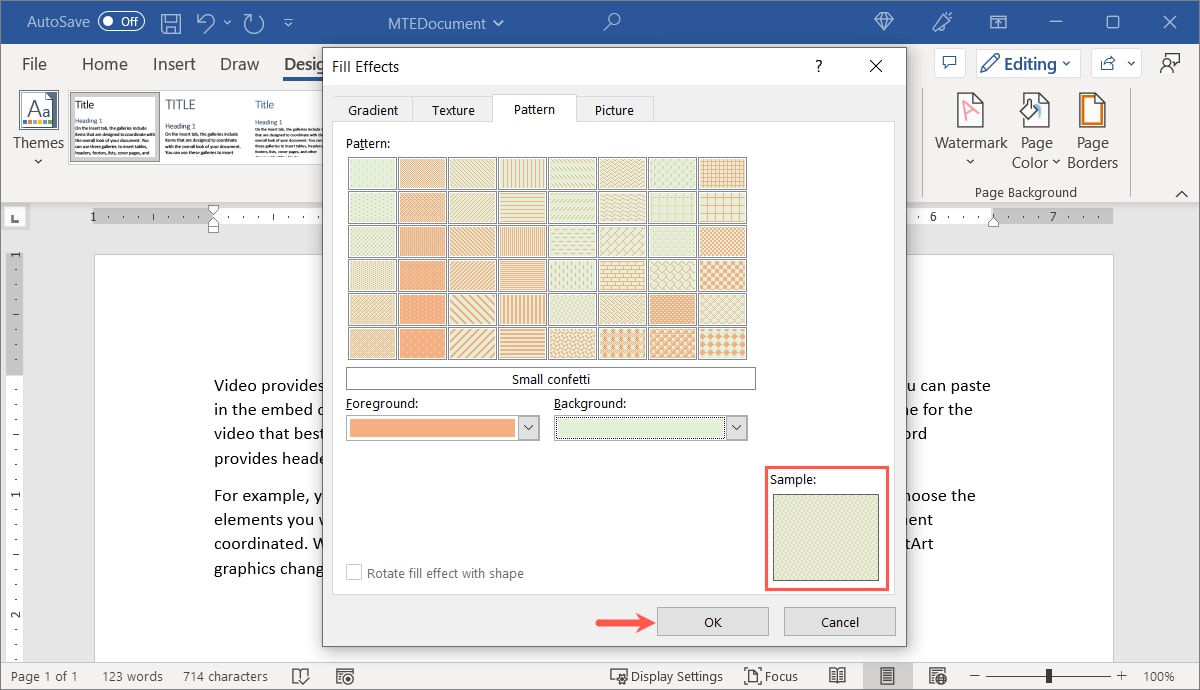
- Review the “Sample” on the bottom right and click “OK” to apply the background.
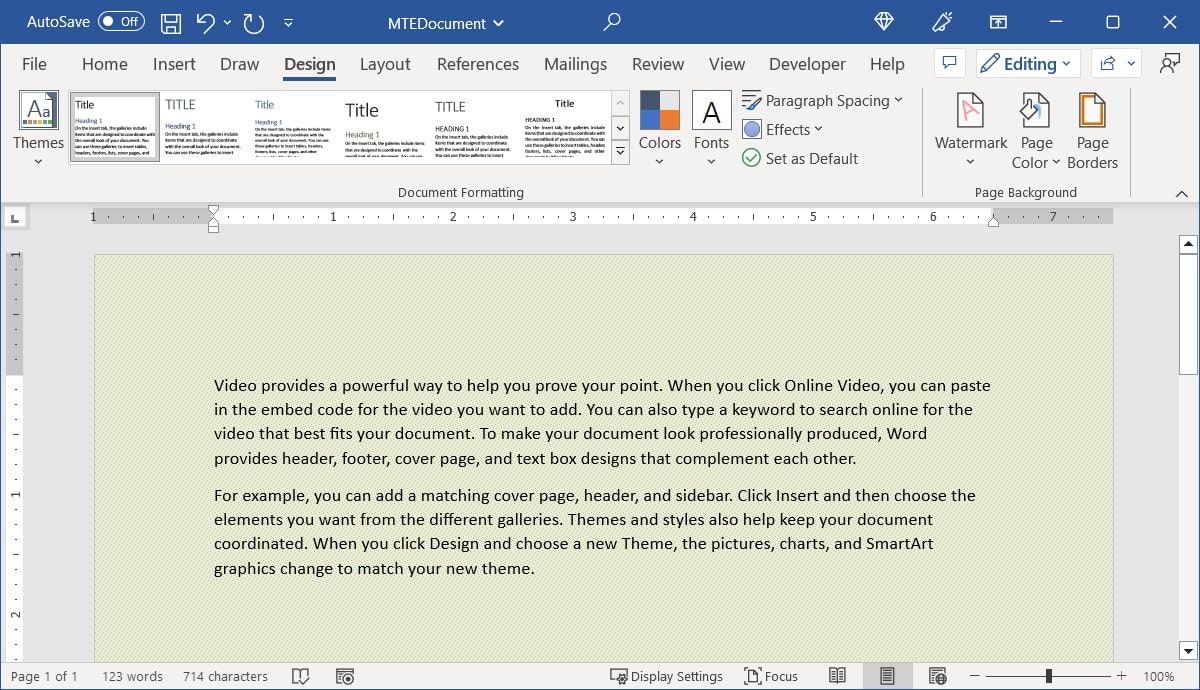
- The pattern will appear as your document background.
Use a Picture Background
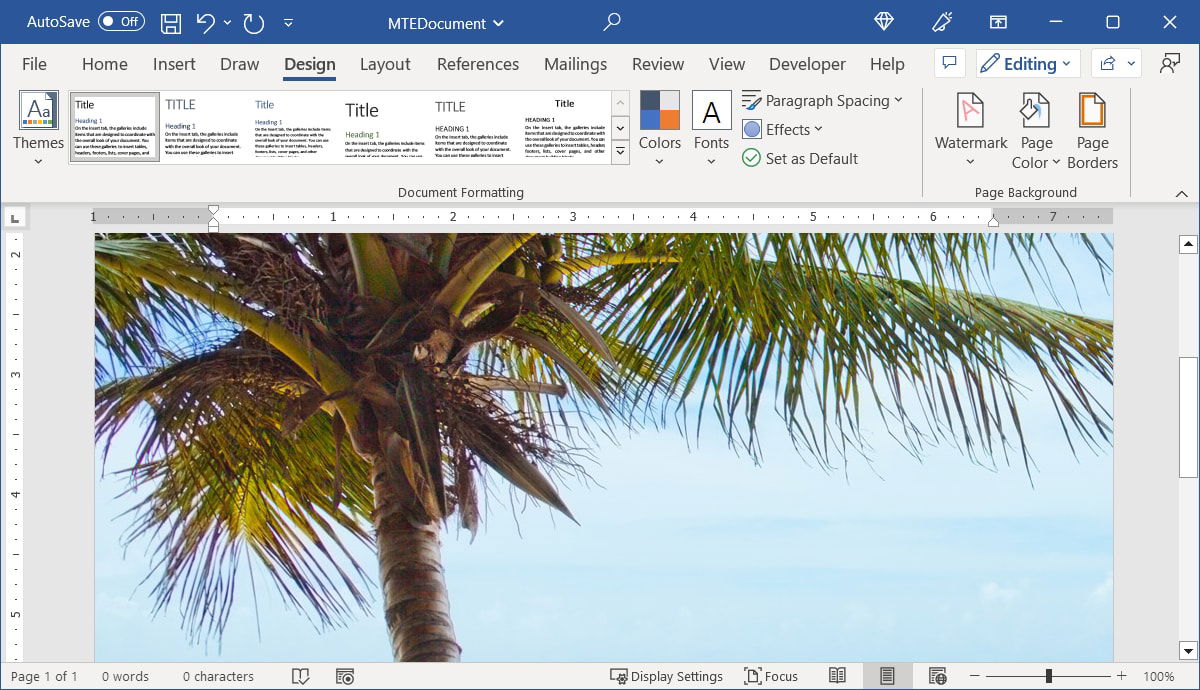
You may want a beach background for your resort brochure or a musical instrument for your private lesson flyer. You can insert a background image easily in Word.
- In the “Page Color” drop-down list, select “Fill Effects.”
- Go to the “Picture” tab and click the “Select Picture” button to locate your photo.
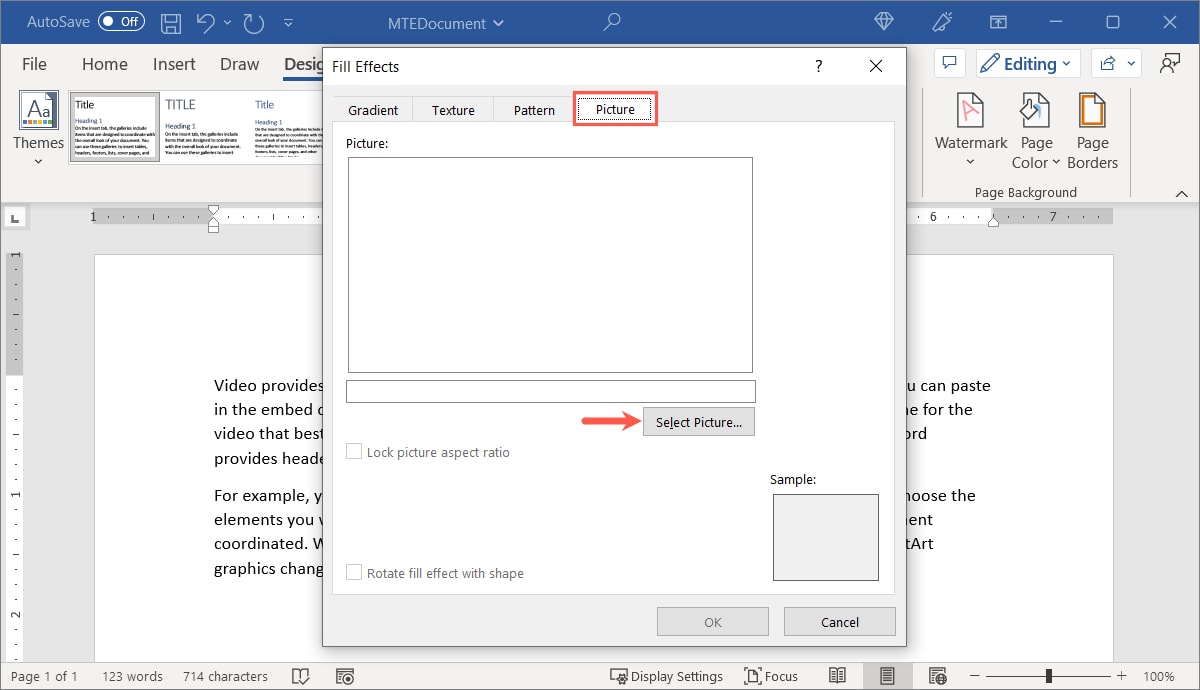
- You can use a picture from a local file, Bing Image Search, or one saved to OneDrive.
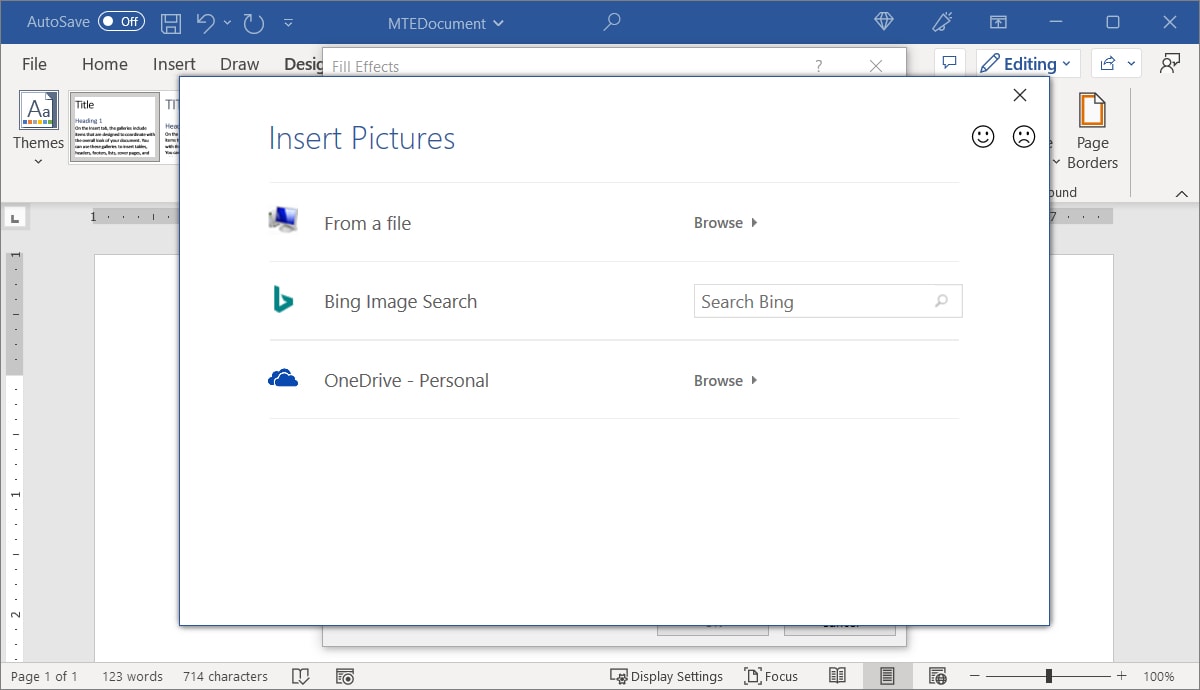
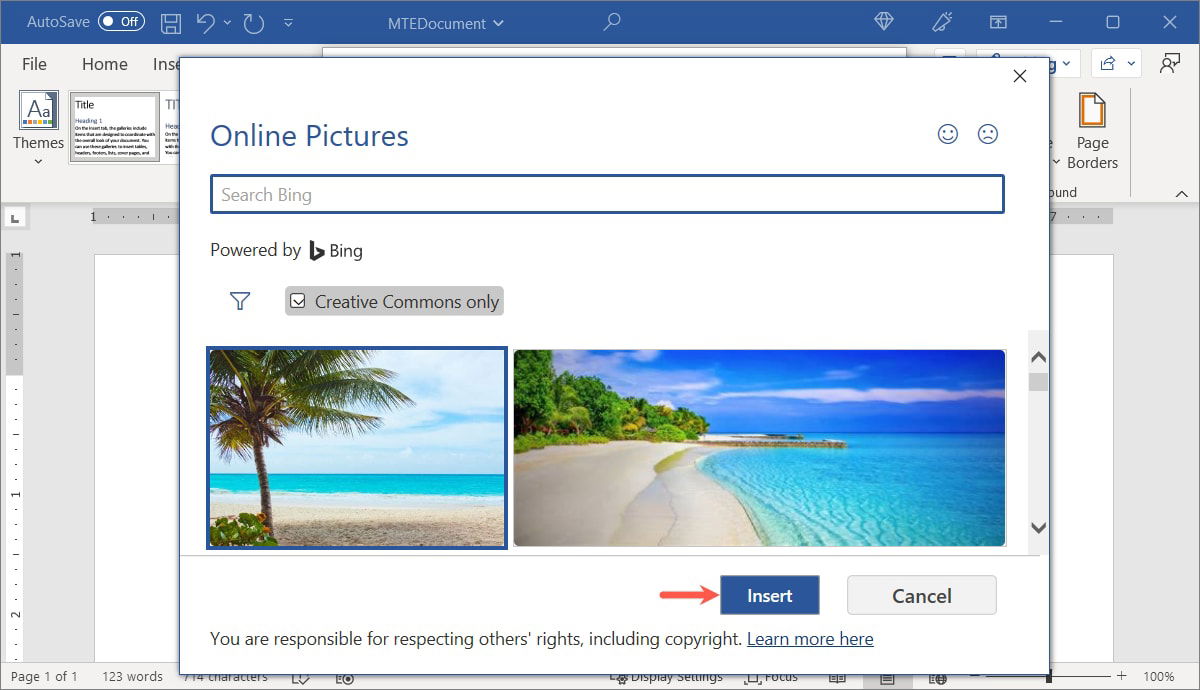
- Once you select the location and find the picture, click “Insert.”
- A preview of the picture will appear at the top with a brief description beneath and a preview below “Sample.” When you finish, click “OK.”
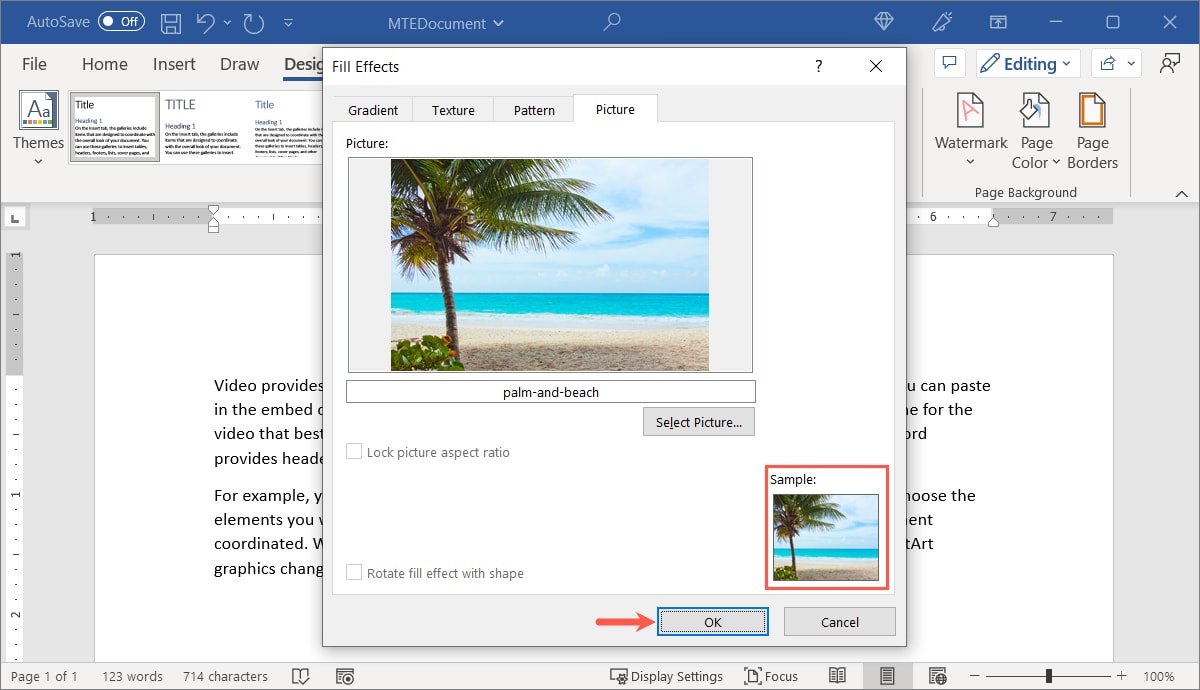
Note: the Lock Aspect Ratio and Rotate Fill Effect settings are unavailable for page backgrounds.
- View your new picture background.
How to Change or Remove a Background
If you added a background in Word but want to change it to a new one or simply remove it, both can be done simply.
Change a Background
Return to the “Design” tab and select the “Page Color” drop-down box. Choose a color from the palette, a custom color using “More Colors,” or a different gradient, texture, pattern, or picture by picking “Fill Effects.”
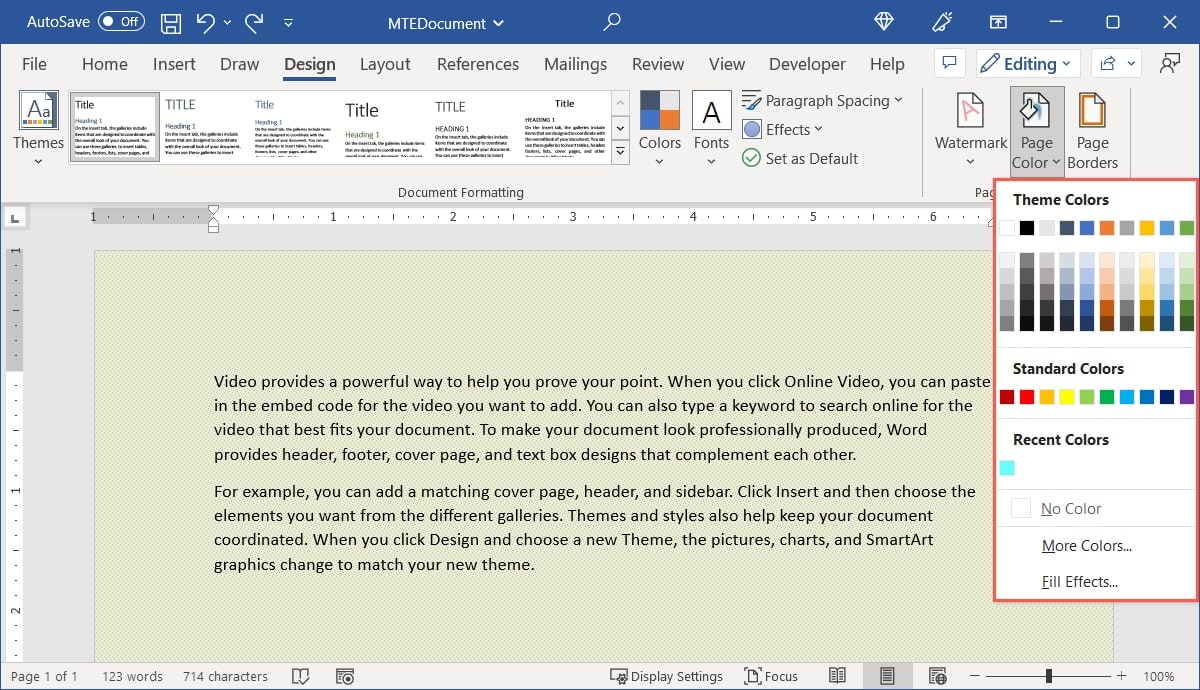
By choosing a new background, you’ll automatically and immediately replace the existing one.
Remove a Background
To get rid of a background altogether, return to the “Design” tab, select the “Page Color” drop-down box, and select “No Color.”

Regardless of which type of background you added, it will be immediately removed.
How to Print a Background in Word
If you plan to print your document, you have the option to print the background along with it. For items like signs and flyers, this is a great option. Note that you’ll need to use a color printer if you use any type of background with color.
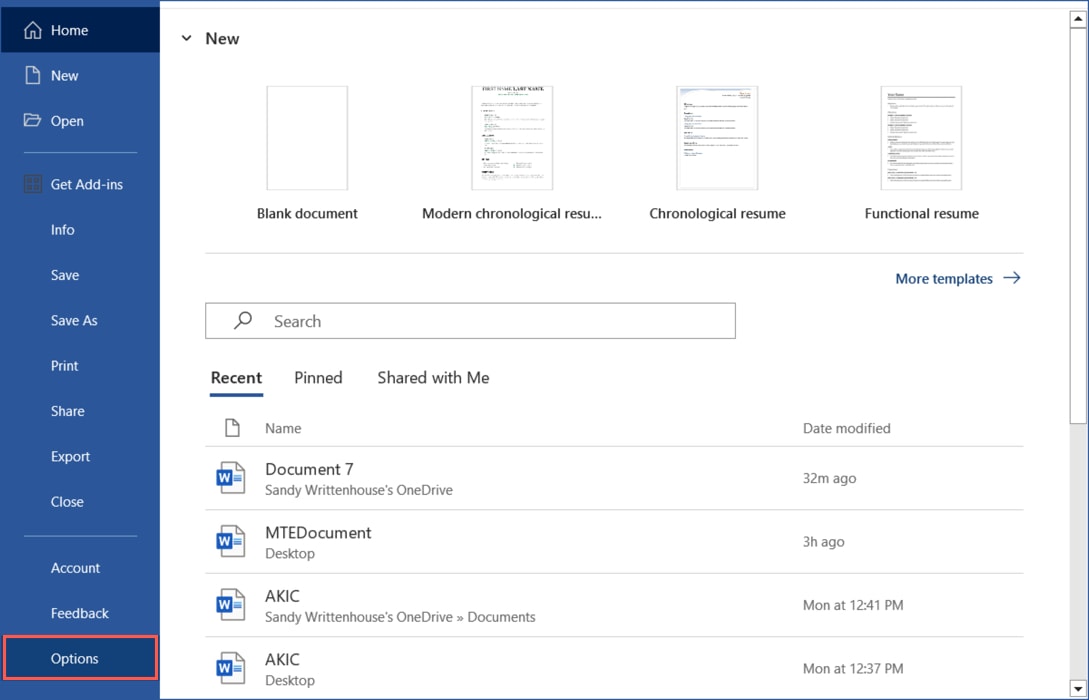
- Go to “File -> Options” or “File -> More -> Options.”
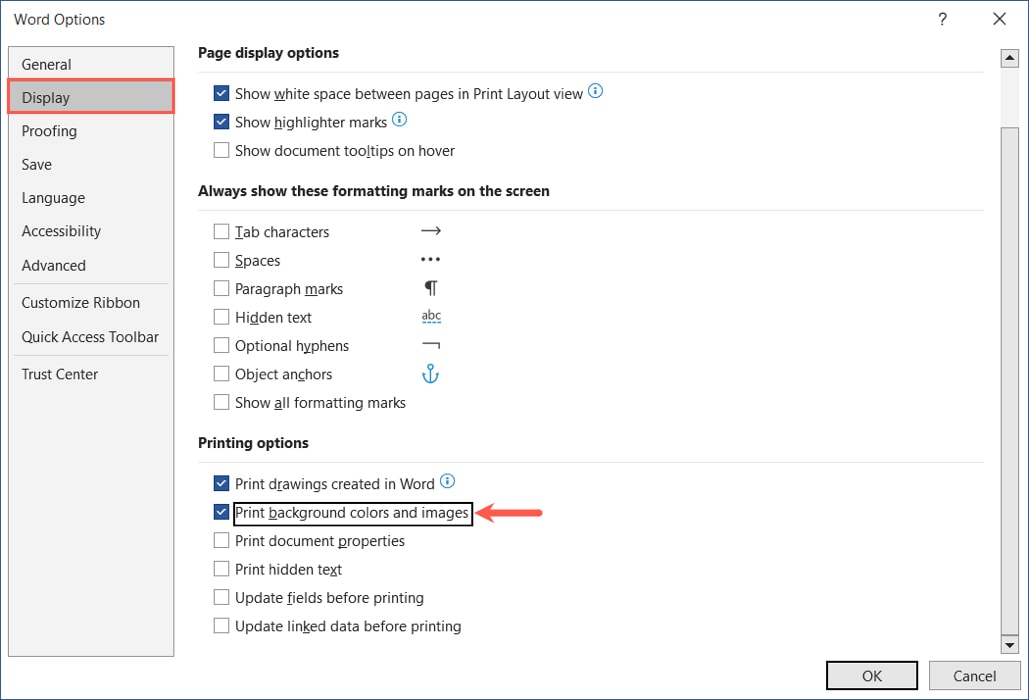
- Choose “Display” on the left and check the box for “Print background colors and images” on the right. Click “OK.”
- When you select “File -> Print,” your background will appear in the print preview and your physical piece when you’re ready to print.
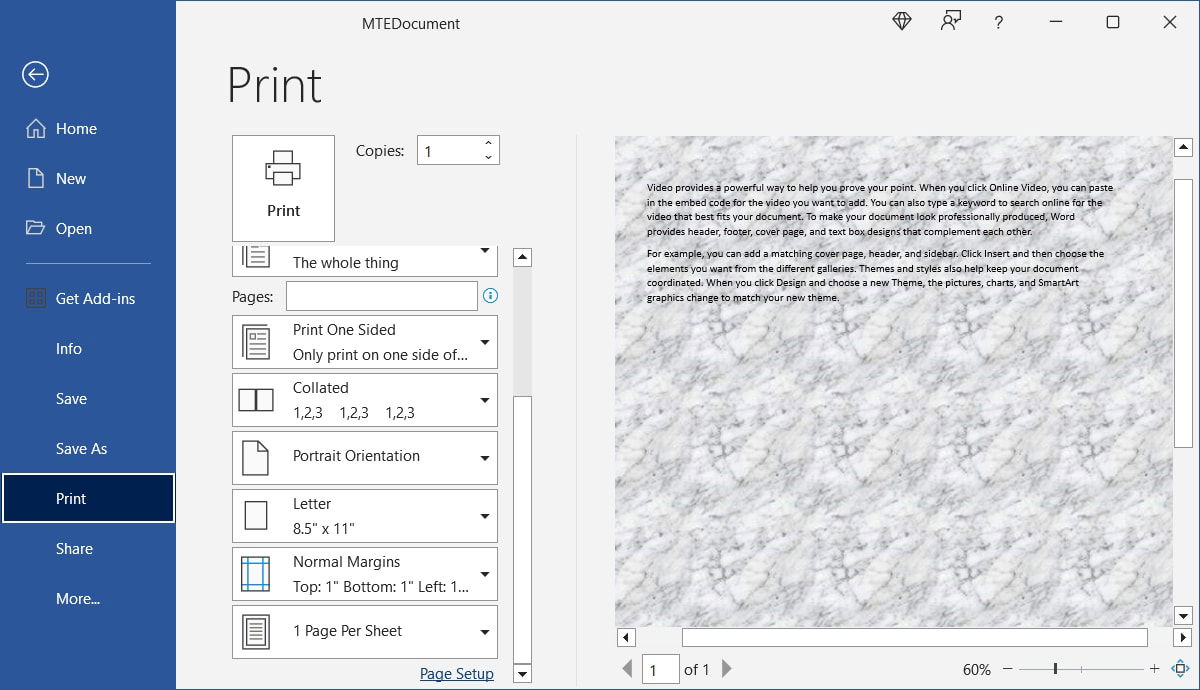
Note: to preserve its formatting, it’s better to export your Word document as a PDF, then print the PDF document.
Frequently Asked Questions
How do I put a background on only one page in Word?
Because the background feature in Word currently applies to the entire document, you’ll need to use a workaround for a background on only a single page.
With your cursor on the page, go to the “Insert” tab, open the “Shapes” menu, and pick the rectangle. Drag to resize the rectangle to cover the entire page. Select the rectangle and use the “Shape Fill” drop-down menu on the “Shape Format” tab to add a color, gradient, texture, or picture to the shape.
Open the “Wrap Text” menu in the same tab and select “Behind Text” to place the rectangle in the background.
How do I use a watermark background in Word?
You may want a word like “Confidential” or your company logo as a watermark (dimmed background) in your document.
Go to the “Design” tab and select the “Watermark” drop-down menu. Choose a built-in option or “Custom Watermark” to use your own text or a picture. Read on for complete details on how to add a watermark in Word.
How do I change the Word application background?
You can change the background of the Word application to dark mode for a different look or to make it easier on your eyes.
Go to “File -> Account” and use the “Office Theme” drop-down menu to choose “Dark Gray” or “Black.” Also check out our tutorial on using dark mode in Word on your other devices.
Image credit: Pixabay. All screenshots by Sandy Writtenhouse.


