Posts Tagged ‘grep’
Saturday, August 5th, 2023 
If you manage old Linux machines it might be after the update either due to update mess or because of old system administrators which manually included the UUID to the config forgot to include it in the present network configuration in /etc/sysconfig/networking-scripts/ifcfg-* Universally Unique IDentifier (UUID)128-bit label I used a small one liner after listing all the existing configured LAN interfaces reported from iproute2 network stack with ip command. As this might be useful to someone out there here is the simple command that returns a number of commands to later just copy paste to console once verified there are no duplicates of the UUID already in the present server configuration with grep.
In overall to correct the configs and reload the network with the proper UUIDs here is what I had to do:
# grep -rli UUID /etc/sysconfig/network-scripts/ifcfg-*
No output from the recursive grep means UUIDs are not present on any existing interface, so we can step further check all the existing machines network ifaces and generate the missing UUIDs with uuidgen command
# ip a s |grep -Ei ': <'|sed -e 's#:##g' |grep -v '\.' |awk '{ print $2 }'
ifcfg-venet0
ifcfg-eth0
ifcfg-eth1
ifcfg-eth2
ifcfg-eth3
I've stumbled on that case on some legacy Linux inherited from other people sysadmins and in order to place the correct
# for i in $(ip a s |grep -Ei ': <'|sed -e 's#:##g' |grep -v '\.' |awk '{ print $2 }'); do echo "echo UUID=$(uuidgen $i)"" >> ifcfg-$i"; done|grep -v '\-lo'
echo UUID=26819d24-9452-4431-a9ca-176d87492b75 >> ifcfg-venet0
echo UUID=3c7e8848-0232-436f-a52a-46db9a03eb33 >> ifcfg-eth0
echo UUID=1fc0454d-bf23-417d-b960-571fc04754d2 >> ifcfg-eth1
echo UUID=5793c1e5-4481-4f09-967e-2cceda85c35f >> ifcfg-eth2
echo UUID=65fdcaf6-d271-4845-a8f1-0ec478c375d1 >> ifcfg-eth3
As you can see I exclude the loopback interface -lo from the ouput as it is not necessery to have UUID for it.
That's all folks problem solved. Enjoy
Tags: awk, command, grep, howto, ip, linux?, sysadmins, sysconfig, update, UUID
Posted in Linux, Linux and FreeBSD Desktop, Networking | 2 Comments »
Tuesday, March 31st, 2015 
If you're forced to update some Java based Web application using Java + Tomcat / WebSphere / Weblogic it is a common thing that the Java App developer handed to you will ask you which version is the Oracle JDBC / ODBC driver on current Java Virtual Machine version installed.
Actually there are few methods to check Java JDBC / ODBC version:
1. Check Java ODBC version greeping it in WEB-INF/MANIFEST.MF
Usually the .jar file comes archived in a .ZIP – i.e. application-name5 .zip
server:~# unzip application-name5.zip
Then if the .zip file contains the OJDBC as a .JAR extension – (Java Archive), inflate it with jar tool.
server:~# jar -xvf ojdbc7.jar META-INF/MANIFEST.MF
inflated: META-INF/MANIFEST.MF
server:~# grep Implementation META-INF/MANIFEST.MF
Implementation-Vendor: Oracle Corporation
Implementation-Title: JDBC
Implementation-Version: 12.1.0.1.0
Alternative way to check the info (if you don't have java or jar installed on the Linux / Unix machine) is simply with unzip + grep like so:
server:~# unzip -p ojdbc14.jar META-INF/MANIFEST.MF | grep -C 1 version
Manifest-Version: 1.0
Implementation-Version: "Oracle JDBC Driver version – 10.1.0.5.0"
Specification-Title: "Oracle JDBC driver classes for use with JDK1.4"
Specification-Version: "Oracle JDBC Driver version – 10.1.0.5.0"
Implementation-Title: "ojdbc14.jar"
If you're on a Windows (and you have Windows server grep.exe installed), use instead:
C:\jar> unzip -p ojdbc14.jar META-INF/MANIFEST.MF | grep -C version
2. Getting some info with Java JRE tool
You can check some useful Java version info also just with Java Runtime Environment (java) tool
server:~# java -jar ojdbc5.jar
Oracle 11.1.0.7.0-Production JDBC 3.0 compiled with JDK5
Tags: check, grep, How to, info, MF, server, tool, unzip, use, version, Windows
Posted in Everyday Life, Java, Linux, Windows | No Comments »
Monday, May 21st, 2012 
I'm running FreeBSD with Apache and PHP on it and I got in dmesg (kernel log), following error:
freebsd# dmesg|grep -i vm.pmap.shpgperproc

Approaching the limit on PV entries, consider increasing either the vm.pmap.shpgperproc or the vm.pmap.pv_entry_max tunable.

Approaching the limit on PV entries, consider increasing either the vm.pmap.shpgperproc or the vm.pmap.pv_entry_max tunable.

Approaching the limit on PV entries, consider increasing either the vm.pmap.shpgperproc or the vm.pmap.pv_entry_max tunable.

Approaching the limit on PV entries, consider increasing either the vm.pmap.shpgperproc or the vm.pmap.pv_entry_max tunable.

Approaching the limit on PV entries, consider increasing either the vm.pmap.shpgperproc or the vm.pmap.pv_entry_max tunable.
The exact FreeBSD, Apache and php versions I have installed are:
freebsd# uname -a ; httpd -V ; php –version
FreeBSD pcfreak 7.2-RELEASE-p4 FreeBSD 7.2-RELEASE-p4 #0: Fri Oct 2 12:21:39 UTC 2009 [email protected]:/usr/obj/usr/src/sys/GENERIC i386
Server version: Apache/2.0.64
Server built: Mar 13 2011 23:36:25Server's Module Magic Number: 20050127:14
Server loaded: APR 0.9.19, APR-UTIL 0.9.19
Compiled using: APR 0.9.19, APR-UTIL 0.9.19
Architecture: 32-bit
Server compiled with….
-D APACHE_MPM_DIR="server/mpm/prefork"
-D APR_HAS_SENDFILE
-D APR_HAS_MMAP
-D APR_HAVE_IPV6 (IPv4-mapped addresses enabled)
-D APR_USE_FLOCK_SERIALIZE
-D APR_USE_PTHREAD_SERIALIZE
-D SINGLE_LISTEN_UNSERIALIZED_ACCEPT
-D APR_HAS_OTHER_CHILD
-D AP_HAVE_RELIABLE_PIPED_LOGS
-D HTTPD_ROOT="/usr/local"
-D SUEXEC_BIN="/usr/local/bin/suexec"
-D DEFAULT_PIDLOG="/var/run/httpd.pid"
-D DEFAULT_SCOREBOARD="logs/apache_runtime_status"
-D DEFAULT_LOCKFILE="/var/run/accept.lock"
-D DEFAULT_ERRORLOG="logs/error_log"
-D AP_TYPES_CONFIG_FILE="etc/apache2/mime.types"
-D SERVER_CONFIG_FILE="etc/apache2/httpd.conf"
PHP 5.3.5 with Suhosin-Patch (cli) (built: Mar 14 2011 00:29:17)
Copyright (c) 1997-2009 The PHP Group
Zend Engine v2.3.0, Copyright (c) 1998-2010 Zend Technologies
with eAccelerator v0.9.6.1, Copyright (c) 2004-2010 eAccelerator, by eAccelerator
After a bunch of research a FreeBSD forums thread , I've found the fix suggested by a guy.
The solution suggested in the forum is to raise up vm.pmap.pv_entry_ma to vm.pmap.pv_entry_max=1743504, however I've noticed this value is read only and cannot be changed on the BSD running kernel;
freebsd# sysctl vm.pmap.pv_entry_max=1743504

sysctl: oid 'vm.pmap.pv_entry_max' is read only
Instead to solve the;
Approaching the limit on PV entries, consider increasing either the vm.pmap.shpgperproc or the vm.pmap.pv_entry_max tunable.
, I had to add in /boot/loader.conf
vm.pmap.pde.mappings=68

vm.pmap.shpgperproc=500

vm.pmap.pv_entry_max=1743504
Adding this values through /boot/loader.conf set them on kernel boot time. I've seen also in the threads the consider increasing either the vm.pmap.shpgperproc is also encountered on FreeBSD hosts running Squid, Dansguardion and other web proxy softwares on busy hosts.
This problems are not likely to happen for people who are running latest FreeBSD releases (>8.3, 9.x), I've read in same above post in newer BSD kernels the vm.pmap is no longer existing in newer kernels.
Tags: apache 2, apache2, architecture, Auto, boot time, BSD, dmesg, Draft, eeBSDI, errorlog, Fix Approaching, flock, freebsd, freebsd apache, Fri, GENERIC, grep, httpd, kernel, limit, loader, logs apache, magic number, Mar, mime types, mmap, Module, mpm, net usr, number, Oct, patc, pcfreak, php version, php versions, PV, RELEASE-p, root, scoreboard, sendfile, serialize, server, server config, server version, shpgperproc, suexec, threads, uname, UTC, vm, Zend
Posted in FreeBSD, System Administration | No Comments »
Saturday, April 28th, 2012 
If there is necessity to look for a string in all hidden files with all sub-level subdirectories (be aware this will be time consuming and CPU stressing) use:
hipo@noah:~$ grep -rli 'PATH' .*
./.gftp/gftprc
./.gftp/cache/cache.OOqZVP
….
Sometimes its necessery to only grep for variables within the first-level directories (lets say you would like to grep a 'PATH' variable set, string within the $HOME directory, the command is:
hipo@noah:~$ grep PATH .[!.]*
.profile:PATH=/bin:/usr/bin/:${PATH}
.profile:export PATH
.profile:# set PATH so it includes user's private bin if it exists
.profile: PATH="$HOME/bin:$PATH"
.profile.language-env-bak:# set PATH so it includes user's private bin if it exists
.profile.language-env-bak: PATH="$HOME/bin:$PATH"
.viminfo:?/PATH.xcyrillic: XNLSPATH=/usr/X11R6/lib/X11/nls
.xcyrillic: export XNLSPATH
The regular expression .[!.]*, means exclude any file or directory name starting with '..', e.g. match only .* files
Note that to use the grep PATH .[!.]* on FreeBSD you will have to use this regular expression in bash shell, the default BSD csh or tsch shells will not recognize the regular expression, e.g.:
grep PATH '.[!.]*'
grep: .[!.]*: No such file or directory
Hence on BSD, if you need to look up for a string within the home directory, hidden files: .profile .bashrc .bash_profile .cshrc run it under bash shell:
freebsd# /usr/local/bin/bash
[root@freebsd:/home/hipo]# grep PATH .[!.]*
.bash_profile:# set PATH so it includes user's private bin if it exists
.bash_profile:# PATH=~/bin:"${PATH}"
.bash_profile:# do the same with …
Another easier to remember, alternative grep cmd is:
hipo@noah:~$ grep PATH .*
.profile:PATH=/bin:/usr/bin/:${PATH}
.profile:export PATH
.profile:# set PATH so it includes user's private bin if it exists
.profile: PATH="$HOME/bin:$PATH"
….
Note that grep 'string' .* is a bit different in meaning, as it will not prevent grep to match filenames with names ..filename1, ..filename2 etc.
Though grep 'string' .* will work note that it will sometimes output some unwanted matches if filenames with double dot in the beginning of file name are there …
That's all folks 🙂
Tags: Auto, bash shell, bit, BSD, cache cache, cmd, consuming, csh, cshrc, directory name, Draft, export path, expression, file, freebsd, gftp, grep, hipo, home directory, How to, level directories, Linux, MANPATHAnother, nbsp, necessery, noah, note, Path, path profile, private bin, profile path, quot, regular expression, rli, root, set path, Shell, shrc, text, text strings, time, time consuming, tsch, value, XNLSPATH, XNLSPATHThe, zcompdump
Posted in FreeBSD, Linux, System Administration | 2 Comments »
Tuesday, March 10th, 2015 
Something very useful that most Apache LAMP (Linux Apache MySQL PHP) admins should know is how to check Apache Webserver uptime and MySQL server running (uptime).
Checking Apache / MySQL uptime is primary useful for scripting purposes – creating auto Apache / MySQL service restart scripts, or just as a quick console way to check what is the status and uptime of Webserver / SQL.
My experience as a sysadmin shows that lack of Periodic Apache and MySQL restart every week or every month often creates sys-admin a lot of a headaches cause (Apache / NGINX / SQL server) starts eating too much memory or under some circumstances leads to service or system crashes. Periodic system main services restart is especially helpful in case if Website's backend programming code is writetn in a bad and buggy uneffient way by unprofessional (novice) programmers.
While I was still working as Senior SysAdmin in Design.BG, I've encountered many such Crappy Web applications developed by dozen of different programmers (because company's programmers changed too frequently and many of the hired Web Developers ,were still learning to program, I guess same is true also for other Start-UP Web / IT Company where crappy programming code is developed you will certainly need to keep an eye on Apache / MYSQL uptime. If that's the case below 2 quick one liners with PS command will help you keep an eye on Apache / MYSQL uptime
ps -eo "%U %c %t"| grep apache2 | grep -v grep|grep root
root apache2 02:30:05
Note that above example is Debian specific on RPM based distributions you will have to grep for httpd instead of apache2
ps -eo "%U %c %t"| grep http| grep -v grep|grep root
root apache2 10:30:05
To check MySQL uptine:
ps -eo "%U %c %t"| grep mysqld
root mysqld_safe 20:42:53
mysql mysqld 20:42:53
Though example is for mysql and Apache you can easily use ps cmd in same way to check any other Linux service uptime such as Java / Qmail / PostgreSQL / Postfix etc.
ps -eo "%U %c %t"|grep qmail
qmails qmail-send 19-01:10:48
qmaill multilog 19-01:10:48
qmaill multilog 19-01:10:48
qmaill multilog 19-01:10:48
root qmail-lspawn 19-01:10:48
qmailr qmail-rspawn 19-01:10:48
qmailq qmail-clean 19-01:10:48
qmails qmail-todo 19-01:10:48
qmailq qmail-clean 19-01:10:48
qmaill multilog 40-18:02:53
ps -eo "%U %c %t"|grep -i nginx|grep -v root|uniq
nobody nginx 55-01:22:44
ps -eo "%U %c %t"|grep -i java|grep -v root |uniq
hipo java 27-22:02:07
Tags: apache webserver, apache2, case, cms, command, Crappy Web, crashes, daemon, doesn, example, eye, grep, headaches, How to, lot, multilog, mysqld, primary, programmers, programming code, root, running, scripting, scripts, week
Posted in Everyday Life, Linux, Monitoring, Programming, System Administration | No Comments »
Tuesday, May 13th, 2014 
GNU Grep is equipped with a special option "-r" to grep recursively. Looking for string in a file in a sub-directories tree with the -r option is a piece of cake. You just do:
grep -r 'string' /directory/
or if you want to search recursively non-case sensitive for text
grep -ri 'string' .
Another classic GNU grep use (I use almost daily) is whether you want to match all files containing (case insensitive) string among all files:
grep -rli 'string' directory-name
Now if you want to grep whether a string is contained in a file or group of files in directory recursively on some other UNIX like HP-UX or Sun OS / Solaris where there is no GNU grep installed by default here is how to it:
find /directory -exec grep 'searched string' {} dev/null ;
Note that this approach to look for files containing string on UNIX is very slowThus on not too archaic UNIX systems for some better search performance it is better to use xargs;
find . | xargs grep searched-string
A small note to open here is by using xargs there might be weird results when run on filesystems with filenames starting with "-".
Thus comes the classical (ultimate) way to grep for files containing string with find + grep, e.g.
find / -exec grep grepped-string {} dev/null ;
Another way to search a string recursively in files is by using UNIX OS '*' (star) expression:
grep pattern * */* */*/* 2>/dev/null
Talking about recursive directory text search in UNIX, should mention another good GNU GREP alternative ACK – check it on betterthangrep.com 🙂 . Ack is perfect for programmers who have to dig through large directory trees of code for certain variables, functions, objects etc.
Tags: cake, code, directory, file, filesystems, GNU, grep, How to, Linux, look, match, note, piece, piece of cake, recursively, string, text, unix, variables, xargs
Posted in Programming, System Administration, Various | 1 Comment »
Tuesday, June 3rd, 2014 
If you're configuring a new Webserver or adding a new VirtualHost to an existing Apache configuration you will need to restart Apache with or without graceful option once Apache is restarted to assure Apache is continuously running on server (depending on Linux distribution) issue:
1. On Debian Linux / Ubuntu servers
# ps axuwf|grep -i apache|grep -v grep
root 23280 0.0 0.2 388744 16812 ? Ss May29 0:13 /usr/sbin/apache2 -k start
www-data 10815 0.0 0.0 559560 3616 ? S May30 2:25 _ /usr/sbin/apache2 -k start
www-data 10829 0.0 0.0 561340 3600 ? S May30 2:31 _ /usr/sbin/apache2 -k start
www-data 10906 0.0 0.0 554256 3580 ? S May30 0:20 _ /usr/sbin/apache2 -k start
www-data 10913 0.0 0.0 562488 3612 ? S May30 2:32 _ /usr/sbin/apache2 -k start
www-data 10915 0.0 0.0 555524 3588 ? S May30 0:19 _ /usr/sbin/apache2 -k start
www-data 10935 0.0 0.0 553760 3588 ? S May30 0:29 _ /usr/sbin/apache2 -k start
…
2. On CentOS, Fedora, RHEL and SuSE Linux and FreeBSD
ps ax | grep httpd | grep -v grep
7661 ? Ss 0:00 /usr/sbin/httpd
7664 ? S 0:00 /usr/sbin/httpd
7665 ? S 0:00 /usr/sbin/httpd
7666 ? S 0:00 /usr/sbin/httpd
7667 ? S 0:00 /usr/sbin/httpd
7668 ? S 0:00 /usr/sbin/httpd
7669 ? S 0:00 /usr/sbin/httpd
7670 ? S 0:00 /usr/sbin/httpd
7671 ? S 0:00 /usr/sbin/httpd
Whether a new Apache IP Based VirtualHosts are added to already existing Apache and you have added new
Listen 1.1.1.1:80
Listen 1.1.1.1:443
directives, after Apache is restarted to check whether Apache is listening on port :80 and :443
netstat -ln | grep -E ':80|443'
tcp 0 0 0.0.0.0:80 0.0.0.0:* LISTEN
tcp 0 0 0.0.0.0:443 0.0.0.0:* LISTEN
Meaning of 0.0.0.0 is that Apache is configured to Listen on Any Virtualhost IPs and interfaces. This output is usually returned whether in Apache config httpd.conf / apache2.conf webserver is configured with directive.
Listen *:80
If in netstat output there is some IP poping up for example "192.168.1.1:http", this means that only connections to the "192.168.1.1" IP address will be accepted by Apache.
Another way to look for Apache in netstat (in case Apache is configured to listen on some non-standard port number) is with:
netstat -l |grep -E 'http|www'
tcp 0 0 *:www *:* LISTEN
As sometimes it might be possible that Apache is listening but its processes are in in defunct (Zommbie) state it is always a good idea, also to check if pages server by Apache are opening in browser (check it with elinks, lynx or curl)
To get more thorough information on Apache listened ports, protocol, user with which Apache is running nomatter of Linux distribution use lsof command:
/usr/bin/lsof -i|grep -E 'httpd|http|www'
httpd 6982 nobody 3u IPv4 29388359 0t0 TCP www.pc-freak.net:https (LISTEN)
httpd 18071 nobody 3u IPv4 702790659 0t0 TCP www.pc-freak.net:http (LISTEN)
httpd 18071 nobody 4u IPv4 702790661 0t0 TCP www.pc-freak.net.net:https (LISTEN)
…
If Apache is not showing up even though restarted check what is going wrong in the error logs:
– on Debian standard error log is /var/log/apache2/error.log
– On RHEL, CentOS, SuSE std. error log is in /var/log/httpd/error.log
– on FeeBSD /var/log/httpd-error.log
Tags: check, configured, grep, httpd, Linux, log, need, nobody, option, port, ports, rhel, running, sbin, Ss May29, tcp, usr, var
Posted in Everyday Life, Linux, System Administration, Web and CMS | No Comments »
Wednesday, September 7th, 2011 
One good module that helps in mitigating, very basic Denial of Service attacks against Apache 1.3.x 2.0.x and 2.2.x webserver is mod_evasive
I’ve noticed however many Apache administrators out there does forget to install it on new Apache installations or even some of them haven’t heard about of it.
Therefore I wrote this small article to create some more awareness of the existence of the anti DoS module and hopefully thorugh it help some of my readers to strengthen their server security.
Here is a description on what exactly mod-evasive module does:
debian:~# apt-cache show libapache2-mod-evasive | grep -i description -A 7
Description: evasive module to minimize HTTP DoS or brute force attacks
mod_evasive is an evasive maneuvers module for Apache to provide some
protection in the event of an HTTP DoS or DDoS attack or brute force attack.
.
It is also designed to be a detection tool, and can be easily configured to
talk to ipchains, firewalls, routers, and etcetera.
.
This module only works on Apache 2.x servers
How does mod-evasive anti DoS module works?
Detection is performed by creating an internal dynamic hash table of IP Addresses and URIs, and denying any single IP address which matches the criterias:
- Requesting the same page more than number of times per second
- Making more than N (number) of concurrent requests on the same child per second
- Making requests to Apache during the IP is temporarily blacklisted (in a blocking list – IP blacklist is removed after a time period))
These anti DDoS and DoS attack protection decreases the possibility that Apache gets DoSed by ana amateur DoS attack, however it still opens doors for attacks who has a large bot-nets of zoombie hosts (let’s say 10000) which will simultaneously request a page from the Apache server. The result in a scenario with a infected botnet running a DoS tool in most of the cases will be a quick exhaustion of system resources available (bandwidth, server memory and processor consumption).
Thus mod-evasive just grants a DoS and DDoS security only on a basic, level where someone tries to DoS a webserver with only possessing access to few hosts.
mod-evasive however in many cases mesaure to protect against DoS and does a great job if combined with Apache mod-security module discussed in one of my previous blog posts – Tightening PHP Security on Debian with Apache 2.2 with ModSecurity2
1. Install mod-evasive
Installing mod-evasive on Debian Lenny, Squeeze and even Wheezy is done in identical way straight using apt-get:
deiban:~# apt-get install libapache2-mod-evasive

...
2. Enable mod-evasive in Apache
debian:~# ln -sf /etc/apache2/mods-available/mod-evasive.load /etc/apache2/mods-enabled/mod-evasive.load
3. Configure the way mod-evasive deals with potential DoS attacks
Open /etc/apache2/apache2.conf, go down to the end of the file and paste inside, below three mod-evasive configuration directives:
<IfModule mod_evasive20.c>

DOSHashTableSize 3097DOS

PageCount 30

DOSSiteCount 40

DOSPageInterval 2

DOSSiteInterval 1

DOSBlockingPeriod 120

#DOSEmailNotify [email protected]

</IfModule>
In case of the above configuration criterias are matched, mod-evasive instructs Apache to return a 403 (Forbidden by default) error page which will conserve bandwidth and system resources in case of DoS attack attempt, especially if the DoS attack targets multiple requests to let’s say a large downloadable file or a PHP,Perl,Python script which does a lot of computation and thus consumes large portion of server CPU time.
The meaning of the above three mod-evasive config vars are as follows:
DOSHashTableSize 3097 – Increasing the DoSHashTableSize will increase performance of mod-evasive but will consume more server memory, on a busy webserver this value however should be increased
DOSPageCount 30 – Add IP in evasive temporary blacklist if a request for any IP that hits the same page 30 consequential times.
DOSSiteCount 40 – Add IP to be be blacklisted if 40 requests are made to a one and the same URL location in 1 second time
DOSBlockingPeriod 120 – Instructs the time in seconds for which an IP will get blacklisted (e.g. will get returned the 403 foribden page), this settings instructs mod-evasive to block every intruder which matches DOSPageCount 30 or DOSSiteCount 40 for 2 minutes time.
DOSPageInterval 2 – Interval of 2 seconds for which DOSPageCount can be reached.
DOSSiteInterval 1 – Interval of 1 second in which if DOSSiteCount of 40 is matched the matched IP will be blacklisted for configured period of time.
mod-evasive also supports IP whitelisting with its option DOSWhitelist , handy in cases if for example, you should allow access to a single webpage from office env consisting of hundred computers behind a NAT.
Another handy configuration option is the module capability to notify, if a DoS is originating from a number of IP addresses using the option DOSEmailNotify
Using the DOSSystemCommand in relation with iptables, could be configured to filter out any IP addresses which are found to be matching the configured mod-evasive rules.
The module also supports custom logging, if you want to keep track on IPs which are found to be trying a DoS attack against the server place in above shown configuration DOSLogDir “/var/log/apache2/evasive” and create the /var/log/apache2/evasive directory, with:
debian:~# mkdir /var/log/apache2/evasive
I decided not to log mod-evasive DoS IP matches as this will just add some extra load on the server, however in debugging some mistakenly blacklisted IPs logging is sure a must.
4. Restart Apache to load up mod-evasive
debian:~# /etc/init.d/apache2 restart

...
Finally a very good reading which sheds more light on how exactly mod-evasive works and some extra module configuration options are located in the documentation bundled with the deb package to read it, issue:
debian:~# zless /usr/share/doc/libapache2-mod-evasive/README.gz
Tags: ana amateur, anti, apache 2, apache server, apache2, awareness, bandwidth server, botnet, brute force attack, concurrent requests, configured, criterias, DDoS, debian linux, Denial, denial of service, denial of service attacks, description, dos attack, dos tool, DOSHashTableSize, evasive maneuvers, event, exhaustion, existence, file, grep, hash, hash table, HTTP, IfModule, Installing, libapache, mod, number, option, page, period of time, protection, Secure Apache, server security, Service, show, small article, system resources, time, tool, uris, webpage
Posted in Computer Security, Linux, System Administration, Web and CMS | 1 Comment »
Wednesday, November 13th, 2013 
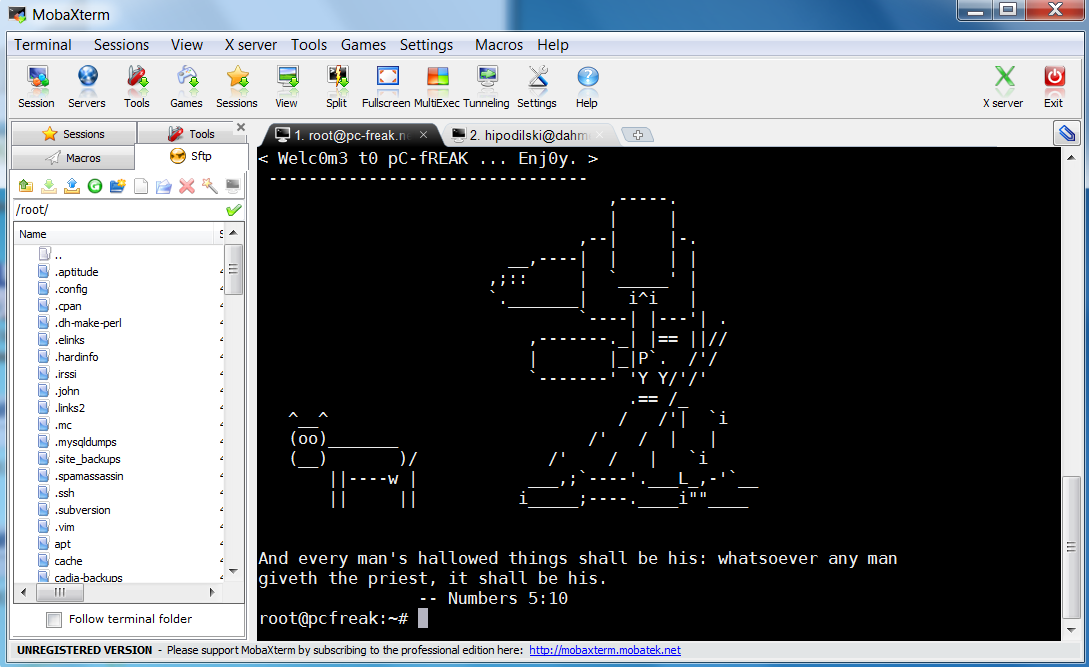
Last 10+ years I worked on GNU / Linux as Desktop. Last 7 years most of my SSH connections were managed from GNOME and I'm quite used to gnome-terminal ssh tabbing. In my new Employee Hewlett Packard. I'm forced to work on Microsoft Windows 7 and thus I used for a month or so Putty and Kitty fork from version 0.63 of PuTTY advertising itself as the best telnet / SSH client in the world. Both of the two lack tabbing and have interface which is pretty unfamiliar to me. As I'm so used to using native UNIX terminal. Fortunately a colleague of mine Ivelin was using an SSH client called MobaXTerm which very much did emulation similar to my favourite gnome-terminal. MobaXterm is not free software / open source app but this doesn't matter so much to me as anyways I'm running a non-free Win OS on my desktop. What makes MobaXterm so attractive is its rich functionality (cosmic years infront of Putty).
Here is website description of MobaXterm quoted from its website:
MobaXterm is an enhanced terminal for Windows with an X11 server, a tabbed SSH client and several other network tools for remote computing (VNC, RDP, telnet, rlogin). MobaXterm brings all the essential Unix commands to Windows desktop, in a single portable exe file which works out of the box.
Overall list of features MobaXterm offers are;
-
multitab terminal with embedded Unix commands (ls, cd, cat, sed, grep, awk, rsync, wget, …)
-
embedded X11 server for easily exporting your Unix/Linux display
-
a session manager with several network utilities: SSH, RDP, VNC, Telnet, Rlogin, FTP, SFTP and XDMCP
-
passwords management for SSH, RDP, VNC, SFTP (on demand password saving)
-
easy graphical file transfer using drag and drop during SSH sessions
-
advanced SSH tunnels creation tool (graphical port forwarding builder)
-
tasks automation using scripts or macros
Mobaxterm is portable just like Putty so its useful to use on HOP stations to servers like used in big companies like HP. Featured embedded Unix commands (e.g., ls, cd, cat, sed, grep, awk, rsync, wget) gives a feeling like you're working on pure Linux console making people addicted to Linux / BSD quite confortable. Some other very useful terminal emulator functions are support for anti-aliasing session manager (save / remember passwords for ssh sessions in Crypted format so much missing in Putty) and it even supports basic macros.
Basic UNIX commands embedded in MobaXterm are taken and ported from Cygwin project – Linux-like environment for Windows making it possible to port software running on POSIX systems (such as Linux, BSD, and Unix systems) to Windows. A very cool think is also MobaXterm gives you a Linux like feel of console navigation in between basic files installed from Cygwin. Some downside I found is program menus which look at first glimpse a bit confusing especially for people used to simplicity of gnome-terminal. Once logged in to remote host via ssh command the program offers you to log you in also via SFTP protocol listing in parallel small window with possibility to navigate / copy / move etc. between server files in SFTP session which at times is pretty useful as it saves you time to use some external SFTP connector tools like WinSCP.
From Tools configuration menu, there are few precious tools as well;
– embedded text editor MobaTextEditor
– MobaFoldersDiff (Able to show diffeernces between directories)
– AsciiTable (Complete List of Ascii table with respective codes and characters)
– Embedded simple Calculator
– List open network ports – GUI Tool to list all open ports on Windows localhost
– Network packets capture – A Gui tool showing basic info like from UNIX's tcpdump!
– Ability to start quickly on local machine (TFTP, FTP, SFTP / SSH server, Telnet server, NFS server, VNC Server and even simple implementation of HTTP server)
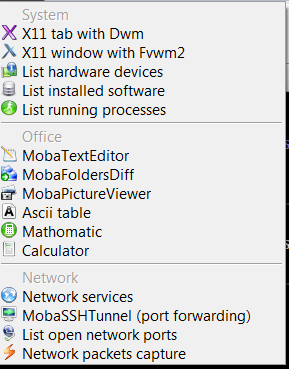
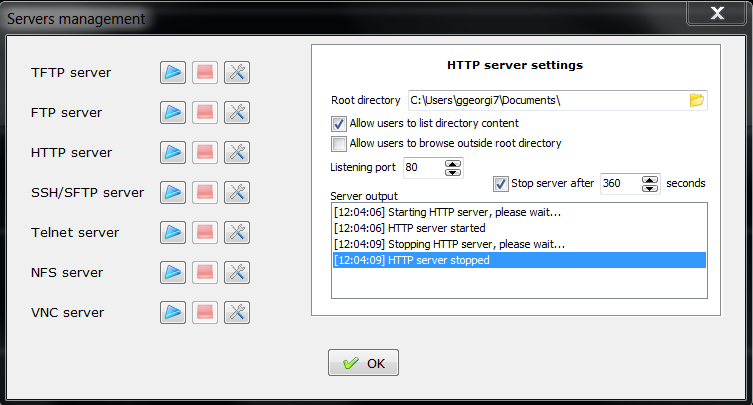
Below are few screenshots to get you also idea about what kind of configuration MobaXterm supports
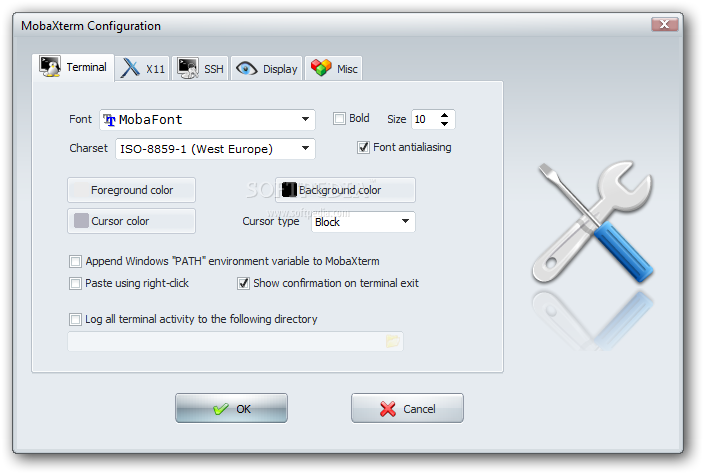
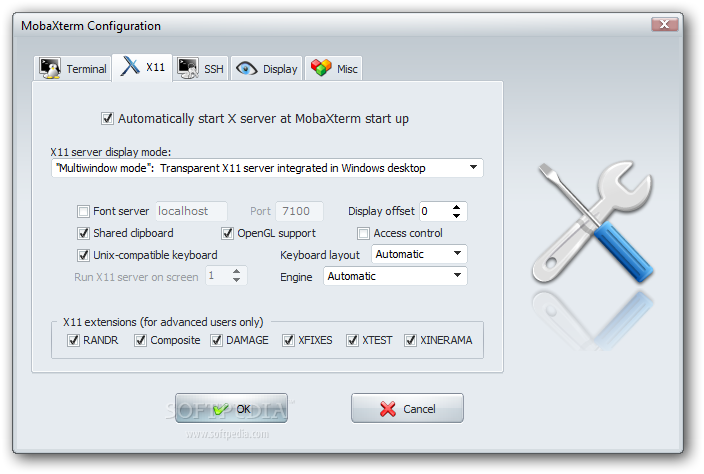
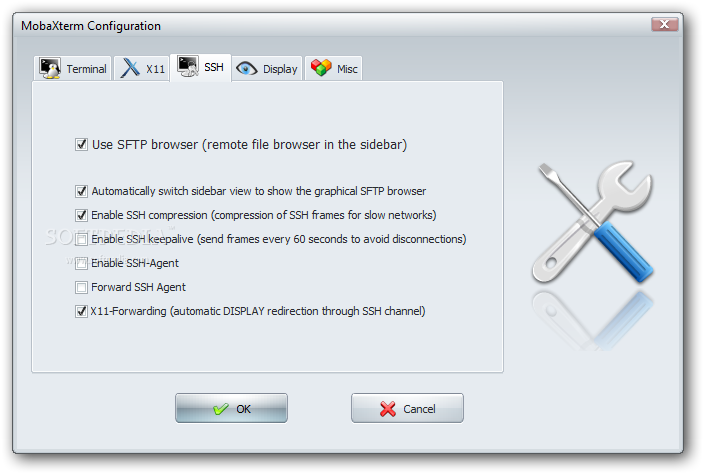
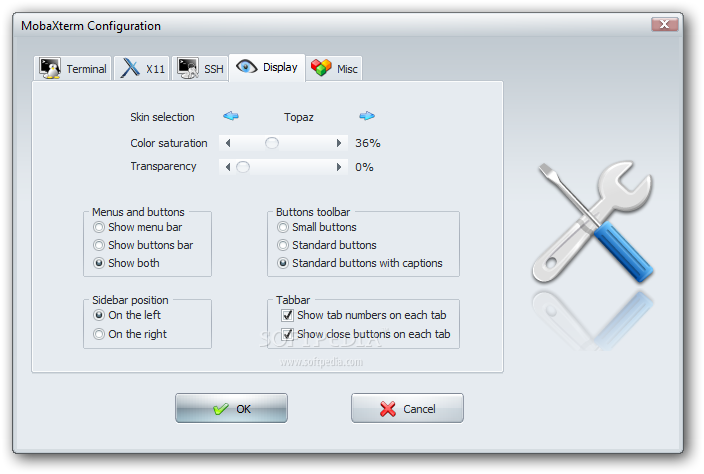
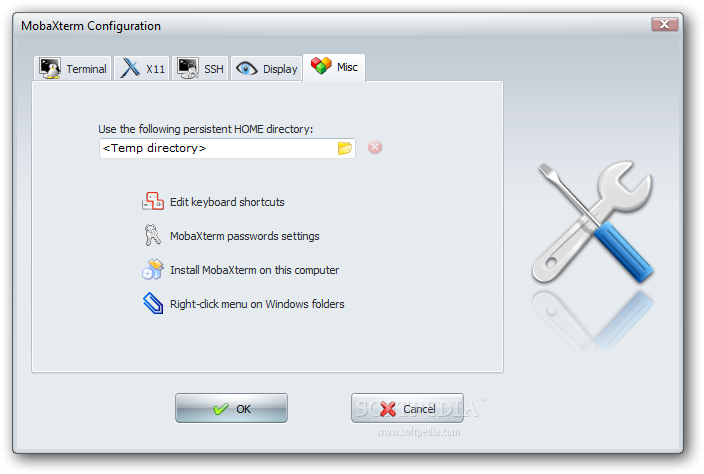
To configure and use Telnet, RSH, RDP, VNC, FTP etc. Sessions use the Sessions tab on top menu.
One very handy thing is MobaXterm supports export of remote UNIX display with no requirement to install special Xserver like already a bit obsolete Xming – X server for Windows.
The X Display Manager Control Protocol (XCMCP) is a key feature of the X11 architecture. Together with XDMCP, the X network protocol allows distributed operation of the X server and X display manager. The requesting X server runs on the client (usually as an X terminal), thus providing a login service, that why the X server ported to MobaXterm from Cygwin also supports XDMCP. If, for example, you want to start a VNC session with a remote VNC server, all you have to do is enter the remote VNC server’s IP address in the VNC area; the default VNC port is already registered.
Accessing the remote Windows server via RDP (Remote Desktop Protocol) is also a piece of cake. Once you establish a session to RDP or other Proto it is possible to save this session so later you just choose between session to access. The infamous (X11 Port Forwarding) or creation of SSH encrypted tunnels between hosts to transfer data securily or hide your hostname is also there.
MobaXterm is undoubtedly a very useful and versatile tool. Functionally, the software is well mannered, and Windows users who want to sniff a little Linux/Unix air can get a good idea of how Linux works. A closer look reveals that anything you can do with MobaXterm can be achieved directly with freely available tools (Cygwin) and Unix tools ported from Cygwin. However, although Cygwin provides a non-Posix environment for Windows, it doesn’t offer a decent terminal, which is one thing Moba-Xterm has going for it.
Admittedly, in pure vanilla Cygwin, you can start an X server automatically and then use xterm, but xterm lacks good-quality fonts, whereas MobaXterm conveniently lets you integrate a font server.
Tags: awk, cat, drag, drop, exe, file, Ftp, grep, infront, manager, microsoft windows, network, open source, password, Putty, RDP, session, session manager, sftp, software open source, ssh, Telnet, terminal, VNC, wget, Windows
Posted in System Administration, Various, Windows | 15 Comments »
Tuesday, February 21st, 2012 
Did you ever needed to count, how many files in a directory are there?
Having the concrete number of files in a directory is not a seldom task but still very useful especially for scripts or simply for the sake of learning
The quickest and maybe the easiest way to count all files in a directory in Linux is with a combination of find and wc commands:
Here is how;
linux:~# cd ascii

linux:~/ascii# find . -type f -iname '*' -print |wc -l

407
This will find and list all matched files in any directory and subdirectories, print them out and count them with wc command.
The -type f argument instructs find to look only for files.
Other helpful variance of finding and listing all files in a directory and subdirectories is to list and count all the files with a certain file extension under a directory. For example, lets list all text files (.txt) contained in a directory and all level sub-directories:
linux:~/ascii# find . -type f -iname '*.txt' -print |wc -l

401
If you need to check the number of files in a directory for multiple directories on a server and you're aiming at doing it efficienly, issung above find .. | wc code will definitely be not a good choice. If used it will generate heavy load for the system and along with that will complete the execution in ages if issued on a large number of files containing dirs.
Thanksfully if efficiency is targetted, there is a command written in C called tree which is more efficient than find.
To count the number of files in dir but using tree :
linux:~# cd ascii

linux:/ascii# tree | tail -n 1

32 directories, 407 files
By default tree prints info for both the number of found files and directories.
To print out only the files matched, awk comes handy, e.g.:
linux:/ascii# tree |tail -n 1| awk '{ print $3 }'407
To list only the number of files in a directory without its existing sub-directories ls + wc use is also possible:
linux:~/ascii# ls -l | grep ^- | wc -l68
This result the above command would produce is +1 more than the real number of files, as it counts the directory ".." as one file (in UNIX / LINUX everything is file).
A short one liner script that can calculate all files correctly by substracting 1 is and hence present correct result on number of files is like so:
linux:~/ascii# var=$(ls -l | grep ^- | wc -l); var=$(($var - 1)); echo $var
ls can be used to calculate the number of 1-st level sub-directories under certain directory for instance:
linux:~/ascii# ls -l |grep ^d|wc -l

25
You see the ascii directory has 25 subdirectories in its 1st level.
To check symlinks under a directory with ls the command would be:
linux:~/ascii# ls -l | grep ^l | wc -l

0
Note above 3 ls | grep … examples, will not work properly if the directory contains files with SUID or some special properties set.
Hence to get the same 3 results for active files, directories and symbolic links, a one liner similar to the one below can be used instead:
linux:~/ascii# for t in files links directories; do echo `find . -type ${t:0:1} | wc -l` $t; done 2> /dev/null

407 files

0 links

33 directories
This will show statistics about all files, links and directories for all directory sub-levels.
Just in case if there is need to only count files, links and directories without directory recursion enabled, use:
linux:~/ascii# for t in files links directories; do echo `find . -maxdepth 1 -type ${t:0:1} | wc -l` $t; done 2> /dev/null

68 files

0 links

26 directories
Anyways the above bash loop will be slow, for directories containing thousands of files. For better performance the equivallent of above bash loop rewritten in perl would be:
linux:~/ascii# ls -l |perl -e 'while(<>){$h{substr($_,0,1)}+=1;} END {foreach(keys %h) {print "$_ $h{$_}\n";}}'

- 68

d 25

t 1

linux:~/ascii#
In any case the most preferrable and efficient way to count files en directories is by using tree command.
In my view using always tree command instead of code "hacks" is smart idea.
In Slackware tree command is part of the base install, on Debian and CentOS Linux, tree cmd is not part of the base system and requires install via apt / yum e.g.:
debian:~# apt-get --yes install tree

...
[root@centos:~ ]# yum --yes install tree
Happy counting 😉
Tags: are, argument, Ascii, asciilinux, Auto, code, default tree, Draft, efficiency, everything, execution, exi, file, file extension, filesBy, grep, heavy load, iname, info, instance, level, Linux, linux cd, maxdepth, number, prints, quot, recursion, sake, script, scripts, SUID, tail, text, tree, type, variance, yum
Posted in Linux, System Administration | No Comments »


