How to Key Green Screen Footage in After Effects
In this article, we’ll take a detailed, step by step look at the various methods to keying green screen footage in Adobe After Effects.
Of all the editing software, you’ll probably get the best key results in After Effects. There are several methods for working with After Effects green screen footage. Adobe recommends using a built-in preset with a combination of three effects. This method works great for beginners (and experts) because it produces quick (and usually great) results. We’ll walk you through how to do this step-by-step.
Of course, the process of keying in all depends on the quality of your green screen footage. If you’re looking for the best chroma key possible, check out our comprehensive guide to green screen for tips on building, lighting, and capturing green screen footage.
Step 1: Import Your Footage

Click on the New Composition From Footage to begin import.
After you launch After Effects, click New Composition From Footage and select your green screen footage.
Step 2: Apply the Keying Preset

To begin applying the Key Presets, you’ll need to open Effects & Presets.
First, you need to open the Effects & Presets panel. Navigate to Window and select Effects & Presets to open the panel.

Select Keylight + Key Cleaner + Advanced Spill Suppressor to drag and drop onto your footage.
Open the Animation Presets dropdown listed at the top. Toggle open the Presets folder, and then toggle open Image – Utilities. There, you’ll see a preset named Keylight + Key Cleaner + Advanced Spill Suppressor. Drag and drop this preset onto your footage.

As mentioned, this preset contains three separate effects that work together to get you the best possible green screen key. In order, the three effects are:
- Keylight: A chroma keyer that allows you to select the color of your background and make it transparent.
- Key Cleaner: An effect that cleans up the edges of your subject and ensures they are sharp.
- Advanced Spill Suppressor: This effect removes color spill from the background that might appear on your subject.
Step 3: Start with the Keylight Effect
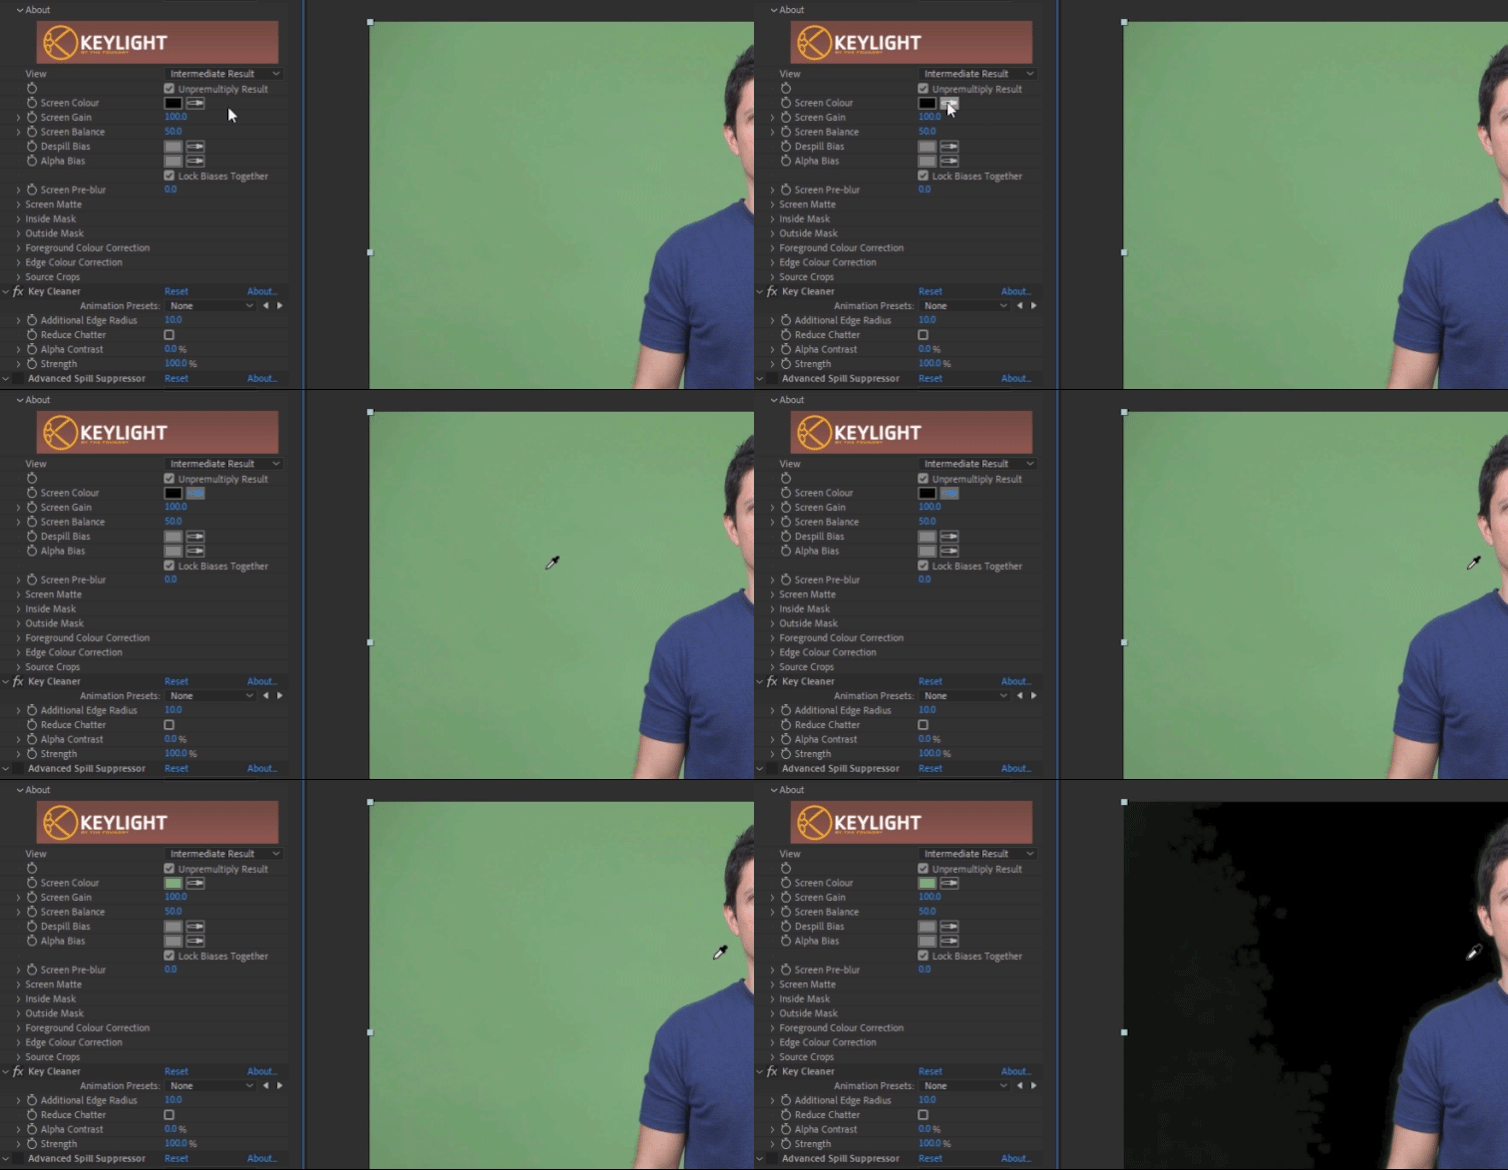
Let’s start with the Keylight effect, which we’ll use the select the green screen background. For Screen Color, select the Color Picker and click on an area of the green screen close to your subject.
Pro tip: Hold CTRL while you click the green screen color to sample even more pixels. This will give you a better color average.

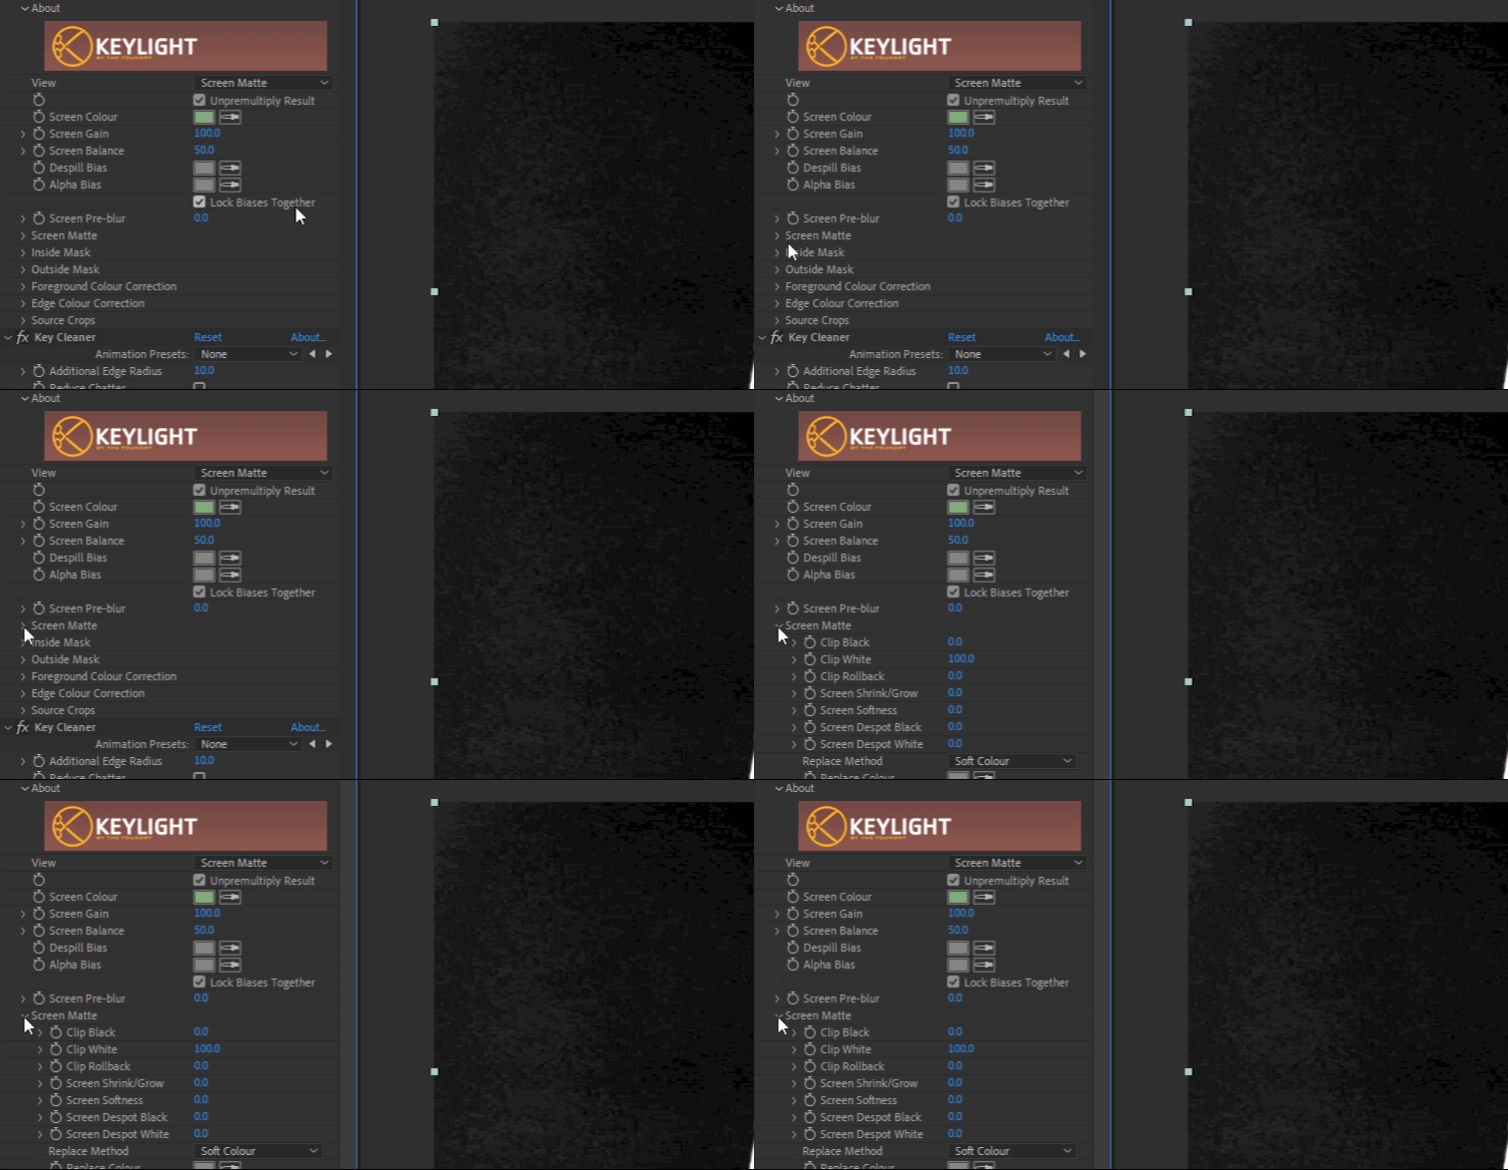
Next, change the View setting to Screen Matte. This shows a black, white, and grey matte view of your footage.

Now, toggle open the Screen Matte settings.

Adjust the Screen Matte settings Clip Black and Clip White until the background is completely black and the subject is completely white. You can also adjust settings such as Screen Shrink/Grow or Screen Softness, if needed.

Now, change the View setting back to Intermediate Result. This is important because if the view accidentally gets set to Final Result, artifacts will occur on your keyed footage.

You can now toggle the Transparency Grid to see that the background has been completely removed. You can also playback your footage now to see if there’s any unwanted noise on the image. If there is, continue to adjust the Screen Matte settings.

Step 4: Key Cleaner Effect
Unbeknownst to you, the Key Cleaner effect has already been working on your footage from the time you applied the preset. It basically works in conjunction with the Keylight effect, ensuring that the edges of everything are clean. At this point you might not need to adjust any settings with it, if everything already looks good.

Lowering the value of the Additional Edge Radius and enabling Reduce Chatter allows for better results.
Depending on your footage, there are two settings with Key Cleaner you may want to adjust. I found that lowering the value of the Additional Edge Radius yielded better looking results on my footage. I also recommend enabling Reduce Chatter, to reduce visible noise along the edges.
Finally, if needed, you can increase the Alpha Contrast. This will sharpen up the edges of your subject if they look too soft. Be careful with this setting, though. If you increase it too far, the edges can look overly sharp and pixelated.
Step 5: Advanced Spill Suppressor
At this point, your footage should have a clean key with the background removed. However, you may still notice some green color spill on your subject. This may show up on parts of their skin or clothing, or as a thin, green line around the edges of the subject. (Note, a blue screen will have blue color spill.)
You can see evidence of green color spill here, on the subject’s hair.

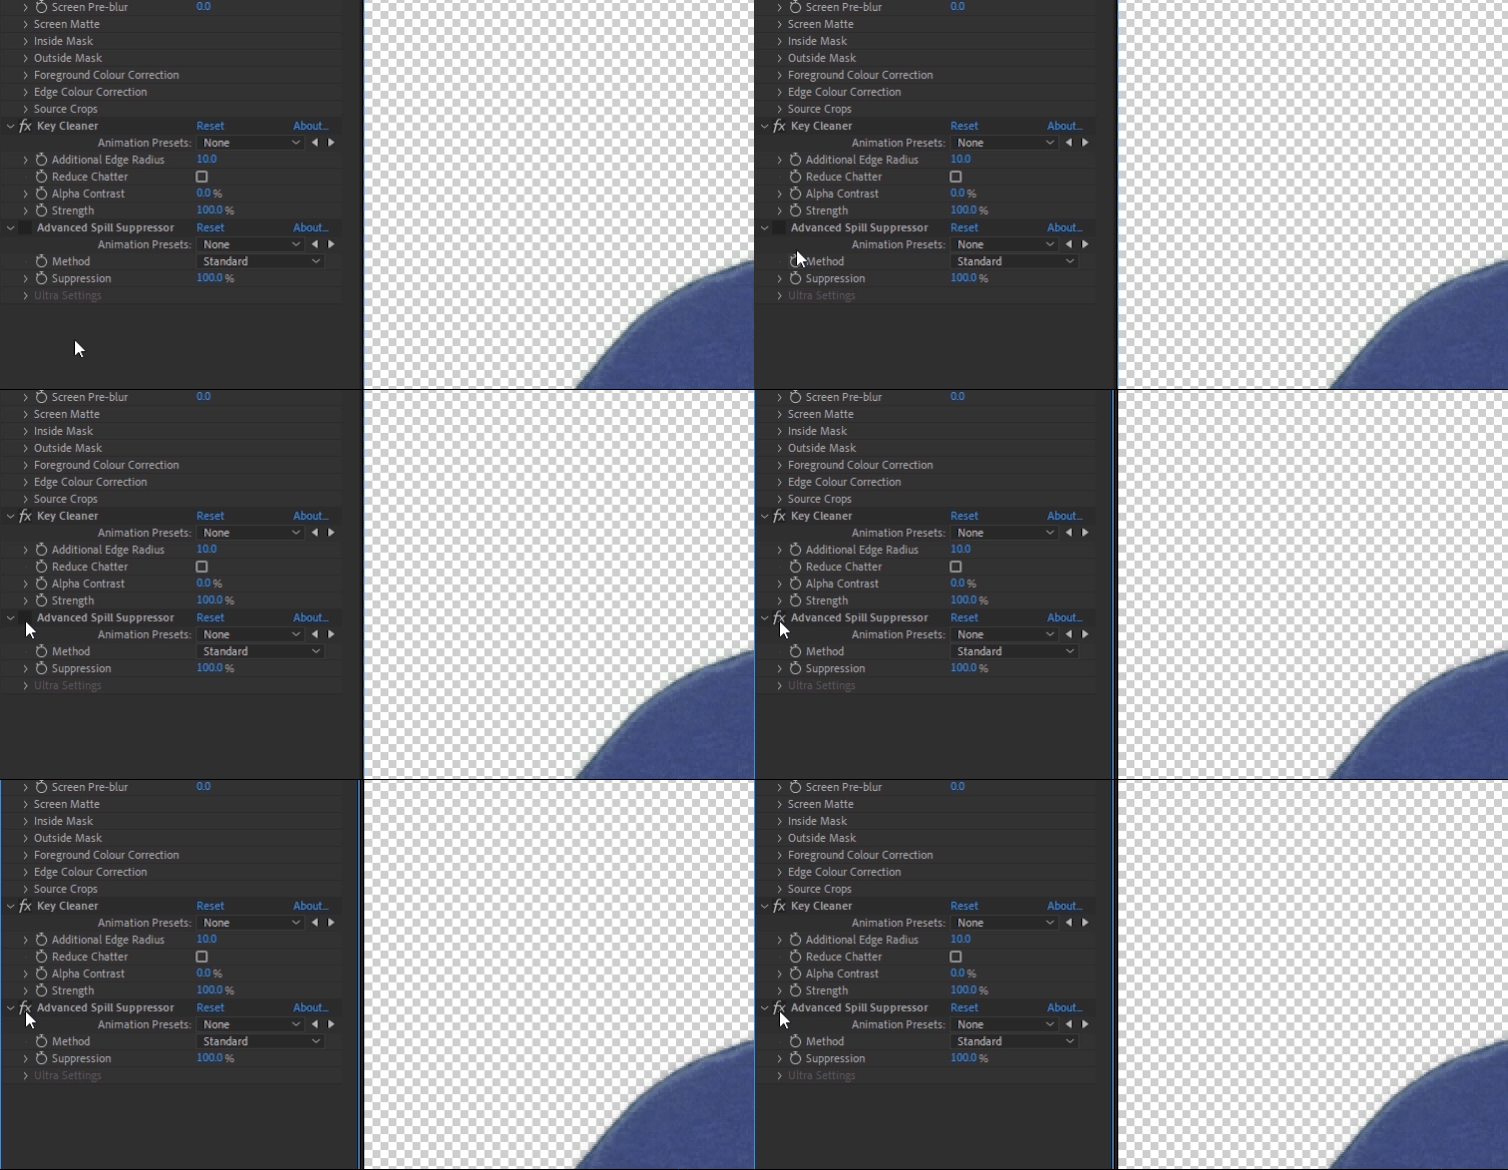
Enable the Advanced Spill Suppressor to remove color spill.
To remove this color spill, we simply need to enable the Advanced Spill Suppressor effect, which is off by default. To enable it, click in the empty box next to the effect name.

Here’s a close up of the hair after Advanced Spill Suppressor has been enabled. Notice the green edging and spill on the hair has been removed.

Here’s the subject’s hair with the Advanced Spill Suppressor enabled.
Advanced Spill Suppressor should automatically detect what color you want removed, and it usually has great results. However, if you get something unexpected, you may have to manually set the color. To do this, change the Method setting to Ultra. You’ll then see more options where you can set your Key Color and make other fine-tune adjustments.

Changing the Method setting to Ultra allows you to set your Key Color and fine-tune adjustments.
And that’s it! You should be left with a clean chroma key.

Here’s the complete, corrected image.
Step 6: Add a Background
To add a background image or video to your clip, simply drag and drop it below your green screen footage in your composition.

Extra Green Screen Tips
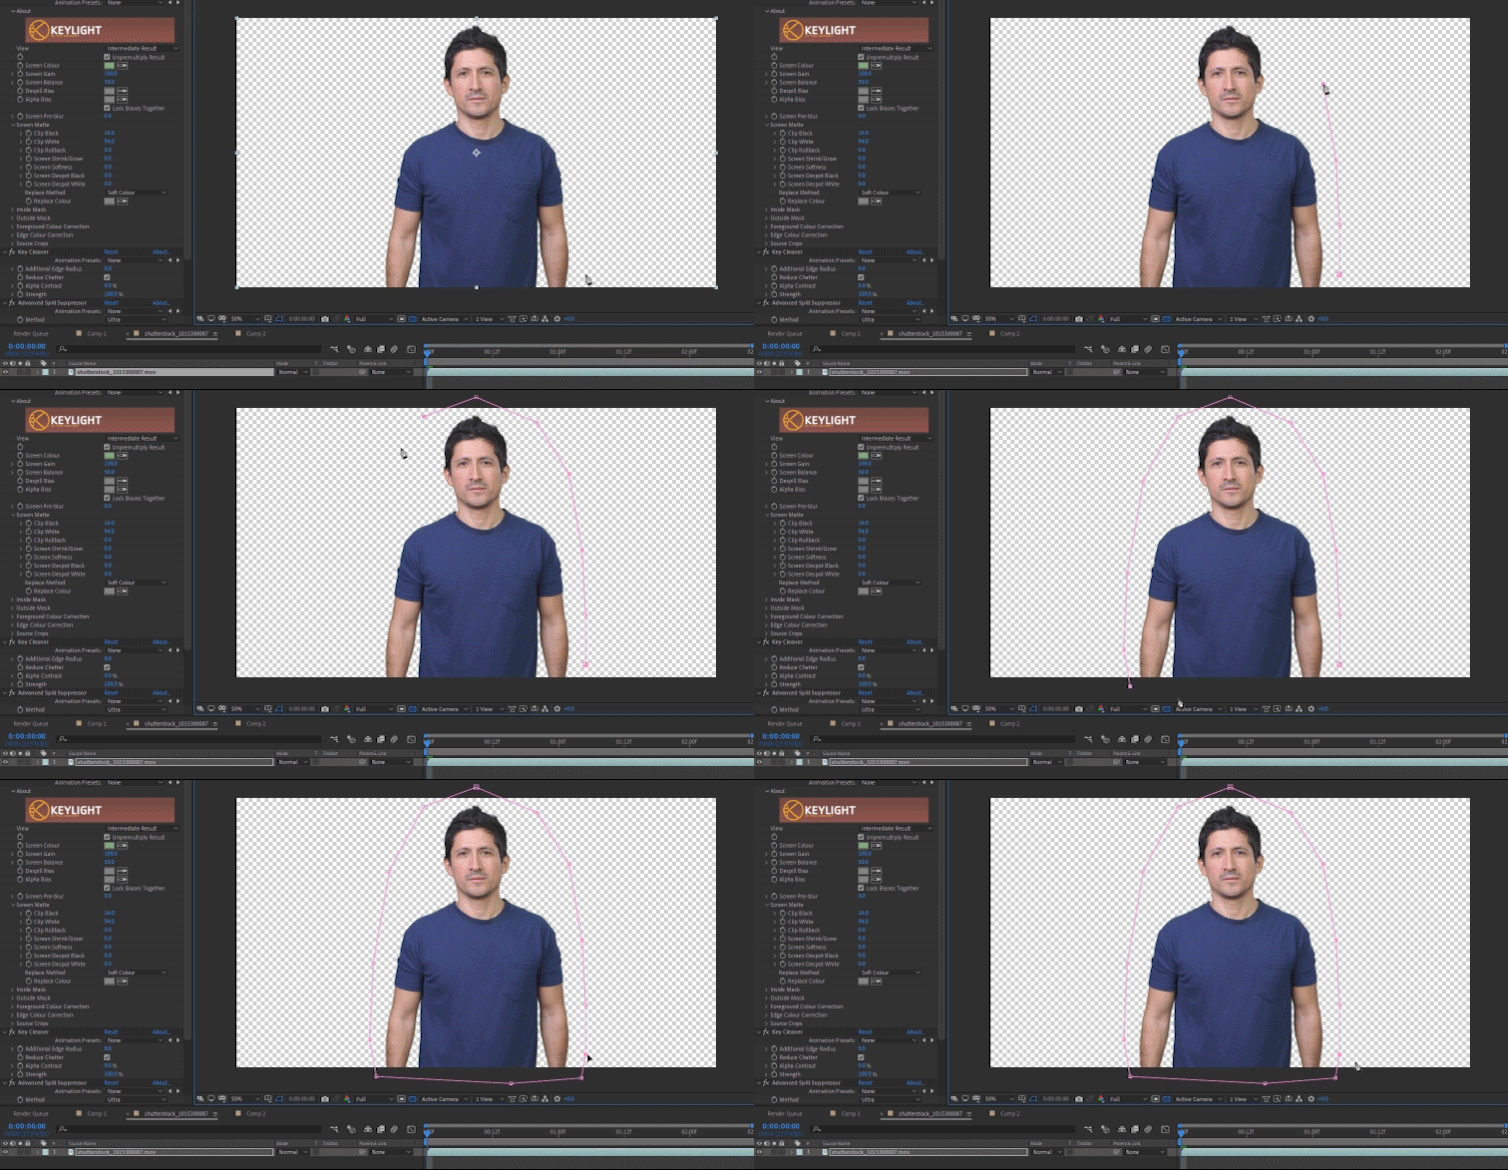
If your green screen doesn’t cover the entire background, you may need to use the Pen Tool to create a Mask around your subject. You can do this before or after you apply the keying preset. Select the Pen Tool icon in the top left tool bar.

Then, select your green screen footage and click to draw a mask around your subject. Close the mask by clicking back on the first mask point created.

If you’d also like to see a video tutorial using this green screen preset, check out the video below.
Learn more about green screen and must-have After Effects skills in these articles:


