Analytical balance Presentation
- 4. Simple balances were used as early as 5000 B.C. "balance" comes from the Latin word bilanx which means "two pans.“ The modern analytical balance originated during the mid-18th century. The lightweight technique is developed Joseph Black.
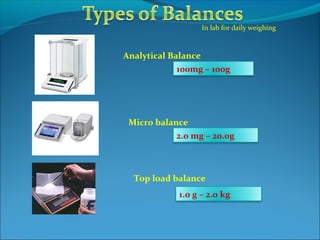
- 5. In lab for daily weighing Analytical Balance Micro balance Top load balance 100mg – 100g 2.0 mg – 20.0g 1.0 g – 2.0 kg
- 6. Analytical Balance Class-I Low-capacity & high-sensitivity balances Top load balance 100mg – 100g 2mg – 20g 1.0 g – 2.0 kg Micro balance 5µg – 500mg Semi Micro balance Class-II Built-in weights for analytical balances & Laboratory weights for routine analytical work Class-III & IV Precision balances & All other weighing equipments
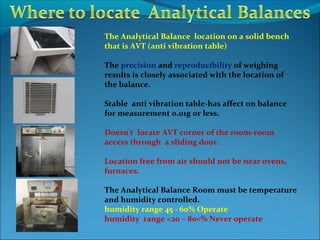
- 7. The Analytical Balance location on a solid bench that is AVT (anti vibration table) The precision and reproducibility of weighing results is closely associated with the location of the balance. Stable anti vibration table-has affect on balance for measurement 0.01g or less. Doesn't locate AVT corner of the room-room access through a sliding door. Location free from air should not be near ovens, furnaces. The Analytical Balance Room must be temperature and humidity controlled. humidity range 45 - 60% Operate humidity range <20 – 80<% Never operate
- 8. The balance should not be installed near sources of electromagnetic radiation such as radio frequency generators, electric motors, hand held communication devices (including card less telephones and cell phones) The balance should not be adjacent to equipment producing a magnetic field(a magnetic stirrer) Low humidity increases buildup of static electricity. Never disconnect the balance from the power supply and leave it always switched on / STAND BY mode. If “OFF” mode: warm-up for 1 hour after switching ‘ON’ the power supply
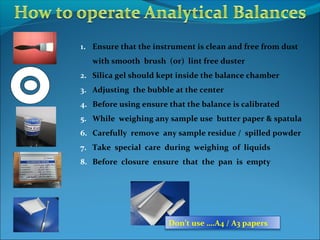
- 9. 1. Ensure that the instrument is clean and free from dust with smooth brush (or) lint free duster 2. Silica gel should kept inside the balance chamber 3. Adjusting the bubble at the center 4. Before using ensure that the balance is calibrated 5. While weighing any sample use butter paper & spatula 6. Carefully remove any sample residue / spilled powder 7. Take special care during weighing of liquids 8. Before closure ensure that the pan is empty Don’t use ….A4 / A3 papers
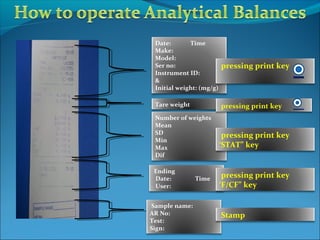
- 10. Date: Time Make: Model: Ser no: Instrument ID: & Initial weight: (mg/g) pressing print key Number of weights Mean SD Min Max Dif Tare weight pressing print key pressing print key ‘STAT” key Ending Date: Time User: pressing print key ‘F/CF” key Sample name: AR No: Test: Sign: Stamp
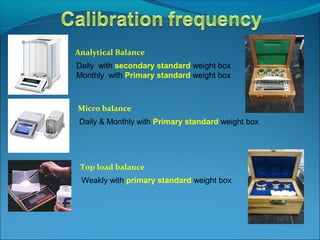
- 11. Analytical Balance Micro balance Top load balance Daily with secondary standard weight box Monthly with Primary standard weight box Daily & Monthly with Primary standard weight box Weakly with primary standard weight box
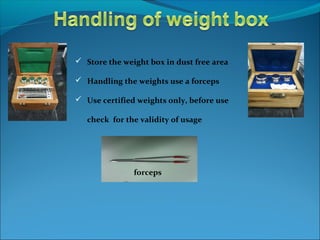
- 12. Store the weight box in dust free area Handling the weights use a forceps Use certified weights only, before use check for the validity of usage forceps
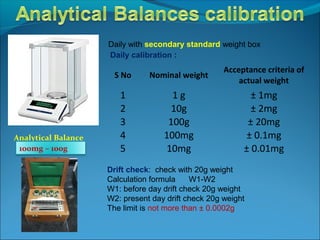
- 13. Analytical Balance Daily with secondary standard weight box Daily calibration : S No Nominal weight Acceptance criteria of actual weight 1 1 g ± 1mg 2 10g ± 2mg 3 100g ± 20mg 4 100mg ± 0.1mg 5 10mg ± 0.01mg100mg – 100g Drift check: check with 20g weight Calculation formula W1-W2 W1: before day drift check 20g weight W2: present day drift check 20g weight The limit is not more than ± 0.0002g
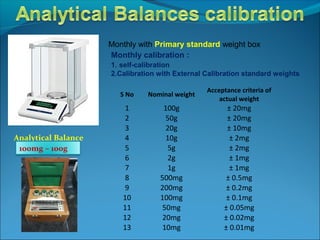
- 14. Analytical Balance Monthly with Primary standard weight box Monthly calibration : 1. self-calibration 2.Calibration with External Calibration standard weights 100mg – 100g S No Nominal weight Acceptance criteria of actual weight 1 100g ± 20mg 2 50g ± 20mg 3 20g ± 10mg 4 10g ± 2mg 5 5g ± 2mg 6 2g ± 1mg 7 1g ± 1mg 8 500mg ± 0.5mg 9 200mg ± 0.2mg 10 100mg ± 0.1mg 11 50mg ± 0.05mg 12 20mg ± 0.02mg 13 10mg ± 0.01mg
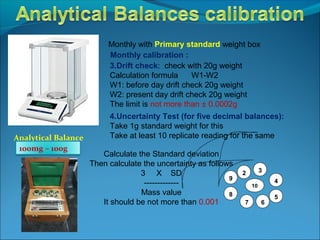
- 15. Analytical Balance Monthly with Primary standard weight box Monthly calibration : 100mg – 100g 3.Drift check: check with 20g weight Calculation formula W1-W2 W1: before day drift check 20g weight W2: present day drift check 20g weight The limit is not more than ± 0.0002g 4.Uncertainty Test (for five decimal balances): Take 1g standard weight for this Take at least 10 replicate reading for the same 9 2 8 7 6 3 5 4 10 Calculate the Standard deviation Then calculate the uncertainty as follows 3 X SD ------------- Mass value It should be not more than 0.001
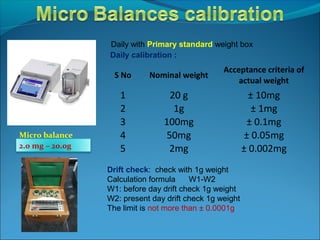
- 16. Daily calibration : S No Nominal weight Acceptance criteria of actual weight 1 20 g ± 10mg 2 1g ± 1mg 3 100mg ± 0.1mg 4 50mg ± 0.05mg 5 2mg ± 0.002mg Drift check: check with 1g weight Calculation formula W1-W2 W1: before day drift check 1g weight W2: present day drift check 1g weight The limit is not more than ± 0.0001g Micro balance Daily with Primary standard weight box 2.0 mg – 20.0g
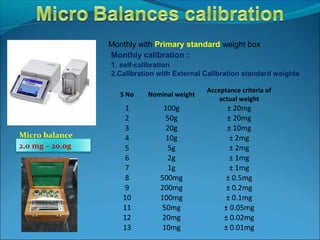
- 17. Monthly with Primary standard weight box Monthly calibration : 1. self-calibration 2.Calibration with External Calibration standard weights S No Nominal weight Acceptance criteria of actual weight 1 100g ± 20mg 2 50g ± 20mg 3 20g ± 10mg 4 10g ± 2mg 5 5g ± 2mg 6 2g ± 1mg 7 1g ± 1mg 8 500mg ± 0.5mg 9 200mg ± 0.2mg 10 100mg ± 0.1mg 11 50mg ± 0.05mg 12 20mg ± 0.02mg 13 10mg ± 0.01mg Micro balance 2.0 mg – 20.0g
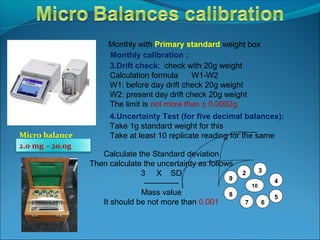
- 18. Monthly with Primary standard weight box Monthly calibration : 3.Drift check: check with 20g weight Calculation formula W1-W2 W1: before day drift check 20g weight W2: present day drift check 20g weight The limit is not more than ± 0.0002g 4.Uncertainty Test (for five decimal balances): Take 1g standard weight for this Take at least 10 replicate reading for the same 9 2 8 7 6 3 5 4 10 Calculate the Standard deviation Then calculate the uncertainty as follows 3 X SD ------------- Mass value It should be not more than 0.001 Micro balance 2.0 mg – 20.0g
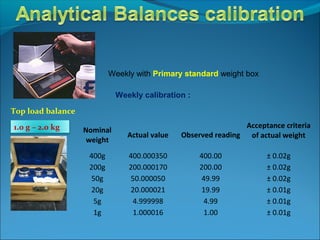
- 19. Weekly with Primary standard weight box Weekly calibration : Nominal weight Actual value Observed reading Acceptance criteria of actual weight 400g 400.000350 400.00 ± 0.02g 200g 200.000170 200.00 ± 0.02g 50g 50.000050 49.99 ± 0.02g 20g 20.000021 19.99 ± 0.01g 5g 4.999998 4.99 ± 0.01g 1g 1.000016 1.00 ± 0.01g Top load balance 1.0 g – 2.0 kg
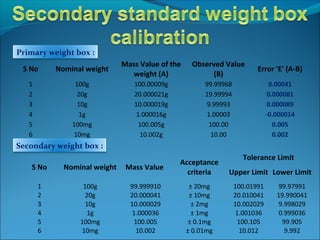
- 20. S No Nominal weight Mass Value of the weight (A) Observed Value (B) Error 'E' (A-B) 1 100g 100.00009g 99.99968 0.00041 2 20g 20.000021g 19.99994 0.000081 3 10g 10.000019g 9.99993 0.000089 4 1g 1.000016g 1.00003 -0.000014 5 100mg 100.005g 100.00 0.005 6 10mg 10.002g 10.00 0.002 Primary weight box : S No Nominal weight Mass Value Acceptance criteria Tolerance Limit Upper Limit Lower Limit 1 100g 99.999910 ± 20mg 100.01991 99.97991 2 20g 20.000041 ± 10mg 20.010041 19.990041 3 10g 10.000029 ± 2mg 10.002029 9.998029 4 1g 1.000036 ± 1mg 1.001036 0.999036 5 100mg 100.005 ± 0.1mg 100.105 99.905 6 10mg 10.002 ± 0.01mg 10.012 9.992 Secondary weight box :
- 23. Don’t weigh like this……
- 24. weigh like this !
- 25. Special thanks to Ushakiran madam & GLP Team Your’s


