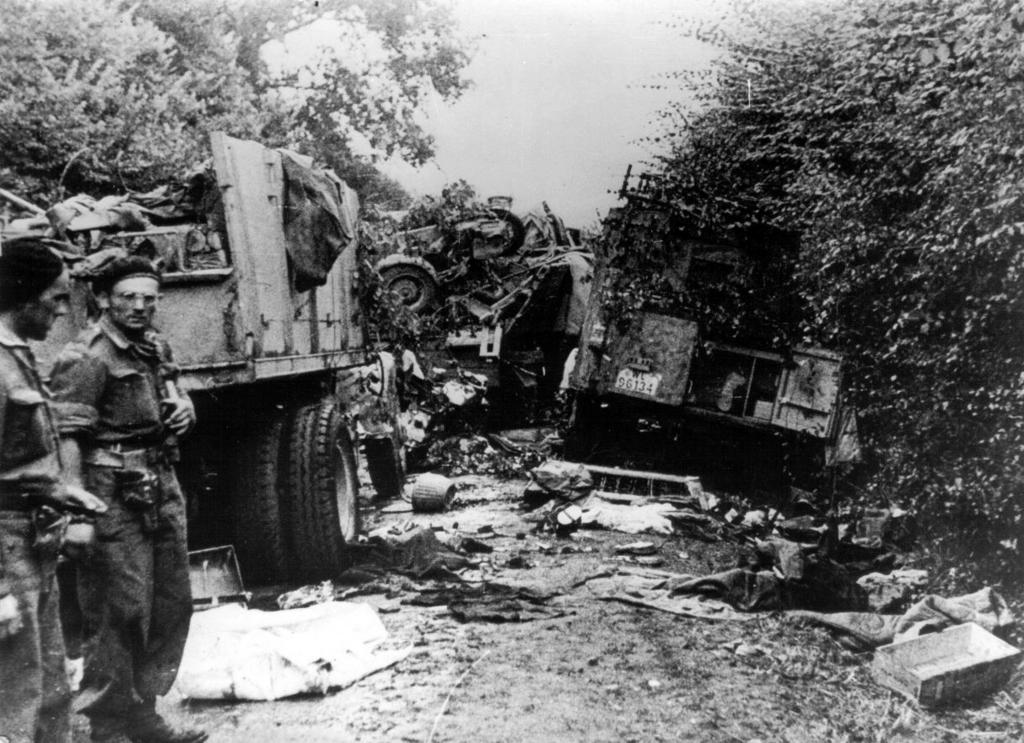
Normandy Tour - Day 6 - Falaise Pocket- End of the Battle for Normandy

Gunner

FGM Major
FGM MEMBER
Joined
Apr 16, 2013
Messages
4,501
Reaction score
3,139
Age
68
Location
Blue Point, New York
I thought I would revive these for the 75th anniversary of D-Day
These are from 2014 when my brothers and nephews took a grand six day tour of Normandy.
I see some of the pictures have issues.
I'll fix those at a later date...
I hope you enjoy the tour


Day 6 - The Falaise Pocket

Cinthaux/La Jalousie - Michael Wittman tank battle & death (101 Heavy Panzer Battalion) & Operations Totalise & Tractable
Hill 140 - Worthington Force - Fog and 12SS Panzer Division
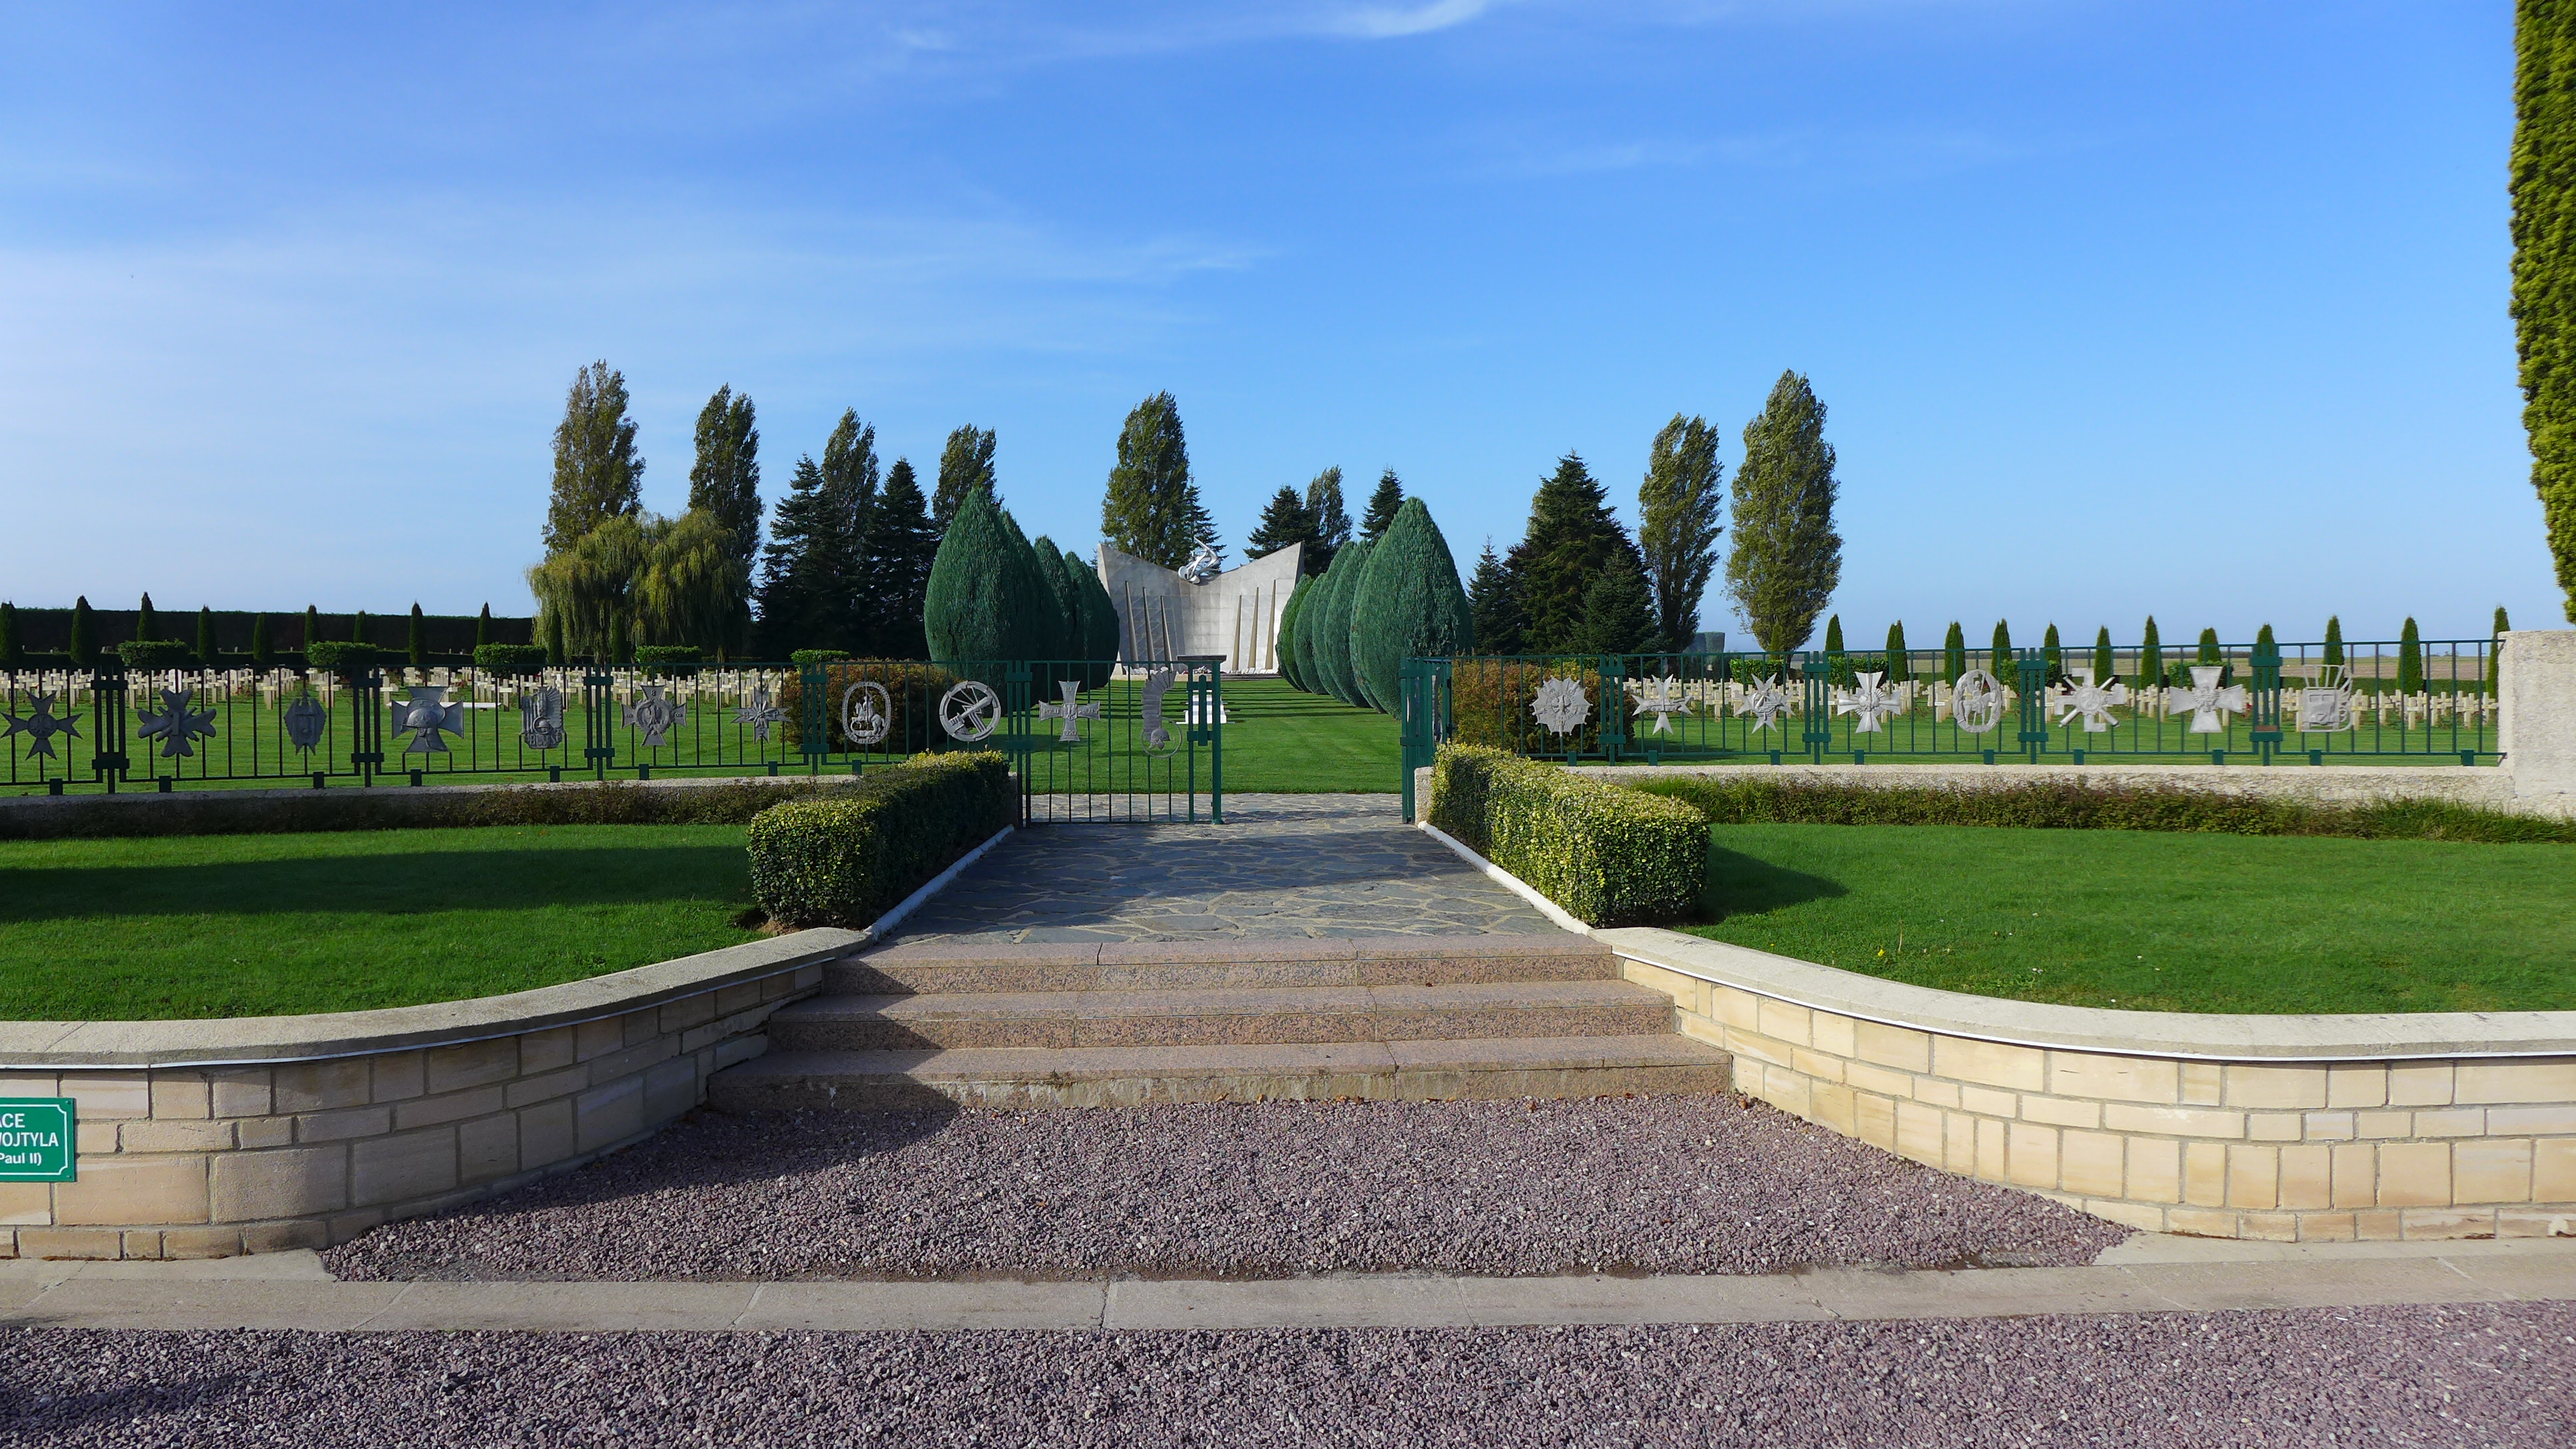
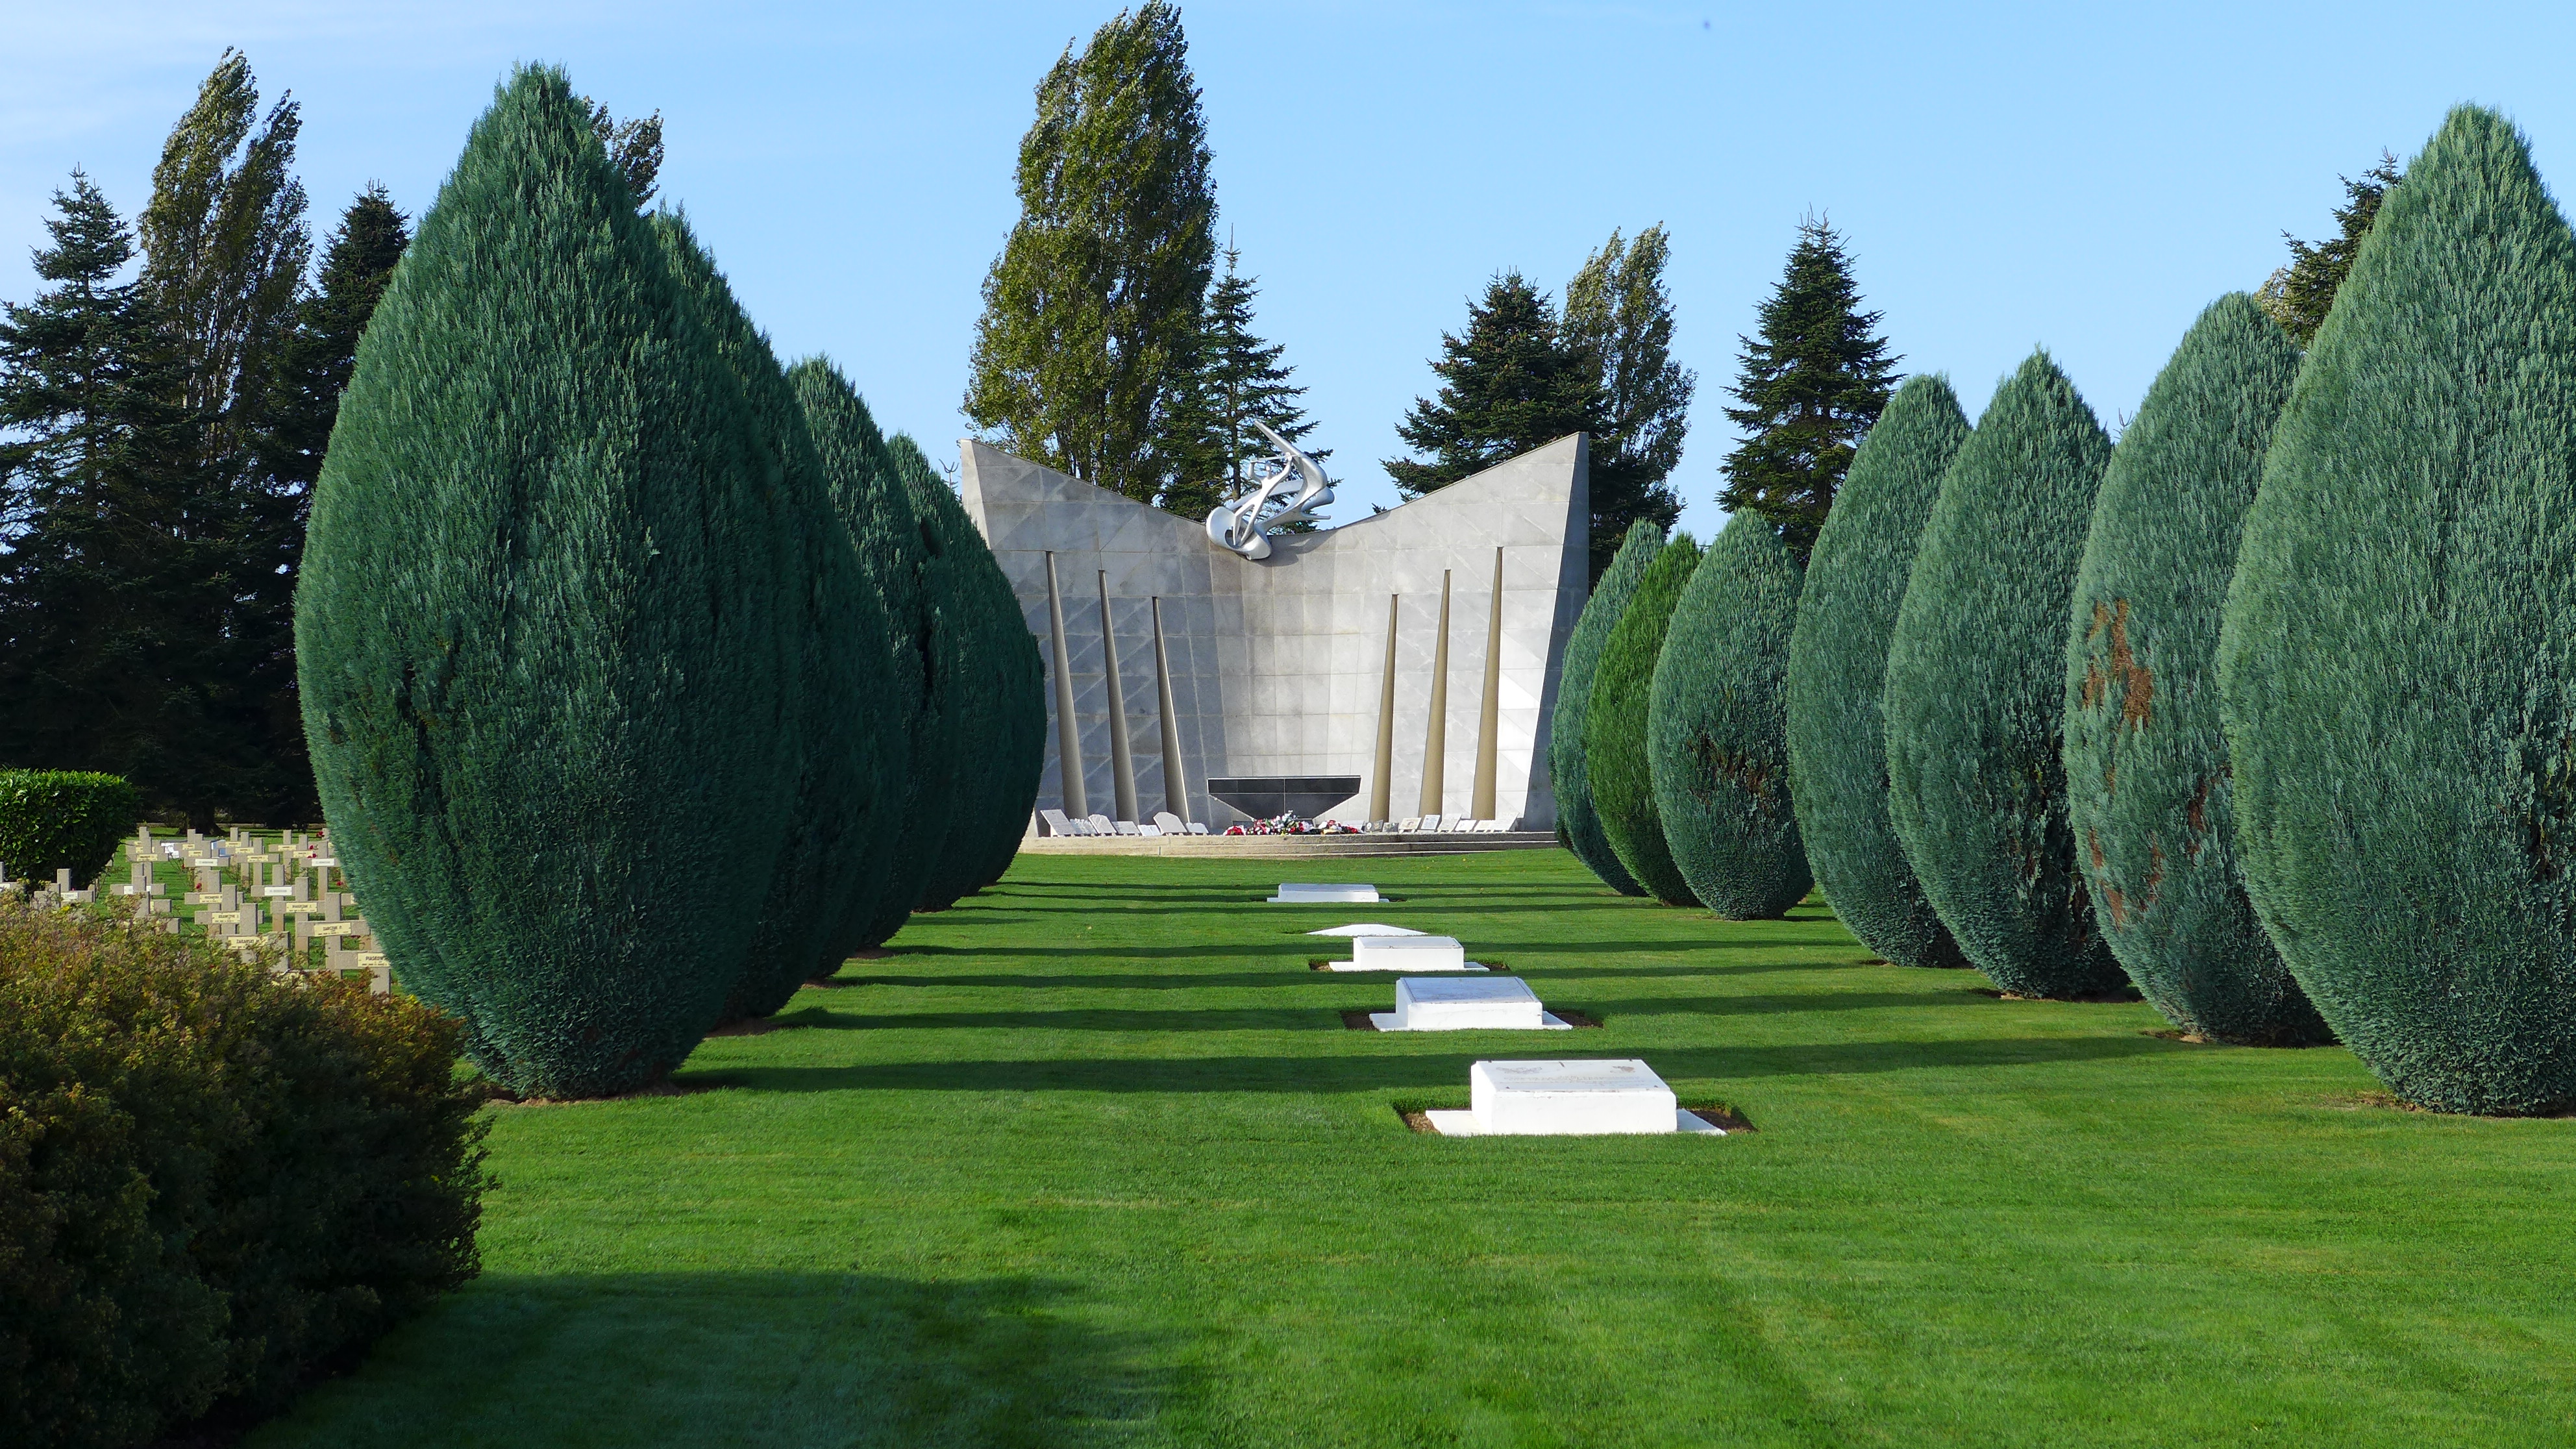
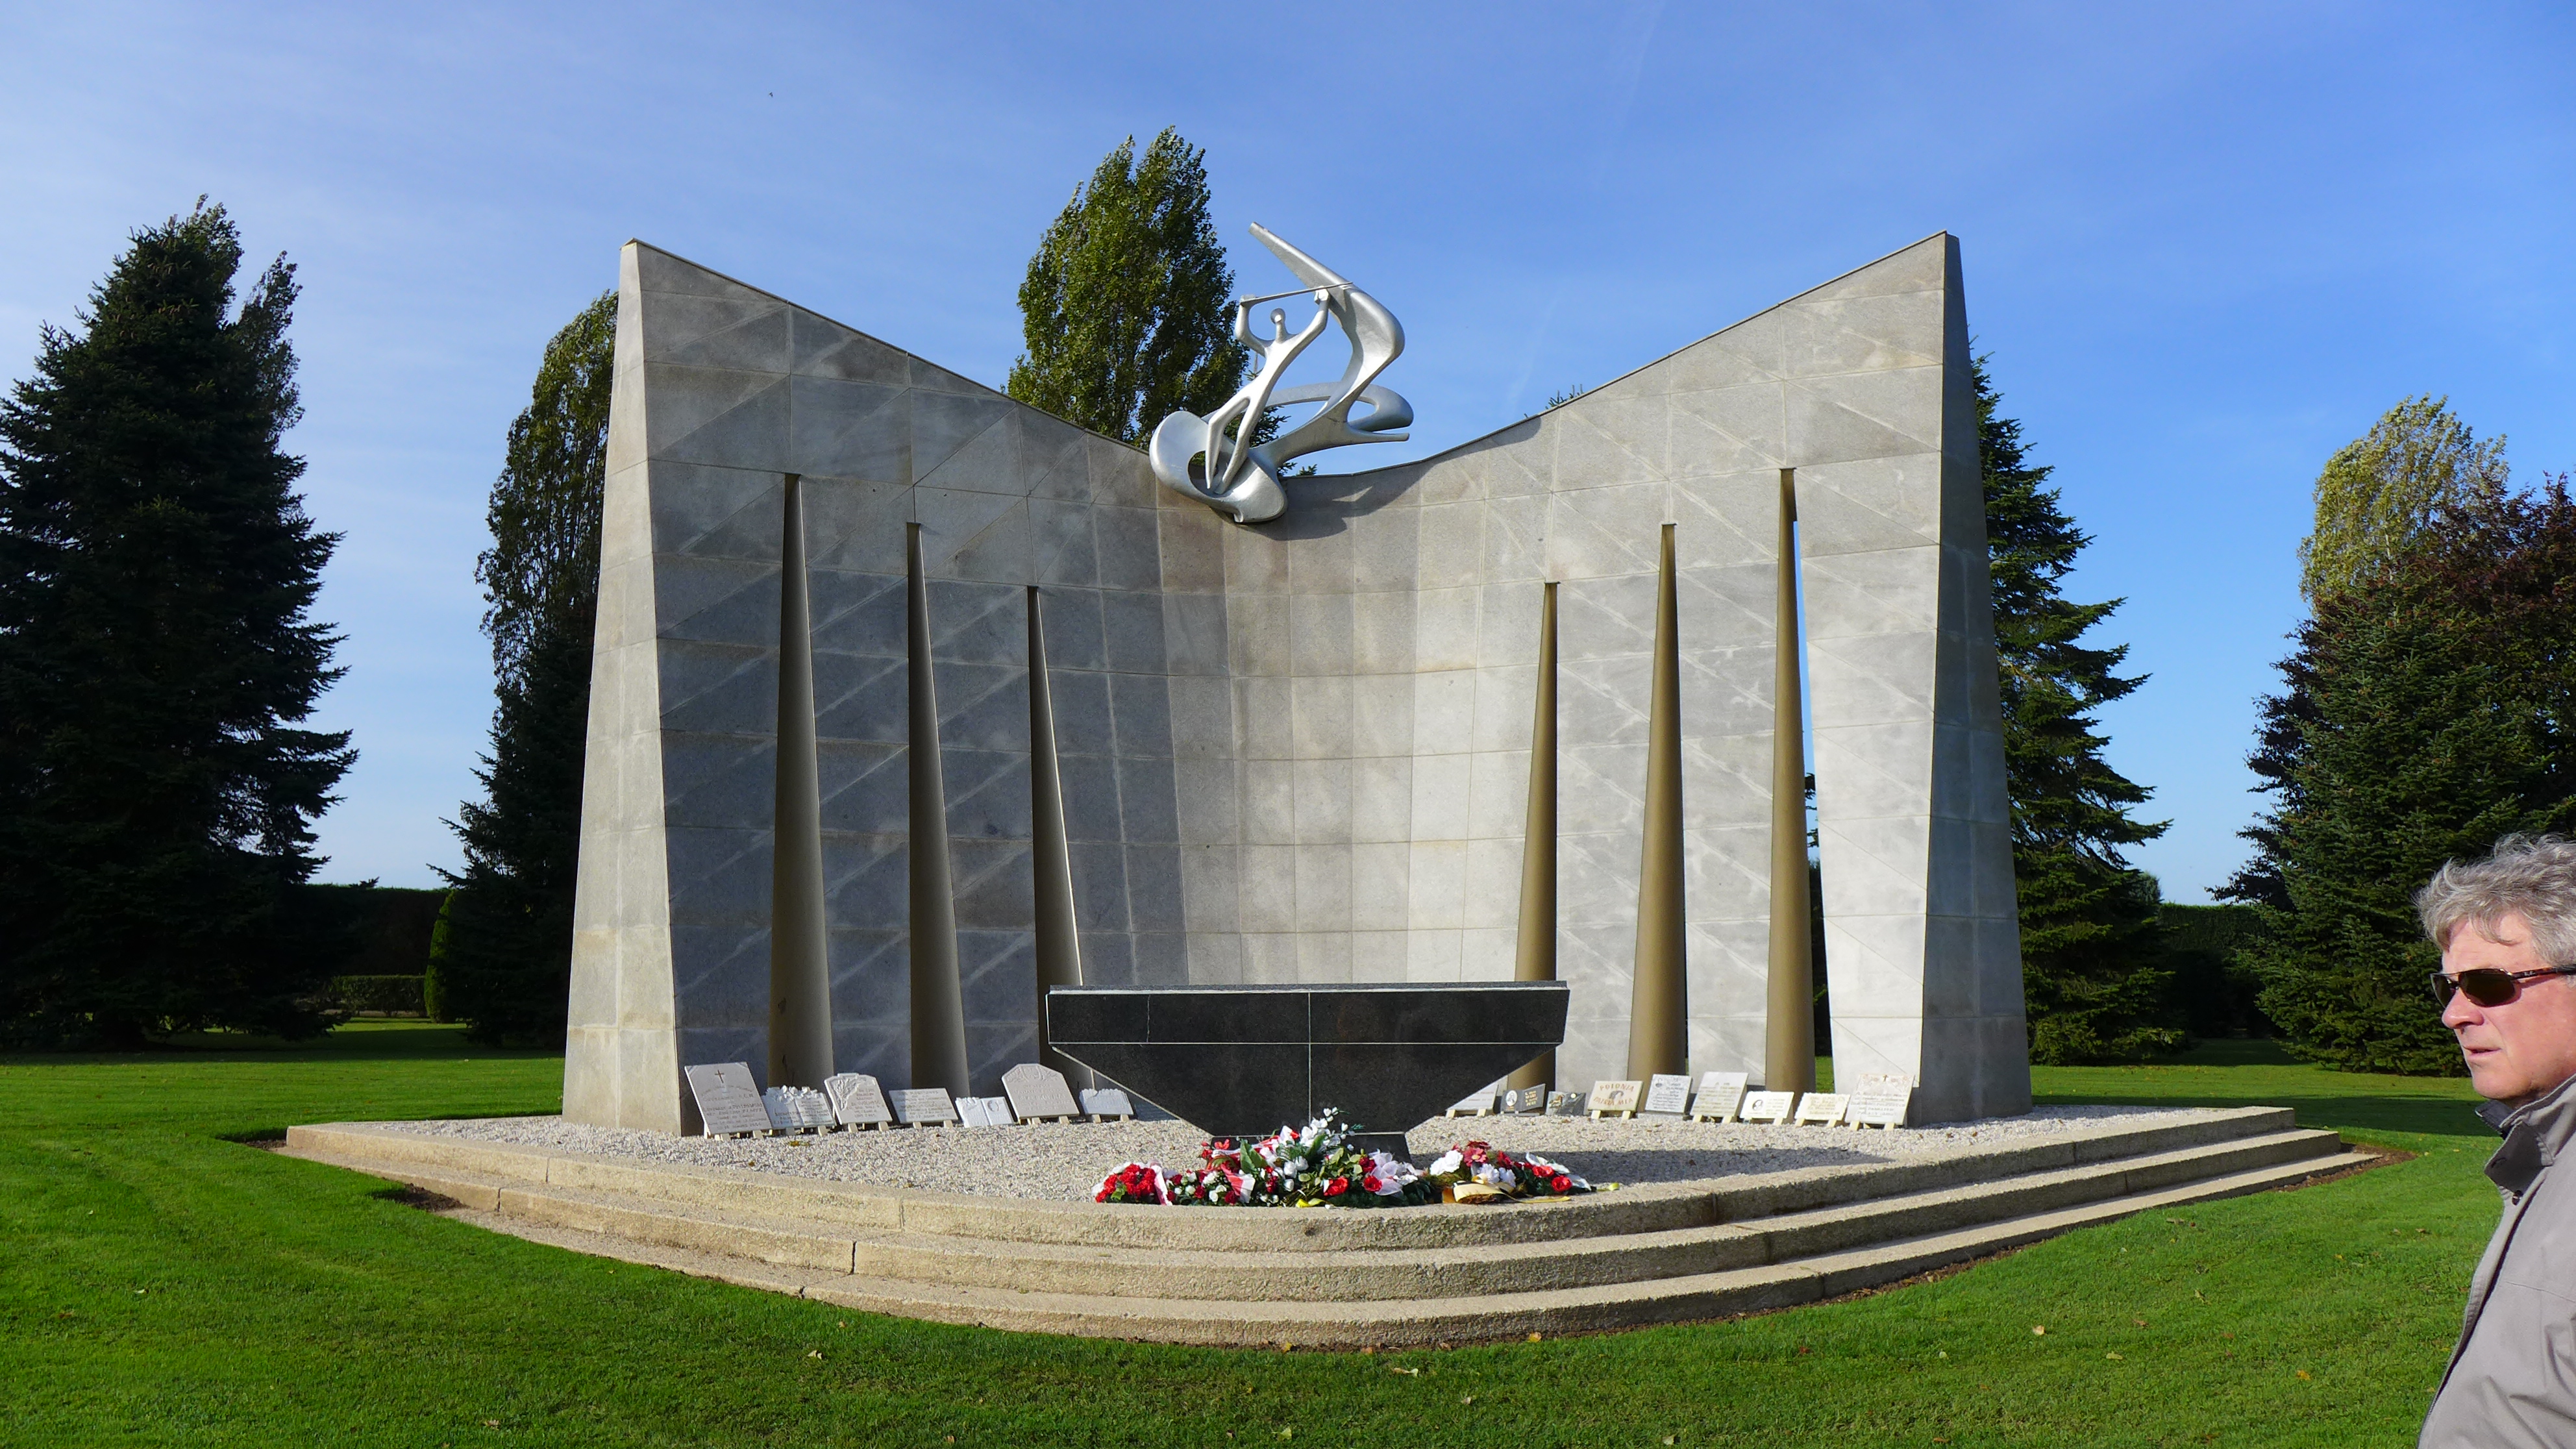
Grainville-Langannerie - Polish Military Cemetery
Falaise - William The Conqueror birthplace & castle
Trun - 4th Canadian Armoured Division HQ
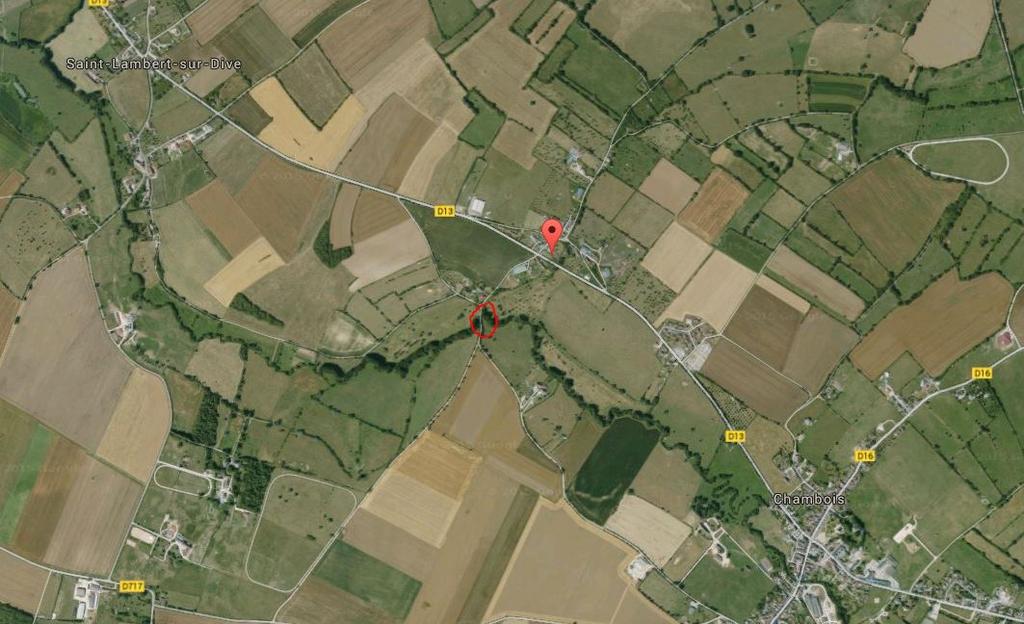
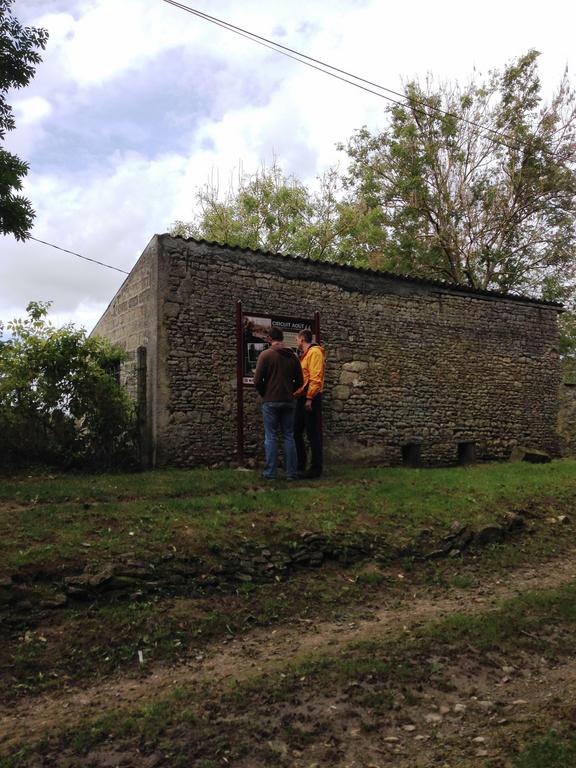
St Lambert-sur-Dive - Memorial stand and viewpoint over 'The Gap'.
St Lambert-sur-Dive - Major David Currie VC Memorial - South Alberta Regiment
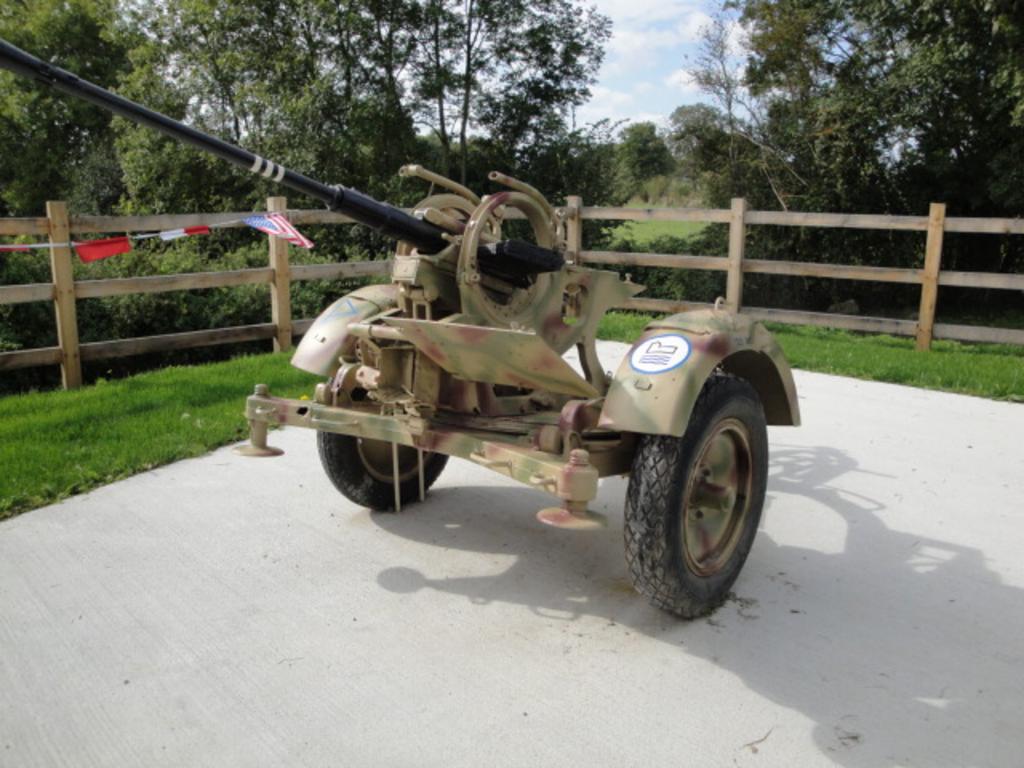
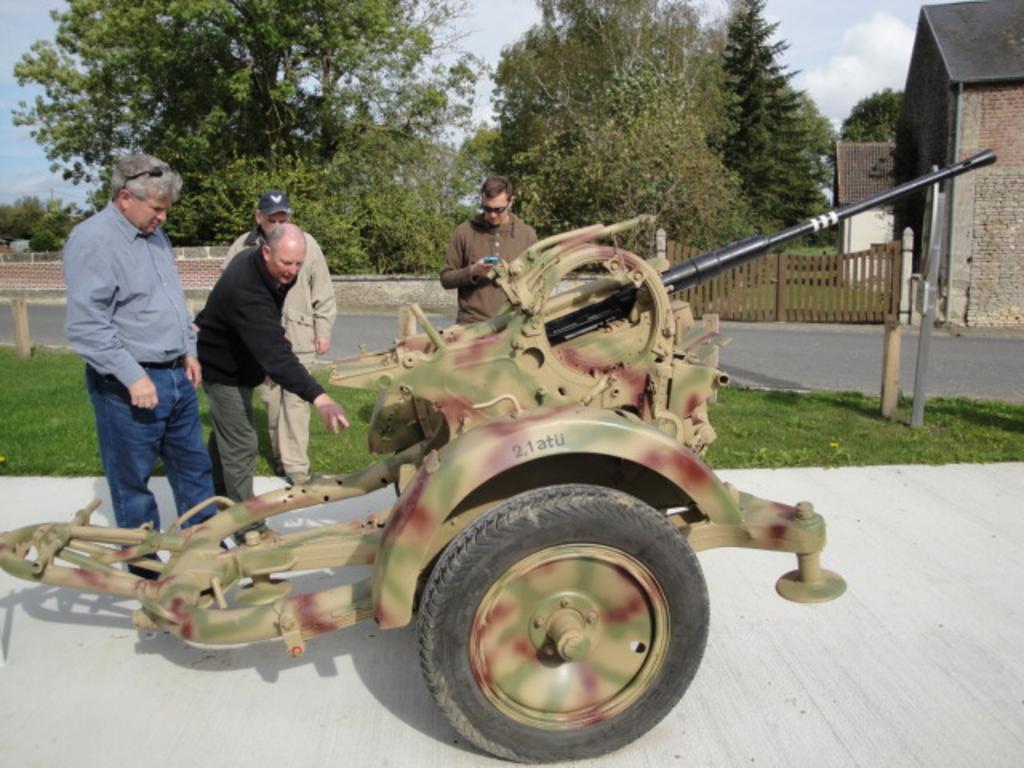
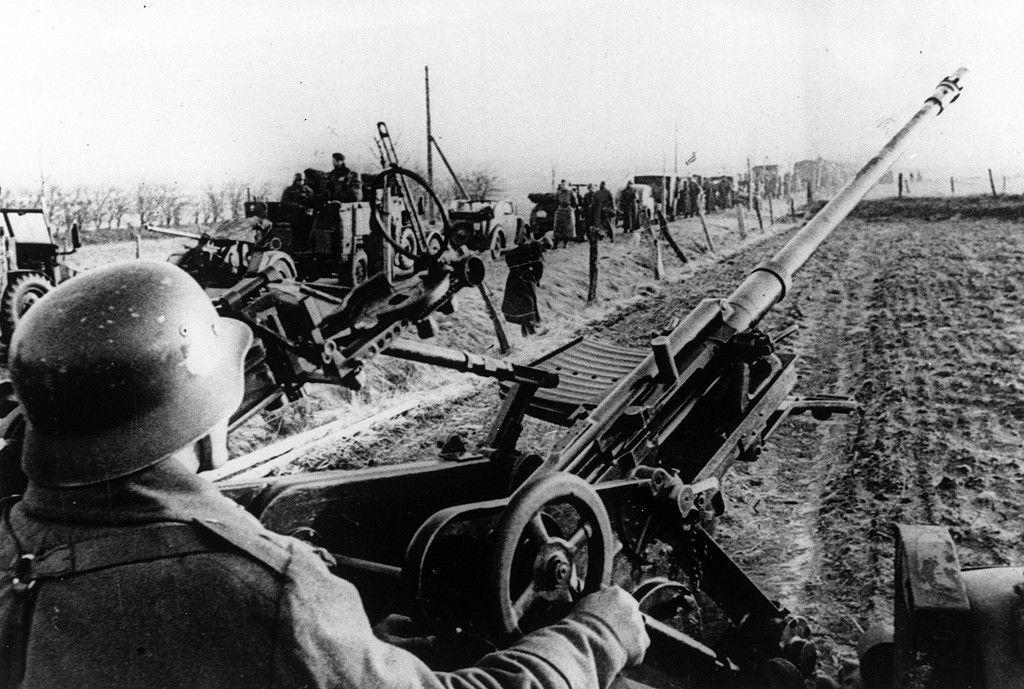
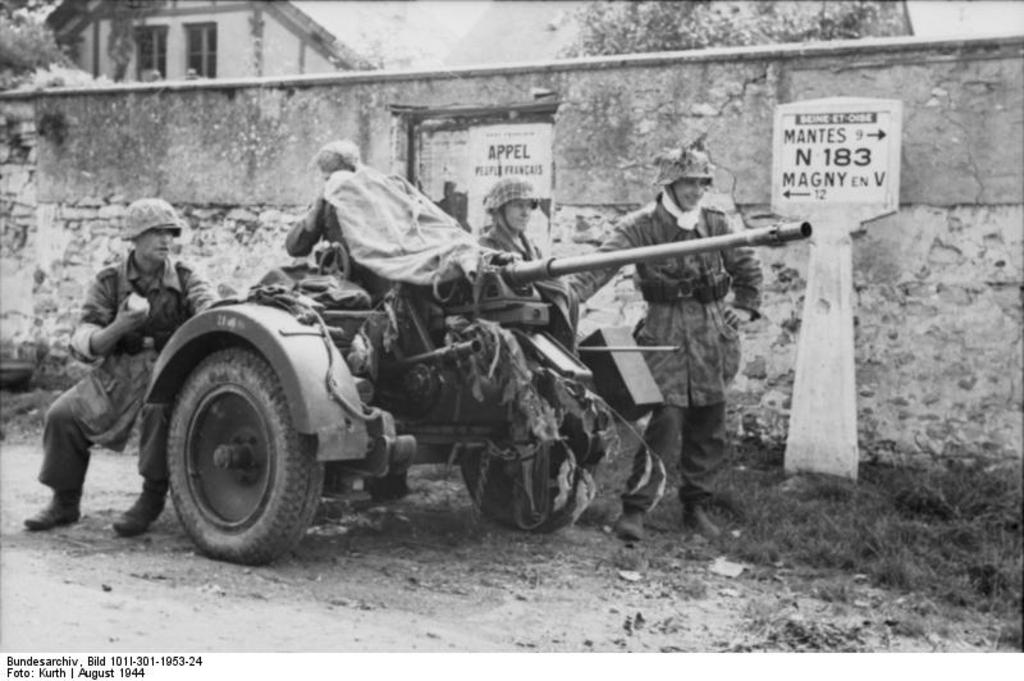
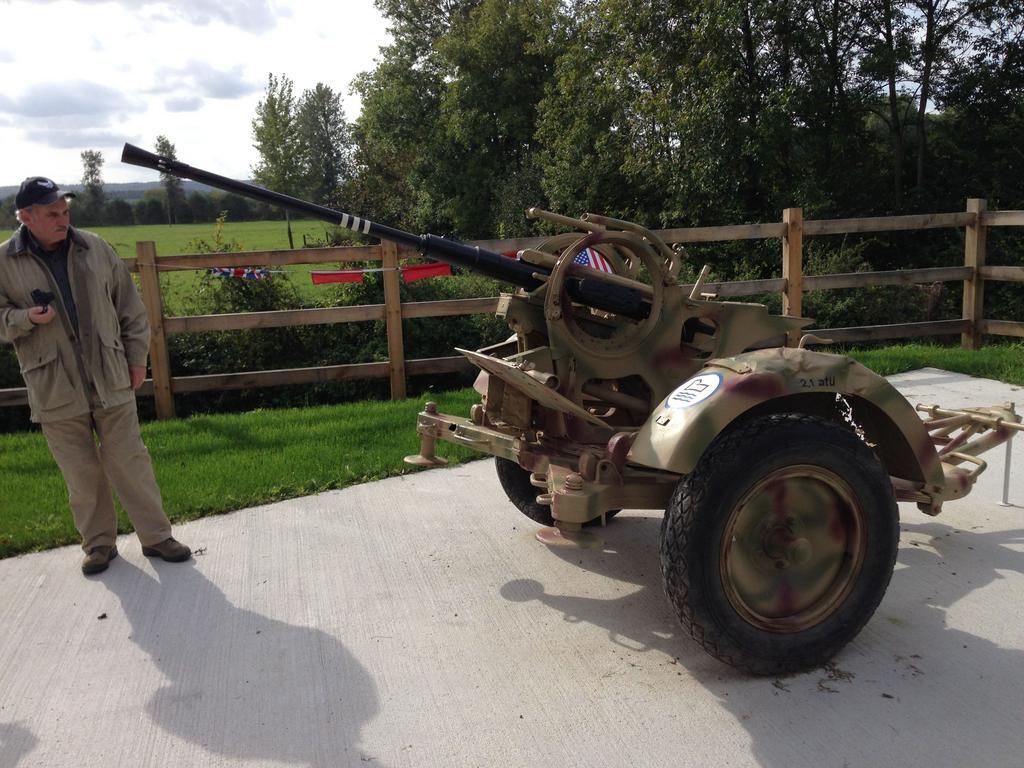
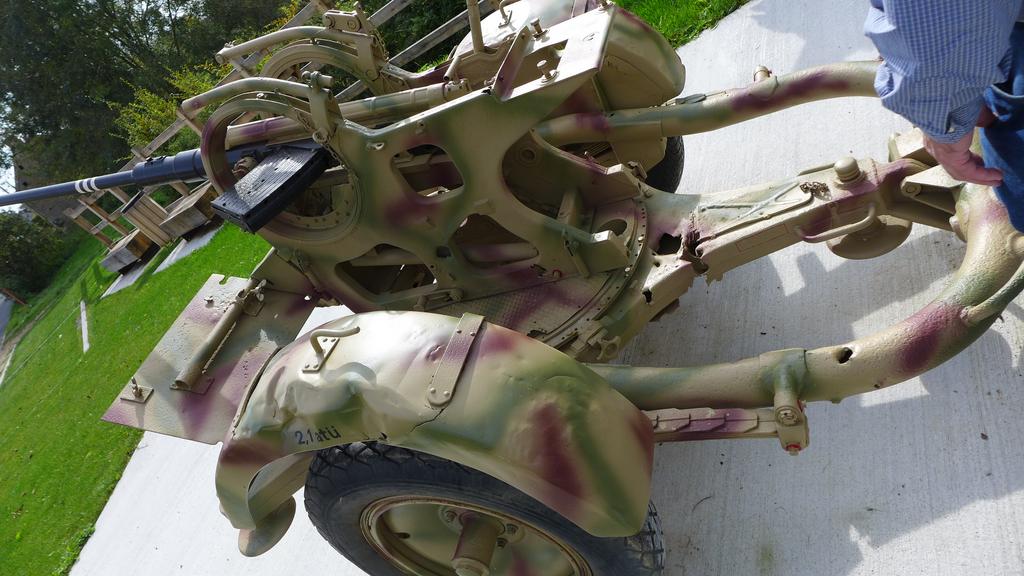
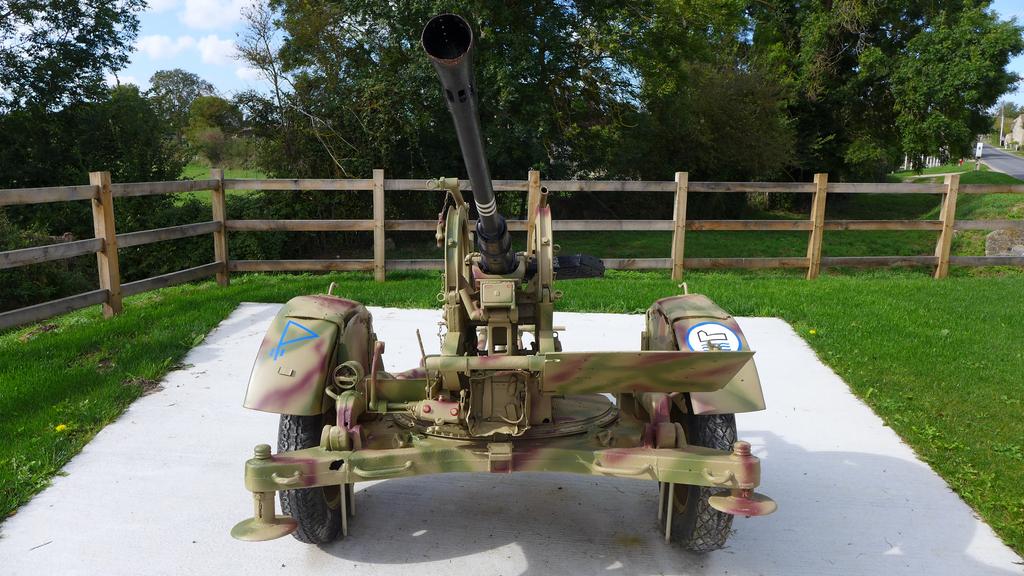
St Lambert-sur-Dive - German 20mm Flak gun

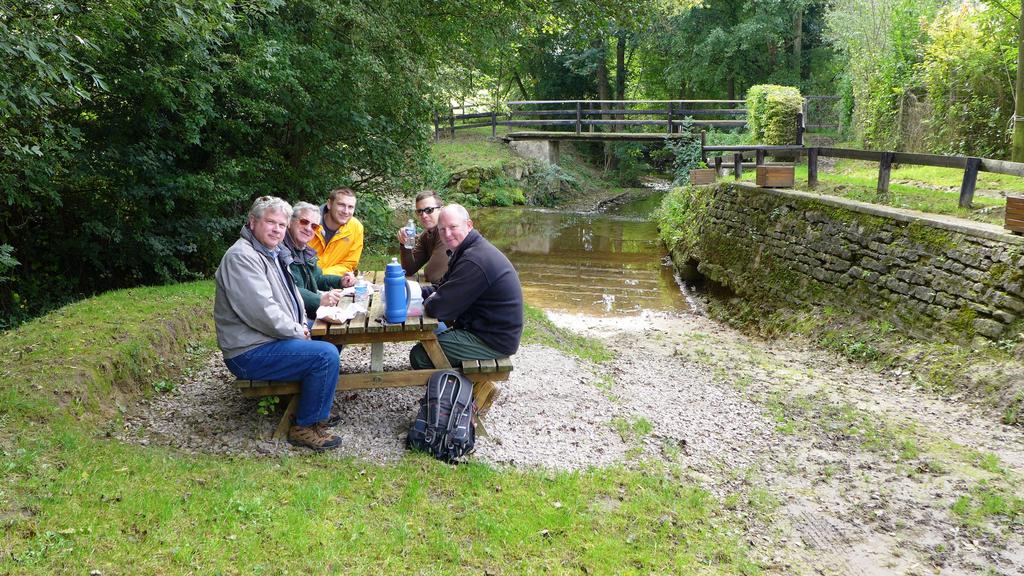
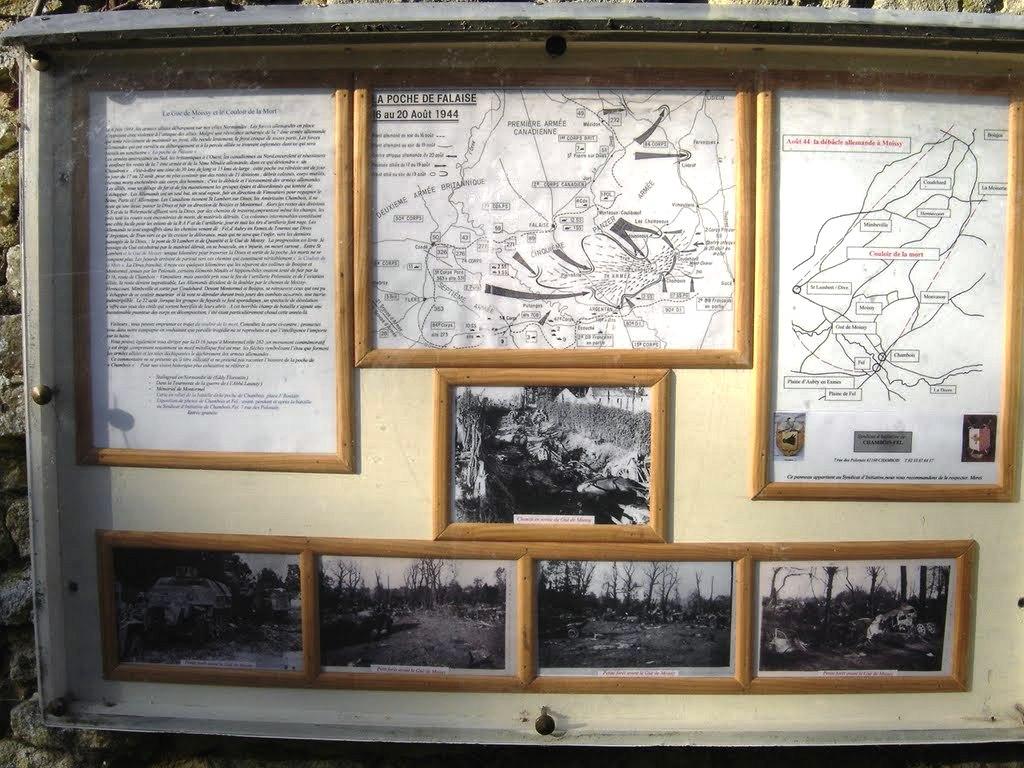
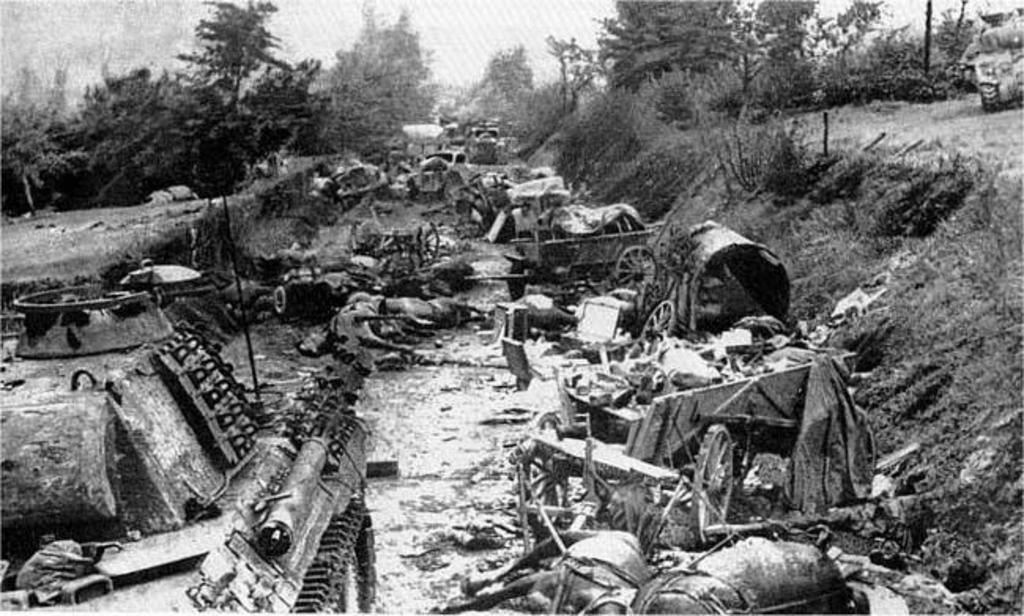
Lunch at my private 'Restaurant de la Mort' at Moissy - The Ford - last exit route - The Corridor of Death

Chambois - Polish battle - General Maczek and meeting point of US 359th Infantry Regiment (90th Division) and the Poles - Memorials
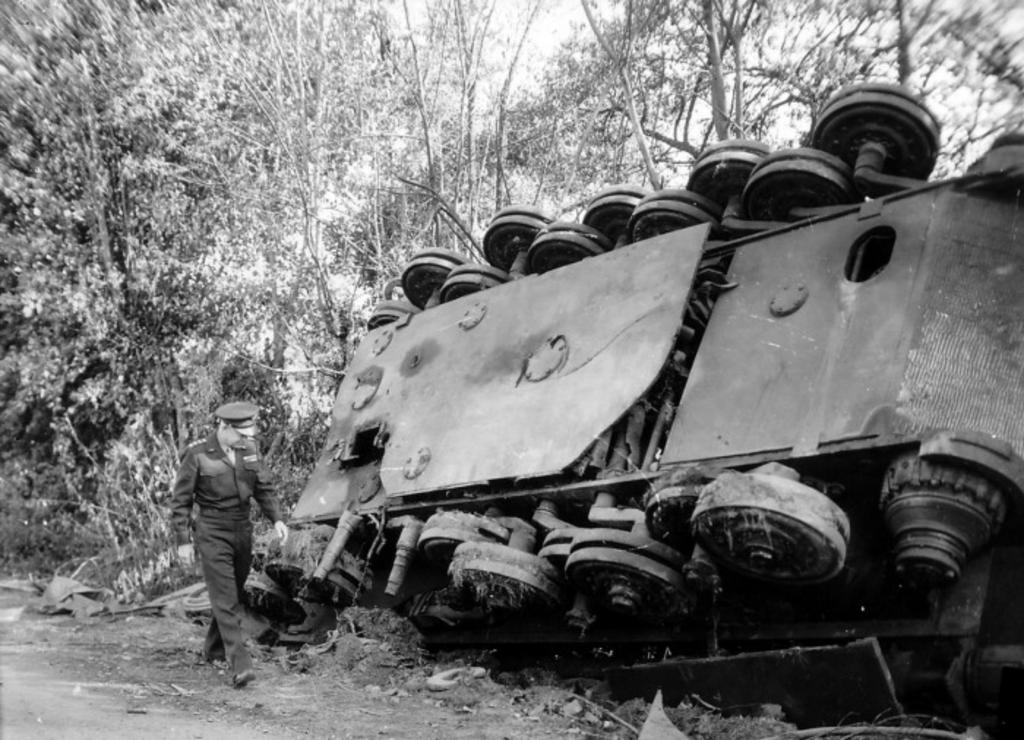
Vimoutiers - Rommel's crash site
Vimoutiers - Tiger Tank
The Mace (Maczuga) - Hill 262 North - Polish 1st Armoured Division positions - Polish Memorial
Boisjos Farmhouse - HQ and aid station for Polish 1st Armoured Division
Montormel - Memorials and view over the pocket/gap
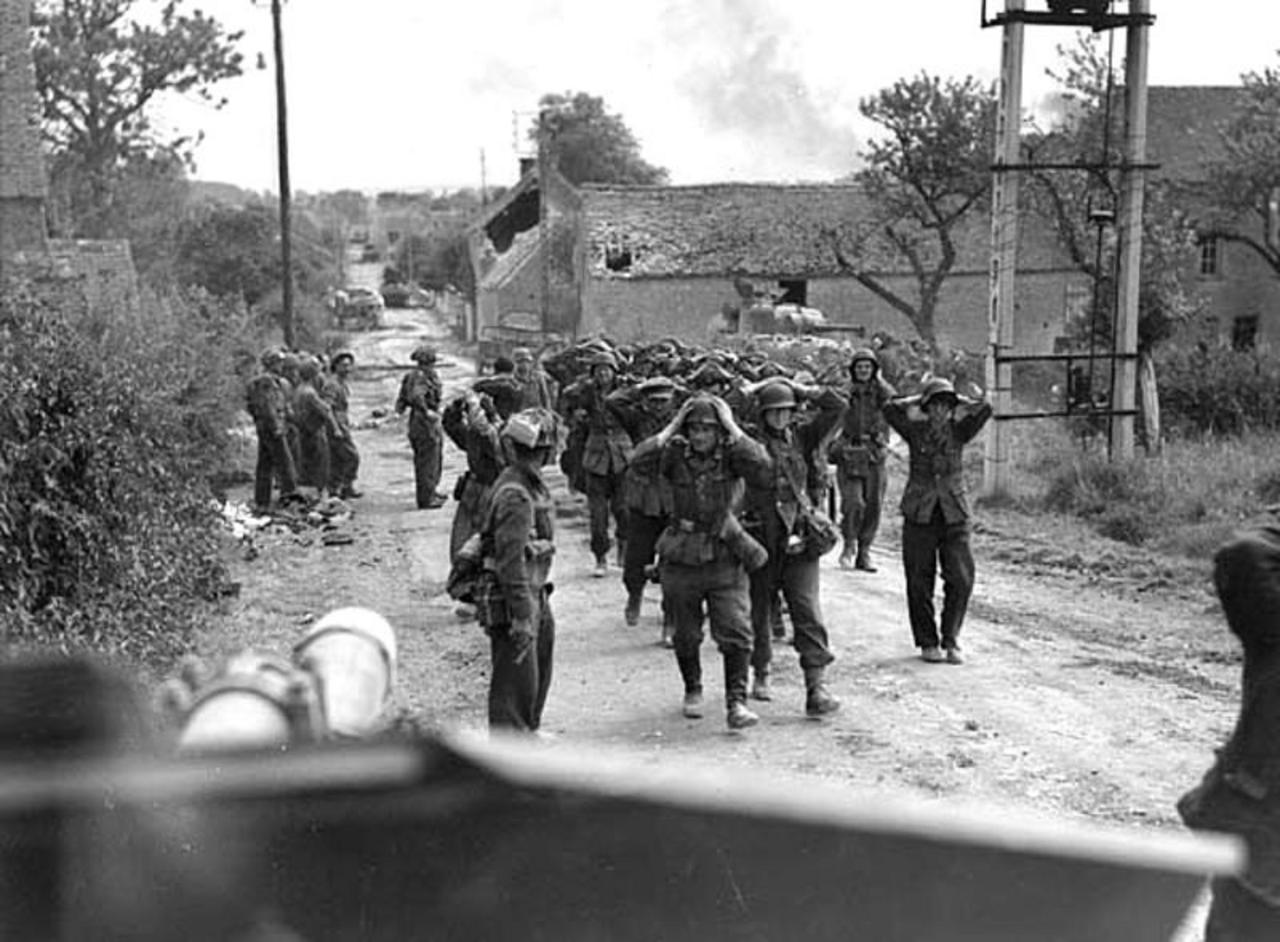
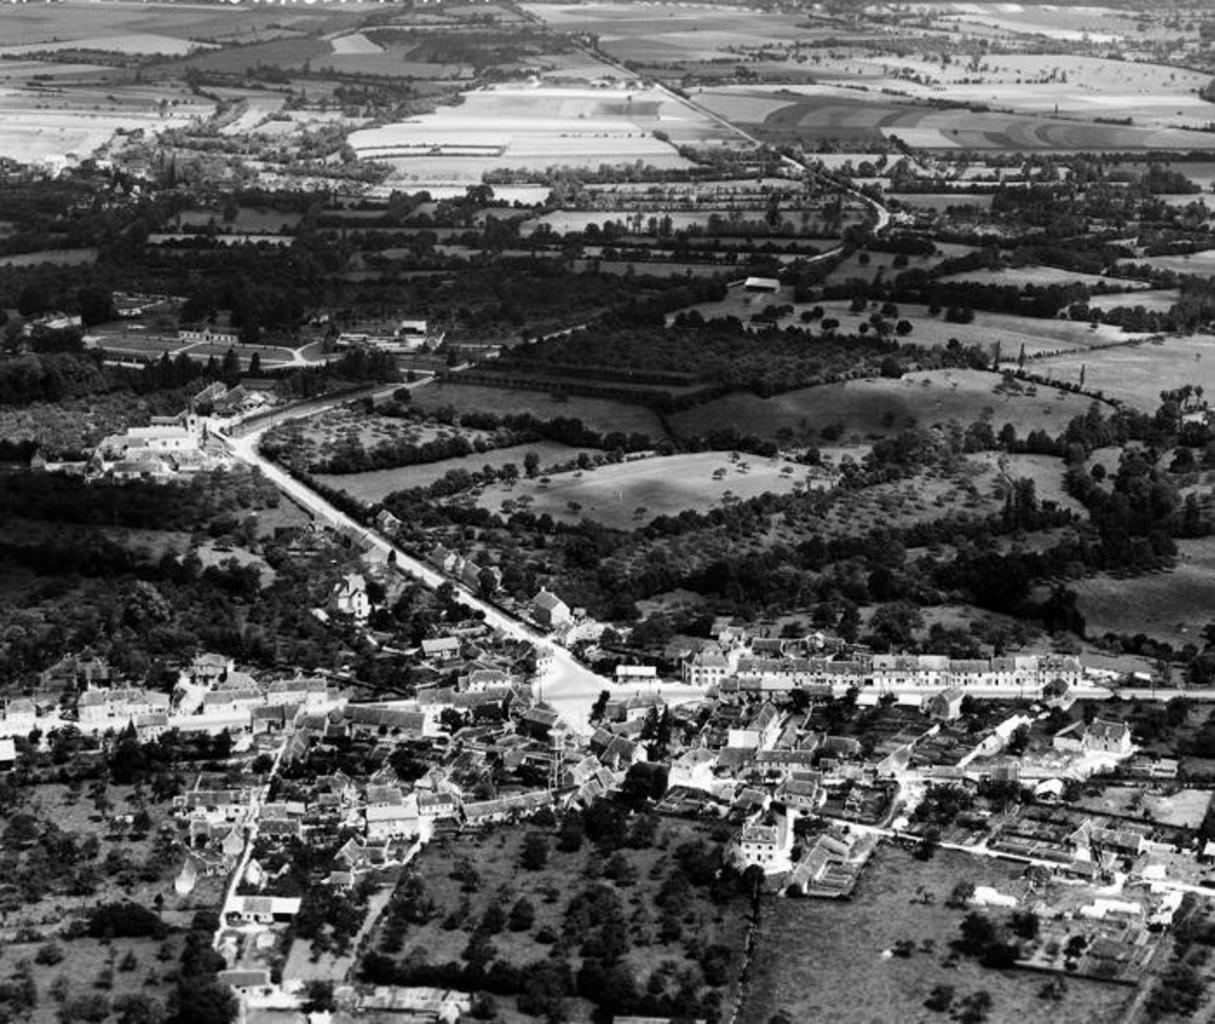
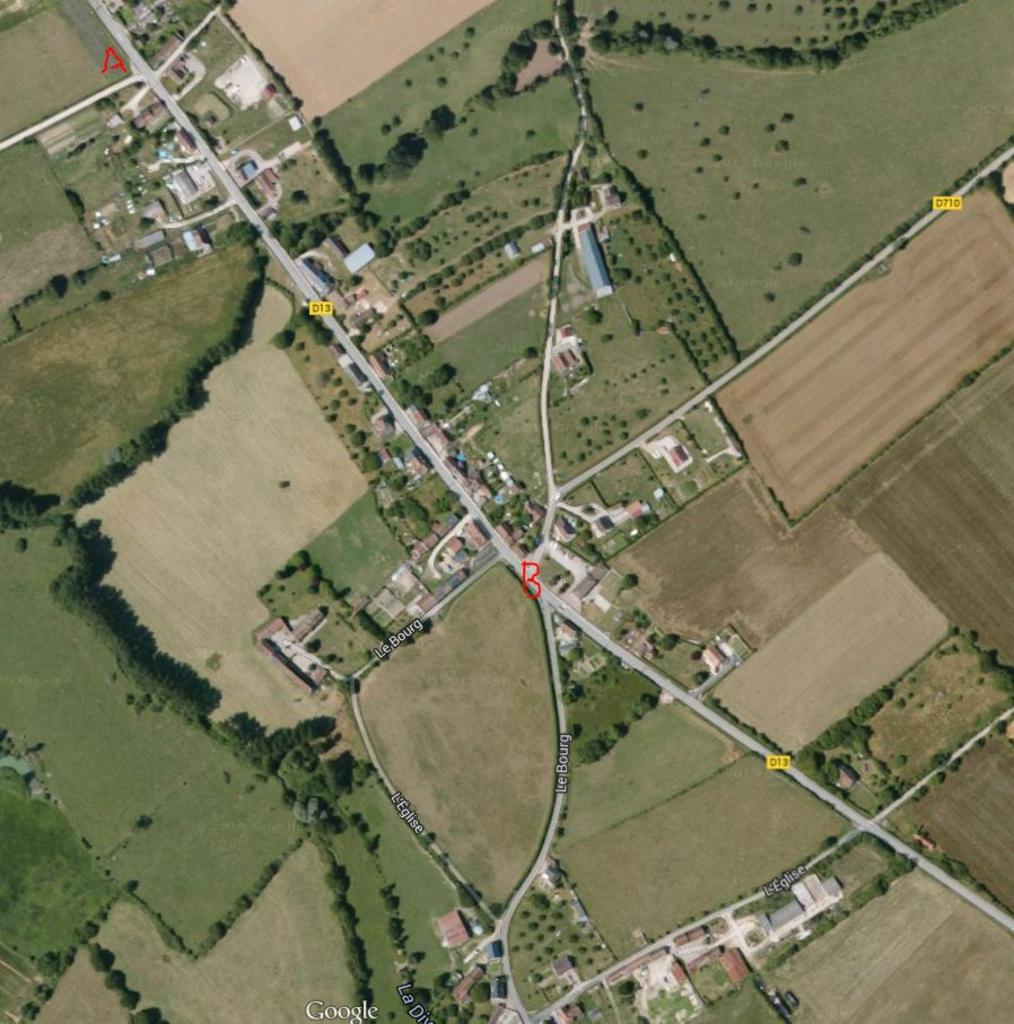
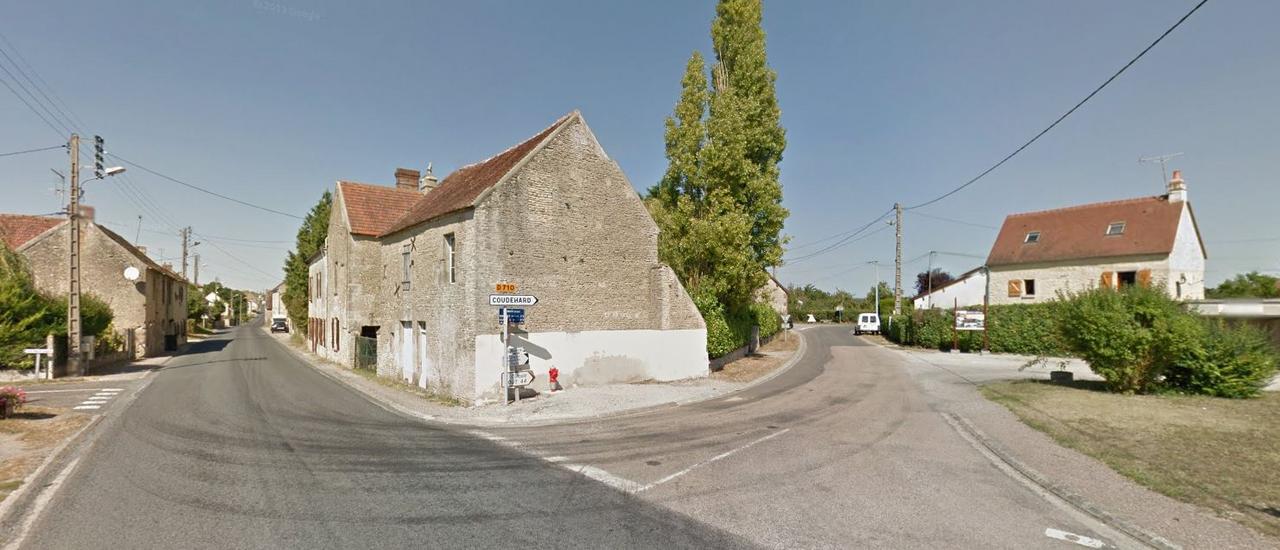
Chambois/Fel - German surrender - POW's brought to this position (through archway)
Hill 129 - US 359th Infantry Regiment positions
Hill 114 - von Richtofen German Memorial
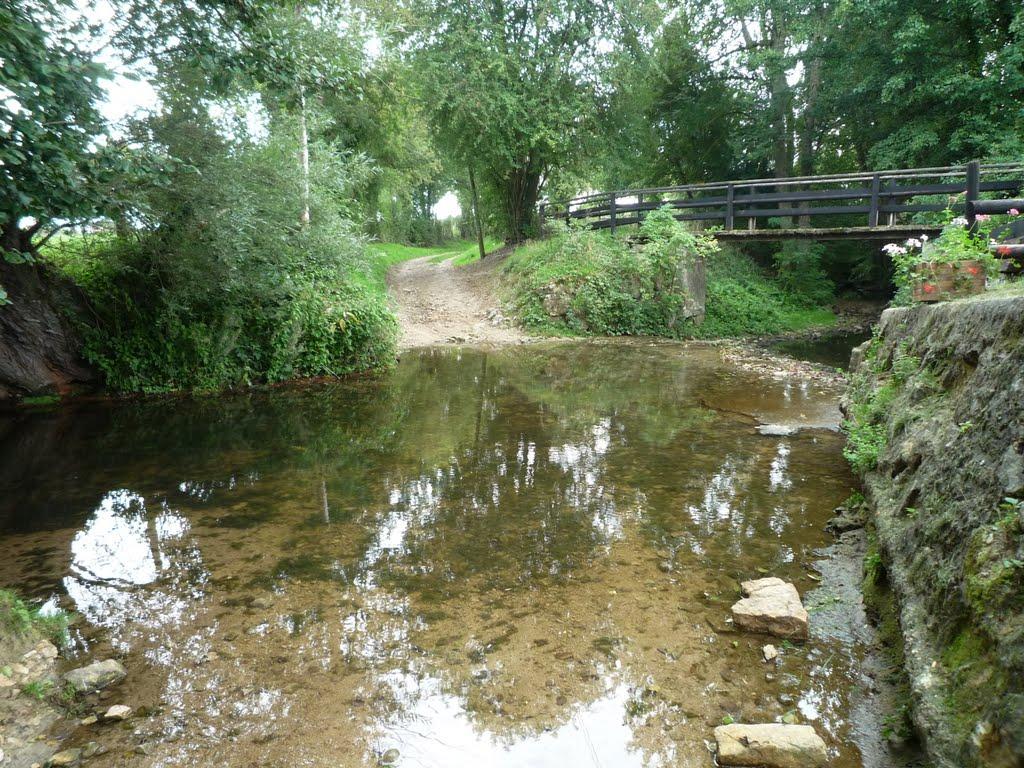
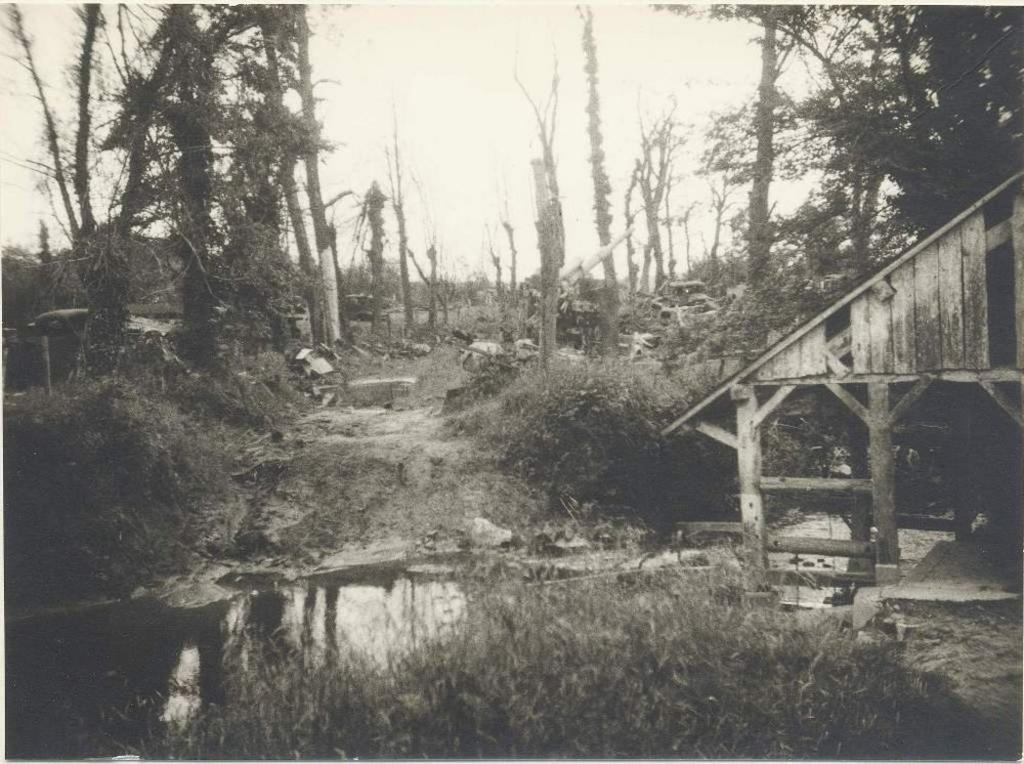
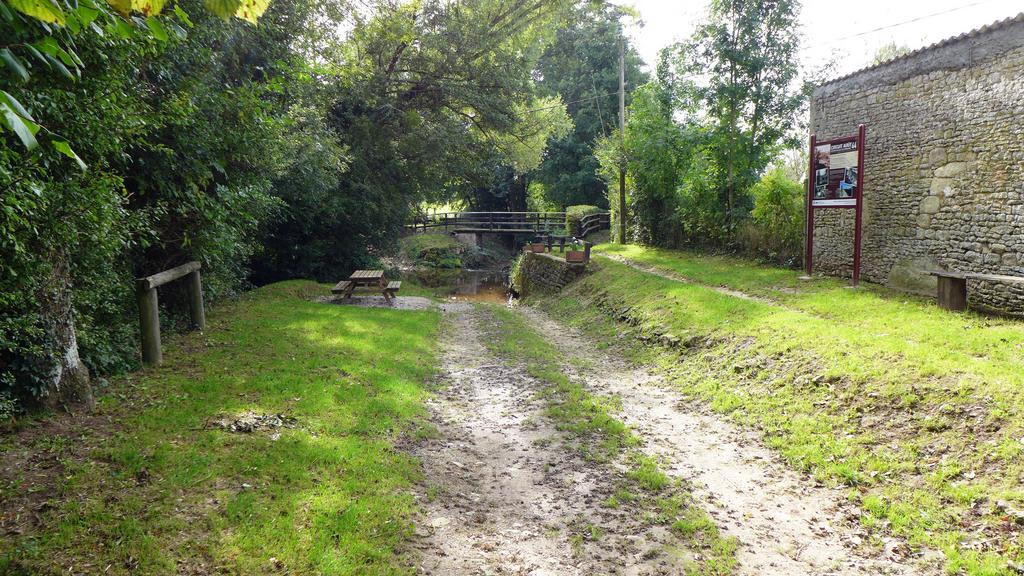
St Lambert-sur-Dive - Bridge over River Dives and position of knocked out Panthers
Le Chateau d'Aubry - Mauser K98 in the tree
Torpedo Junction - US 359th Infantry Regiment Artillery zero point
Tournai-sur-Dive - 105mm Gun in garden and strafing on buildings
Tournai-sur-Dive - Church & M3A1 Half Track
Tournai-sur-Dive - Memorial for L'Abbe Launay and Negotiation of Surrender at Morellec Farm


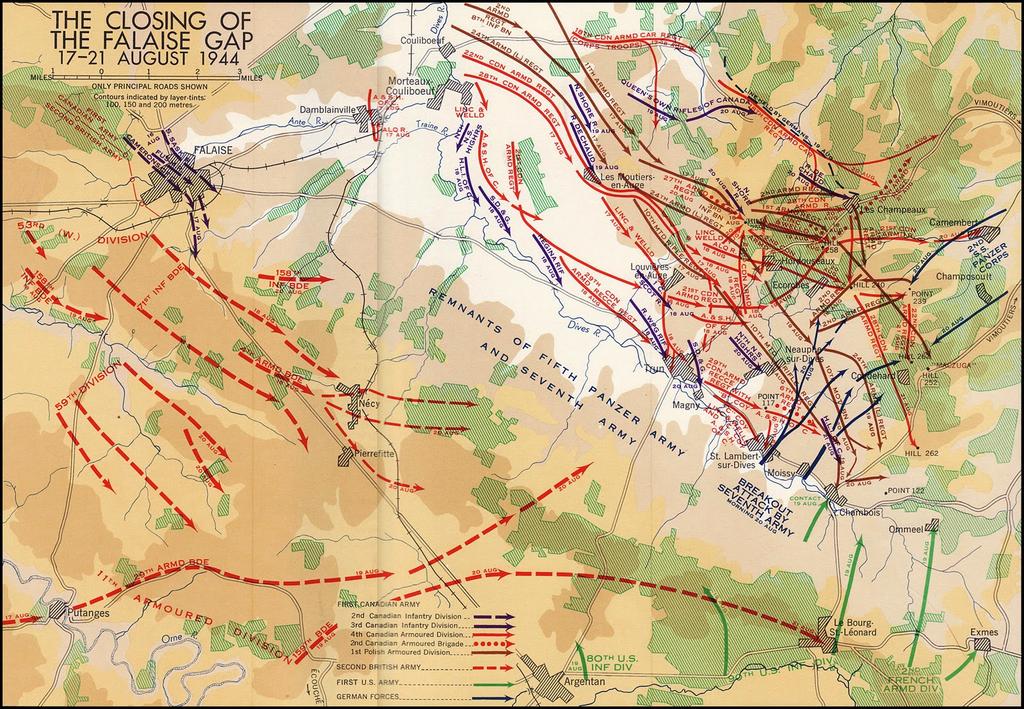
On Day 6, our last day, we follow the paths of Operation Totalize and Tractable and to the closing of the Falaise Pocket and what is described as the end of the Battle for Normandy.

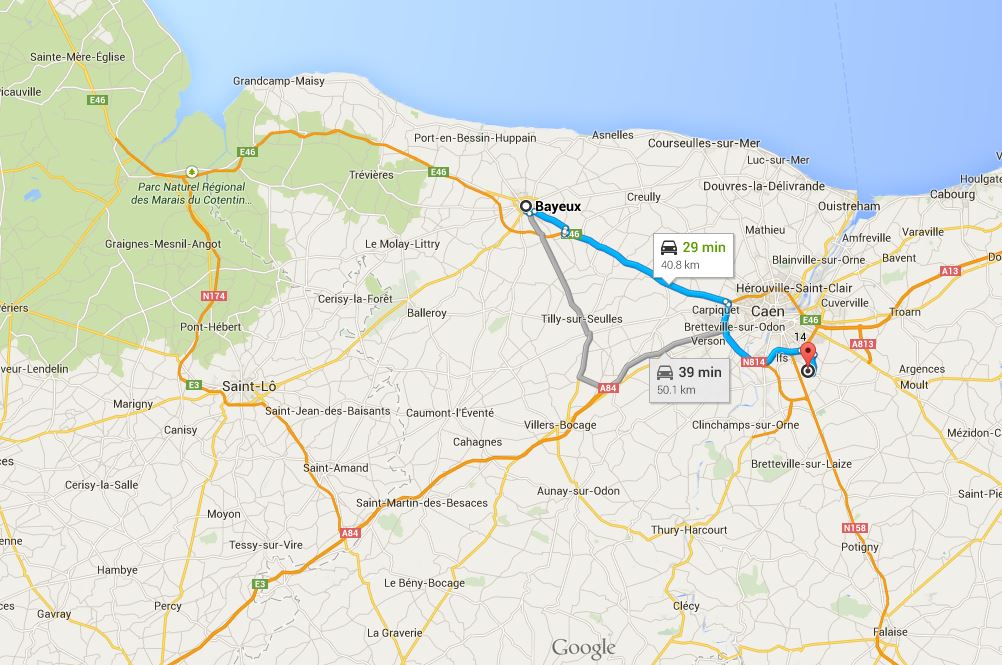
We started Day 6 with a drive from our base of operations in Bayeux (aka our hotel) to an area south of Caen on the N158 just west of the town of Hubert-Folie.
BxqBr80.jpg


This was close to the jump off point for Operation Totalize.

No longer do we follow small unit actions such as Dick Winters at Brecourt Manor or where Stran Hollis earned his V.C. at Cristot.
Today will be battles of Divisions, Corps and Armies.
NpS2hev.jpg


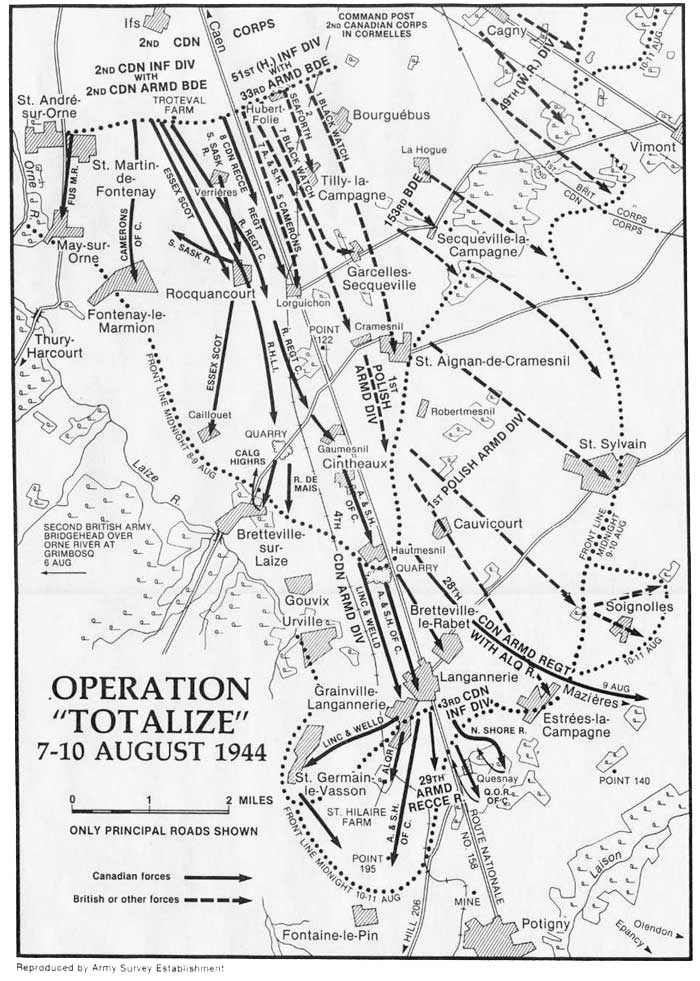
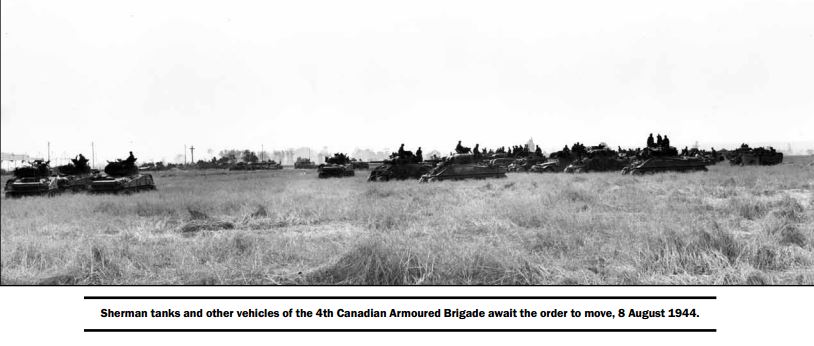
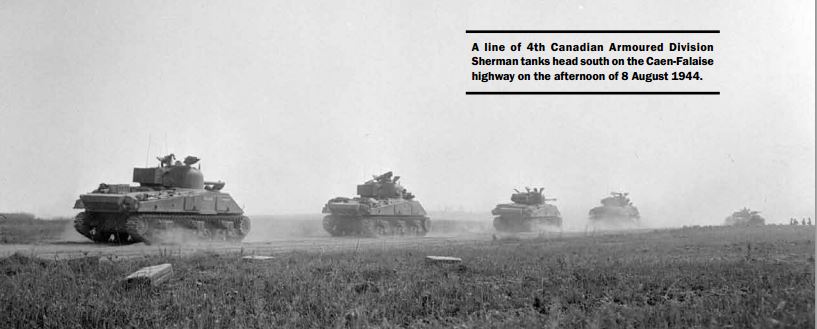
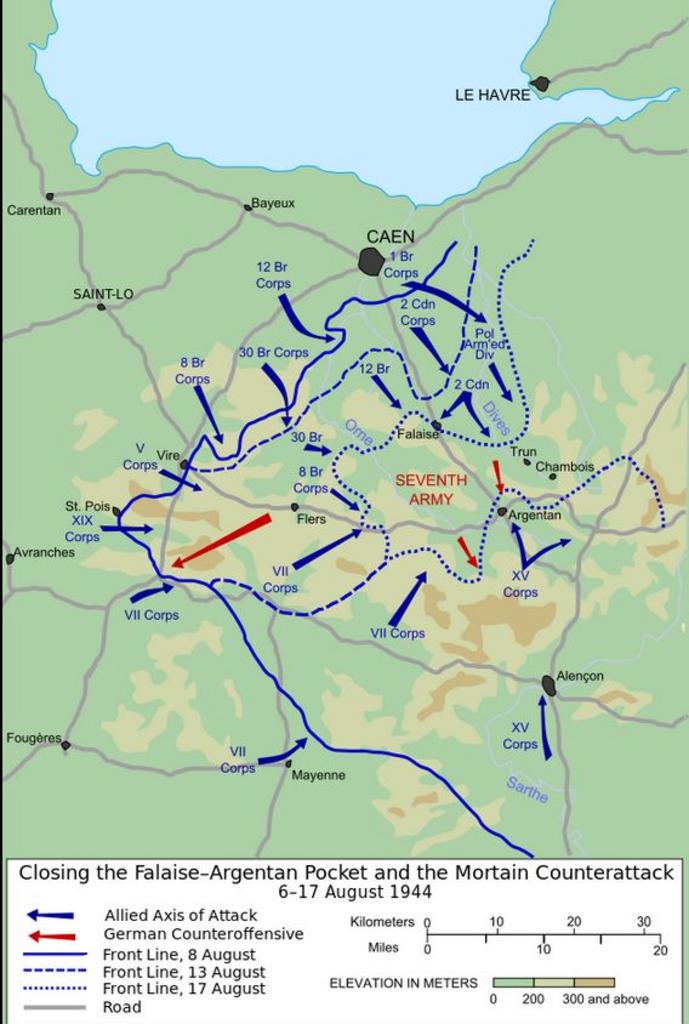
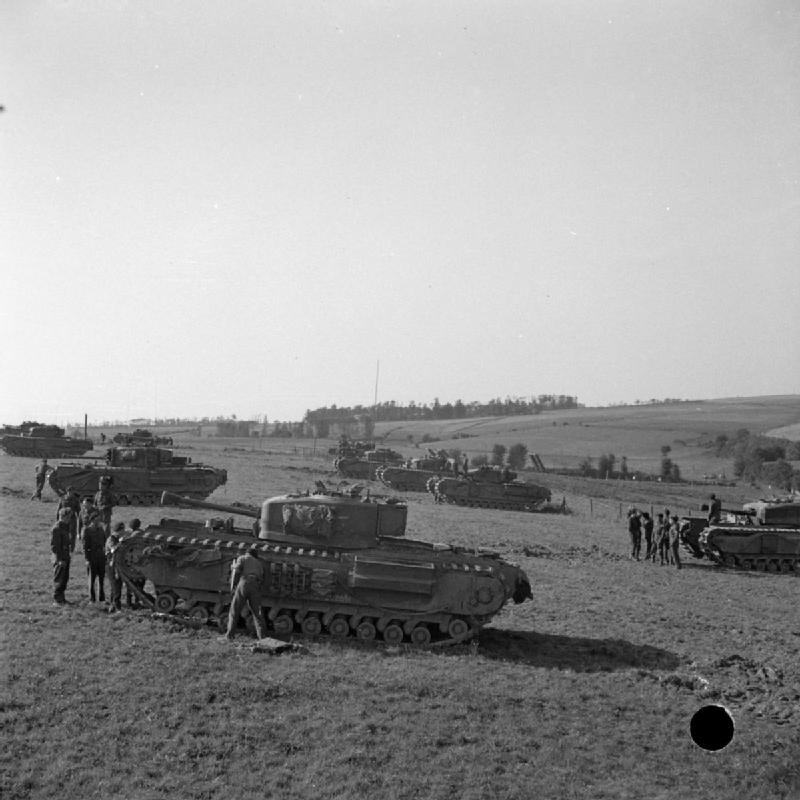
Operation Totalize (also spelled "Operation Totalise" in some more recent British sources) was an offensive launched by Allied troops of the First Canadian Army during the later stages of the Operation Overlord, from 8 to 13 August 1944.

The intention was to break through the German defenses south of Caen on the eastern flank of the Allied positions in Normandy and exploit success by driving south to capture the high ground north of the city of Falaise. The overall goal was to precipitate the collapse of the entire German front, and cut off the retreat of German forces fighting American and British armies further west. The battle is considered the inaugural operation of the First Canadian Army, which had been formally activated on 23 July.


In the early hours of 8 August 1944, II Canadian Corps launched the attack using mechanized infantry. They broke through the German front lines and captured vital positions deep in the German defenses. It was intended that two fresh armoured divisions would continue the attack, but some hesitancy by these two comparatively inexperienced divisions and German armoured counter-attacks slowed the offensive. Having advanced 9 miles (14 km), the Allies were halted 7 miles (11 km) north of Falaise, and forced to prepare a fresh attack.
XKc5Uvg.jpg


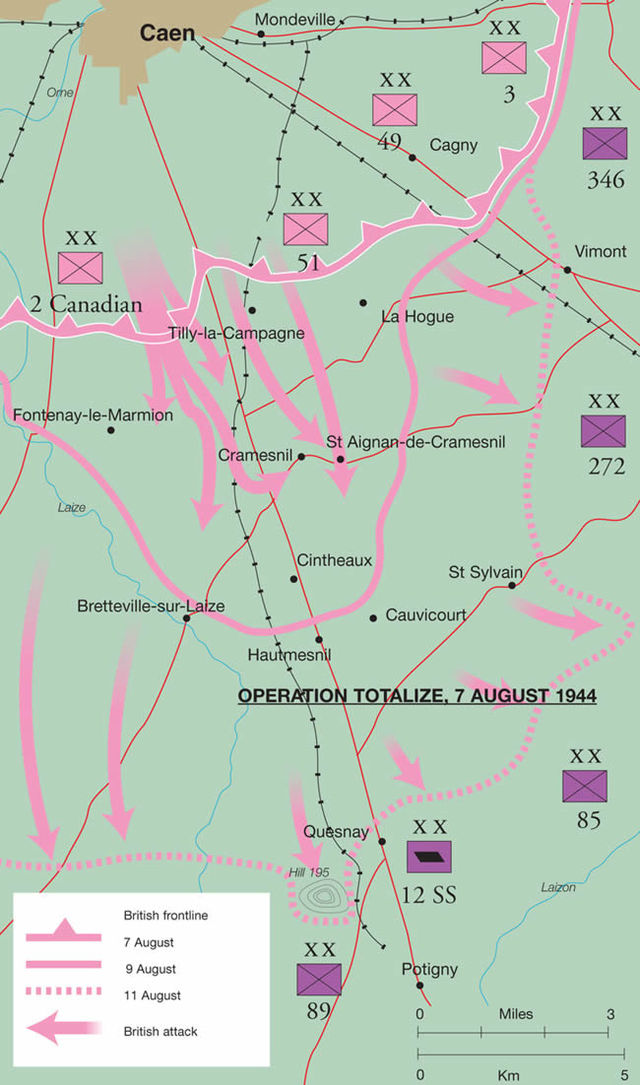
During the evening of 7 August 1944, the attacking forces formed up in six columns, each only four vehicles wide, of tanks, Kangaroo APCs, half tracks, self-propelled anti-tank guns and Mine flail tanks. At 23:00, the heavy bombers of RAF Bomber Command commenced their bombardment of German positions along the entire Caen front. At 23:30, the armoured columns began their advance behind a rolling barrage.

Initially, movement was slow; many APC drivers became disoriented by the amount of dust caused by the vehicles. Several vehicles became stuck in bomb craters. Simonds had ordered several means for the columns to maintain their direction: some vehicles were fitted with radio direction finders, the artillery fired target-marking shells, Bofors 40 mm guns fired bursts of tracer in the direction of advance. In spite of all these measures there was still confusion. Several vehicles collided, or were knocked out.

However, the attack succeeded in punching significant holes in the German defenses. By dawn, the attacking columns from the British 51st Division had reached their intended positions. The infantry dismounted from their Kangaroo APCs within 200 yards (180 m) of their objectives, the villages of Cramensnil and Saint-Aignan de Cramesnil, and rapidly overran the defenders.The columns from the Canadian 2nd Division were delayed by fog and unexpected opposition on their right flank, but by noon on 8 August, the Allied forces had captured the entire Verrières Ridge. The novel methods used by Simonds ensured that the attackers suffered only a fraction of the loss which would have been incurred in a normal "dismounted" attack.
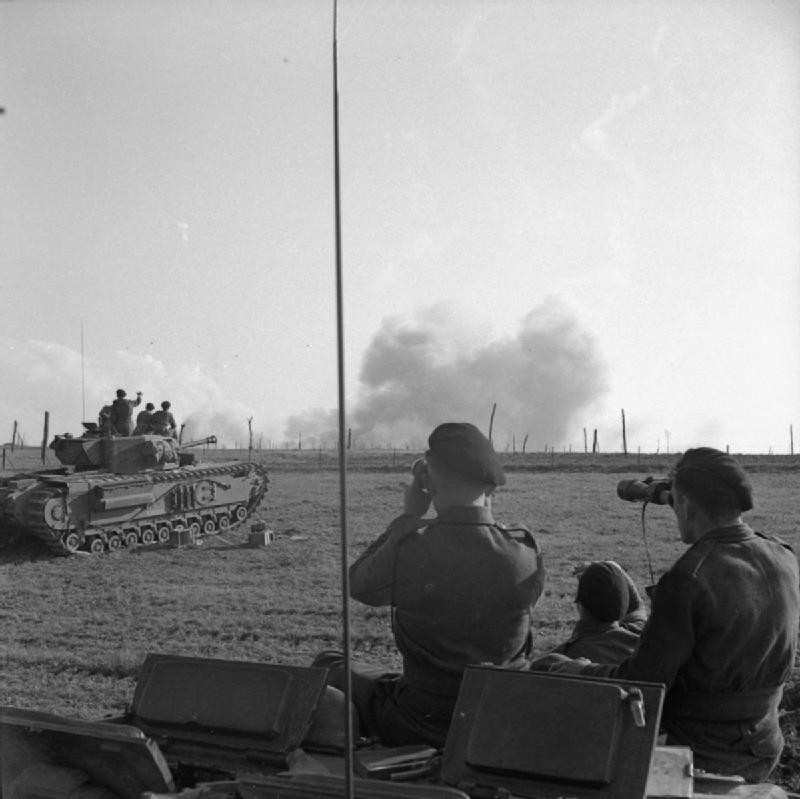
tRLjIQK.jpg


The Allies were poised to move against the heavily defended town of Cintheaux, 2 miles (3.2 km) south of their furthest penetration, but Simonds ordered a halt to the advance to allow field artillery and the armoured divisions (4th Canadian and 1st Polish) to move into position for the second phase of the operation.

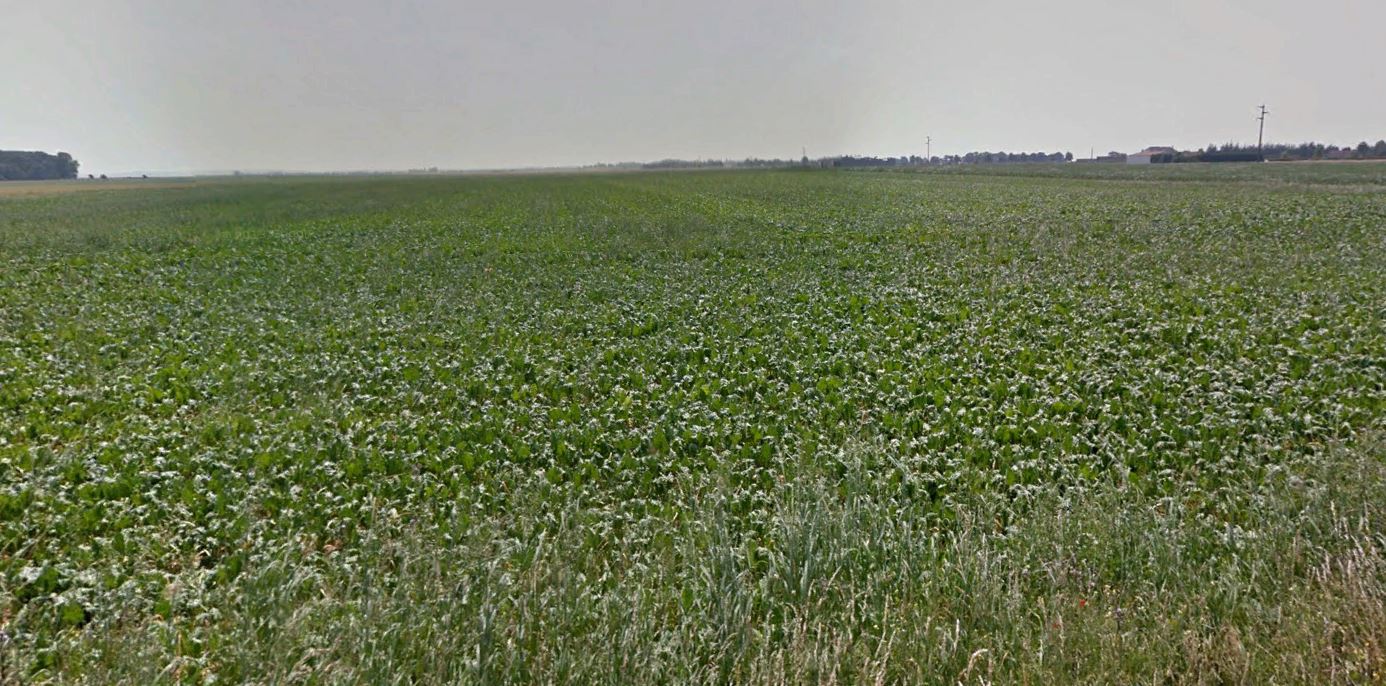
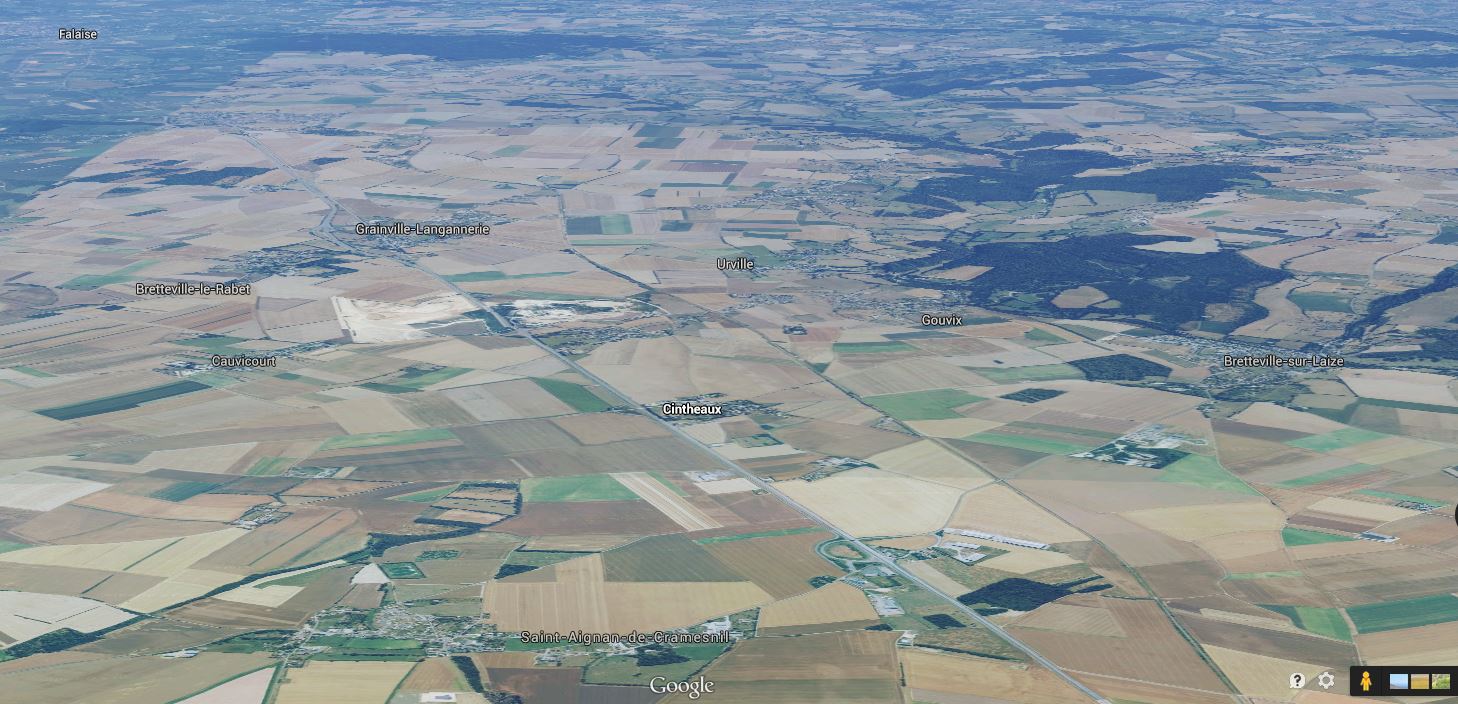
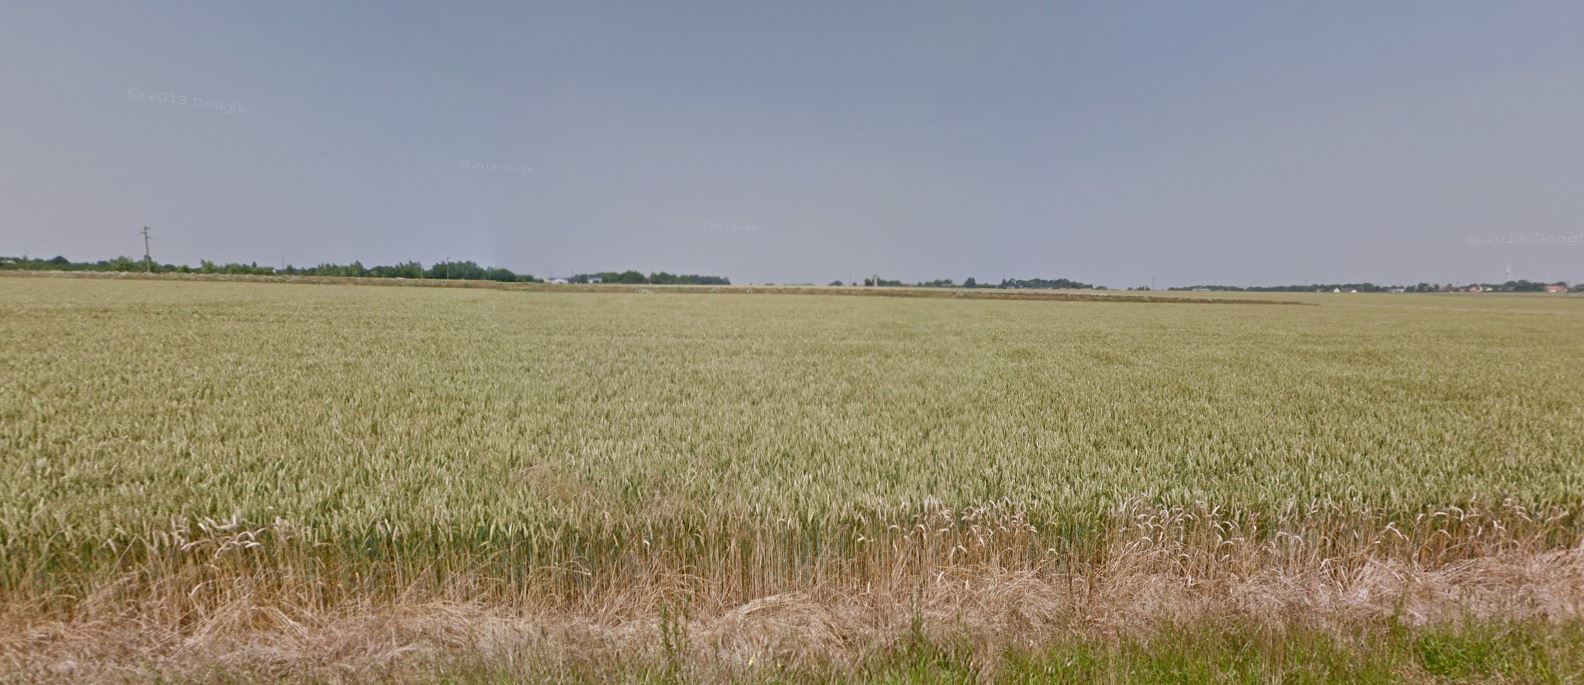
- Let me point out that the terrain here was very flat and open, very unlike what we have been touring through the last 5 days.
This is a Google earth dhot that is looking to the southeast.
Caen is in the lower right, Falaise at the top.
Cintheaux is the marker located about midway. (It was near here that Michael Wittmann and his crew met their deaths)
PuVhS8g.jpg


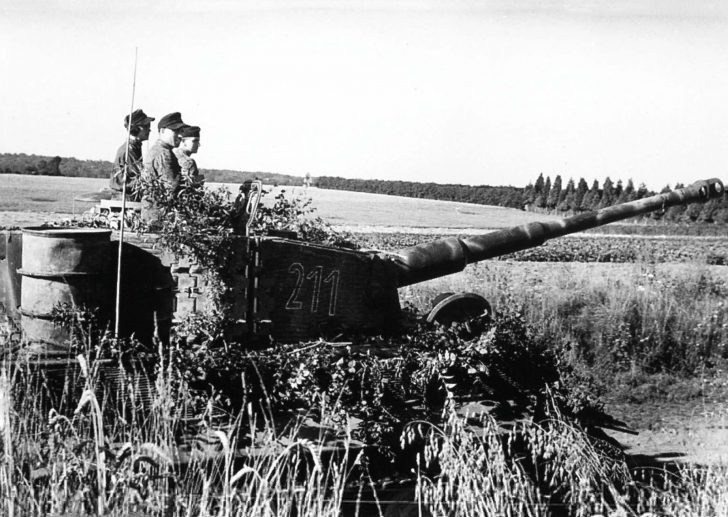
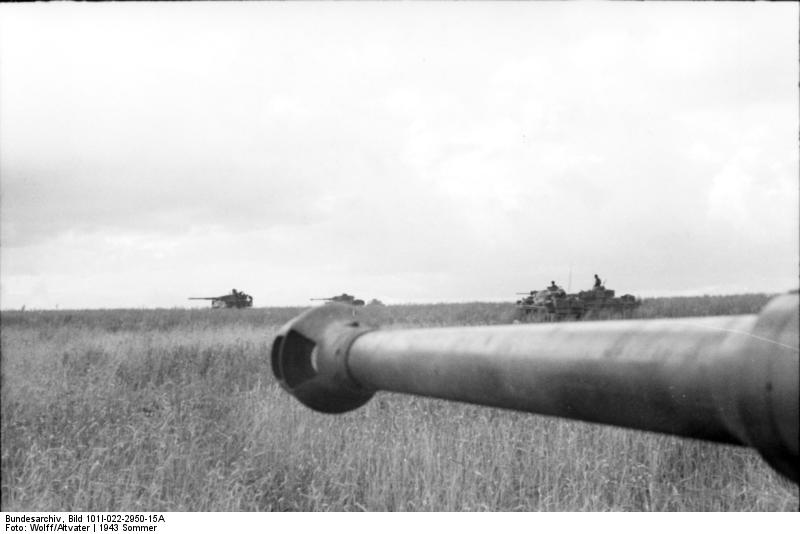
SS General Kurt Meyer, commander of the 12th SS Panzer Division, had already ordered infantry from various formations shattered by the bombardment by Bomber Command and by the armoured attack to occupy Cintheaux. He also moved forward two battlegroups from his own division, consisting of assault guns, infantry and Tiger tanks, positioning them across the Canadian front. Shortly after midday, he ordered these two battlegroups to counter-attack the leading Allied troops.
iNlQl8A.jpg


At this point, the Allied offensive plan called for additional bombardment by the USAAF Eighth Air Force before the 4th Canadian Armoured Division and the Polish 1st Armoured Division pushed south towards Falaise on either side of the Caen-Falaise Road. While the counter-attack by the 12th SS Panzer Division was unsuccessful, it did place Meyer's tanks north of the target area that the Eighth Air Force bombarded in preparation for the second phase of the Allied attack. These tanks, spared the effects of the bombing, slowed the advance of the Polish 1st Armoured Division, preventing a breakthrough east of the road. West of the road, the German infantry at Cintheaux likewise held up Canadian Armoured formations. Neither division (both in combat for the first time) pressed their attacks as hard as Simonds demanded, and "laagered" (went into a defensive formation while vehicles and troops were resupplied and rested) when darkness fell.

To restore the momentum of the attack, Simonds ordered a column from the 4th Canadian Armoured Division to seize Hill 195, just to the west of the main road halfway between Cintheaux and Falaise. The column comprised three companies of the Algonquin Regiment (B, C, and HQ) supporting 52 tanks from the British Columbia Regiment. Worthington Force, as the column was known, bumped into the rear of another mixed force ('Halfpenny Force') fighting the SS in Bretteville-le-Rabet, went round them and got lost. When dawn broke on 9 August, Worthington Force was some four and a half miles to the east of Hill 195 at Hill 140, half-way between Estrees-la-Campagne and Mazieres. They held their ground against repeated German armoured counter-attacks during 9 August, but suffered heavy casualties, including most of their tanks. By 17.00 hours what remained of Worthington Force had either been captured or forced to withdraw.
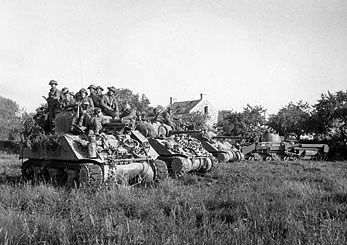


Because the column was so far from its intended objective, other units sent to relieve it could not find it. Eventually, another force captured Hill 195 in a model night attack on 10 August, but the Germans had been given time to withdraw and reform a defensive line on the Laison River. By 11 August, the Anglo-Canadian offensive had been halted.

Although significant strategic successes had been made during the first phases of the assault, heavy casualties were taken by the two Allied armoured divisions in their attempt to push towards Falaise. Formations of four Divisions of the First Canadian Army held positions on Hill 195, directly north of Falaise. At the same time, Allied forces managed to inflict upwards of 1,500 casualties on already depleted German forces.

Major General Rod Keller was removed from his command of the 3rd Canadian Infantry Division after having been badly wounded when his headquarters were hit by misdirected bombs during an American air attack on German positions. Keller's poor performance in Totalize lost him the confidence of General Crerar and he received no further command positions for the remainder of the war. Simonds and Crerar mounted a follow-up offensive, Operation Tractable, which took place between 14 August and 21 August.

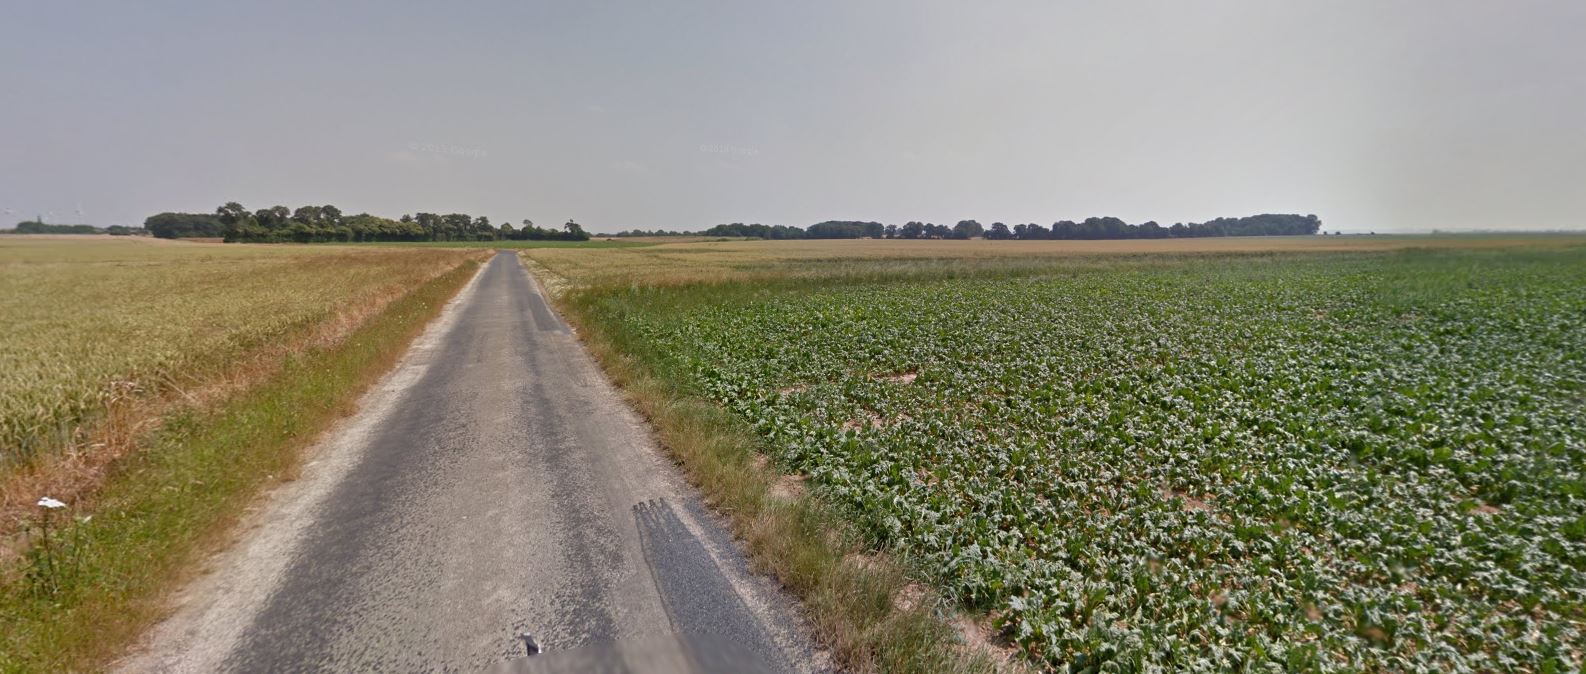
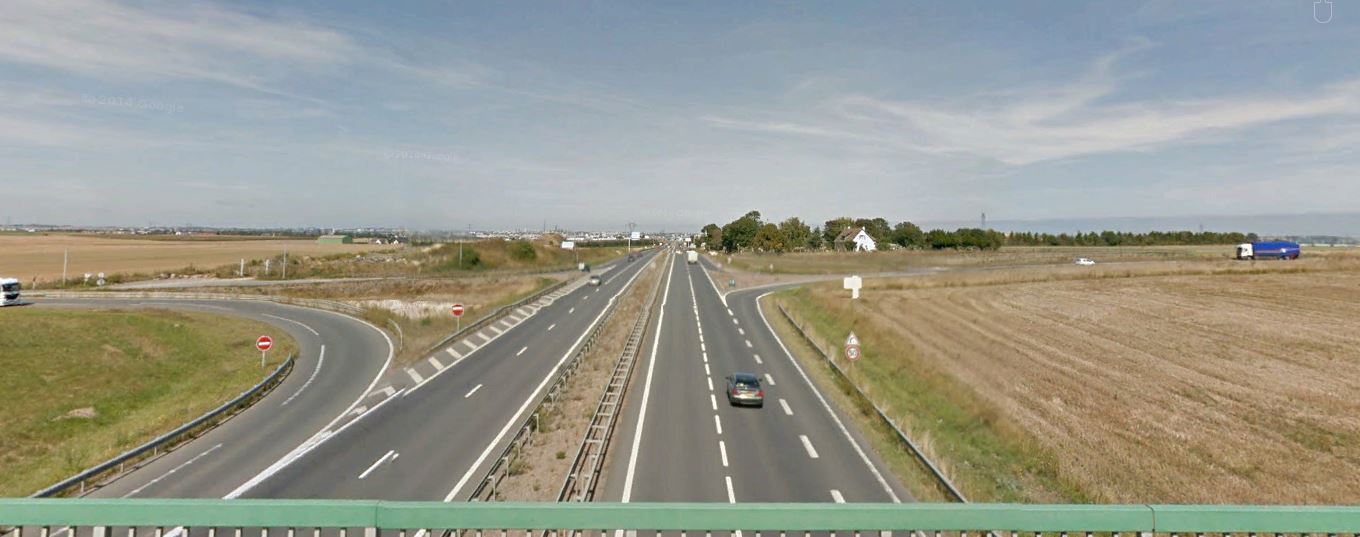
-This is a veiw looking southeast towards Falaise from an overpass near Hubert-Folie, the jumping off point for "Operation Totalize".
Not a hedgerow in sight.

xYTopil.jpg


This is looking back north at Caen which is not so far off in the distance.
UgCjKsQ.jpg


I've said it before and here is another good place to say it, I was surprised so many time by how close together or small a lot of these battlefields are.
Operation Totalize took 6 bloody days. There were many thousands killed on both sides.
And yet it took us only 15 minutes to drive the entire length of he battlefield.

Almost to the end though, we stopped just before the town of Cintheaux, and saw where Michael Wittmann's tank was knocked out.

ovmZ7hc.jpg
 
Last edited:
Wittmann

Well here I am doing research on Michael Wittman's death and where do I find the best discussion and pictures of what happened? Well right here at the FGM. There is a thread started by Poor Old Spike back in 2010 that discusses he aspects of the last moments of Wittmann. It also has several good pictures from today (or at least from the 21st century ;) ) and yesterday.
Included is a fine discussion of who or what actually killed Wittmann.
The thread:
http://www.thefewgoodmen.com/thefgmforum/threads/who-got-wittman.3565/

I am going to re-post some of the pictures here to fill in this post more for touring purposes.

mCivuHq.jpg


We traveled south down the N158, past Point 122 towards Cintheaux.
You could spend a whole day and write a book about the night attack at Point 122 but we have to move on.

(......B Squadron moved up in support of the infantry to a position on high ground immediately west of the village of Cramesnil. A and C Squadrons were in kept in reserve with the Regimental HQ just south of the recently captured Lorguichon Wood. On the left the rest of the brigade had been successful in reaching their mornings objective. After an eventful journey the 1st Northamptonshire Yoemanry with the 1st Black Watch had captured St. Aigman de Cramesnil, and 148th R.A.C h Black Watch hwith the 7 d reached Garcelles Secqueville without opposition.

The Canadians on the west side of the road, reached their objective by dawn. The high ground designated point 122. They too had lost direction in the night and run into opposition. They repulsed an enemy tank counter attack but had taken some casualties. The British units could see a Canadian tank blazing among some scrub on the skyline near point 122. The capture of this high ground enabled the Allies to quickly widen the corridor that had been forced through the enemy held territory the night before. Pockets of resistance had to be dealt with. The village of Tilly-la Campagne had been by passed in the night as it was considered too strongly defended. It now had to be cleared. There were a lot of British casualties before the Germans finally surrendered the village.

From the tank regiment’s point of view the night attack had been very successful in its outcome. Instead of being faced with the prospect, as in the past, of having to advance across open ground while the enemy waited concealed and stationary on dominating ground, able to take well aimed shots, now the tables were turned. That is what happened on the morning of the 8th. The German armour counter attacked twice but were forced to with draw because they came under fire from concealed stationary allied guns and tanks on the high ground. It was in this way that the 144th Tank regiment helped open the first crack in the German defences guarding the approaches to Falaise. It was the first blow followed by others that eventually lead to the battle of the Falaise Gap where the German army retreated from advancing Allied forces. (- Moore Family Tree website) )
--------------------------------------------------------------------------------------------------------------------------------------------------------------------------------
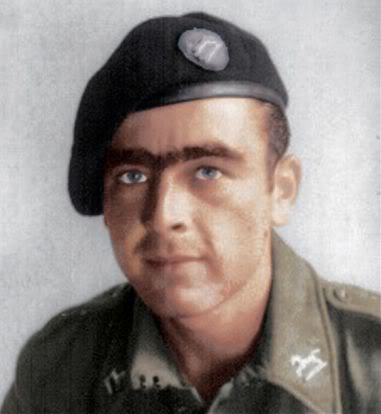
On 8 August 1944, Anglo-Canadian forces launched Operation Totalize. Under the cover of darkness, British and Canadian tanks and soldiers seized the tactically important high ground near the town of Saint-Aignan-de-Cramesnil. Here they paused, awaiting an aerial bombardment that signaled the next phase of the attack. Unaware of why the Allied forces had halted, Kurt Meyer, of the 12th SS Panzer Division, ordered elements of his command to counterattack and recapture the high ground. Wittmann decided to participate in this attack, as he believed the company commander – who was supposed to lead the attack – was too inexperienced.

Wittmann led a group of seven Tiger tanks, from the Heavy SS-Panzer Battalion 101, supported by additional tanks and infantry. His group of Tigers, crossing open terrain towards the high ground, was ambushed by tanks from A Squadron 1st Northamptonshire Yeomanry, A Squadron the Sherbrooke Fusilier Regiment, and B Squadron 144 Regiment Royal Armoured Corps.[50] During the ambush, anti-tank shells – fired from either the British or Canadian tanks – penetrated the upper hull of Wittmann's tank, igniting the ammunition resulting in a fire that engulfed the tank and blew off the turret.

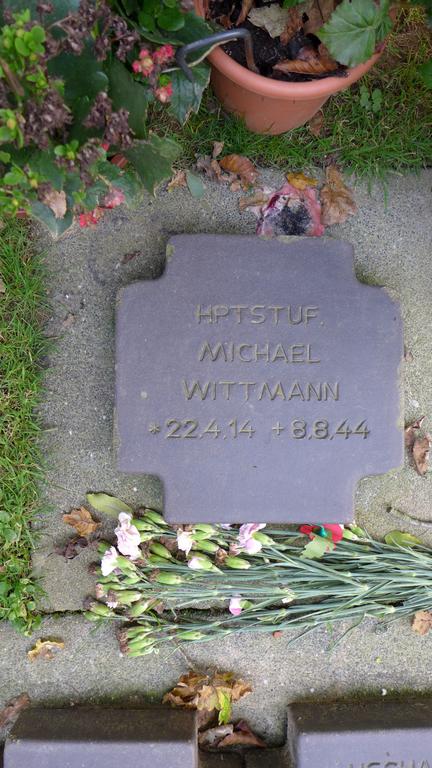
The crew of the destroyed tank were buried in an unmarked grave. In 1983, the German war graves commission, either with help of veterans or from the author of Panzers in Normandy – Then and Now, located the burial site. Wittmann and his crew were then reinterred together at the German war cemetery of La Cambe in France.

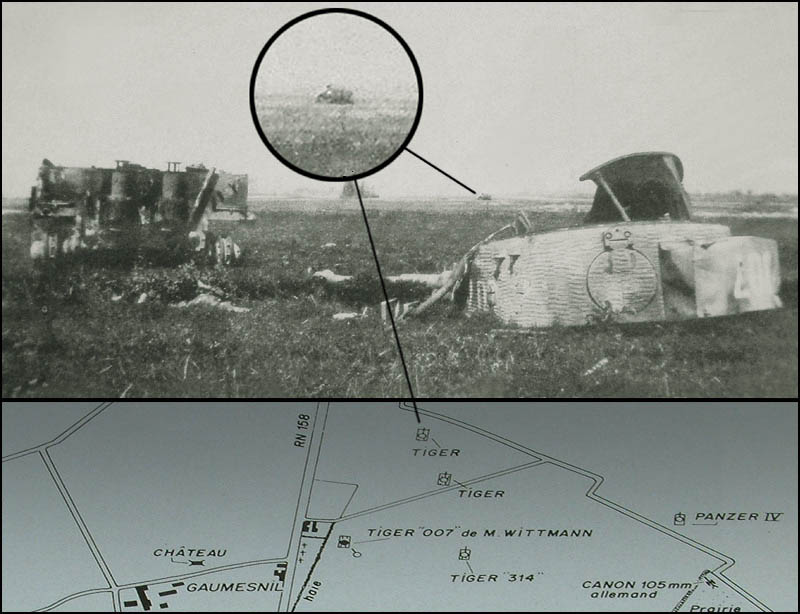
Just north of a little farm complex called Gaumesnil we turned off the road and headed east for a few hundred yards.


This is a pic from the Poor Old Spike thread.
I just added where we parked and got out of the car to discuss what happened here.


Looking south towards Gaumesnil (to the right) :

jJoa4NP.jpg


If you turn to the left, these are the woods the British Tanks came through:

HTQsAlt.jpg


And this is looking back north towards Point 122.
It's a soft slope and doesn't look like much but from up there you can see for miles.

lDYgKXF.jpg


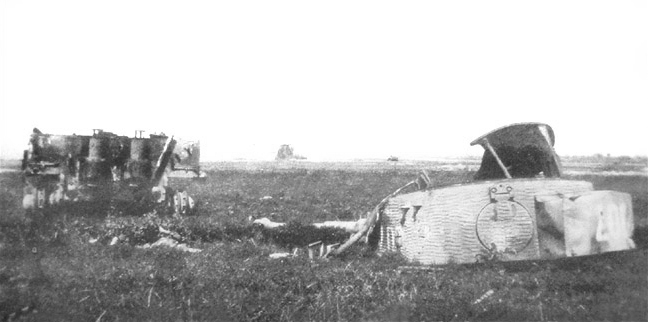
Wittmanns Tiger

Isg8G7u.jpg


KzKBu72.jpg


This is a great picture of the field of battle.
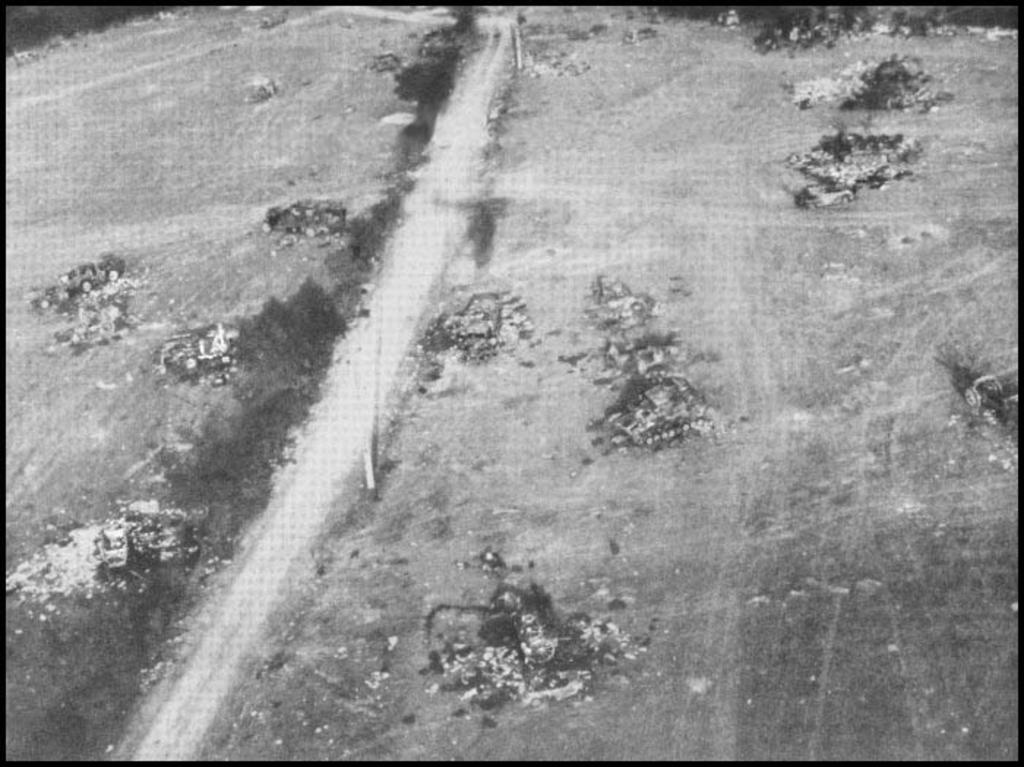
It not only shows the knocked out panzers but gives a good idea of the aerial and cannon bombardment that was brought down on the area.

iTuwgYU.png


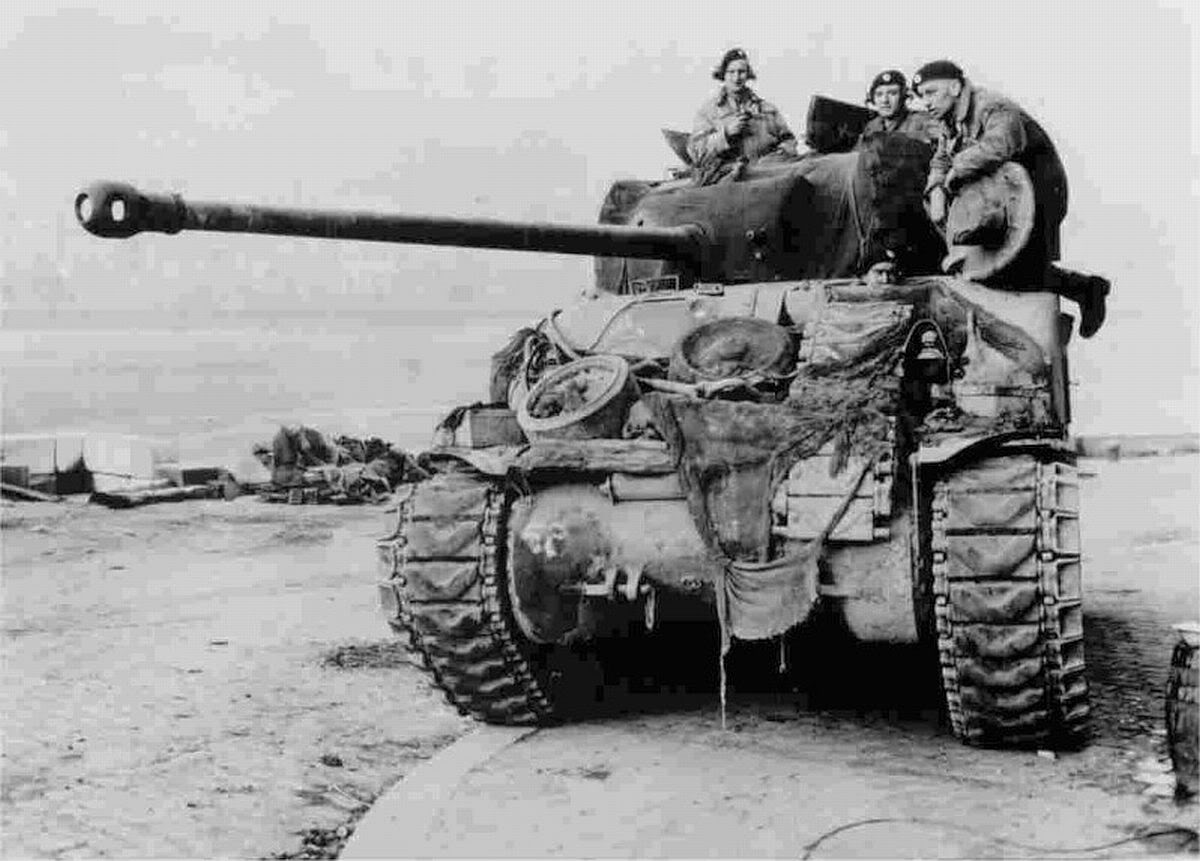
The circumstances behind Wittmann’s death have caused some debate and discussion over the years, but it had been accepted that Trooper Joe Ekins, the gunner in a Sherman Firefly of the 1st Northamptonshire Yeomanry, fired the round that destroyed his tank and killed Wittmann and his crew. However, in recent years, some historians have suggested that members of the Canadian Sherbrooke Fusiliers Regiment may have been responsible instead.


Firefly gunner Joe Ekins (below) got 3x Tigers out of 4 which was a fantastic piece of long range shooting regardless of whether or not Wittman was in one of them.

Ekins quote- "I was sort of thinking 'Get the bastards before they get me....Anybody who goes into another persons country to kill is a criminal. He [Wittman] might have been a hero to the Germans, but not to me"

18biD1D.jpg


Firefly-crew A Firefly Its 17-pdr gun made it the hardest-hitting Allied tank of WW2 until the late arrival of the M26 Pershing

tlaWbHf.jpg


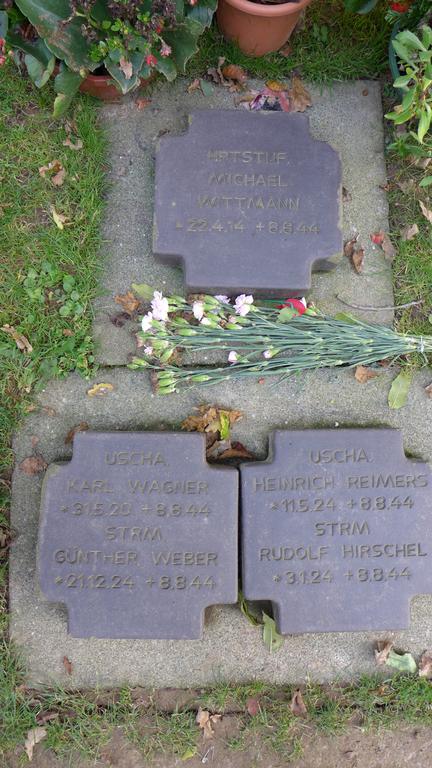
We had visited the German cemetery at La Cambe earlier.
This is where Michael Wittmann and his crew are buried.

skzVdpT.jpg


RF30bPx.jpg


It was truly amazing to be standing in this field.
I never thought I would be here.
I only wish we had had more time.
 
Last edited:
Wow Gunner, I'm going to read all your posts, well done thanks for sharing!
 
Brilliant again Gunner. Have you played the CMBN user made scenario about Wittmann's final fight? Good scenario and tough as the Germans. (Sorry forgot the author).
 
@Mauser GDog
Thanks GDog. I'm happy to contribute.
Finally ;)
Also, I am learning a lot more detail about where we were and what we were seeing.
Do take your time with the posts though. I'm afraid I got a little wordy with some.
Enjoy.

@Ithikial
Thanks Ithikial.
Almost finished the tour. Thanks for having patience waiting for me to finish each of these tour days.
It does take me hours for each post to find the information of what happened (hopefully condensed versions ;) ) and associated pictures.
You know it's funny you asked about playing the Wittmann scenario. I haven't yet but I will.
Also in doing the research I found several scenarios referencing several sites we visited.
When I finish these posts I intend to go back and play them.
Kind of excited about it really. :)
 
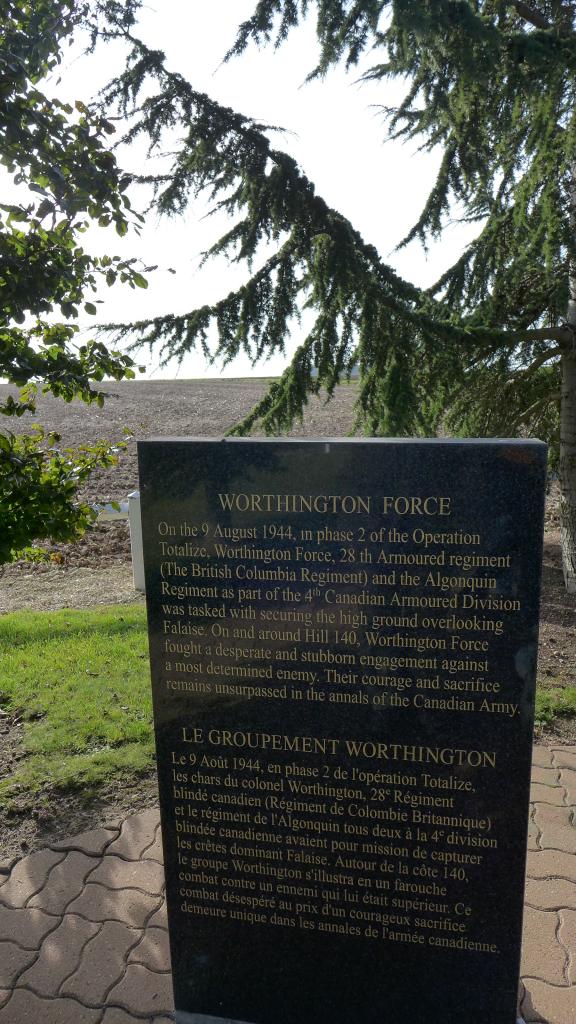
Hill 140 and the Worthington Force.

Of all the battle's in all the books I've read I had never heard of this one before.

This was part of Operation Totalize.

Again, the of Totalize:

mCivuHq.jpg


I believe it was in Phase Two the Worthington Force starts ut from near Cintheaux.

snqgKwW.jpg


Worthington Force consisted of the 28th Armoured Regiment (The British Columbia Regiment) and three companies of the Algonquin Regiment. Lieutenant-Colonel D.G. Worthington, regimental commander of the BCRs commanded.

2dRc7bt.jpg


"The tanks will do the fighting on the way down. Keep moving; try to reach the objective before daylight. Marry up. B Coy, Algonquin Regt., B Squadron; C and D Coy, C Sqn. C.O. Algonquin will travel in my tank with me. Move off in the following order - A Squadron, B Squadron, B Coy., C Squadron, C Coy., D Coy. A Squadron will clear the way. Infantry - net your (wireless) sets to the tank net....Zero Hour's in thirty minutes, and the start line (is) the highway."

a92ZDKR.jpg


The advance probably kicked off shortly after 0300 hrs, 09Aug44. A surviving infantry company commander reported:

" We crawled out of the harbour nose to tail, crossed the highway, and started south....At first there were frequent halts. We were in waist high wheat. The chatter over the R/T (wireless sets) was incessant. We tried to figure out what was going on ahead by what we heard over the R/T but between the excited voices and considerable static, it was difficult."


The leading tanks came under fire thirty minutes into the advance. Wheat fields caught fire, together with houses and haystacks. Fire and movement tactics were employed and haystacks concealing German defensive positions were seen exploding. The infantry, transported in half-track vehicles, followed the tank tracks as best they could under the dangerous and confusing circumstances. Often the tanks had completely disappeared from sight and the infantry was forced to try to keep pace as best they could. A tank crew member related:


"Hello all stations Able One, Sunray calling, push on. On to Hill 195. We must be half-way there now. We must be through the German defense ring. We must be getting close. We see their soft-skinned vehicles. 75 traverse left...steady...on. Enemy half-track...fire. There's a flash, burning wreckage strewn with bodies and one of our gunners claims a hit. Co-ax traverse right...steady..."

bOZSYSG.jpg


Just before dawn, the column neared the village of Bretteville-le-Rabet which Halpenny Force had yet to secure. 'C' Squadron, together with the regimental HQ tanks, was now leading the advance. Worthington Force came under fire and the column faded east to avoid it. The battle group, fighting its first battle, simply lost its way in the dark, moving across country that was virtually devoid of landmarks. Dealing with sporadic resistance further compounded difficulties. The column, with the exception of No. 2 Troop 'A' Squadron, continued moving eastward, rather than swinging to the right to cross the main highway. No. 2 Troop kept to the planned line of march and eventually reached Point 151, south of Grainville-Langannerie, which was suprisingly close to the final objective. Hopelessly isolated, however, it was forced to withdraw.

The main column, having lost all sense of direction, continued on. Worthington most probably mistook a secondary road for the main highway and shortly after crossing the road, high ground was sighted and the column headed for it. The infantry:

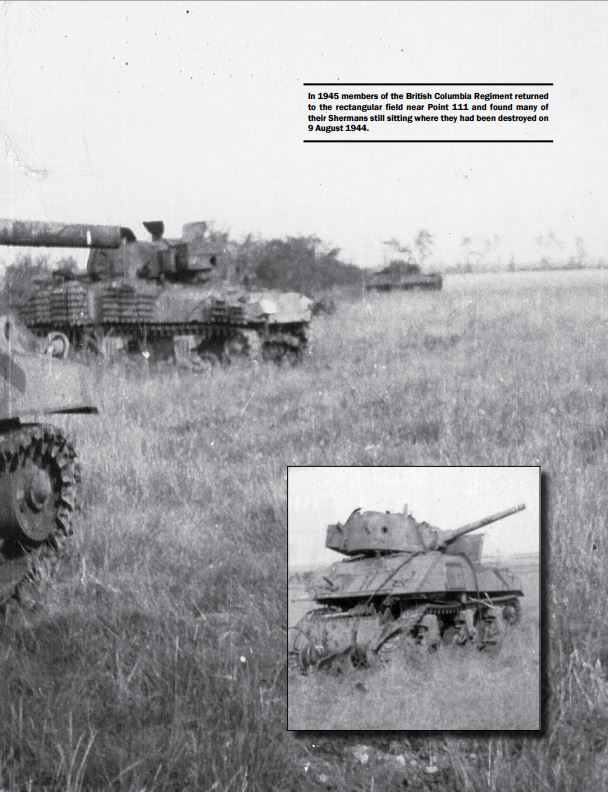
"...followed the tank tracks into a valley, up the far slope, past several orderly rows of trees, and finally up another slope into a rectangular field surrounded by a shoulder-high hedge."

At 0643 hrs, a message received by 4th Armoured Brigade reported:

"Objective less 1800 metres...forming up now to reach objective."

A second radio transmission received at 0655 hrs advised:

"Objective 0650 hrs. No evidence of enemy occupation - but recent signs...We are holding until our friends come forward to consolidate."

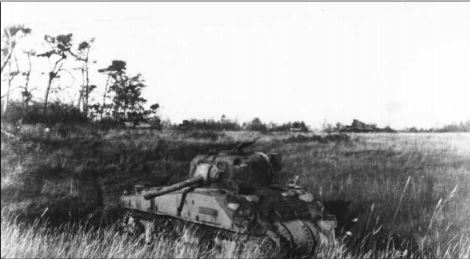
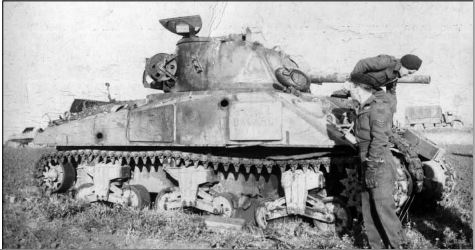
Worthington Force had taken up position close to Point 140, some 6,500 yards northeast of their objective, and at 0755 hrs, they mistakenly gave their position as map reference 0946. That was the actual reference for Point 195. The mistake was to prove fatal. Their battlefield was to consist of a sloping rectangular field, some 300 yards long by 100 yards wide. The nearest Canadians were Halpenny Force, over two miles away.

Worthington's command on Point 140 would consist of sixteen tanks of 'C' Squadron, eleven tanks of 'B' Squadron, four 4HQ tanks, one recce tank, and the majority of 'A' and 'B' Companies of the Algonquins. The infantry was sited around the perimeter of the field and dug their slit trenches. The tanks, half-tracks, and carriers were placed around the four sides of the field, in support, using the hedges and low trees for cover wherever possible.

Worthington Force had pushed through the remnants of the 89th Infantry Division and had actually penetrated the front line of 12. SS-Panzerdivision Hitlerjugend. Hitlerjugend and Schwere SS-Panzer Abteilung 101 were reserve units of I SS Panzer Corps. Both Kampfgruppe Waldmüller and Kampfgruppe Wünsche were in the area of Point 140. Altogether, Hitlerjugend had a total strength of some 1,500 infantry, 20 Panthers, 20 Panzer IVs, and a similar number of self-propelled anti-tank guns. Schwere SS-Panzer Abteilung 101 numbered some 20 odd operational Tigers.

uJSQNwN.jpg


As of 06 Aug 44, Kampfgruppe Wünsche consisted of the Staff of the Panzerregiment, the Staff of I Abteilung with 3. Kompanie (Panthers), 8. Kompanie (Panzer IVs) of II Abteilung, I./26 and III./26 Abteilungs of Panzergrenadierregiment 26 minus headquarters and one company, and 2. Kompanie and Flak platoon of Schwere SS-Panzer Abteilung 101. Kampfgruppe Wünsche was to play a central role in the forthcoming battle.

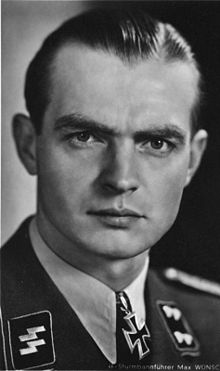
Hitlerjugend's 1st Operations Officer, SS-Obersturmführer Meitzel first discovered the Canadian threat while attempting to make contact with Kampfgruppe Waldmüller. Meitzel reported to SS-Obersturmbannführer Wünsche who quickly set about organizing a counter-attack with his Panthers and Tigers. Meitzel returned to Point 140 and was eventually captured and spent the remainder of the day in the Canadian position.

Obersturmbannführer Max Wünsche
A7uguQ2.jpg


Two of Wünche's Tigers took up well camouflaged positions in a small wood slightly uphill, and west of the Canadians. The first Tiger was sited at 0800 hrs and between 0808 hrs and 0841 hrs, Worthington Force radioed 4th Armoured Brigade that it had made contact with the enemy and had lost ten tanks. The fire was returned, and a task force from 'B' Squadron moved out to secure the high ground. Five of the tanks of that small force were knocked out with heavy crew losses. The rest of the task force withdrew into the relative safety of the defensive perimeter.

gnBf32c.jpg


At about that time, two tanks of 'A' Squadron, which had been coming on as a reserve in the rear together with 'D' Company of the Algonquins, reached the main force, after knocking out a Tiger and an anti-tank gun enroute. They were the only tanks of the squadron to arrive, bringing with them the information that the remainder of the battle group was cut off from the main force by enemy armour and anti-tank guns.


The Tigers, together with three other tanks, were able to hold their own until Sturmbannführer Jürgensen's Panthers were able to wheel around to the eastern flank.

The Canadians requested artillery support and at 0848 hrs, 4th Armoured Brigade asked for the location of the opposition. Worthington Force replied that it was the same as it had been two hours previously, approximately 500 yards southeast. The artillery fire went to Point 195 as requested. Brigade's inquiry at 0907 hrs regarding the artillery's effectiveness went unanswered. There would be no further communication with Worthington Force.

The Canadians were brought under continuous artillery, mortar, and tank fire, as the Germans scrambled to eliminate the breach of their defensive lines. A member of the task force described the effect of the persistent heavy fire:

"The whole area shakes with blast, 88's fire from all angles. The air is streaked with tracer, smoke rises, tanks brew, crews bale out. Orders are shouted over the wireless, crew commanders straining their eyes through binoculars."

By mid-morning, Worthington Force was under attack from three sides, yet the general consensus was that they would be able to hold the position until reinforcements arrived.

"The enemy fire...increased in intensity as the morning wore on. It came in from all directions, but chiefly from the south and east flanks. By 1030 hours, half of our tanks were in flames; the remainder found it difficult to locate and reply to enemy fire. No targets were offered to the infantry, so we just kept our heads down and took a bad beating from enemy shells and mortar fire which would explode in the hedges and trees above, sending shrapnel showers into the slits."

The 4th Armoured Brigade HQ had been hastily organizing followup forces to move on Point 195 to give Worthington Force assistance. At 0914 hrs, and again at 1000 hrs, Brigade ordered the Governor General's Foot Guards to concentrate at Gaumesnil and move to support Worthington Force. There would be further delays until Lieutenant-Colonel M. J. Scott, commanding the GGFGs, could organize the relief force. At 1430 hrs, he finally moved to the attack. His battle group included the tanks of the GGFGs, 'A' Company of the Algonquins, a medium machine-gun platoon, a troop from the 96th Anti-Tank Battery, a troop of flail tanks, and the remaining 3-inch mortars of the Algonquins. They would fight throughout the day, ultimately being stopped by a strong anti-tank gun screen in Quesney Wood. The regimental history related that the GGFGs lost 26 tanks, half their strength, in the attempt to support Worthington.

iDGgNUd.jpg


Meanwhile, back on Point 140, Lt.-Col. Hay was critically wounded in the late morning hours. Half-tracks loaded with wounded made a successful run to the Polish lines at approximately 1100 hrs. Unfortunately, they were unable to shed any light on the actual location of Worthington Force. In the early afternoon hours, Worthington ordered his last eight undamaged tanks to break out from the field. They were successful in reaching the Polish lines, but their crews were also unable to assist in accurately identifying the location of the Canadian position.

British Typhoons initially mistook the isolated Canadian battle group for the enemy and began to rocket and strafe the field. Major Monk of the Algonquins later related that:

"(his soldiers)....quickly got out (their) recognition signals and burned yellow smoke. The planes rocked their wings in acknowledgement. They returned at half-hour intervals all day long, rocketing and strafing the enemy around us. They were heartily cheered many times."

The Typhoons proved to be a valuable asset to the surviving Canadians in driving off repeated German counter-attacks throughout the day.

"About 1400 hrs...approximately 1,000 yards away, we could see the enemy infantry forming up preparing to attack. The enemy systematically laced the whole of our area with shell, mortar and 88mm. fire. It would begin at one end of the field and sweep the length of it and back. Later we saw more enemy mustering....However, the Typhoons arrived back and strafed the enemy who were caught in the open and suffered heavily. Between the Typhoons, the fire from our one remaining tank, and our Brens, no enemy got within 600 yards."

auNILhQ.jpg


During the course of the battle, tanks of the 1st Polish Armoured Regiment were sited some two miles north of the field but they were unable to reach the Canadian position. By 1730 hrs, the Poles had been forced to withdraw, having sustained 24 casualties after losing 22 tanks.

CDkuzv7.jpg


At the end of the afternoon, there were few tanks left in action in Worthington Field.

"...In fact most of them were burning furiously, many with their dead crews still in them. The exploding ammunition in the burning tanks added to the noise and danger. Our mortar detachments were out of action. The field was a mass of shell holes. The trees and shrubs were cut to pieces from shrapnel. The smell of burning human flesh, the odor of exploding H.E. mingled to make most of us nauseated. The continuous crash of exploding shells and mortar bombs began to have its effect, first among the wounded and then the rest of us began to get 'battle-wacky'. We had run out of morphine and bandages. Many of the wounded men were delirious, shouting and screaming - jumping out of their slits, having to be pulled forcibly to cover again. Things looked pretty grim."

At approximately 1800 hrs, Lt.-Col. Worthington held a conference with his four remaining officers. Another counter-attack was launched by the Germans and the four remaining tanks still in action took on the advancing infantry and successfully pinned them down. The counter-attack was renewed, led by a mixed force of Tiger and Panther tanks. Worthington was killed by a mortar round at approximately 1830 hrs. The remaining tanks continued to engage the enemy until they were either knocked out or ran out of ammunition. At approximately 2100 hrs, the survivors managed to slip away in small groups as the Germans formed up for yet another attack. The enemy was said to have been within 50 yards of the position when the last of the Canadians left.

While accompanying some of his Canadian captors attempting the breakout, Obersturmführer Meitzel convinced them that their greatest chance of survival lay in surrendering to German troops, thus ending his day of captivity.

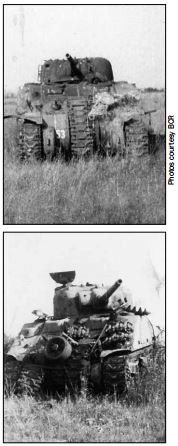
During the course of the advance and the ensuing battle, the British Columbia Regiment lost 47 tanks and suffered 112 casualties. Forty officers and other ranks were killed or died of wounds and 34 were made prisoners. The Algonquins, for the period 9th/10thAug44, suffered 128 casualties of which 45 officers and other ranks were killed or died of wounds, and 45 were made prisoners.

Point 195 was eventually taken by the Argyll and Sutherland Highlanders, virtually uncontested on the night of 9th/10thAug44.

Lt.-Col. Worthington had shown great daring and dash in his night advance through the German 89th Infantry positions. A combination of factors ultimately led to the destruction of his battle group. Most notably was the error in direction, but loss of communication and the fact that this was their first battle also contributed to their eventual misfortune. The 4th Canadian Armoured Division was often criticized for a lack of offensive drive during the push to Falaise. The experience of Worthington Force illustrates the perils that can befall those who are tasked with missions that ultimately prove too daring in nature.


(Note: In 1956 a mountain located in the Palliser River Valley on the British Columbia/Alberta border, was named for Lieutenant-Colonel Donald Grant Worthington, commander of The 28th Armoured Regiment (British Columbia Regiment). Mount Worthington at 2972 meters is a fitting tribute to a strong and valiant leader.)


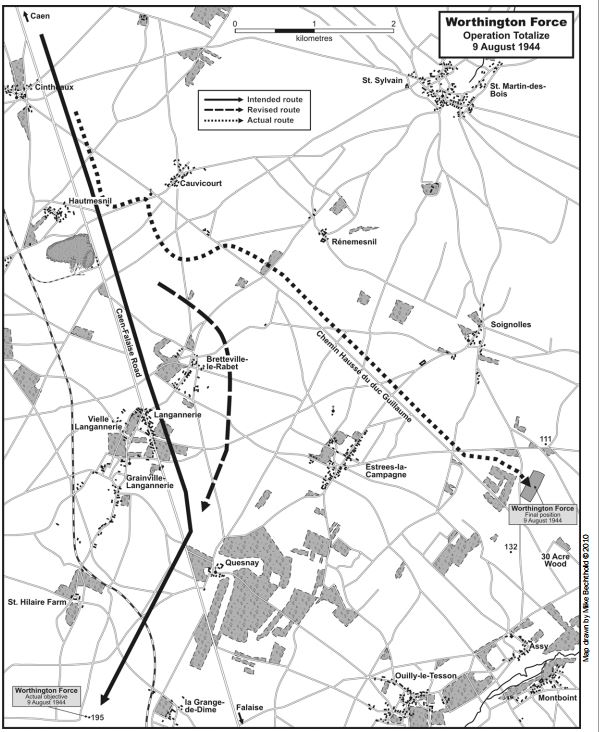
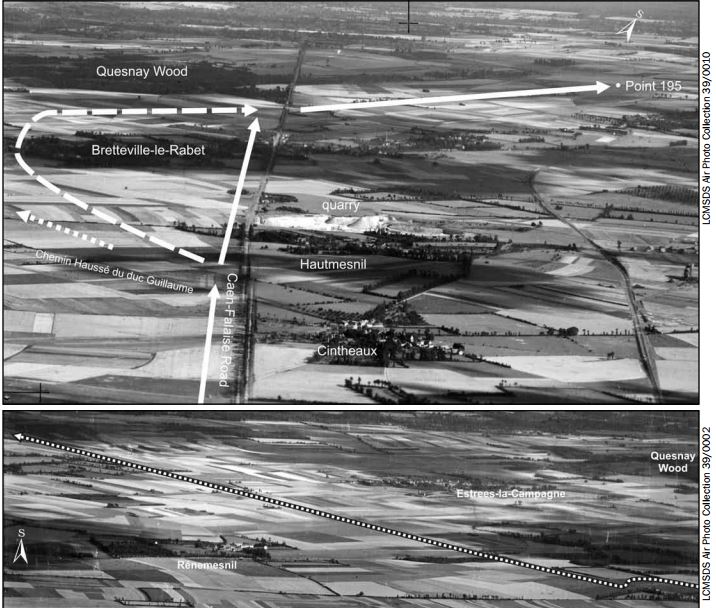
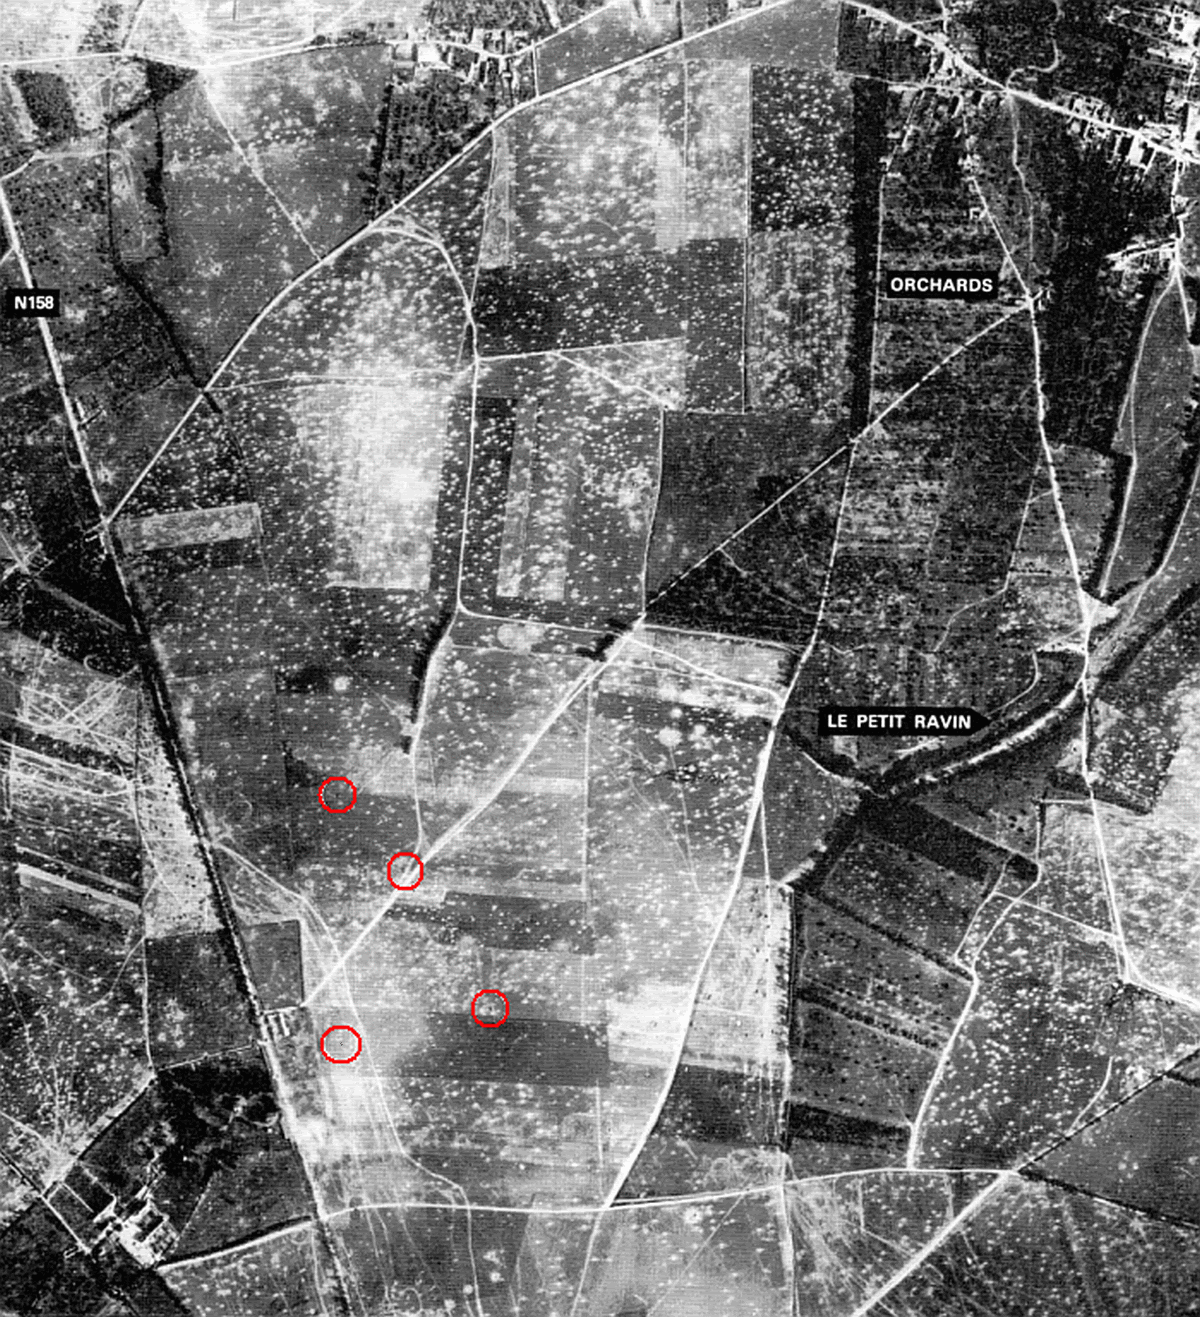
This oblique aerial photograph, taken on 26 July 1944, shows the intended route of Worthington Force as a solid line. When the battlegroup approached Bretteville-le-Rabet they discovered that the village was still being cleared by Halpenny Force so LieutenantColonel Worthington made the decision to skirt the village and continue on to Point 195 (dashed line). The dotted line shows the direction the battlegroup actually took.

fvqWjEP.jpg


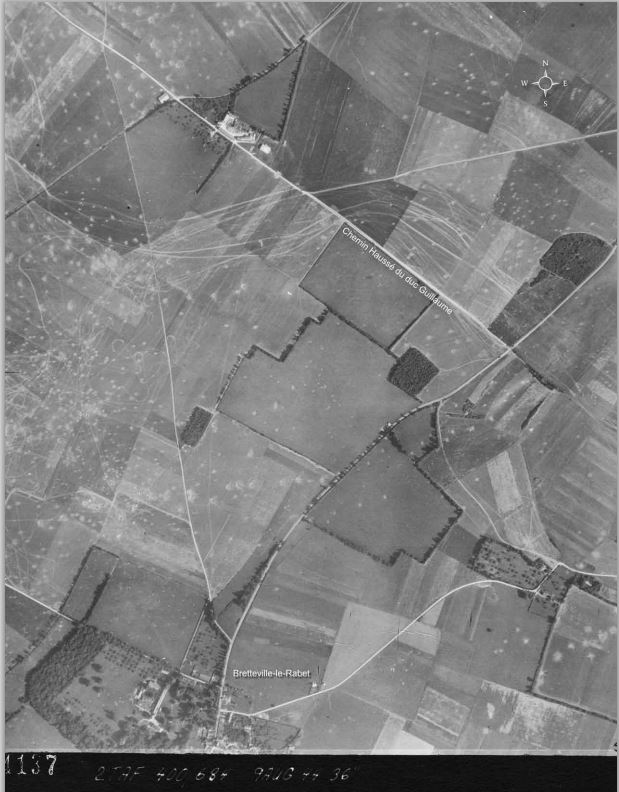
This aerial photograph, taken on 9 August 1944, contains the evidence which shows how Worthington Force got lost. The prominent straight road starting at the top left corner and extending to the centre of the photo is the Chemin Haussé du duc Guillaume. The tracks in the field made by Worthington Force show that as the battlegroup move south, roughly parallel to the Caen-Falaise highway (just off the photo to the left) it moved west where it encountered the Chemin Haussé. After crossing this wide, straight road the battlegroup immediately wheeled to the right and continued to follow this road all the way to its final position near Hill 111. It is believed that in the confusion of the early morning battle, with visibility obscured by smoke, mist and dust, this road was mistaken for the Caen-Falaise highway.

kjFdUO4.jpg


The aerial photographs taken on 9 August 1944 capture the tragedy of Worthington Force. This image shows the area immediately to the west of their final position. A number of burning vehicles can be seen. The two on the left centre of the image almost certainly belong to “A” Squadron which was almost entirely destroyed before reaching the rectangular wood. The white smoke emanating from the tree line below the road at the top centre of the photo is most likely a German position that has been destroyed by the battlegroup while it is impossible to tell the identity of the vehicles on the road.

tNyPtiX.jpg


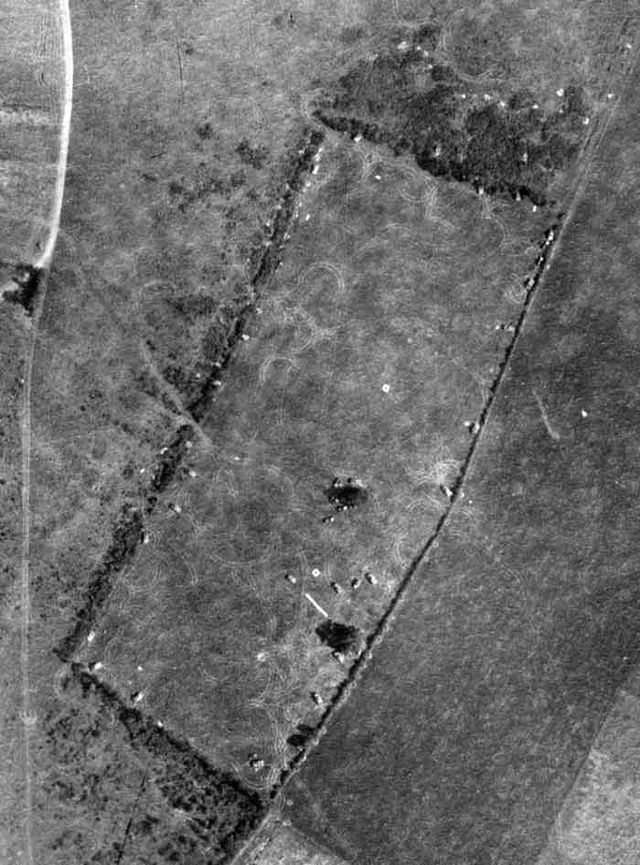
This rectangular wood is the final position of Worthington Force. This air photograph, taken on the morning of 9 August 1944, allows us to see the Sherman tanks of the British Columbia Regiment arrayed around the perimeter of the field.
Worthington’s tank and command post are visible around the tree near the centre of the position. The small white squares and the white line in the position are air recognition panels displayed to prevent attacks by friendly aircraft.

wuFYw1t.jpg


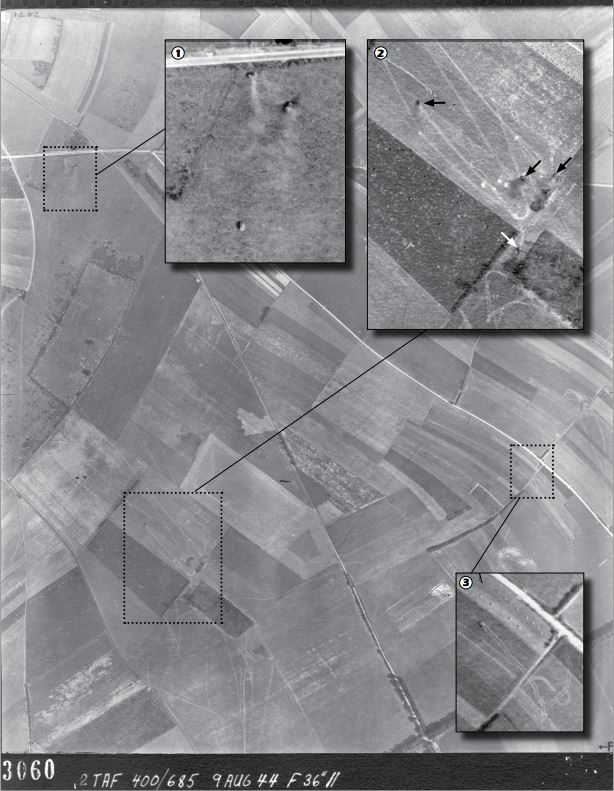
This remarkable air photo captures the battle in progress during the early afternoon of 9 August 1944. The halftracks have departed the battlegroup position to carry the wounded to safety but the results of the morning’s engagements are still evident. To the north of the rectangular field are the burning Shermans that Worthington sent out to deal with German fire coming from that direction (See 1). At the bottom of the photo is 30 Acre Wood and the still burning Shermans of Major Carson, Captain Hope, Lieutenant Stock and Sergeant Wallbank (See 2). All the tracks in the fields south and east of 30 Acre Wood belong to enemy forces. At least one German tank has been captured in this photo (See 3).

devo71f.jpg


663CTSK.jpg


FDwlnYx.jpg


5kg2ot7.jpg


Thanks to Mike Bechthold and his article from Canadian Military History Volume 19, Number 2 Spring 2010, pp 5-24.
Please, for more detail on the Worthington Force read this in depth article.
It is very well done.

http://canadianmilitaryhistory.ca/wp-content/uploads/2011/10/Bechthold-Worthington-Force.pdf


(Tour Pictures in next post - I hit my pic limit in this one)
 
Last edited:
Qfbik83.jpg


Just to catch up.
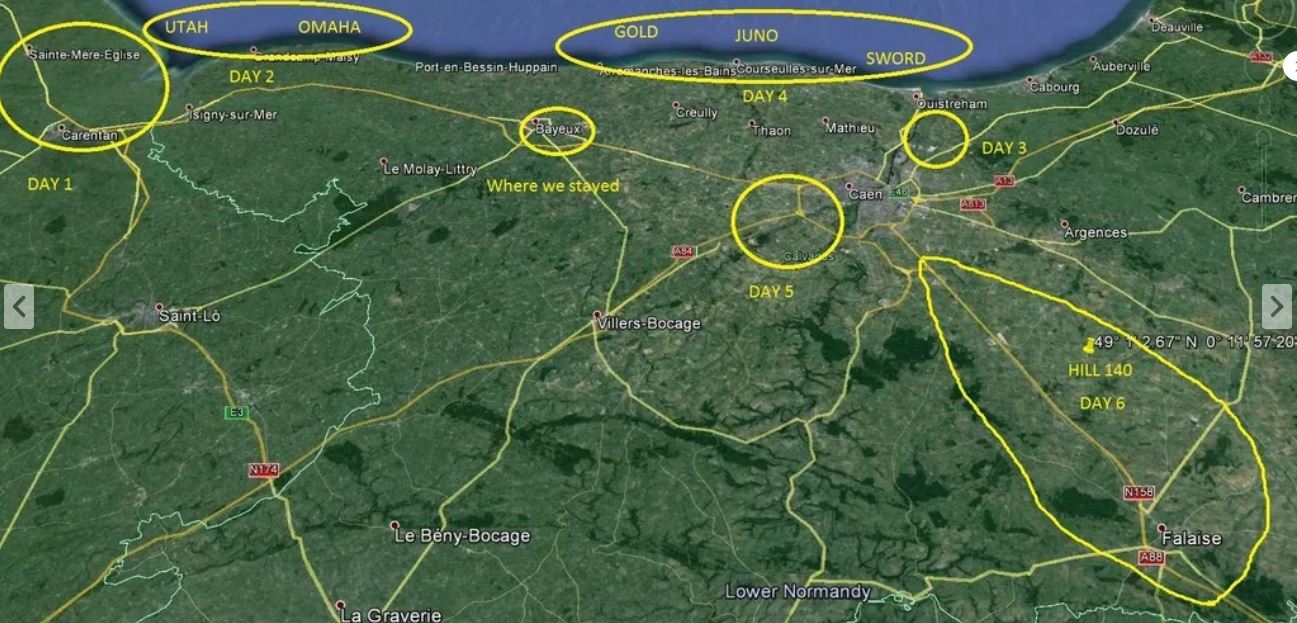
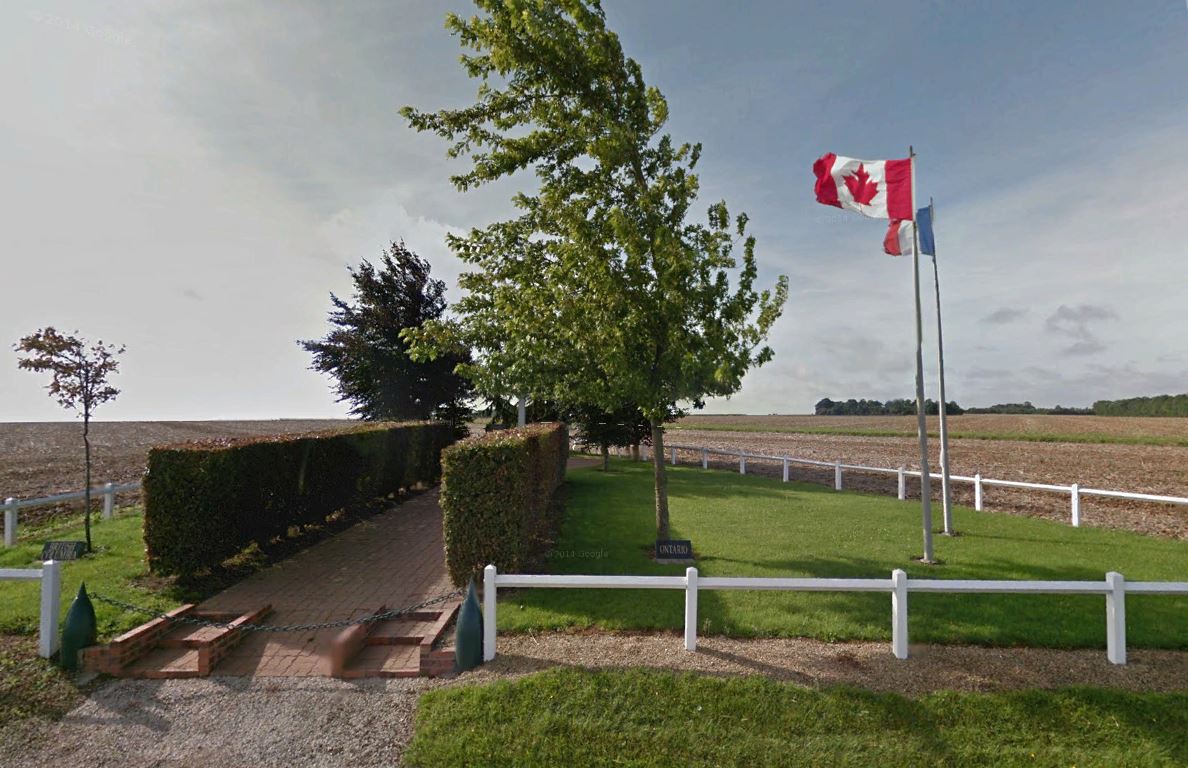
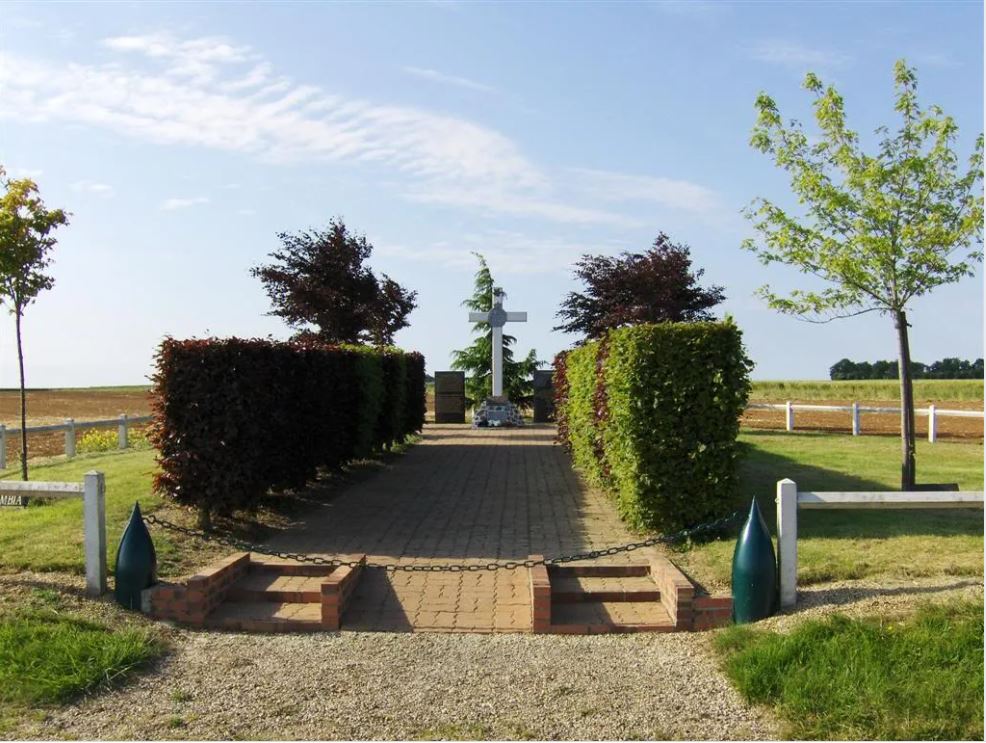
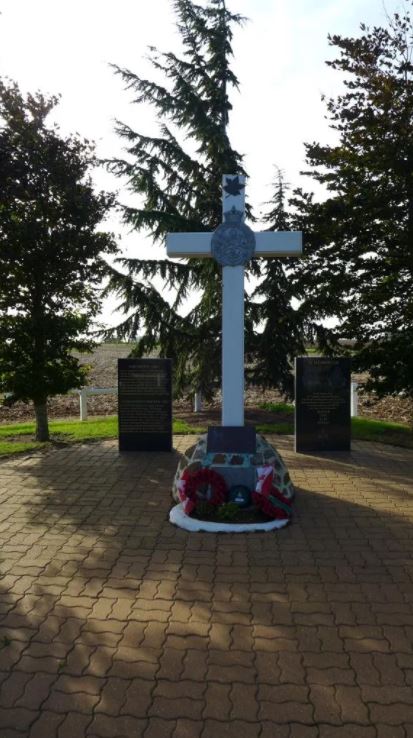
It's Day 6 and we are on Hill 140 at the Worthington Force Monument....

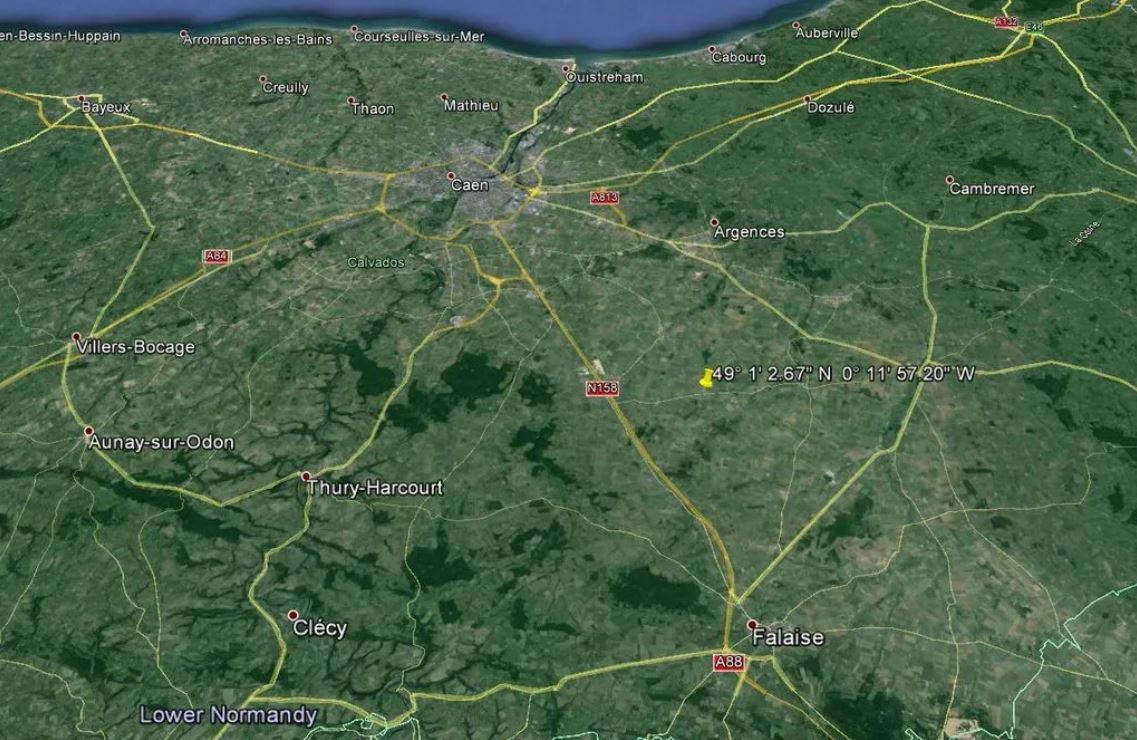
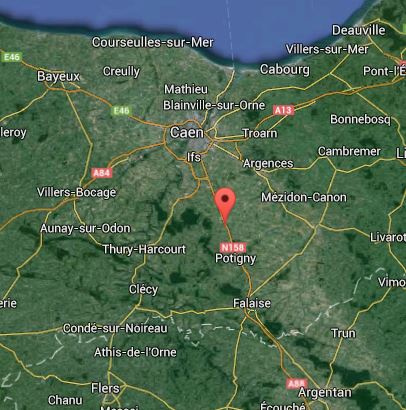
This a Google map showing our current position about half way between Caen and Falaise:

1e4DBcp.jpg


Here'sa larger map showing our realtionship to where we are in in Normandy:

UfP6b74.jpg


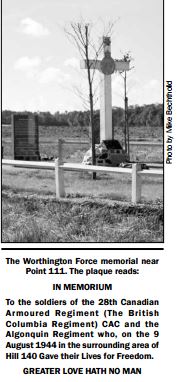
What the memorial originally looked like when it was erected:

rAFhC9P.jpg


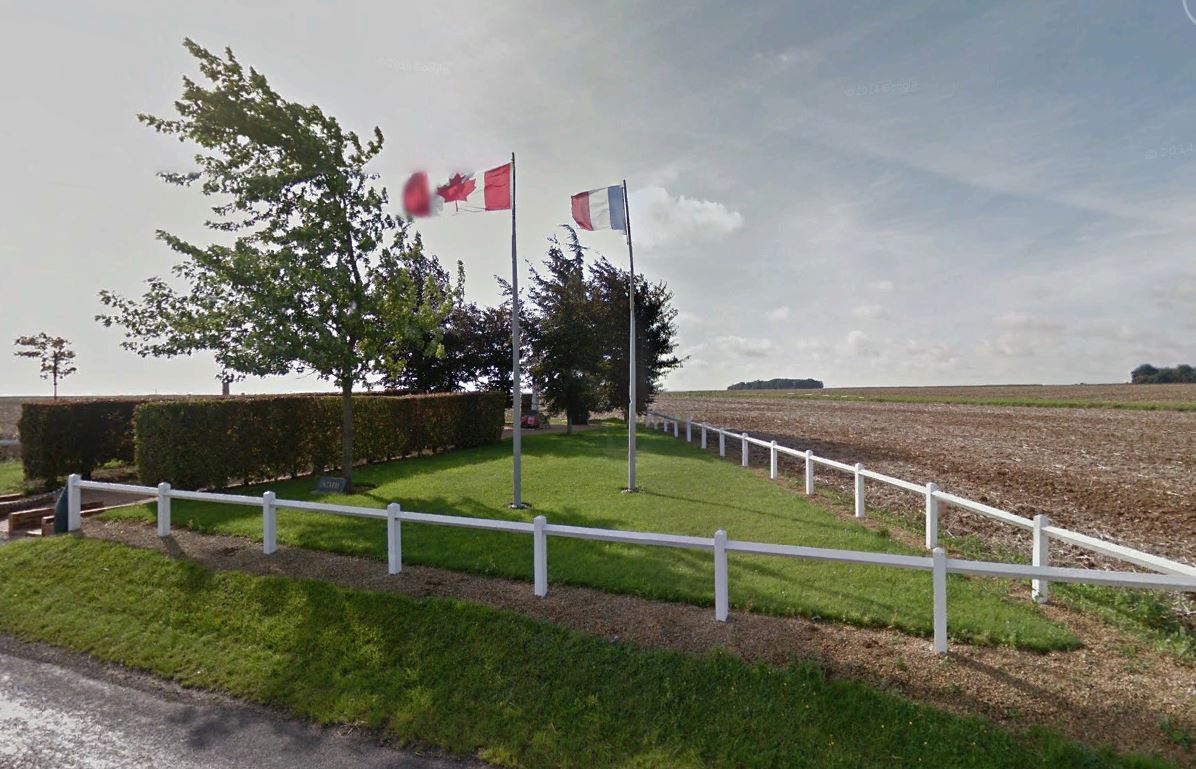
And today, the landscaiping has grown but tje hiil in the background remains very much the same:

BSBK6RN.jpg


cwoAyEC.jpg


cK5Ukou.jpg


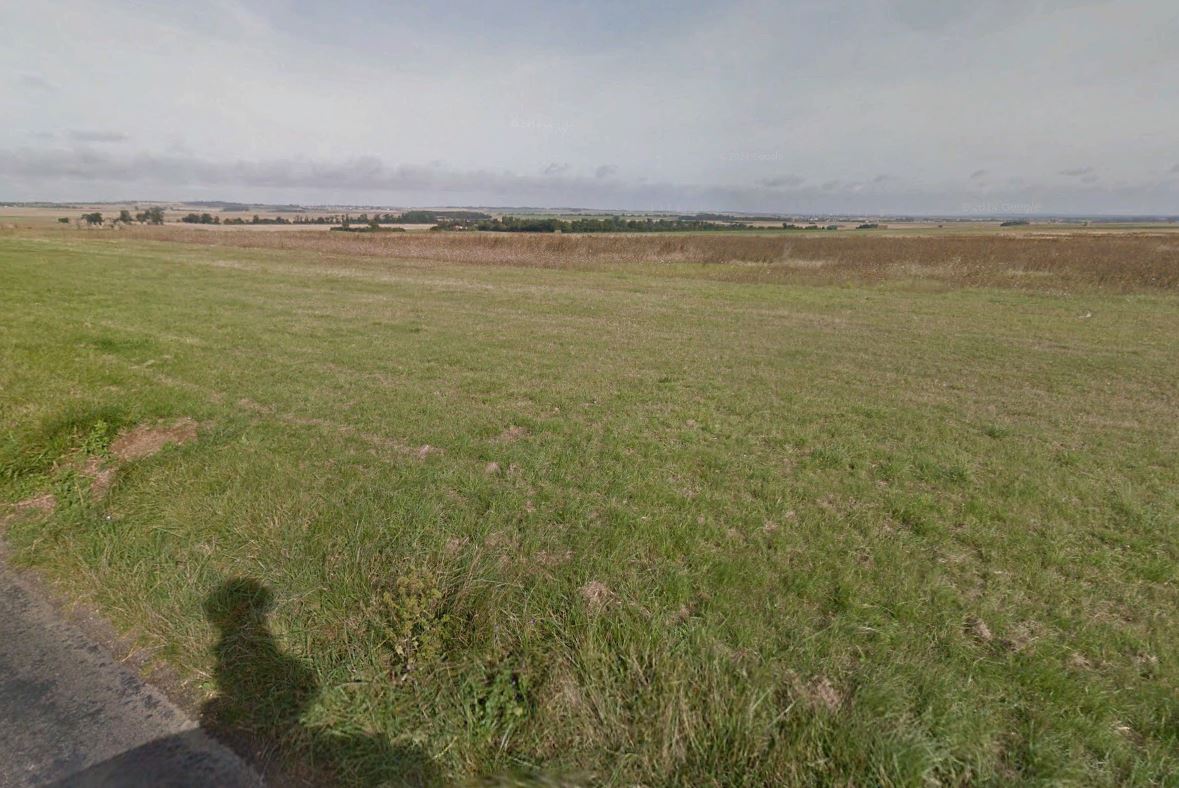
This is a shot from the road in front of the memorial looking back towards British/Canadian/Polish lines .
(The day of the bocage is over.)

GUKEjzU.jpg


The memorial:

rt1UcQa.jpg


kBicu8D.jpg


As with most of the site we visited it was hard to imagine the carnage that would have been taking place all around where we were standing.
If we had more time I would have liked to walk up towards the wood and directly in to the "square" that Worthington setup.
But there's so little time and so much more to see so we must move on.
 
Last edited:
Yeah it's amazing how the Late July-August battles are glossed over in some parts. Reading Mark Zuehlke's "Breakout From Normandy" I didn't realise there was an officer revolt within the ranks of the Canadian Divisions during these later Normandy battles where whole battalions were massacred in stupid suicidal attacks while some of their senior officers thought the Germans in front of them were largely a spent force. Officers all the way up to a Brigadier were replaced.
 
Sorry for the delay guys.
I'll try to pick this up a bit and get it finished.

Grainville-Langannerie - Polish Military Cemetery

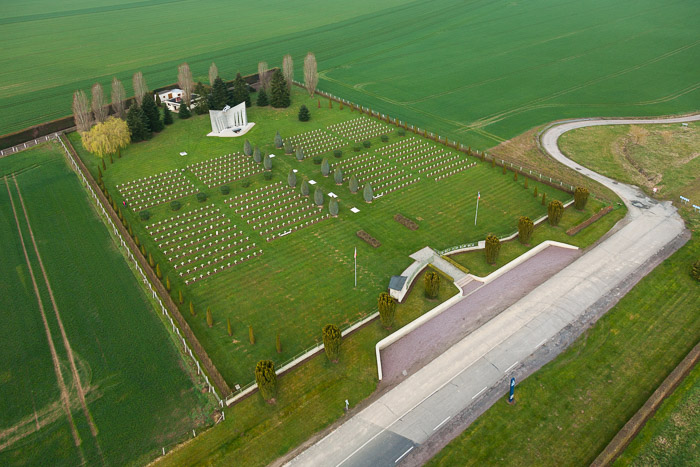
About halfway between Caen and Falaise we stopped at the only Polish Military Cemetery in Normandy.

AcHjuCK.jpg

The only Polish cemetery in France lies on the crossroad from Grainville–Langannerie to Urville, kilometres south of Caen.

Most of these fallen soldiers belong to Major–General Stanislaw Maczek and the Polish 1st Armoured Division and fought during the Battle of Normandy in August 1944.

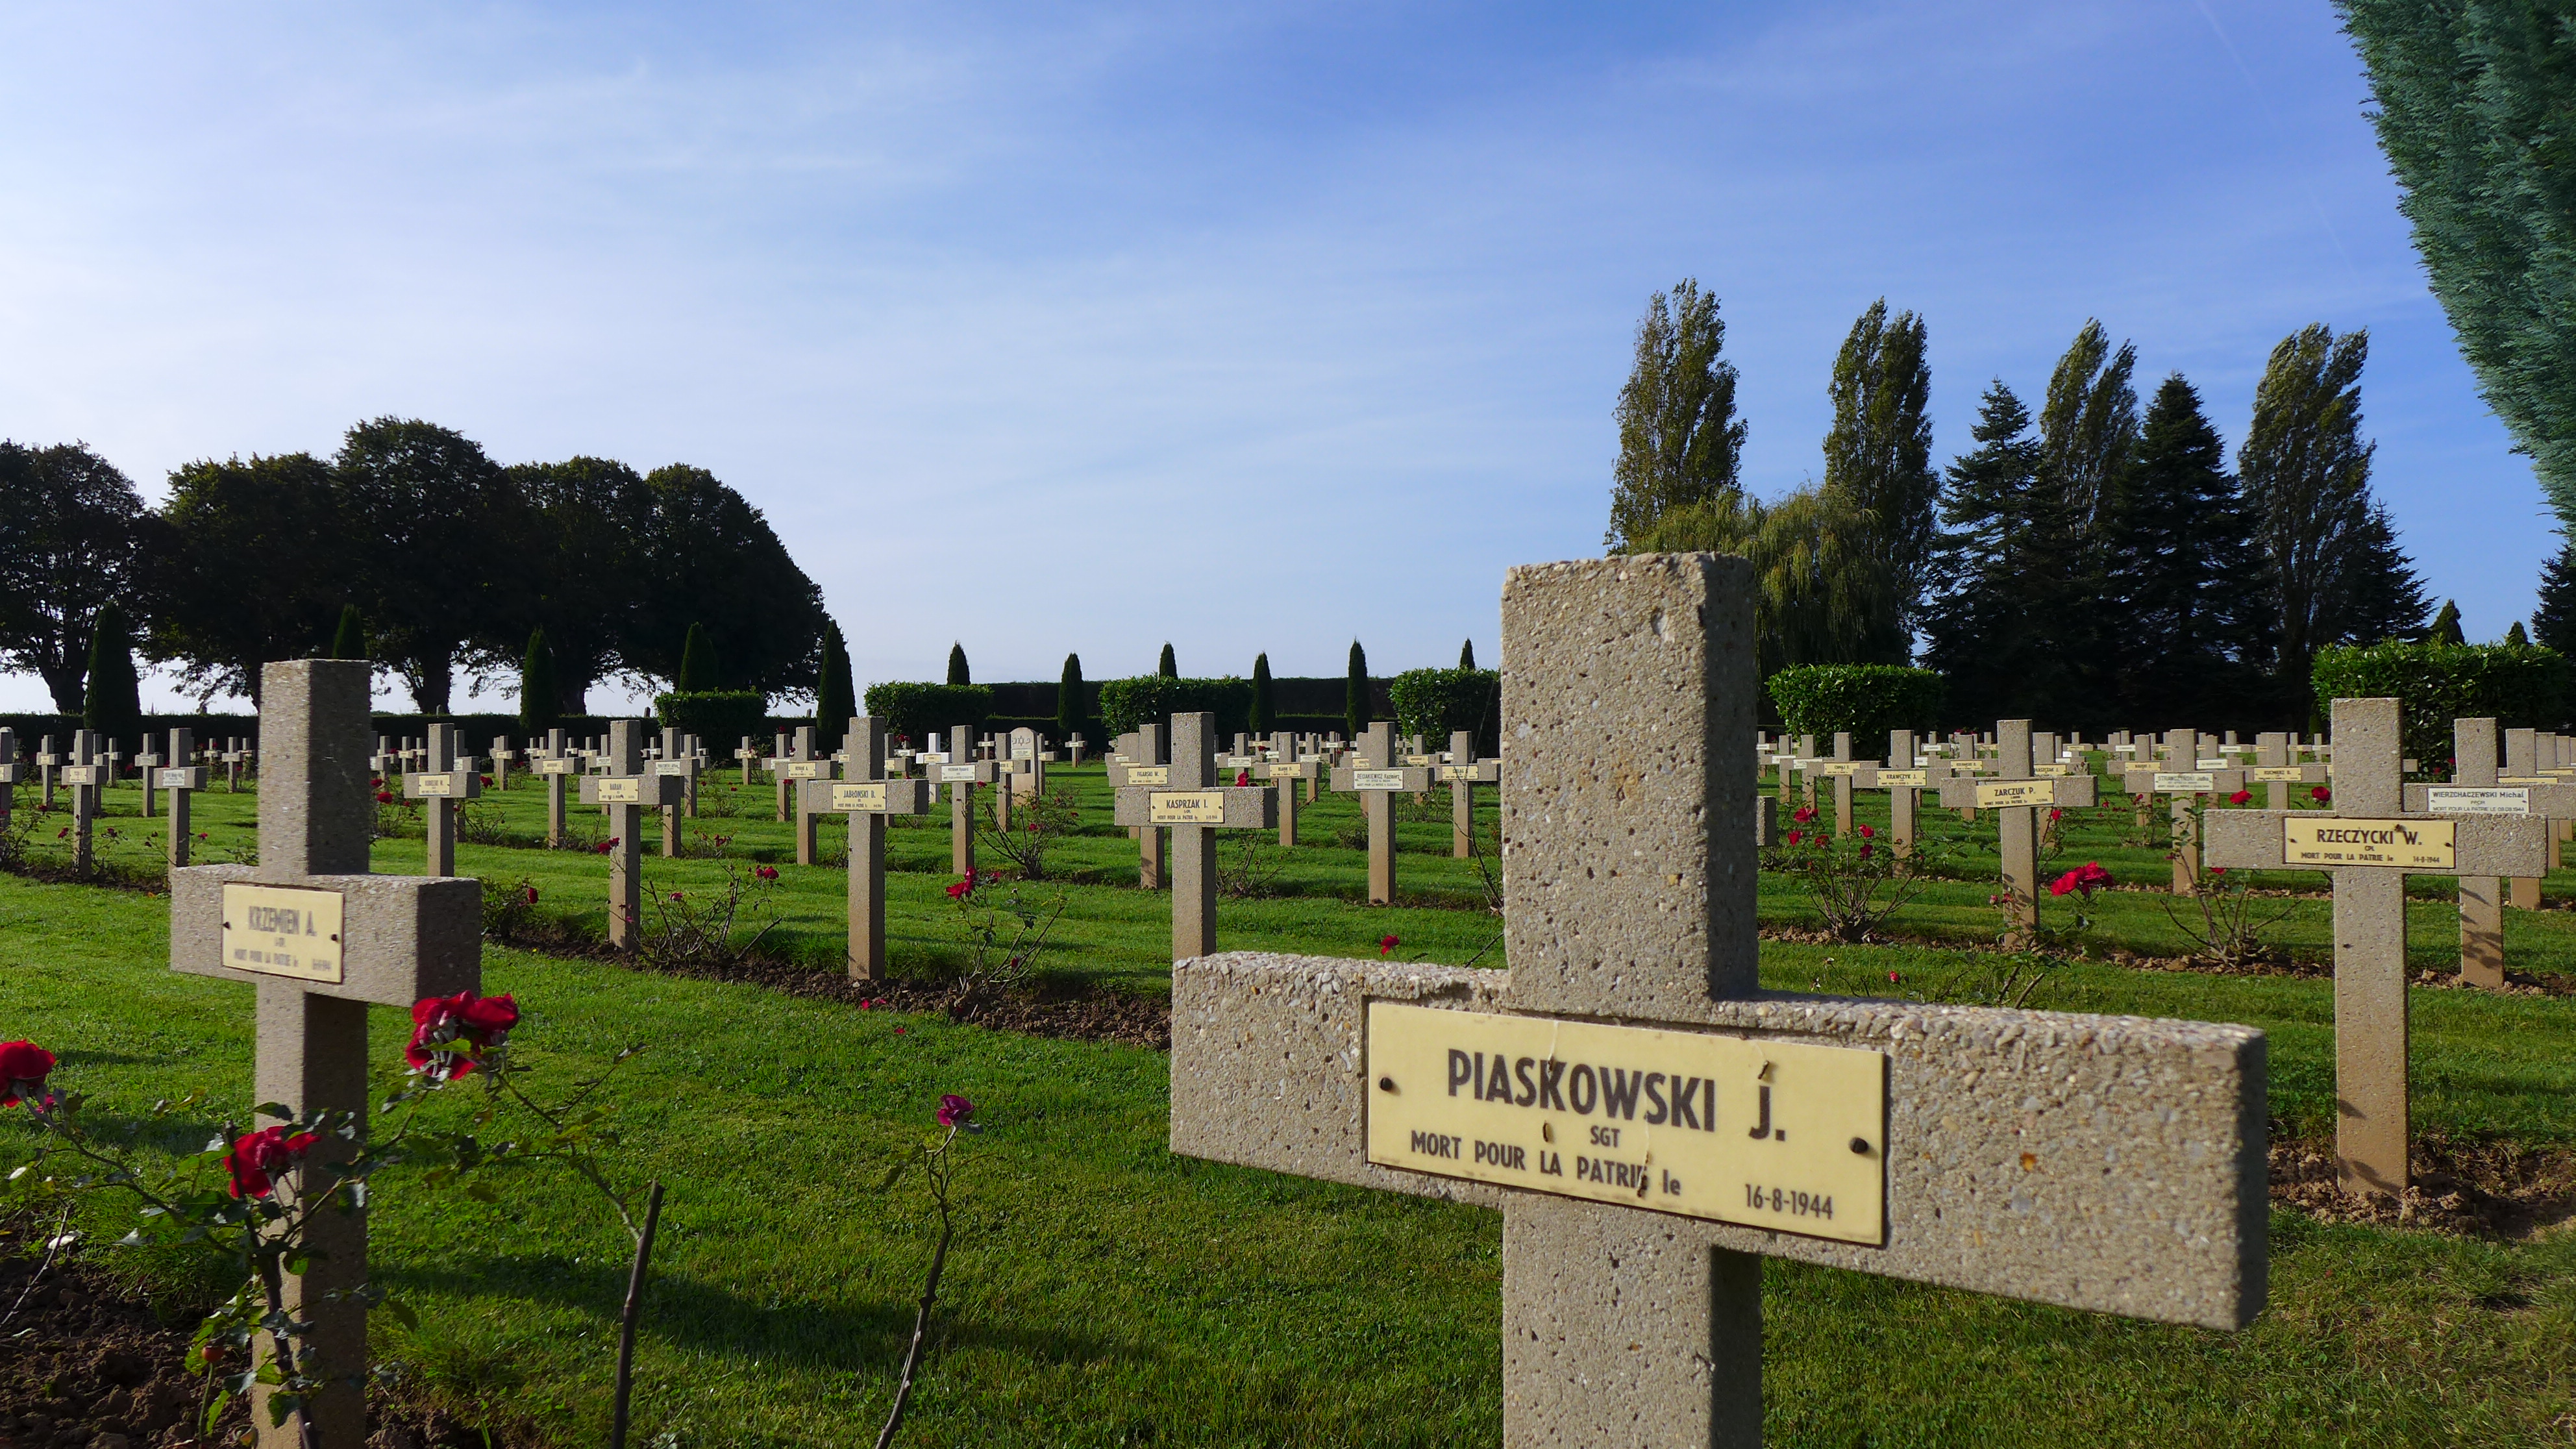
It is an impressive cemetery with 650 graves.

uAFdK2X.jpg


The Polish 1st Division was stationed in Scotland and first saw action during Operation Totalize on 8 to 13 August 1944.

Operation Totalize was an Allied offensive to break through the defensive lines south of Caen. The operation was part of Operation Tractable.

The Division achieved victories against the Wehrmacht on Hill 262 in the Battle for Mont Ormel on 19 to 21 August 1944 and the town of Chambrois.

Chambrois was the scene of some of the bitterest fighting of the Normandy campaign. Here the Polish 1st Division fought to close the Falaise Gap, and met up with the American 90th Infantry Division on the 19th of September in 1944, playing a crucial part in sealing of the gap and cutting off the escape of the German forces.

Free Polish forces who fell in other parts of France are all buried here.
here are 696 graves on this Cemetery. They are arranged around a huge “V” shaped monument, with a sculpture on top. It resembles the Polish eagle.
The field of honour is taken care of by the French Anciens Combattant, a veterans association. Unlike other cemeteries you see many religious mementoes as rosaries and such placed on the graves.

The cemetery lies 17 kilometres south of Caen nest to the N158.

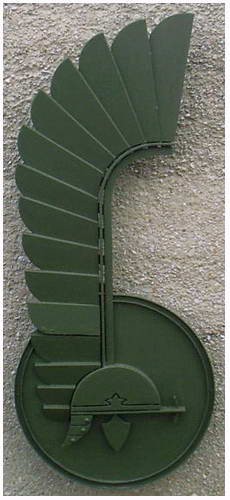
Badge of the 1st Armoured Division inspired by the headdress of Polish winged hussars:

DLlWshD.jpg


The fence line at the entrance shows the badges of all the Polish regiments that fought in Normandy:

t5djNJN.jpg


As with all the cemeteries we visited it is a very solemn place.

t5djNJN.jpg


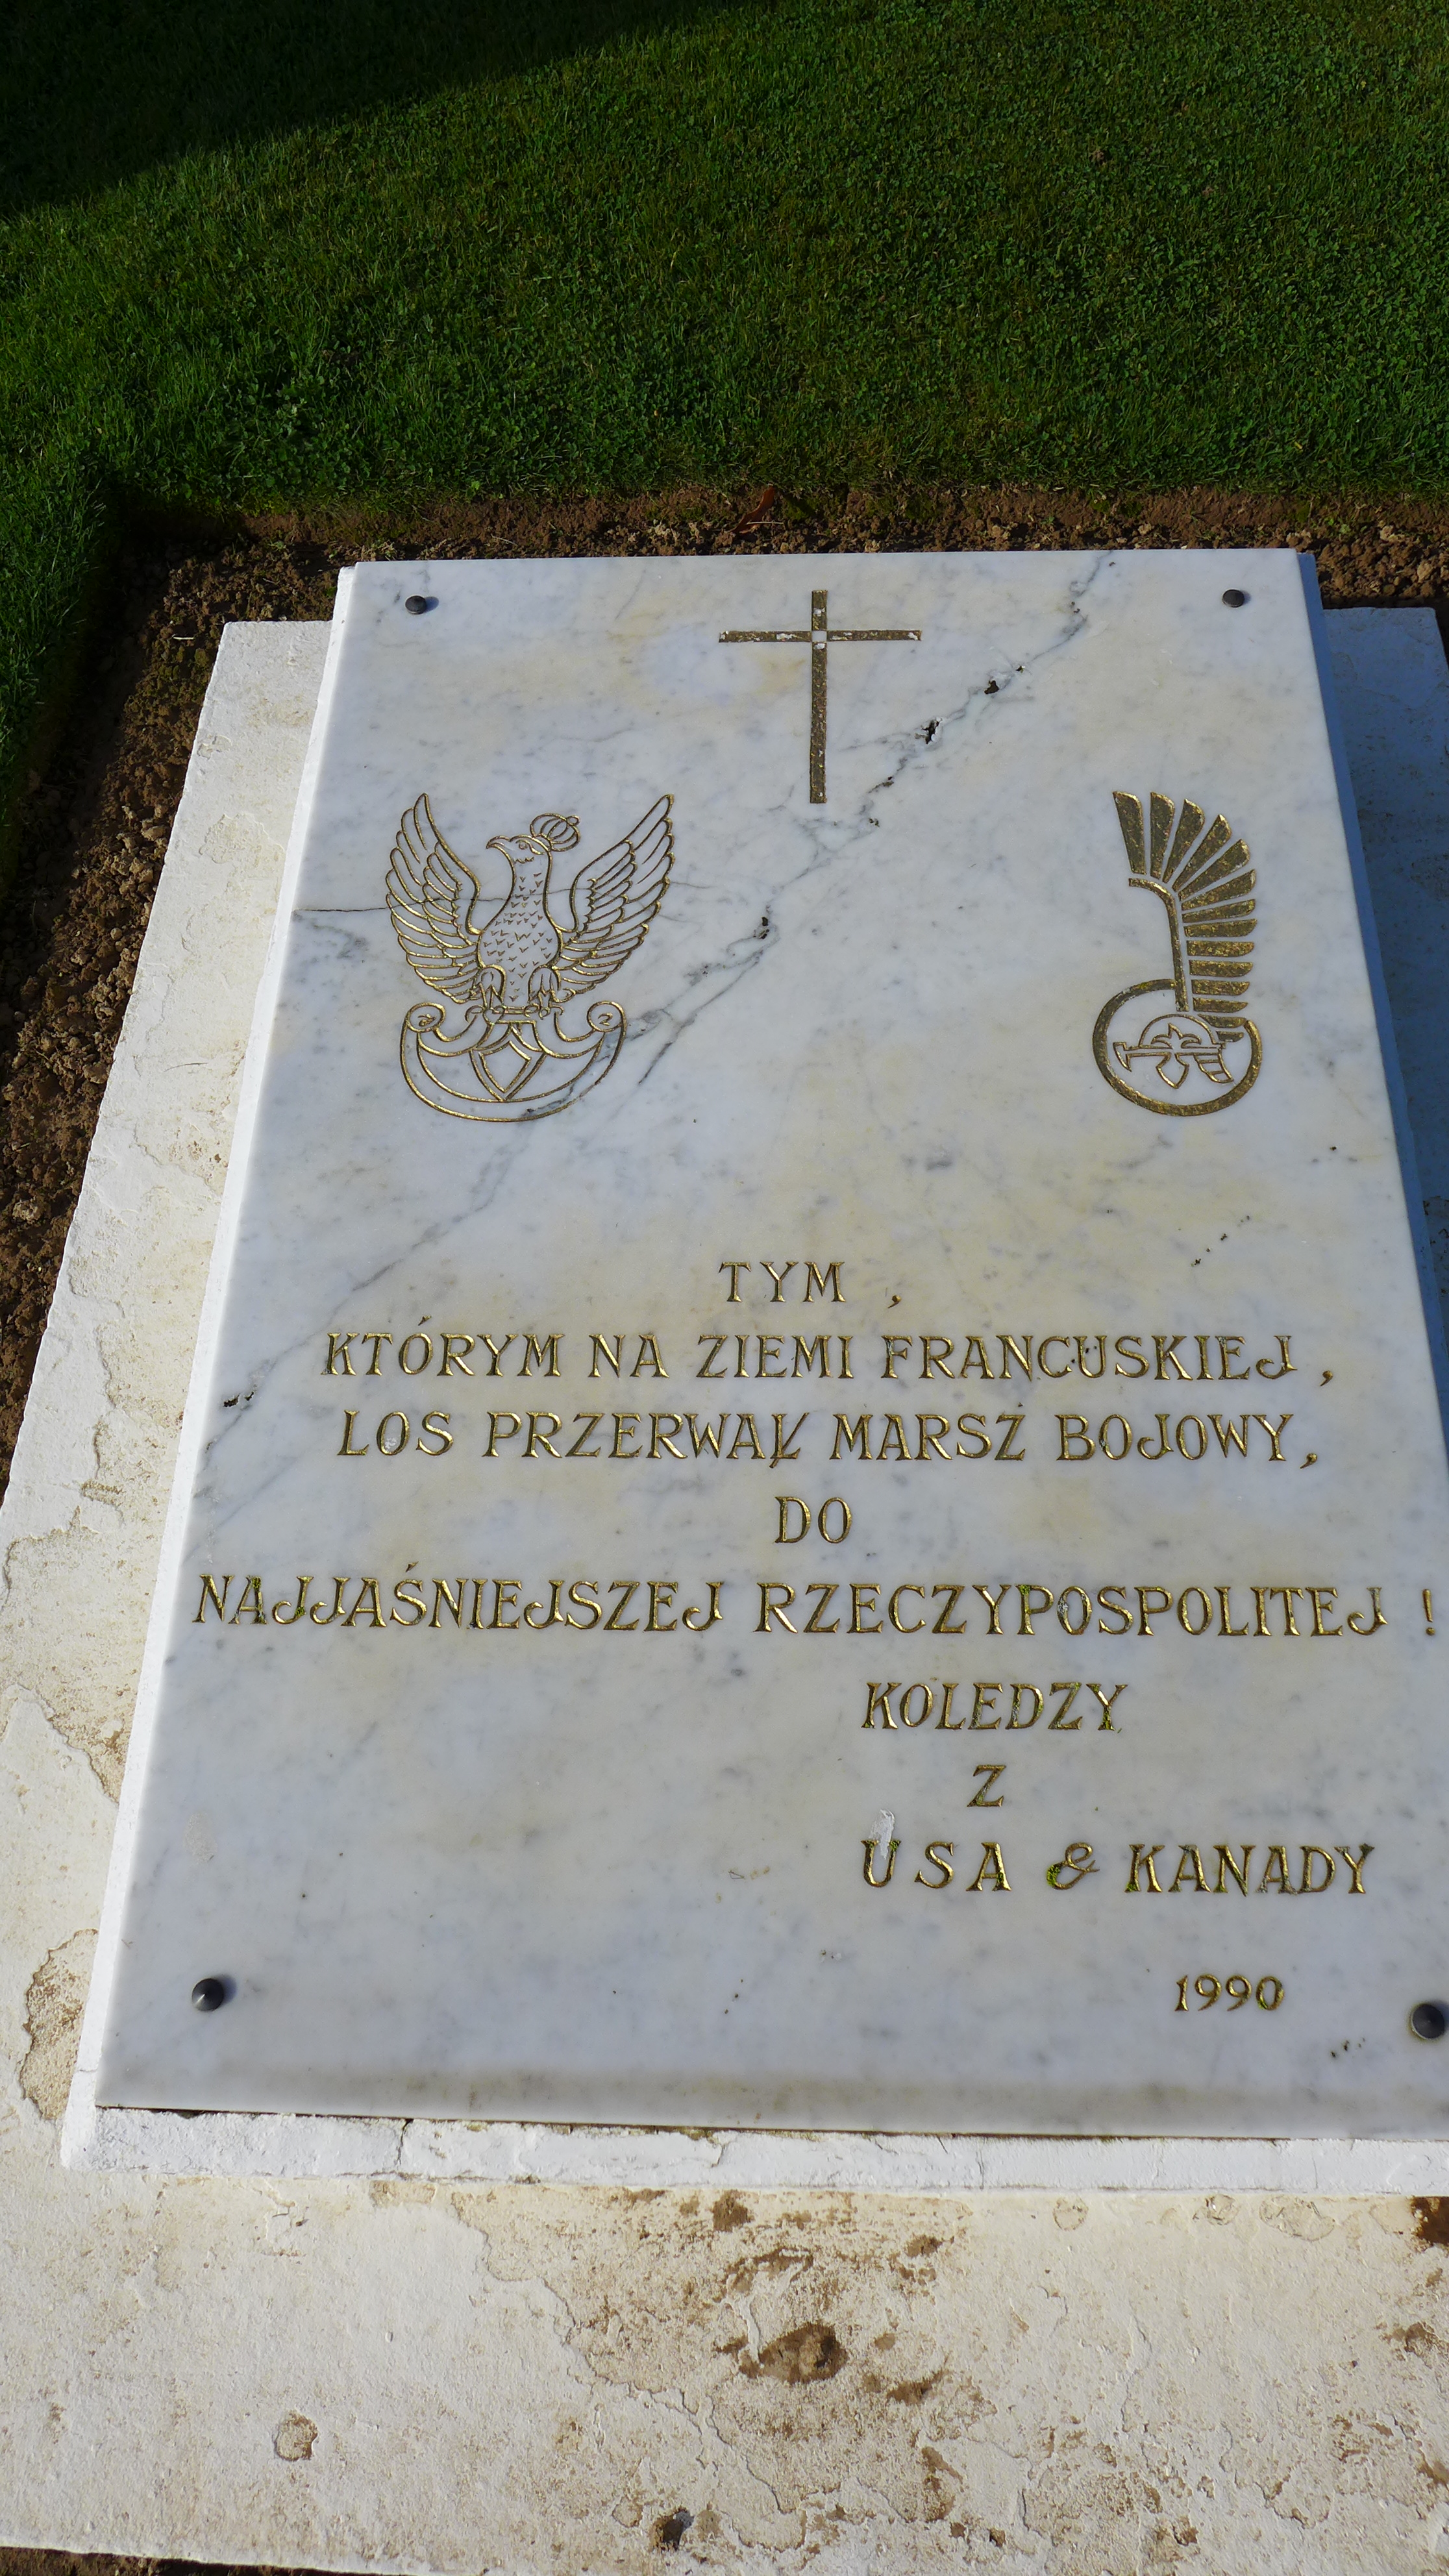
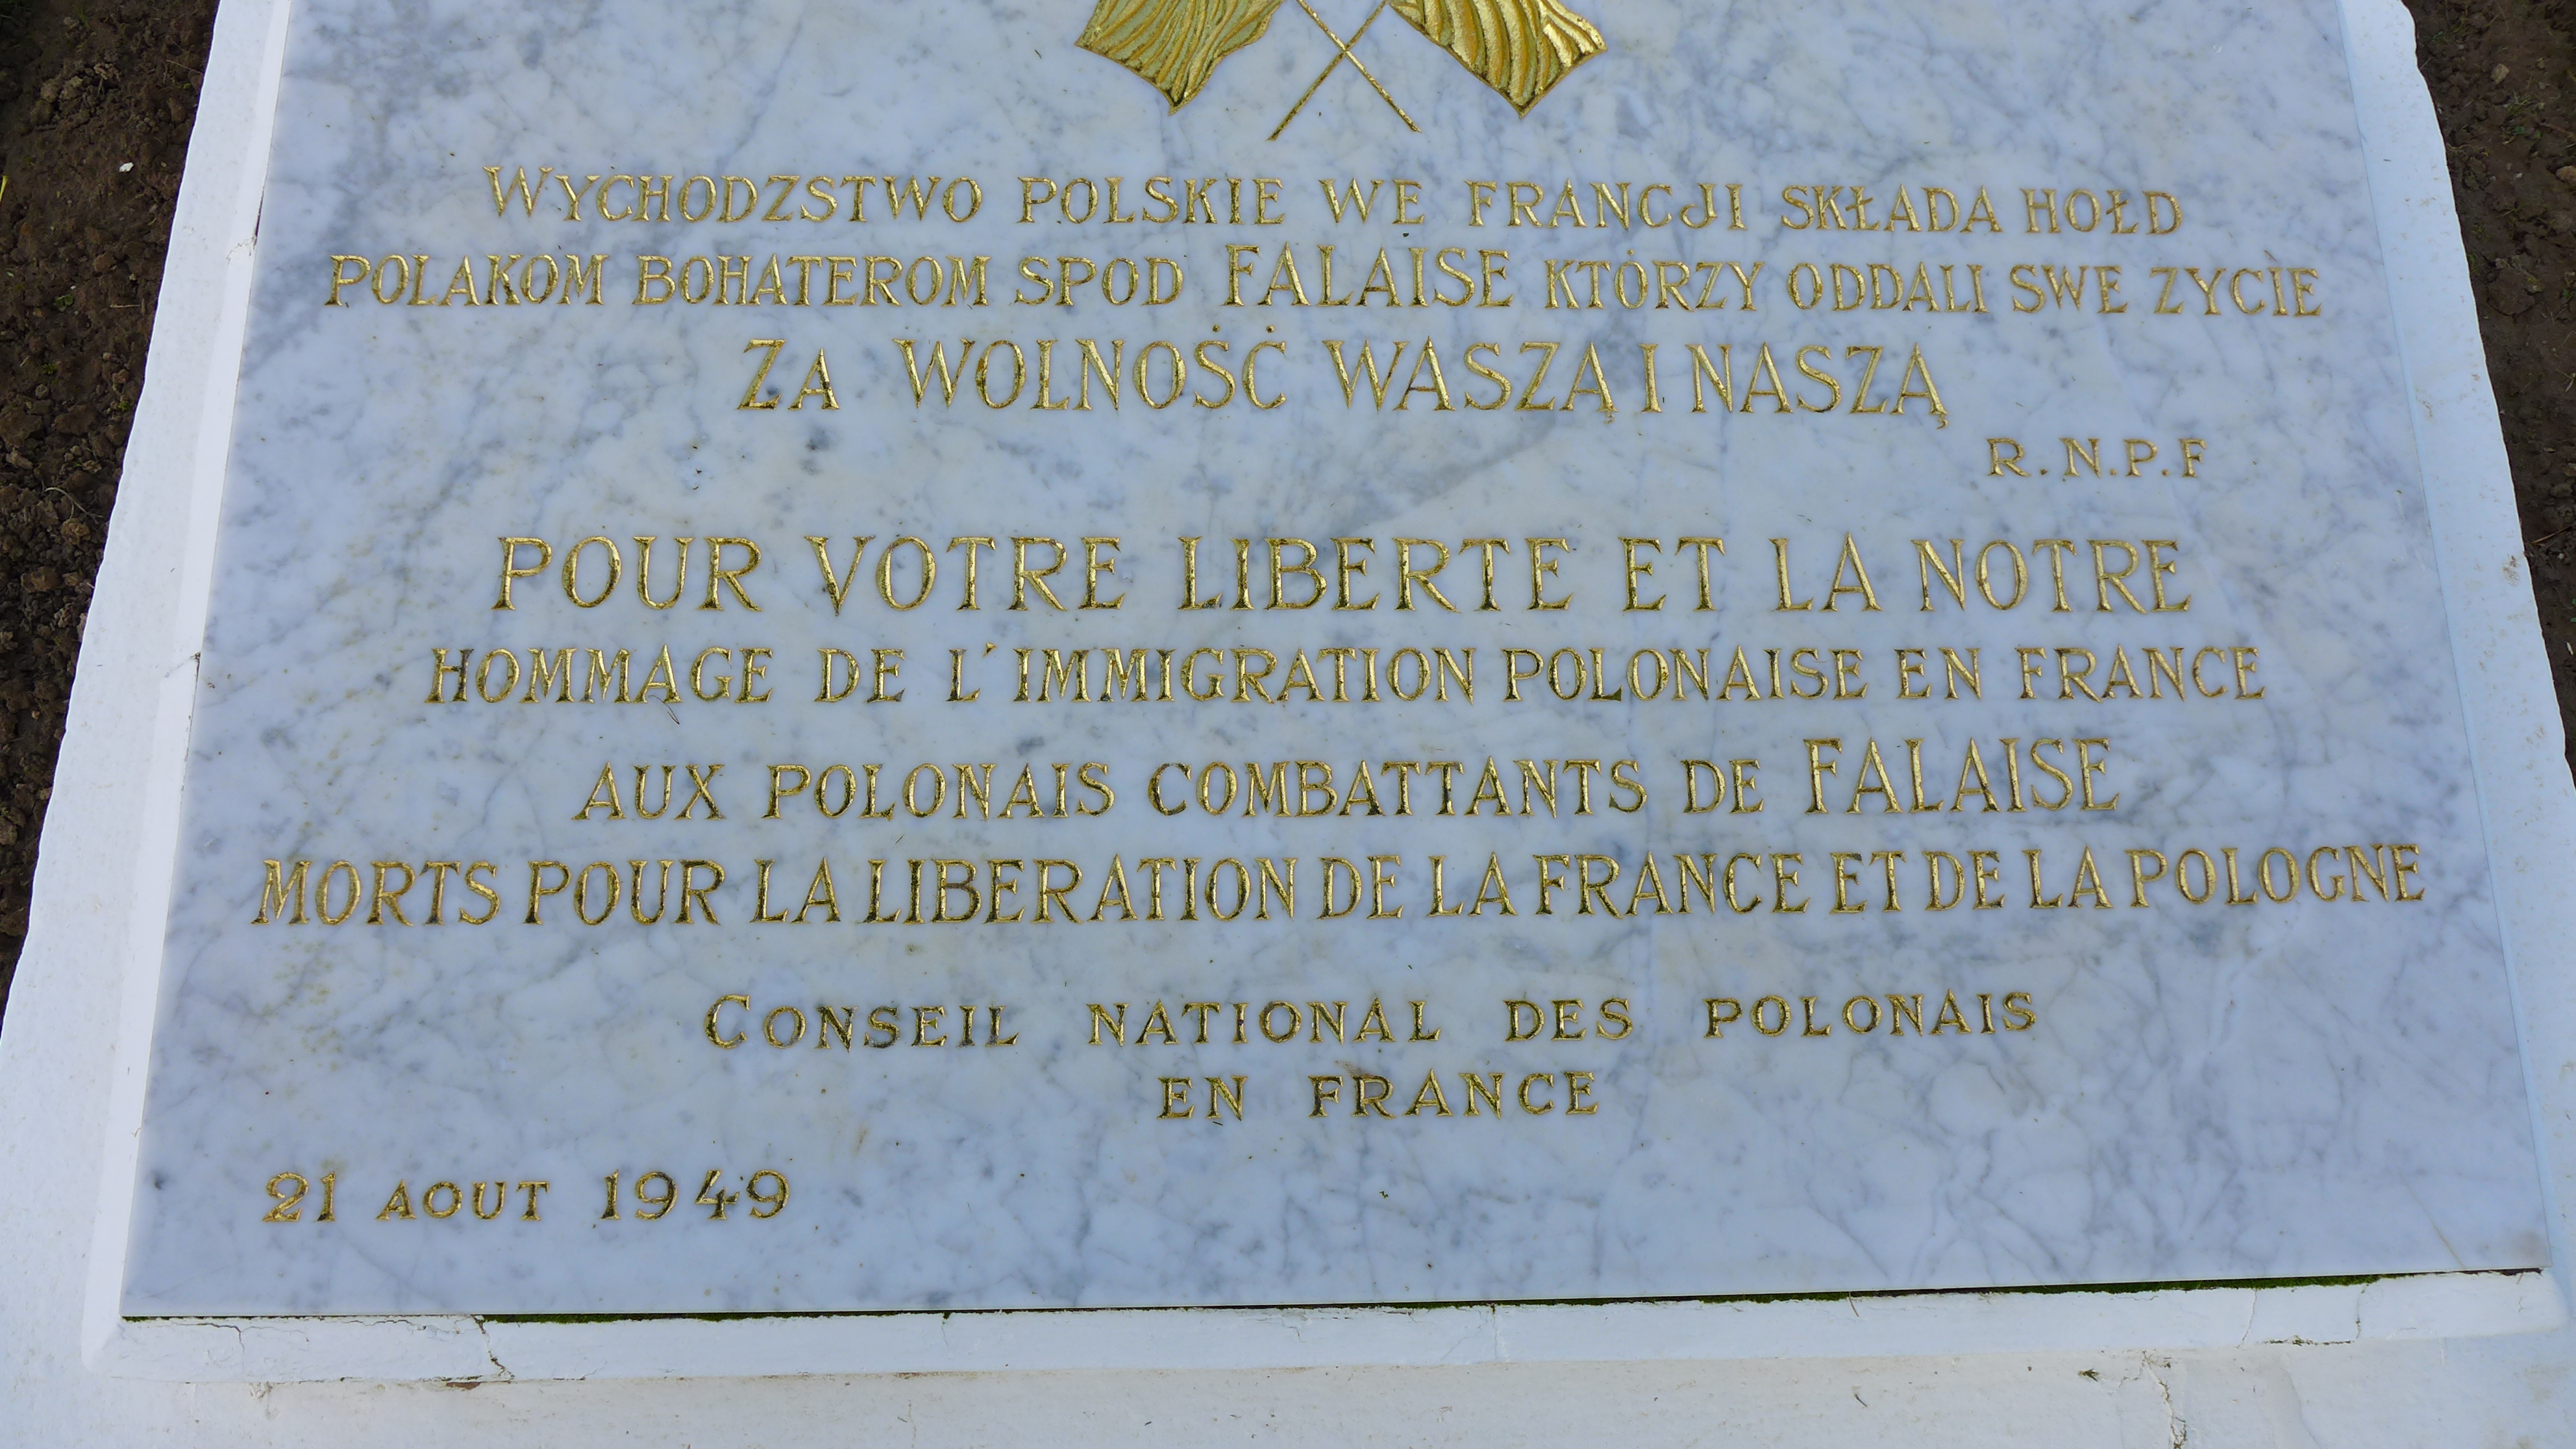
On the way up the center towards the podium (alter?) are several marble blocks with inscriptions dedicated to the fallen.

vJZk720.jpg


6DRR7Xi.jpg


This one, even if you do not speak Polish, is quite understandable.

xrEciTP.jpg


Gary, our guide, pointed out that this podium has a distinct Stalinist era feel about it.
He may be right.

AcXmdzc.jpg


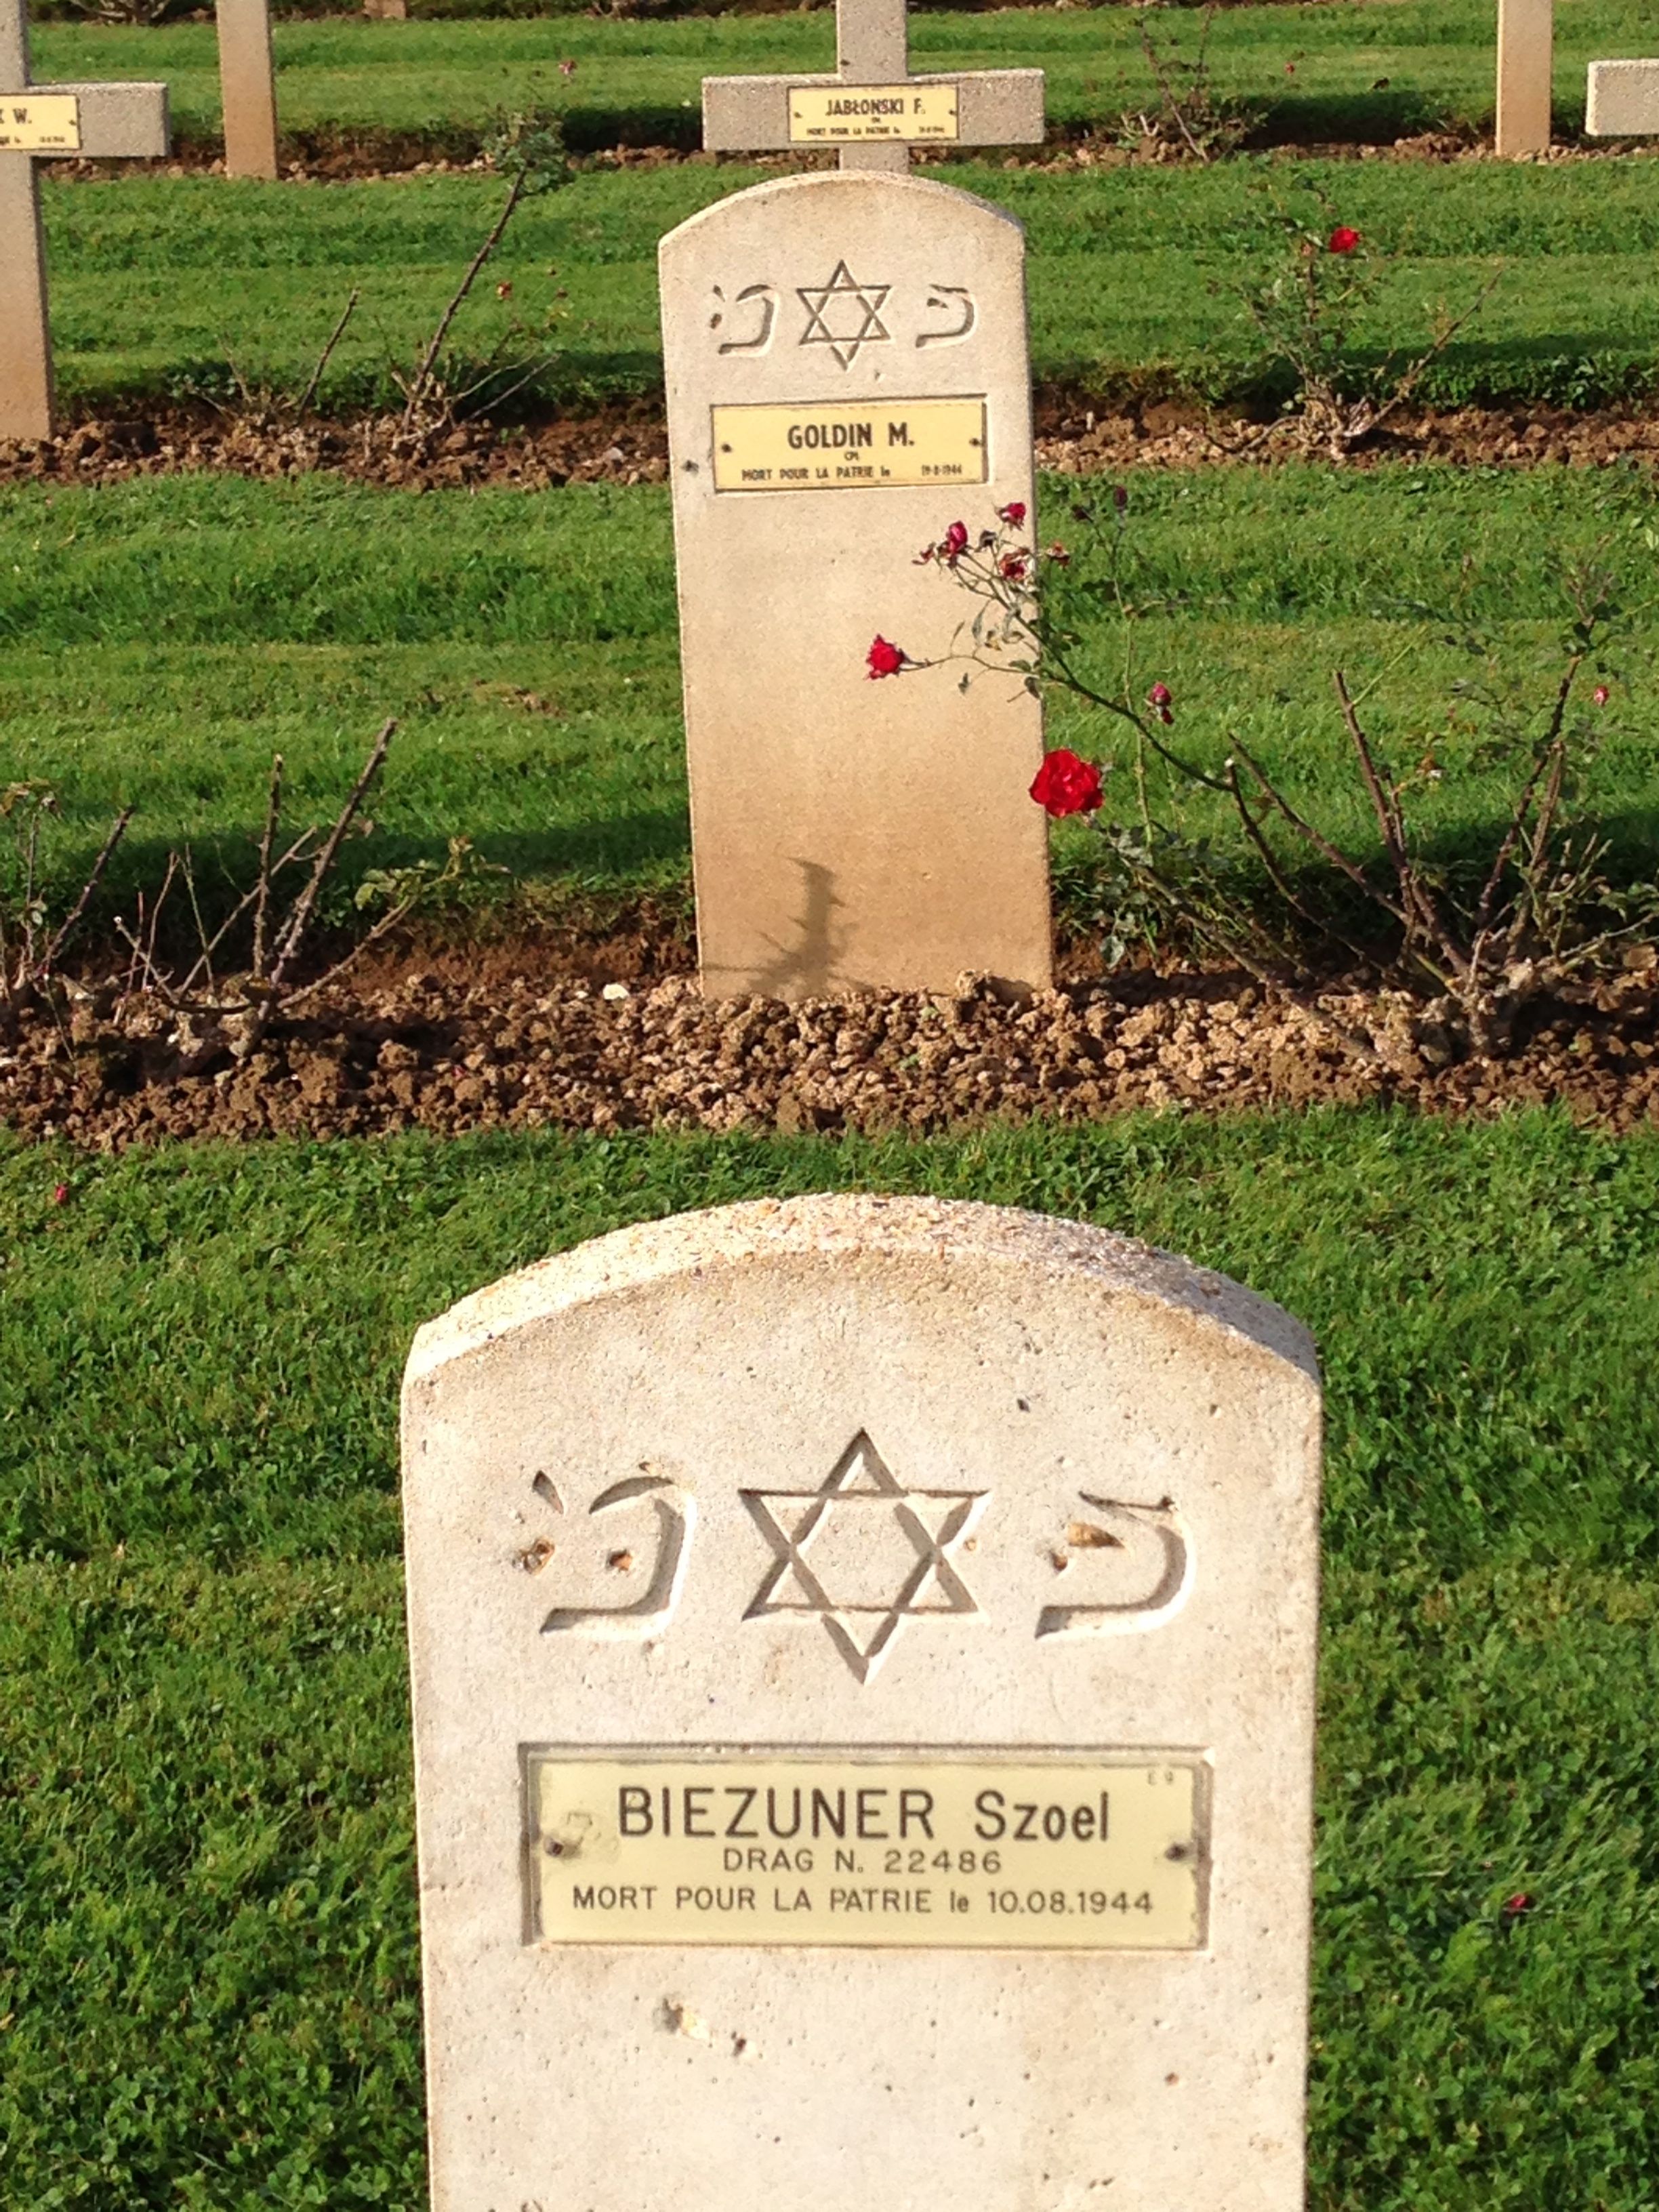
Jewish soldiers graves.

E0EFv9C.jpg


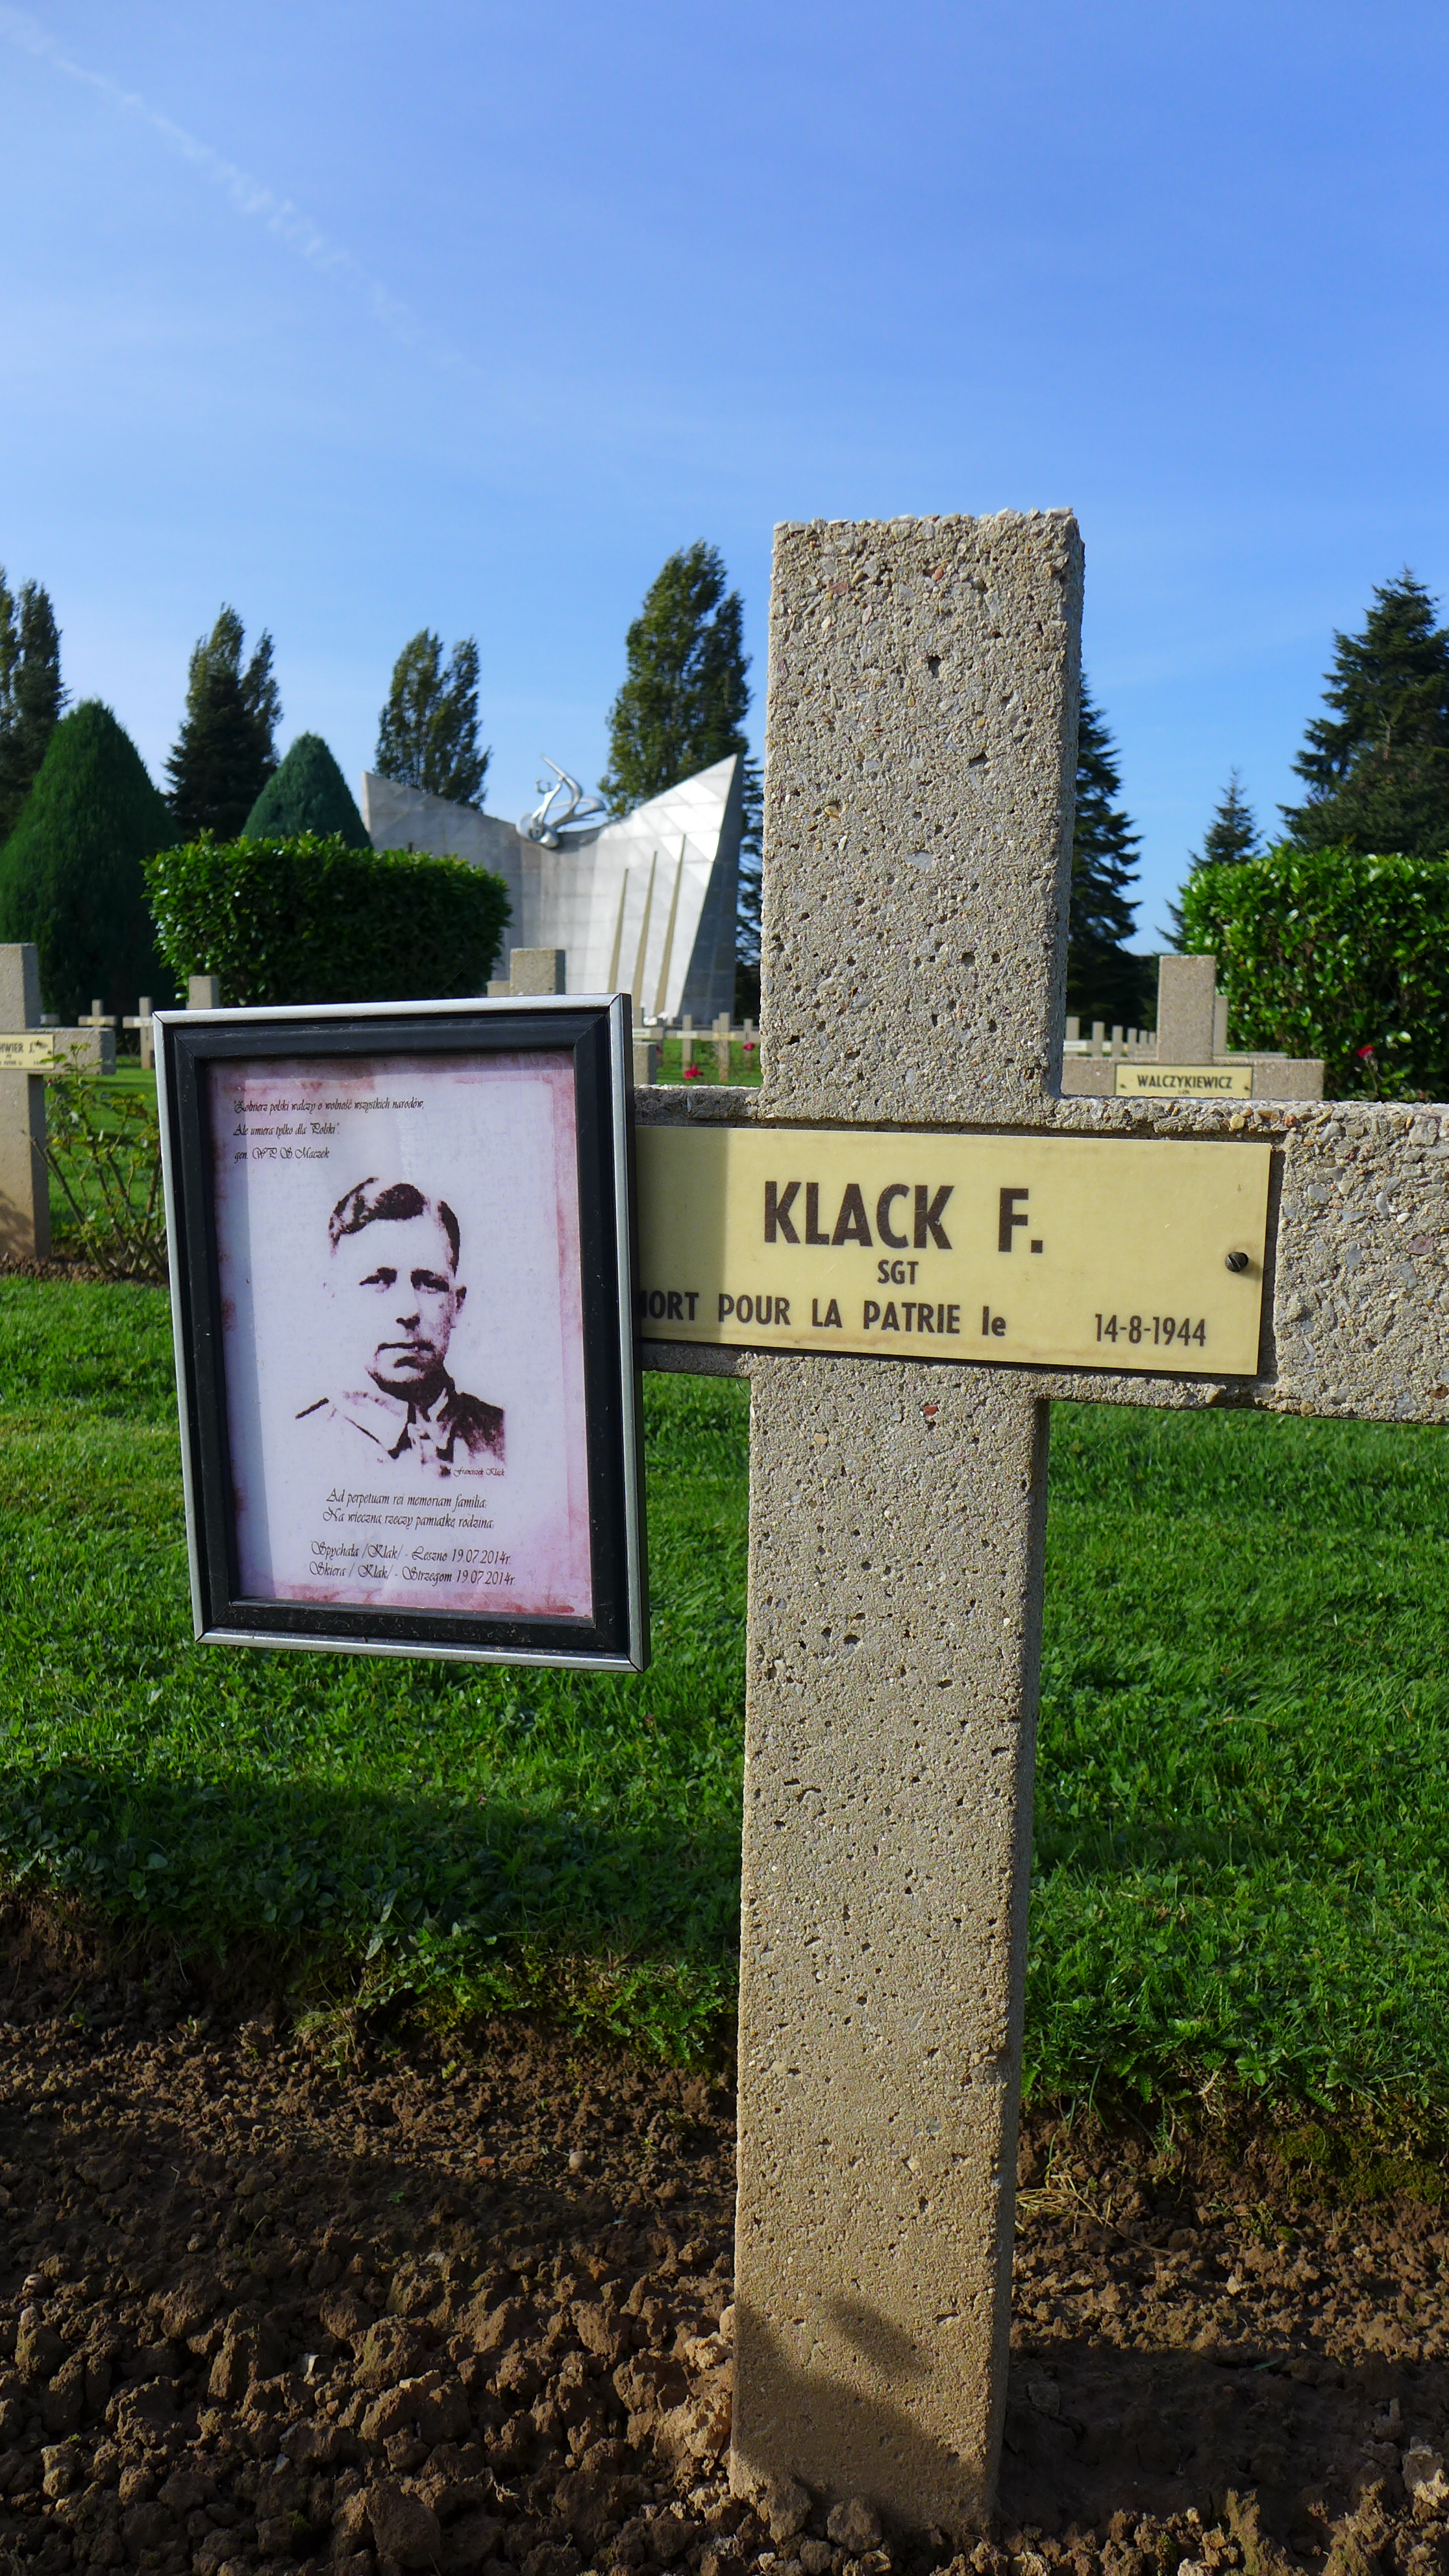
Families come and place remembrances on the crosses.

SdOE1Px.jpg


Nearly all the graves here are marked August of 1944:

1TrcwMc.jpg


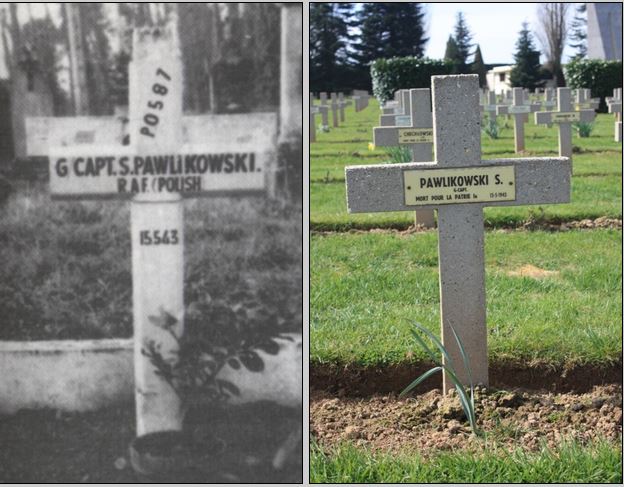
Many killed Polish pilots and aircrew are also buried at the Polish Cemetery at Grainville-Langannerie.

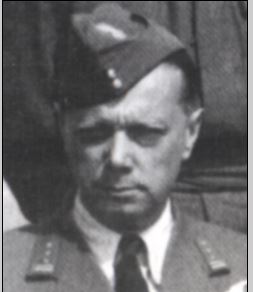
15.05.1943 No. 315 Squadron Spitfire IX LZ990 Gp/Cpt. Pawlikowski
Operation: Circus 297
Date: 15th May 1943 (Saturday)
Unit: No. 315 Squadron (Polish)
Type: Spitfire IX
Serial: LZ990 (1)
Base: R.A.F. Northolt, Middlesex
Location: South East Caen, France.
Pilot: Gp/Cpt. Stefan Pawlikowski P-0587 P.A.F. Age 46. Killed

REASON FOR LOSS:
The squadron took off at 16.07 hrs to cover six Mitchells that were to bomb Caen Airfield.
Four Fw 190’s from II./JG2 jumped the starboard section coming from behind and above.

Also shot down during the same operation Sgt. P-76819 Piotr Lewandoswski flying Spitfire IX BS554 PK-P. He survived but taken as P.o.W. Hauptmann Erich Rudorffer (2) claimed both 315 aircraft shot down.

Stefan Pawlikowski had already seen action in the first world war and then after war end became a test pilot. When Poland collapsed in 1939 he made his escape to France where he took over the training for the Polish Air Force base. Then, with France falling he escaped to England where he had been requested due to his age, to remain in the organisation role of the Air Force.

As do most pilots he loved flying and life behind a desk was becoming difficult. He managed to persuade W/Cdr. Kolaczkowski to allow him to take up a 315 Squadron Spitfire for this operation, which turned out to be his final flight.

Gp/Cpt. Stefan Pawlikowski

JlQMRmX.jpg


4VH3BpH.jpg


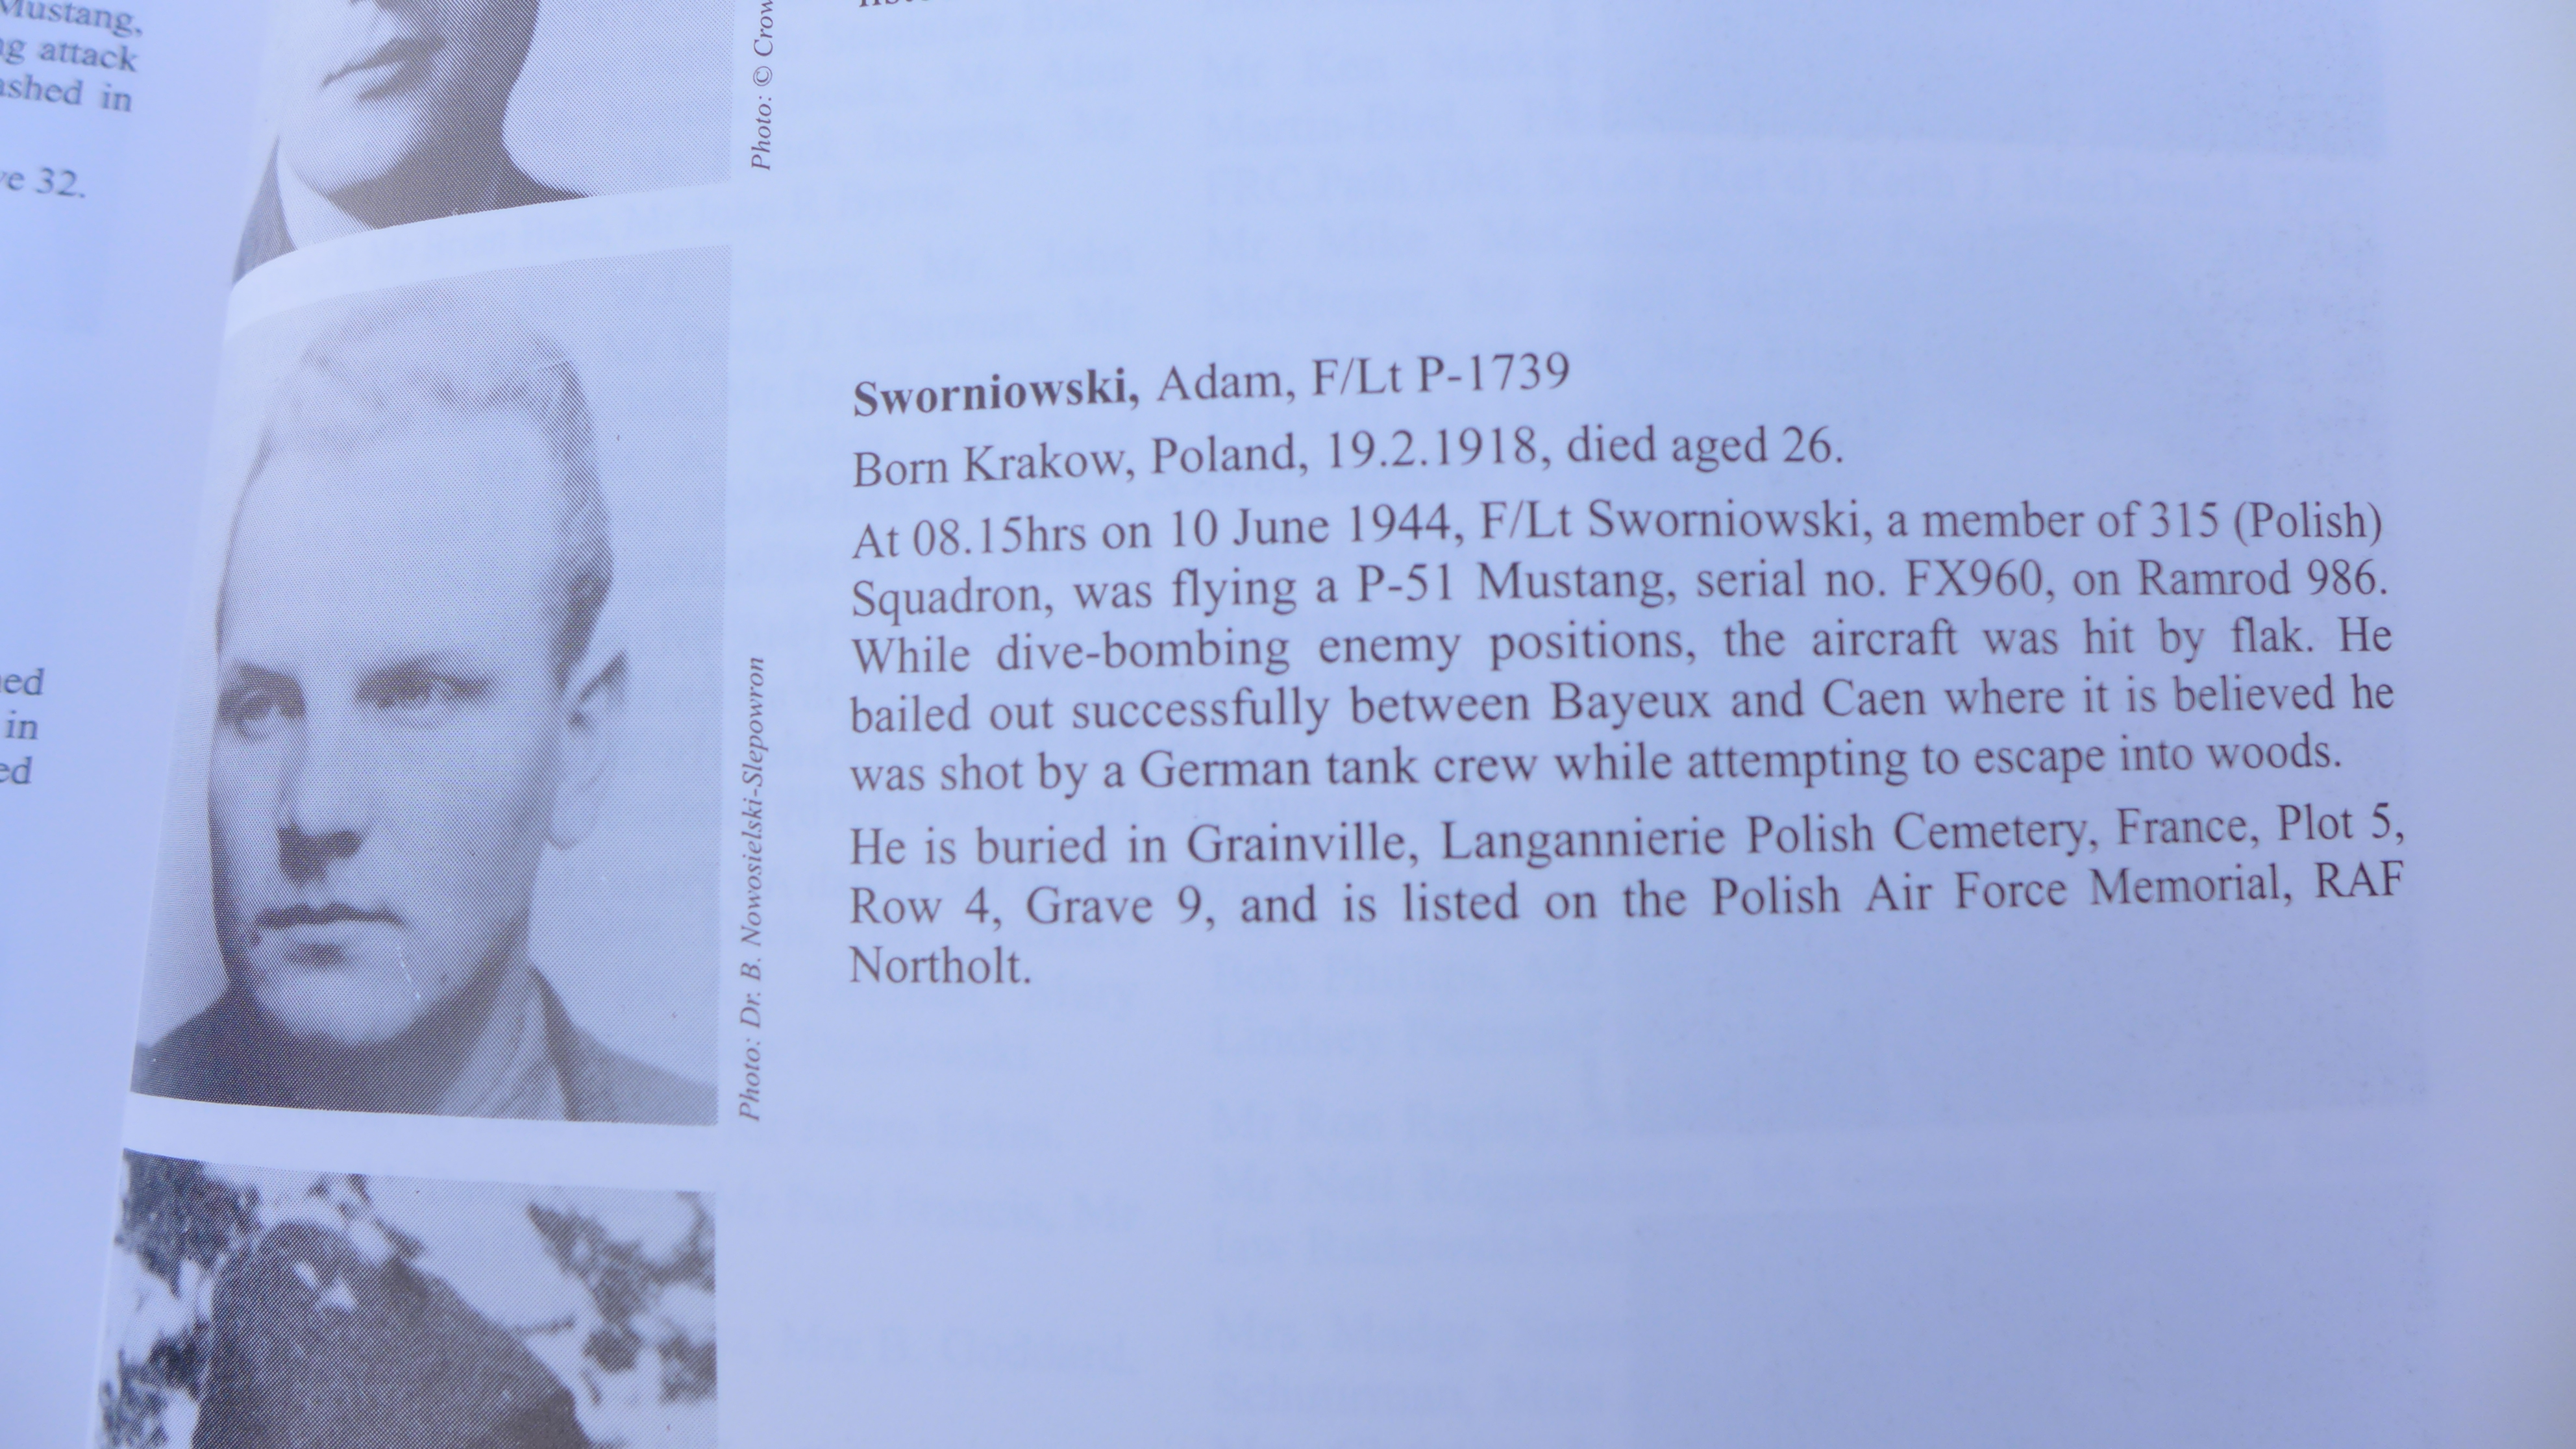
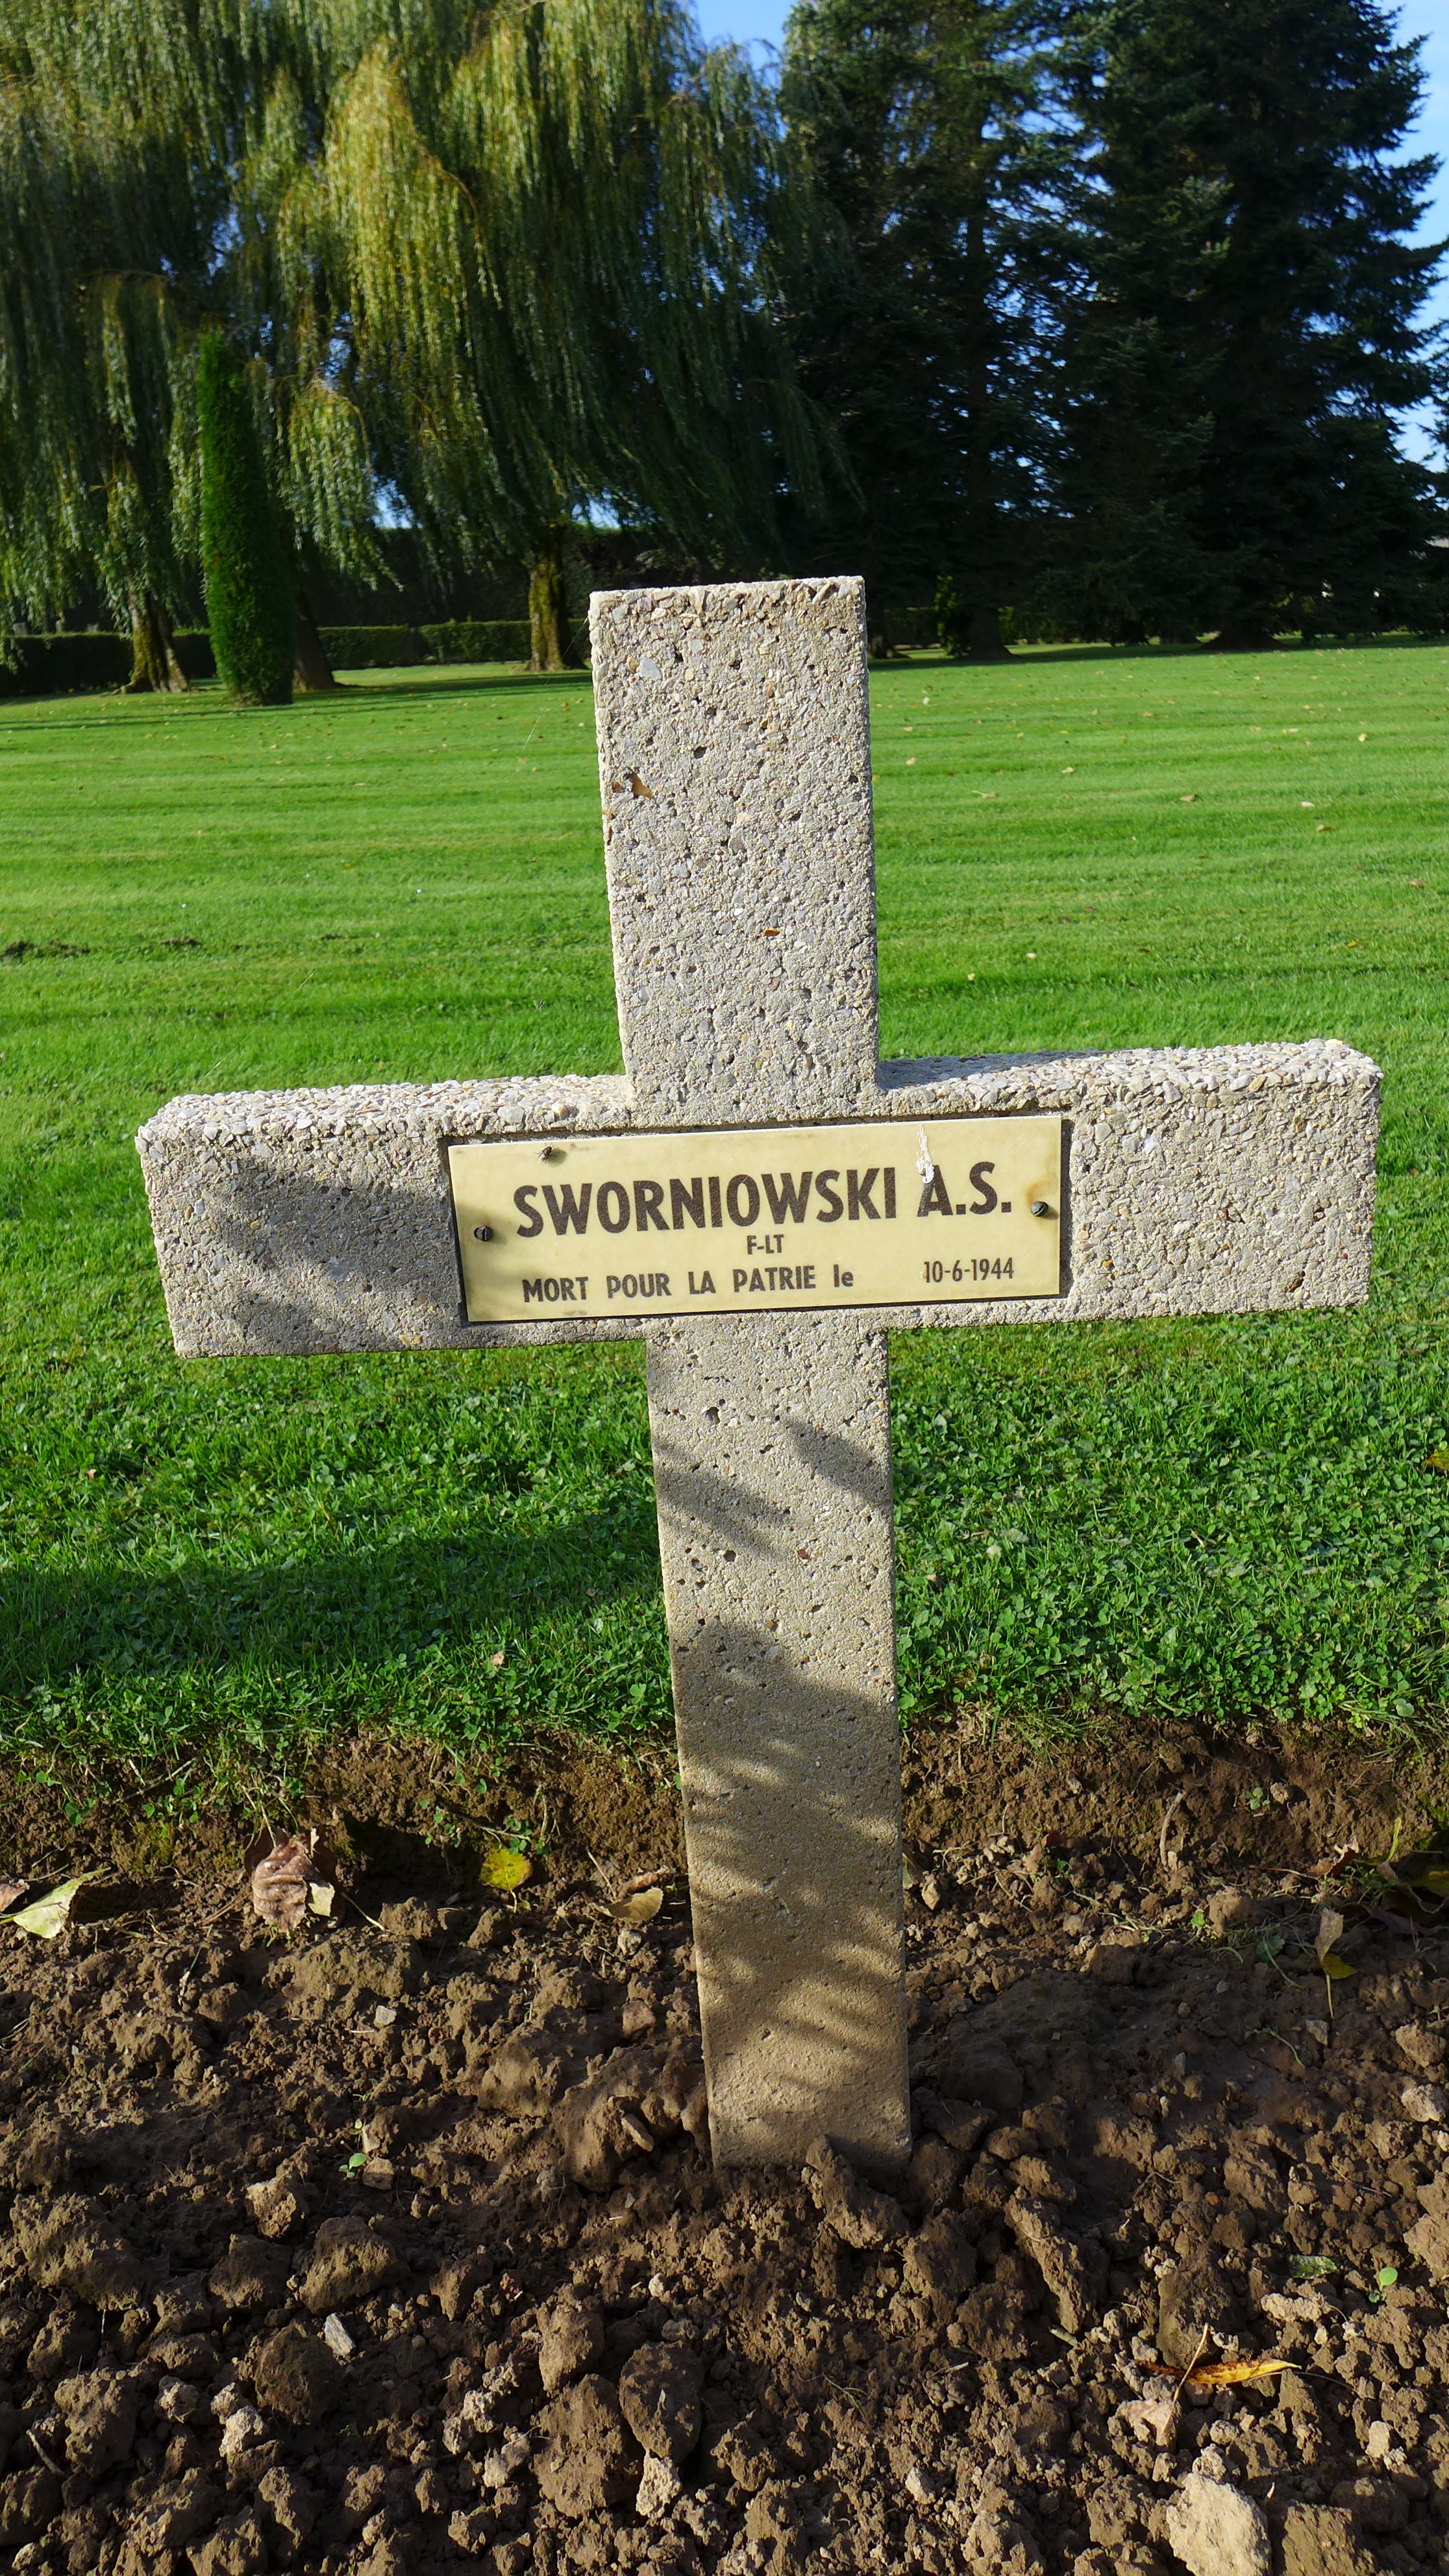
Gary, of course, had stories and pictures of some of the men buried there.

fy8gN9Y.jpg


65RkHqB.jpg


This was the last cemetery we were to visit.
We visited the American, a British, a Canadian, the German and lastly the Polish.
I don't know, being in the cemeteries, standing above all these graves and seeing the pictures of who is buried there and hearing their stories kind of brings the knowledge or awareness of the destruction of war and the wasted life especially of the very young.
I hope I said that right.

I was watching a multi-part documentary called "D-Day to Victory" and a Canadian veteran of the battle for the Falaise Pocket, to paraphrase, said "....I can not believe that two civilized nations can bring so much destruction on to each other. Perhaps we are not yet civilized".

God rest all their souls.
 
Last edited:
@Nathangun
Oh yes, we enjoyed France very much.
I haven't really talked about the spectacularly beautiful country side of the Normandy region or posted any of the touristy pictures we took (especially of Bayeux).
The towns, every one of them all seem to be built around the year 1000 (slight exaggeration) or at least they try to keep that feel about them.
Caen would be the exception. That was a serious prosperous modern city.
Everything and everywhere was clean and well kept.
The wine, the food and yes, even the beer was very enjoyable.
(OK the beer on tap was mostly Kronenbourg or from Belgium and of course everyone had Guinness)
The people were very friendly, cheerful and helpful. No one took offense with our struggling at communicating. In fact we had some good laughs together at our mis-communications.
And of course the girls.......yikes. I was smitten almost daily ;)
Ah to be single and in my 20's, I would surely move to France.
I am in my 50's and very happily married but the mademoiselles did put a smile on my face.

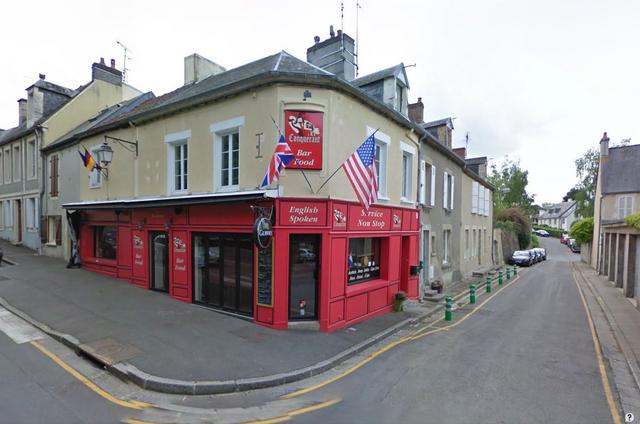
here's a good story for you, right across the street from the hotel was this pub.
It had "English spoken here" and a Guinness sign hanging out front.
So after a long day we would stop at the hotel, freshen up and walk over to the pub.
It turned out the proprieter was French (he worked the bar) and his wife, who acted as hostess towards us, was Irish!
Ah,we had a grand time indeed. Eveyone was so friendly, the owners and patrons. It was a fantastic way to end the day.
(Of course the shots of Calvados took the edge off too ;) )

9hXTMcK.jpg
 
Last edited:
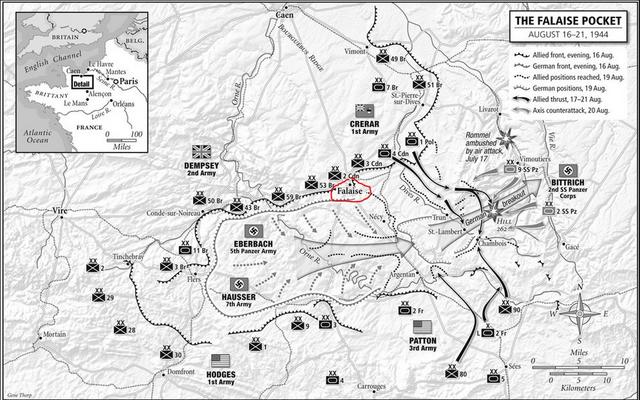
Anyway, from the Polish Cemetery we pushed on to Falaise.
We are now in a position where the British/Canadian/Polish forces were with in range of the American forces at Argentan.
The German 7th Army and the 5th Panzer Army started their mass retreat through the Falaise gap.

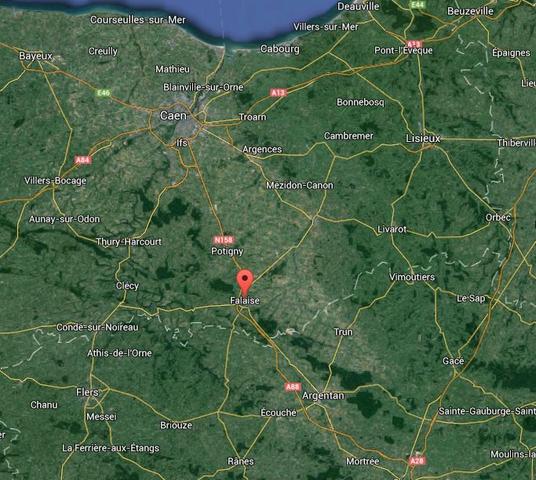
mKsa2YN.jpg


Where we are located in Normandy:

oZEE24I.jpg


But first....
I had asked Gary to stop and show us any significant historical sites and I guess the birthplace of William the Conqueror would qualify.
Please excuse our side trip in to the 11th century.

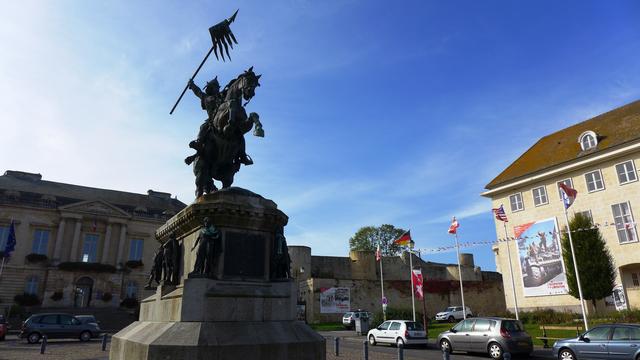
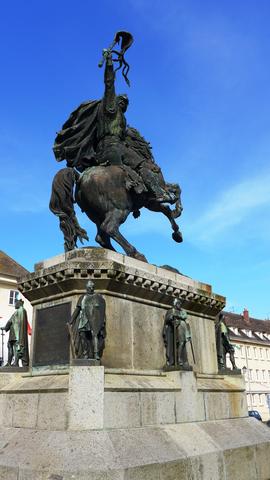
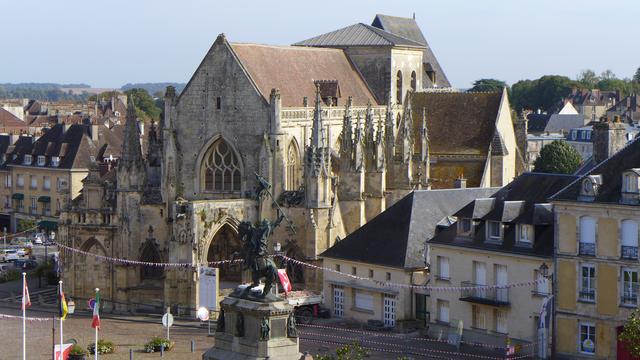
Entering town and in to the town center across from the church is a statue of William the Conqueror.
You can see the castle battlements in the background.

SxymZFW.jpg


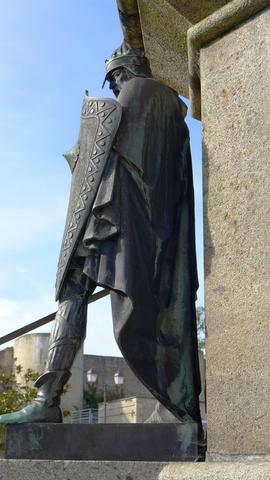
You can see around the staue are smaller statues of his Knights.
On the sides of the pedestal are six statues of Dukes of Normandy:
Robert Ier le Magnifique / Robert I the Magnificent (1000–1035), Duke of Normandy, 1027-1035. Second son of Richard II. Father of William the Conqueror by his mistress, Herleva of Falaise.
Richard III (c. 1001-1027), Duke of Normandy, 1026-1027. Eldest son of Richard II.
Richard II l'Irascible ou Richard le Bon / Richard II the Good (d. 1026), Duke of Normandy, 996-1026. Son of Richard I.
Richard Ier Sans-Peur / Richard I the Fearless (Fécamp c. 930-996), Duke of Normandy, 942-996. Son of William I.
Guillaume Longue-Épée / William I Longsword (c. 900-942), count of Rouen, "Duke" of Normandy, 927-942. Son of Rollo.
Rollon / Rollo (Hrólfr) (c. 846–c. 931). First ruler of the Viking principality now known as Normandy. ( how cool is that )

wNa6WNl.jpg


jfVTSxQ.jpg


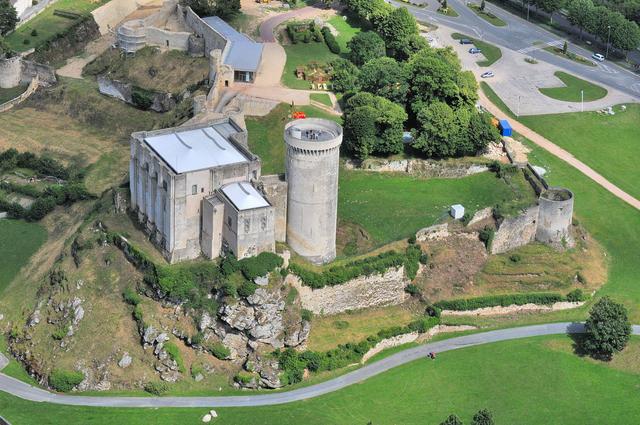
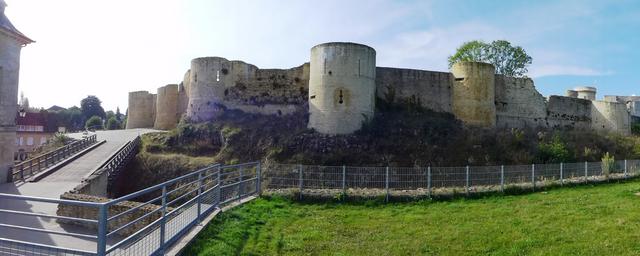
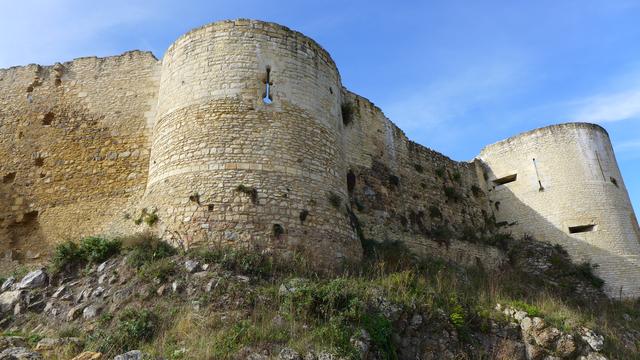
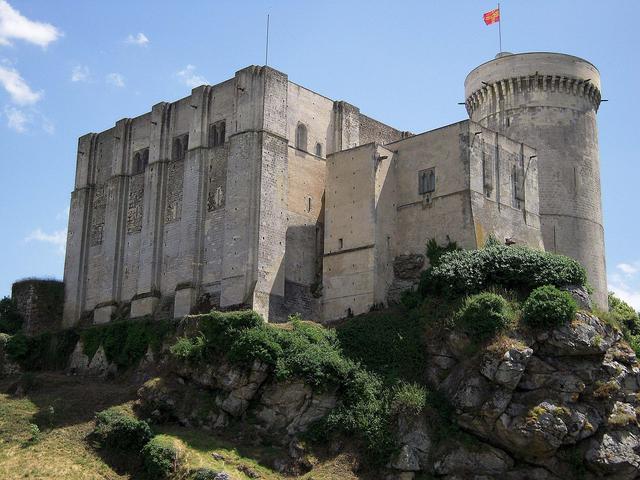
The Château de Falaise is a castle located in the south of the commune of Falaise ("cliff" in French) in the Calvados département of Calvados, in the region of Normandy, France. William the Conqueror, the son of Duke Robert of Normandy, was born at the castle in about 1028. William went on to conquer England and become king and possession of the castle descended through his heirs until the 13th century when it was captured by King Philip II of France.

Possession of the castle changed hands several times during the Hundred Years' War. The castle was deserted during the 17th century. Since 1840 it has been protected as a monument historique.

cV3K3vO.jpg


On the death of Richard II, Duke of Normandy, in August 1026 his son (also called Richard) succeeded to the duchy. The inheritance however was disputed by Richard III's younger brother, Robert. Not content with his inheritance of the town of Exmes and its surrounding area, Robert rebelled and took up arms against his brother and he captured the castle of Falaise. Richard besieged the castle and forced Robert to submit to him, however the duke died from unknown causes in 1027 and was succeeded by his brother. Robert fathered an illegitimate son by a woman named Herleva, who was from the town of Falaise and the daughter of a chamberlain. The child, William, was born in about 1028.

4znb4yy.jpg


The castle (12th–13th century), which overlooks the town from a high crag, was formerly the seat of the Dukes of Normandy. The construction was started on the site of an earlier castle in 1123 by Henry I of England, with the "large keep" (grand donjon). Later was added the "small keep" (petit donjon).

The tower built in the first quarter of the 12th century contained a hall, chapel, and a room for the lord, but no small rooms for a complicated household arrangement; in this way, it was similar to towers at Corfe, Norwich, and Portchester, all in England.

kXmUN91.jpg


Arthur I, Duke of Brittany was King John of England's nephew. With the support of King Philip II of France, Arthur embarked on a campaign in Normandy against John in 1202, and Poitou revolted in support of Arthur. The Duke of Brittany besieged his grandmother, Eleanor of Aquitaine, in Château de Mirebeau. John marched on Mirebeau, taking Arthur by surprise and capturing him on 1 August. From there Arthur was conveyed to Falaise where he was imprisoned in castle's keep. According to contemporaneous chronicler Ralph of Coggeshall, John ordered two of his servants to mutilate the duke. Hugh de Burgh was in charge of guarding Arthur and refused to let him be mutilated, but to demoralise Arthur's supporters was to announce his death. The circumstances of Arthur's death are unclear, though he probably died in 1203.

In about 1207, after having conquered Normandy, Philip II Augustus ordered the building of a new cylindrical keep. It was later named the Talbot Tower (Tour Talbot) after the English commander responsible for its repair during the Hundred Years' War. It is a tall round tower, similar design to the towers built at Gisors and the medieval Louvre.

HJs2DId.jpg


Possession of the castle changed hands several times during the Hundred Years' War. The castle was deserted during the 17th century.

Since 1840, Château de Falaise has been recognised as a monument historique by the French Ministry of Culture. A programme of restoration was carried out between 1870 and 1874. The castle suffered due to bombardment during the Second World War in the battle for the Falaise pocket in 1944, but the three keeps were unscathed.

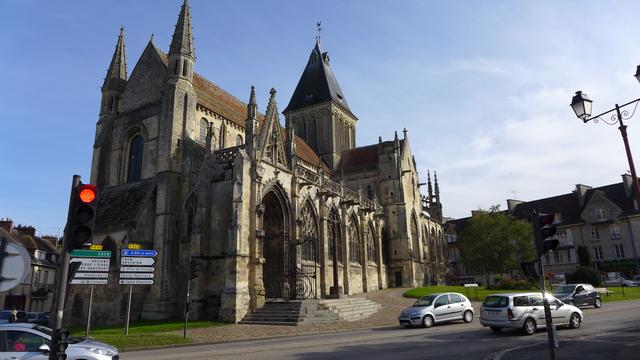
Standing by the statue looking across the street is the church of Saint Gervais.

CD3720b.jpg


A view from a top the battlements:

Yuss4Xk.jpg


And lastly, lest we forget we are here on a WWII adventure.
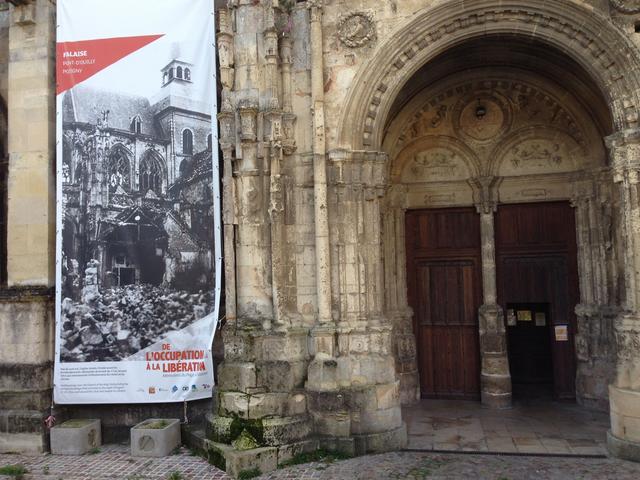
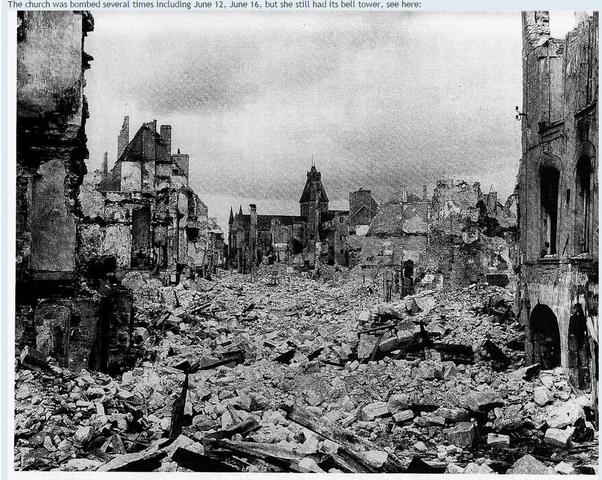
Falaise was pretty well flattened by aerial bombing.

The entrance to the church

4t9CiuQ.jpg


9Ab9D2r.jpg


All in all we were in out pretty quick but for us Yanks, at home, history starts in the mid 17th century, this was so very cool.
To say I stood in the home where William the Conqueror was born, well, there aren't too many of us around here can say that.. :)
 
Last edited:
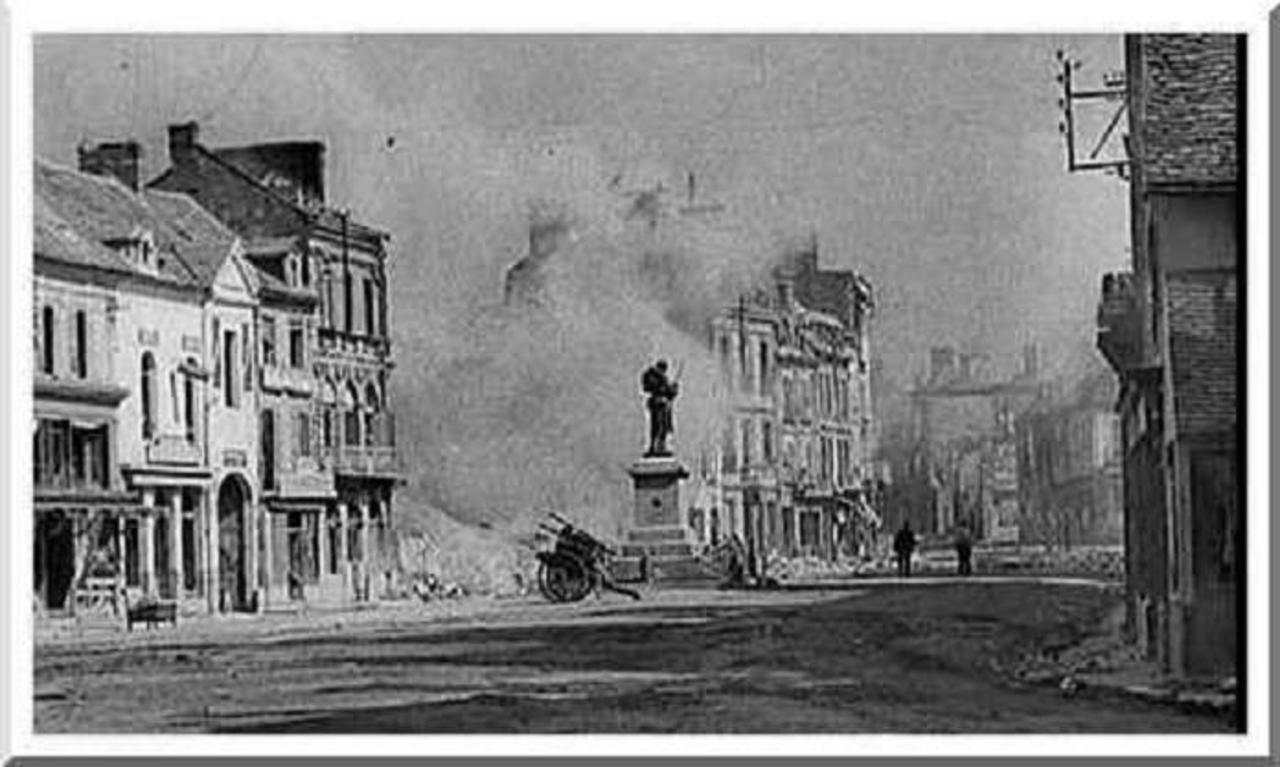
After Falaise we stopped in Trun for a few moments.
Trun, for a time, was where the Canadian 4th Armored division was headquartered.


When the Allies started to approach Trun.....

"The Germans were now becoming increasingly alarmed by the gravity of their situation. On the afternoon of August 16, Field Marshal Günther Kluge, commander of German forces in the West, returned to his headquarters at La Roche Guyon. He had been visiting the Falaise area when his radio truck was disabled, leaving him out of contact with his headquarters for several hours. Since Field Marshal Erwin Rommel had been strafed and wounded by an Allied fighter on July 17, Kluge had also been in personal command of Rommel's Army Group B in Normandy. Fully alerted to the danger there, Kluge now ordered the army group to withdraw, which it began to do that night. The German escape route included two vital crossroads-Trun and Chambois-and two bridges of high load-bearing capacity at their disposal at Chambois and St. Lambert.


On August 17, the British commander in chief, General Bernard Law Montgomery, ordered the Canadian 4th and Polish 1st Armored divisions to advance through Trun and take Chambois. At the same time, the 90th Infantry Division was returned to the control of the V Corps of the First Army, with which it had entered combat back in June. The Polish 1st Armored and American 90th Infantry divisions had embarked on separate courses that were to converge at Chambois."

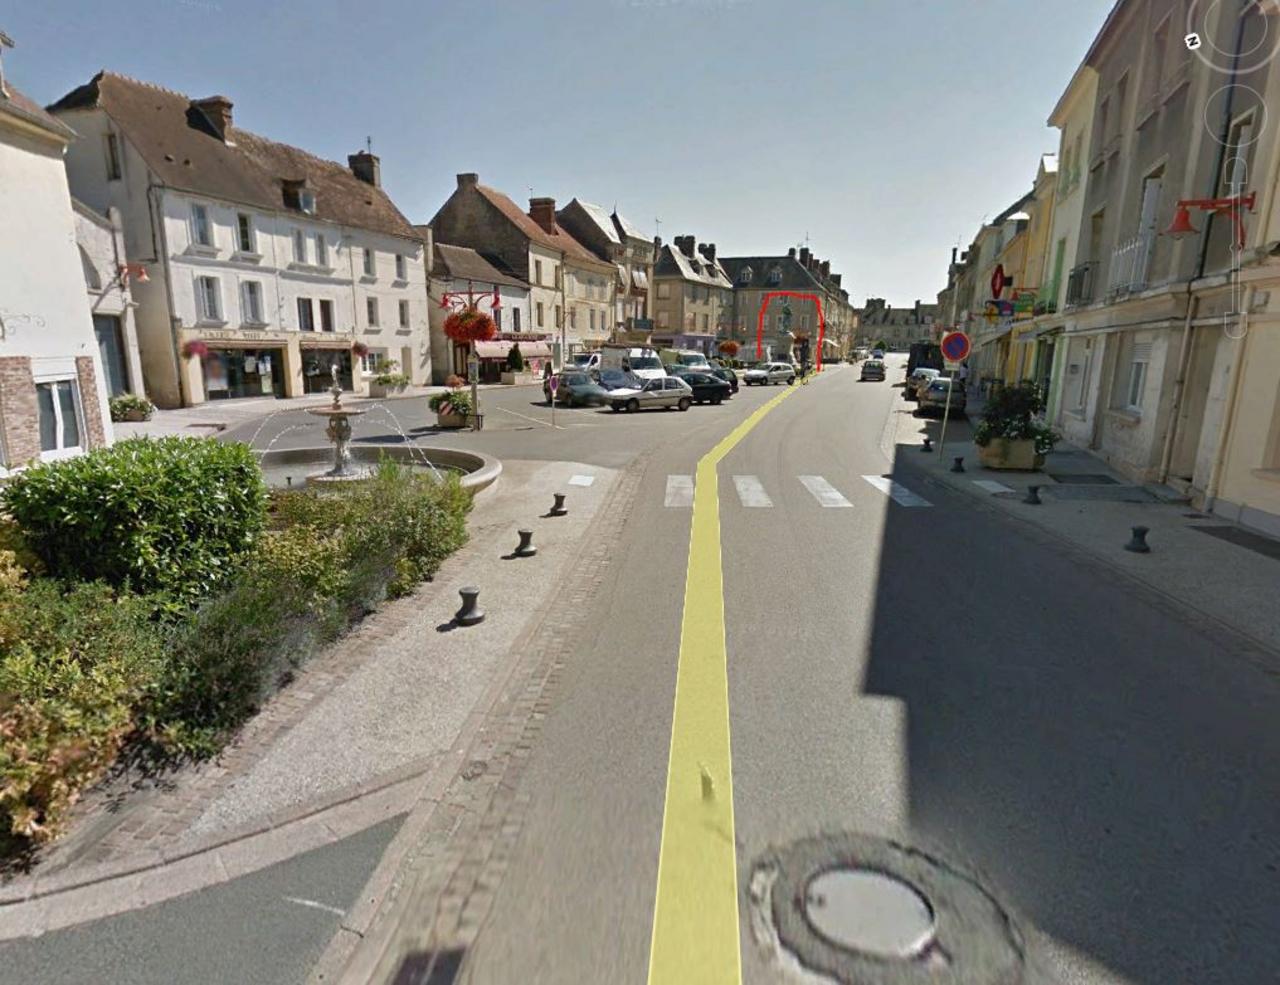
I found a little youtube video where Trun is shown from the 1:28 mark to the 1:50 mark.
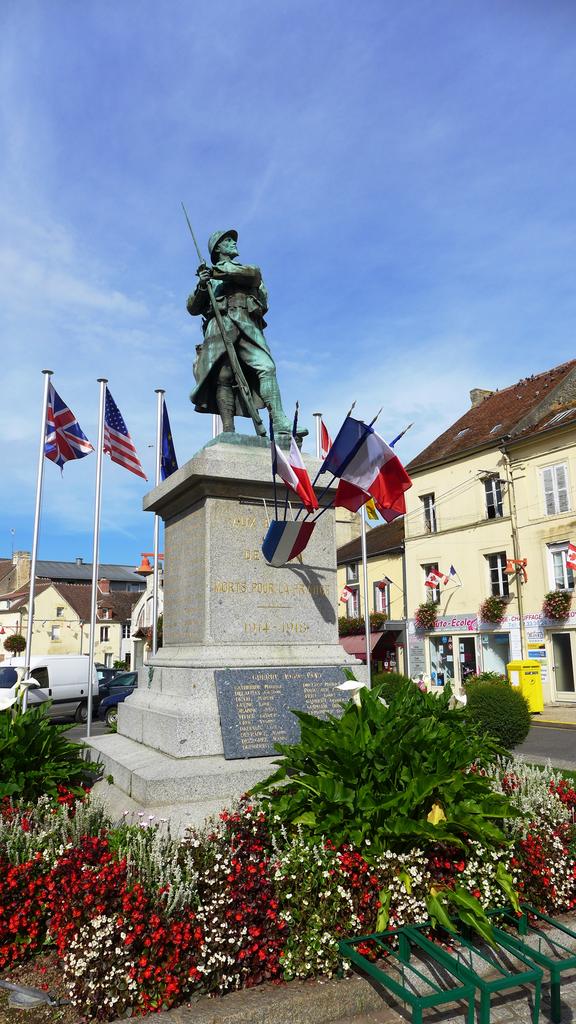
It shows the town square and WWI memorial.

The WWI Memorial

LoJFvnd.jpg


Now and then

BzXHnhS.jpg


WDUjTpf.jpg


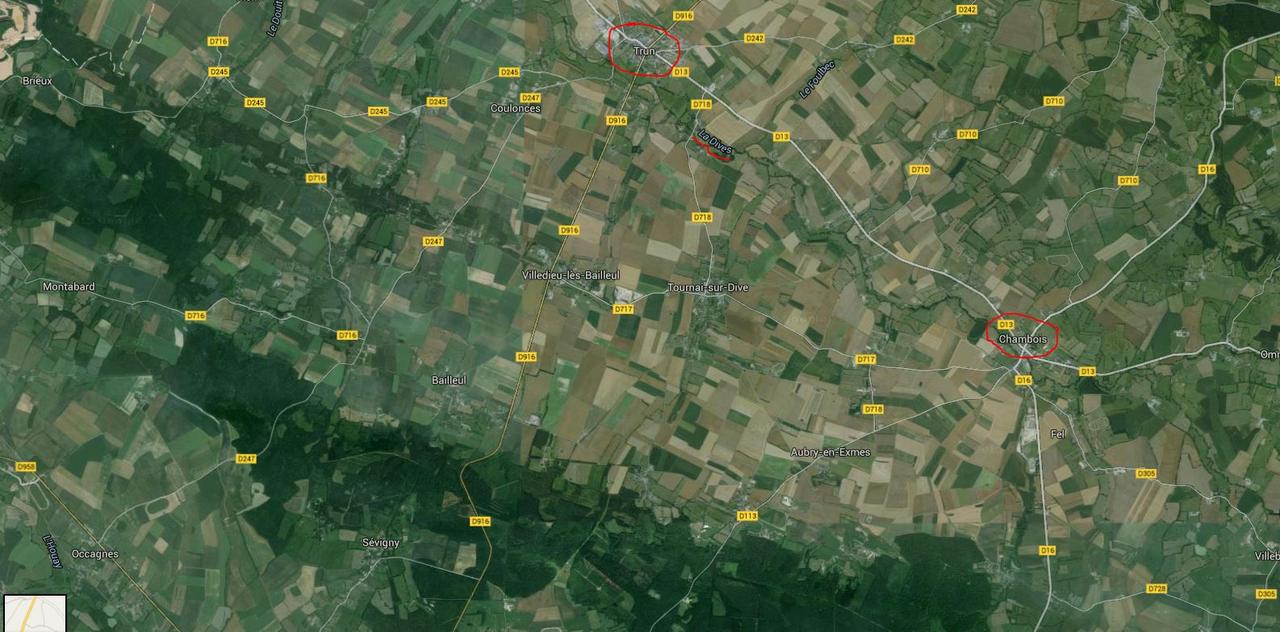
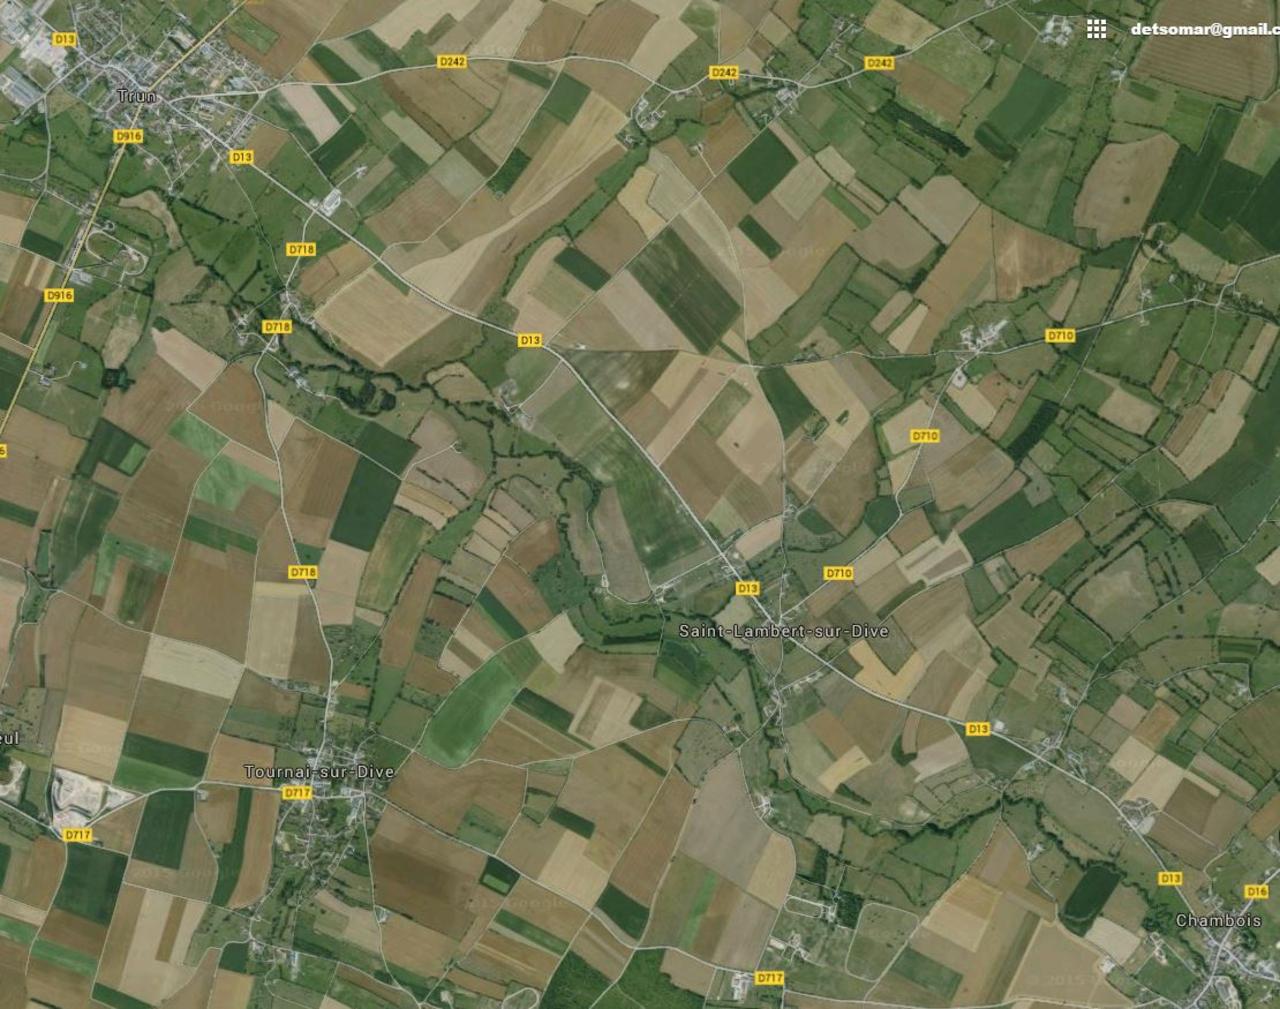
Lastly wtih the fall of Trun the Germans only avenue of escape was to cross the Dives river between Saint-Lambert -sur-Dive and Chambois.

With the Canadians in Trun and the Americans in the woods to the south over one hundred thousand German troops needed to squeeze through a gap about 2 miles wide.

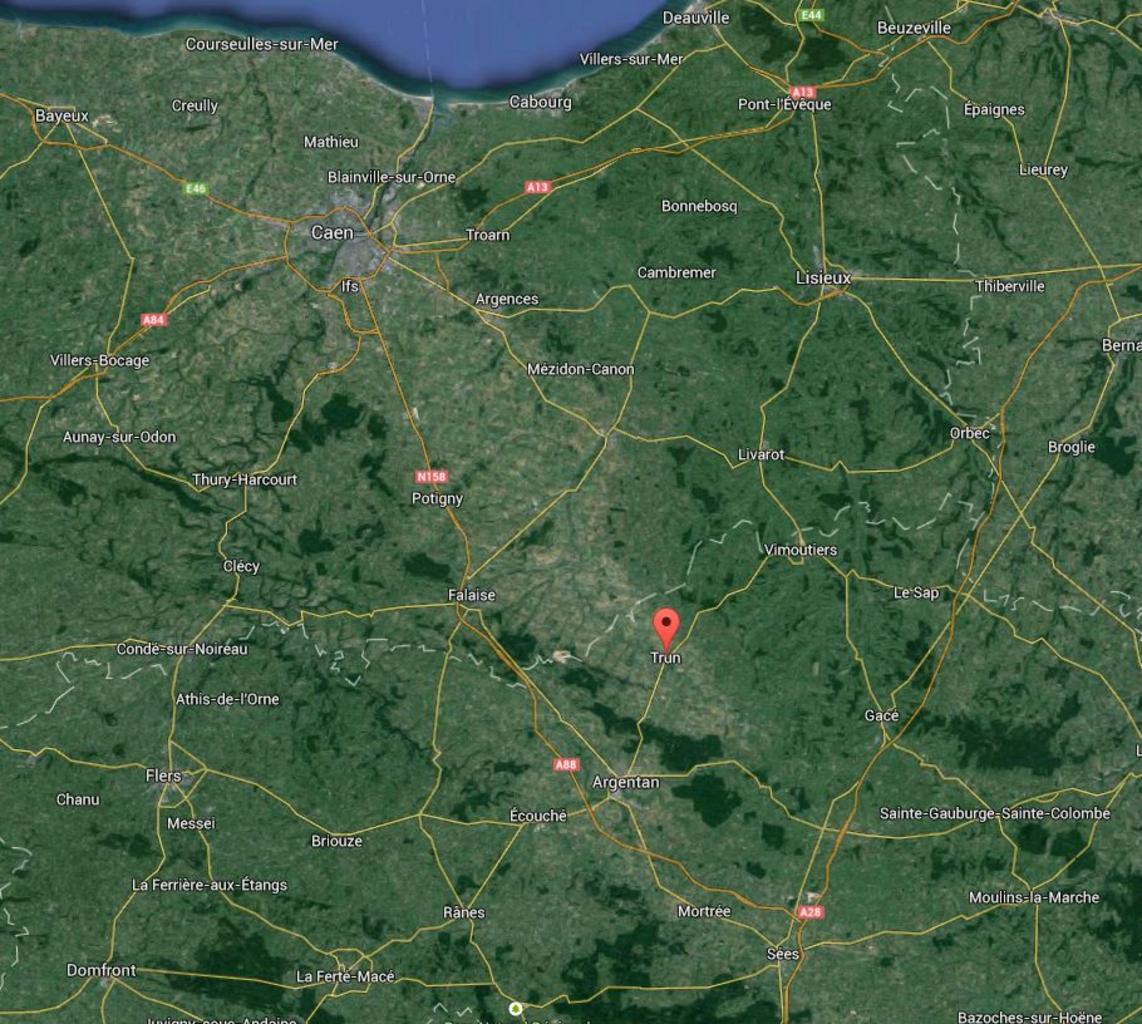
You can see we are now deep in to south east Normandy.
The Americans had taken Argentan and secured the woods to the north and east.

EV8b3yj.jpg


LI6RkkP.jpg


Here you can see the woods south of Chambois where the American lines were:

RGSMv8N.jpg


And a closer shot showing the meandering Dives river between Trun and Chambois:

MpUEOGN.jpg


From here it was on to St Lambert-sur-Dive and the area of some of the most intense fighting of the breakout.....
 
Last edited:
We're almost at the end of our tour.
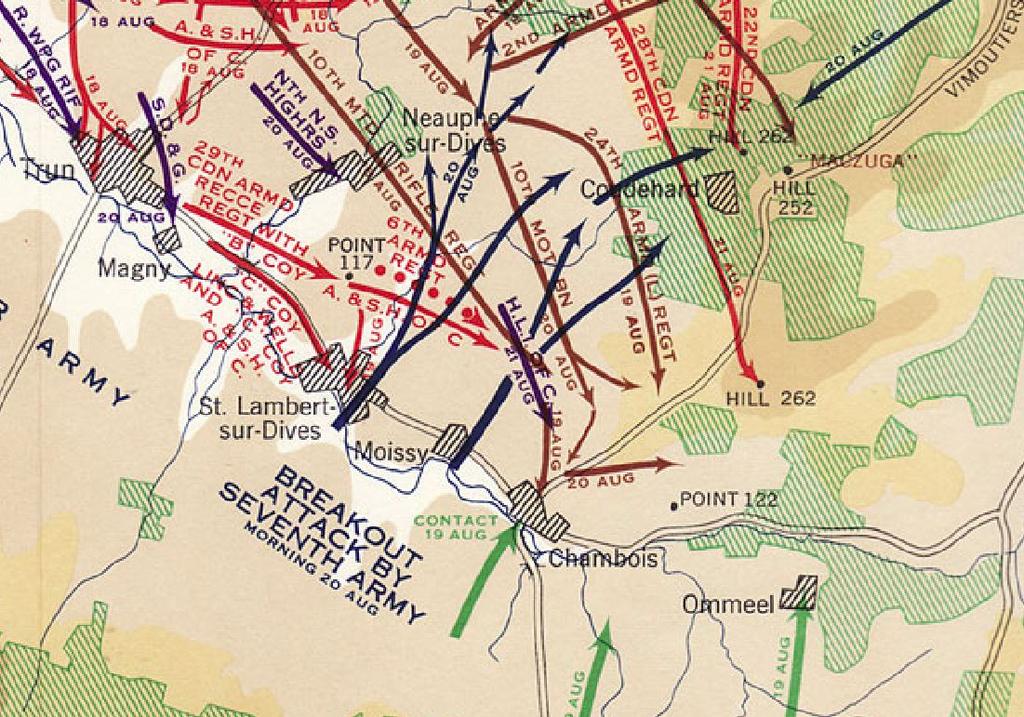
We are at the point where the German Seventh Army is going to try a last ditch effort to breakout of the Falaise Pocket.

a0STAdv.jpg


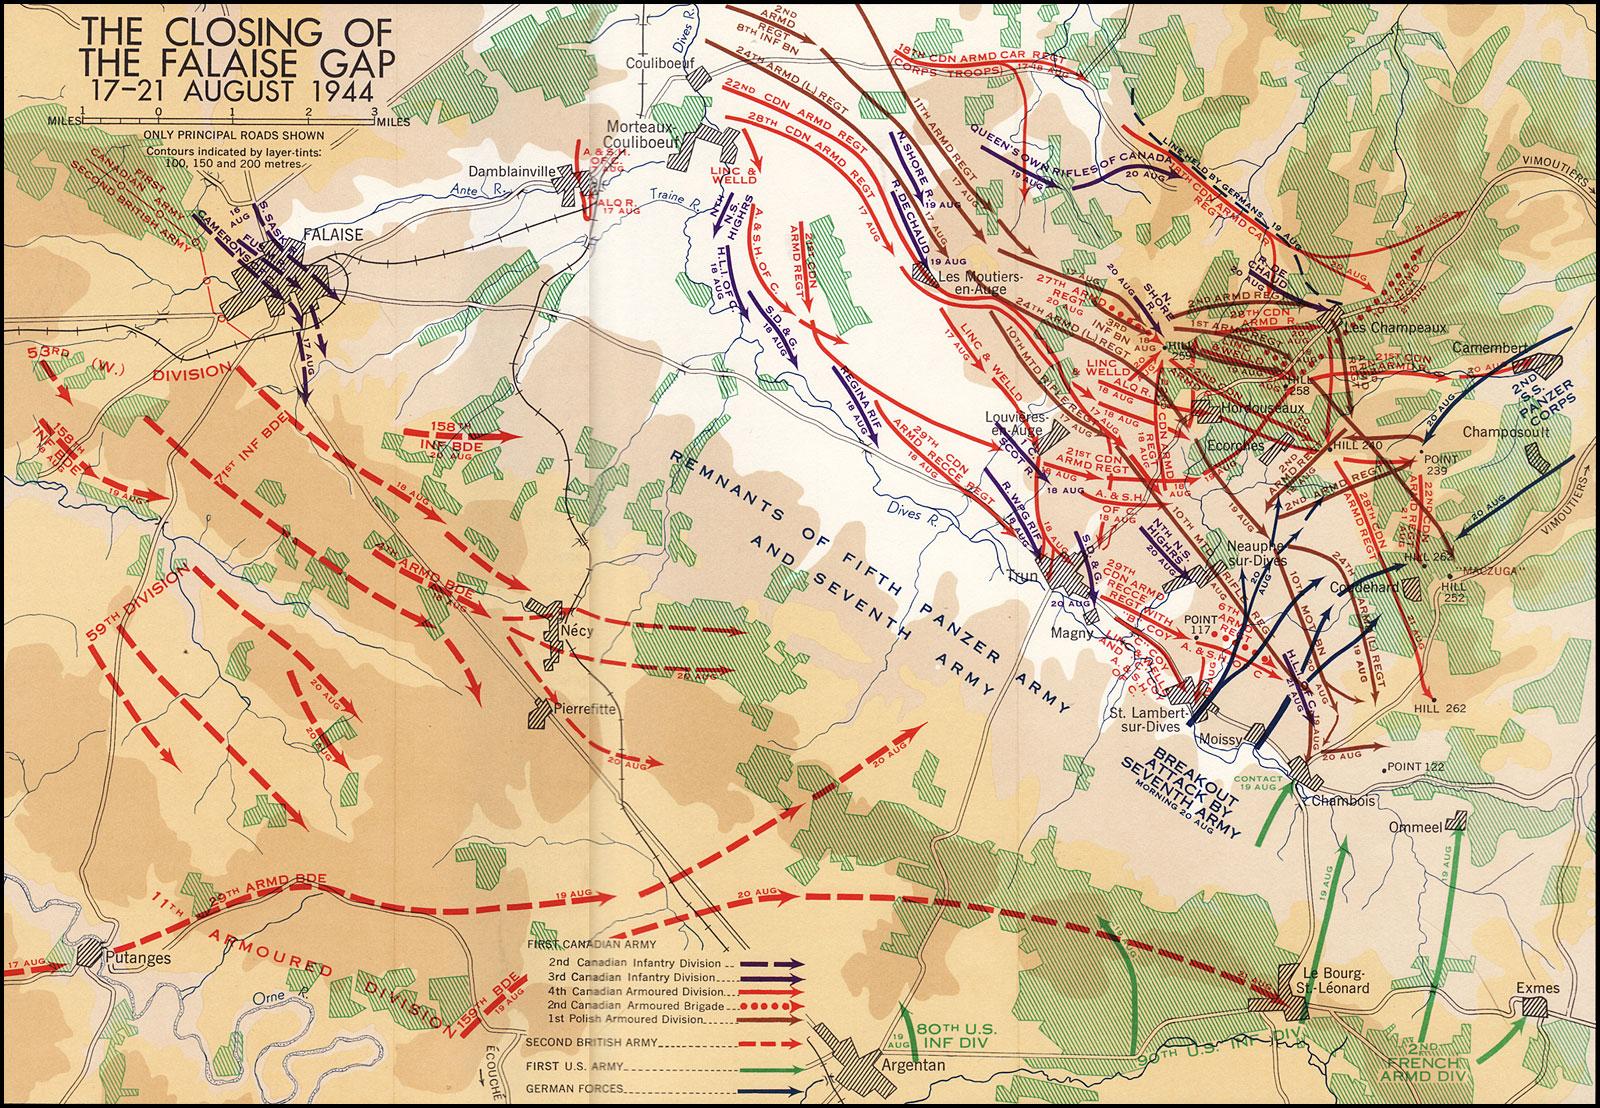
On the afternoon of Aug. 18, 1944, the 4th Canadian Armoured Division redeployed its forces in response to a directive from the corps commander to prevent the enemy from escaping the Falaise Pocket.

a7g8eyb.jpg


The division was to establish blocking positions along the River Dives between the villages of Trun and Chambois. The Polish Armd. Div. was to secure Chambois, linking up with the American 90th Infantry Div.

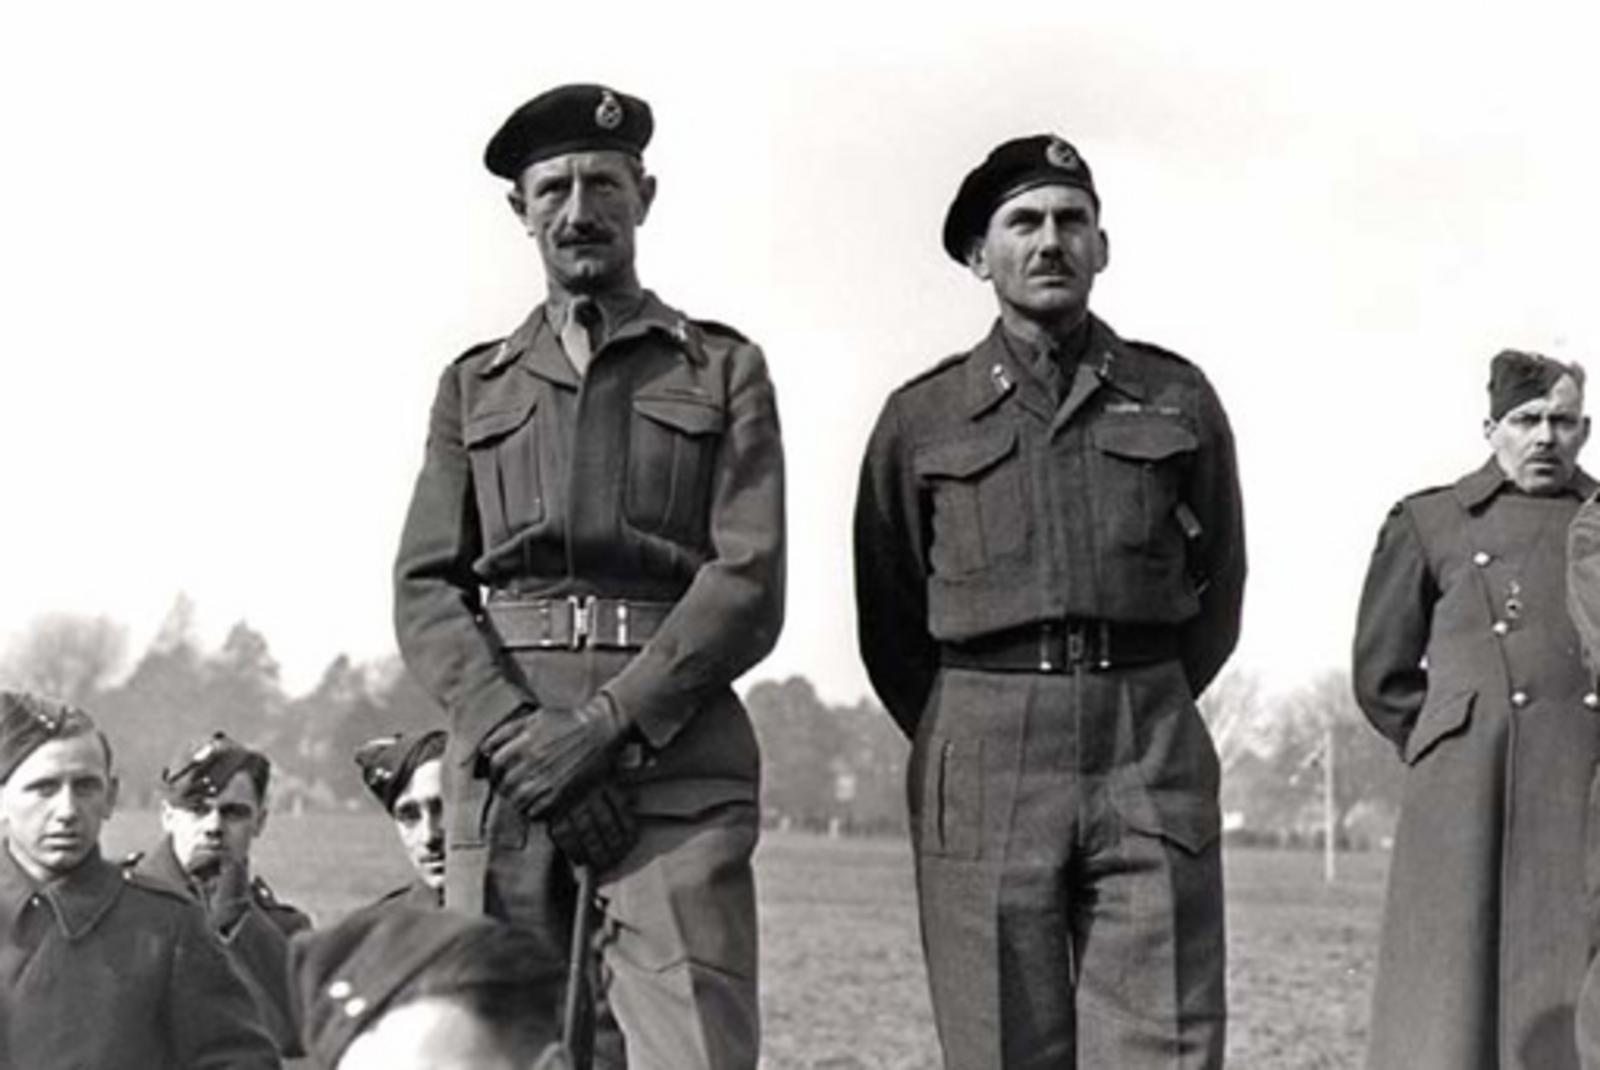
It is not clear why Lieutenant-General Guy Simonds thought that the 10th Canadian Inf. Brigade, less the Algonquin Regiment, was a sufficient force to accomplish this task, but as corps commander he was preoccupied with the next phase of operations: the pursuit to the River Seine.

Simonds ordered Major-General George Kitching to deploy the 4th Armd. Bde., with three of the division’s four armoured regiments and two infantry battalions, north of Trun, where they would begin the advance north.


Major-General George Kitching (left) and Lieutenant-General Guy Simonds (right)

fTf6jbY.jpg


This decision forced Brigadier-General Jim Jefferson to try and close a six-kilometre gap with the tanks of the South Alberta Regiment (SAR) and the rifle companies of the Argyll and Sutherland Highlanders of Canada, and the Lincoln and Welland Regt. The Lincs were committed to holding Trun and the nearby village of Magny, where a bridge crossed the River Dives. Jefferson ordered the SARs and Argylls to advance towards Chambois, gaining control of the village of St. Lambert-sur-Dives, where a second bridge was located.

Major David Currie commanded the lead battlegroup. His C Squadron of the SAR had 15 tanks while Maj. Ivan Martin’s Argyll company could provide 55 men. Their attempt to seize St. Lambert on Aug. 18 was slowed by friendly fire, first from Polish tanks then, more seriously, from repeated attacks by Royal Air Force Spitfires. Currie scouted the village defences on foot and was preparing an attack with dismounted tank crews and the infantry when the regimental commander, Lieutenant-Colonel Gordon Wotherspoon, ordered him to wait for morning.

Using the cover of darkness, Wotherspoon brought his headquarters and most of the remaining armour to Hill 117, a reverse slope position north of St. Lambert. The regiment’s third squadron covered the road back to Magny.

Currie’s battlegroup re-entered the village, a straggle of stone houses on both sides of the road, shortly after dawn on the 19th. This was not an inviting task for thinly armoured Shermans and when the lead tank was hit, the job of taking the village was turned over to the Argylls who systematically cleared the houses and destroyed a Panther tank. Currie’s tanks moved in to consolidate. Brigade, division and eventually corps were informed that “Rooster,” the code name for the village, was secure. Another armoured squadron and two additional infantry companies, one from the Argylls and one from the Lincs, joined Currie. The arrival of Forward Observation Officers (FOOs), who reported that both field and medium artillery were in range, was especially welcome news.

St. Lambert-sur-Dives August 1944

bI8CLuE.jpg


Unfortunately, evidence, including Ultra decrypts of top secret German Enigma traffic, suggested that the enemy was organizing a major breakout to be supported by 2SS Panzer Corps, attacking from outside the pocket. The breakout was to begin in the early hours of Aug. 20 with two columns of paratroopers crossing the Dives at Magny and St. Lambert. What was left of the Hitler Youth was to follow the paratroopers while 1st SS and 116th Panzer divisions broke through near Chambois. The balance of the German forces, 10th SS, 2nd Panzer and elements of three infantry divisions, was to form a third wave, securing the flanks and the rear as they withdrew. If all went well, the concentric attack would open the Chambois-Vimoutiers road, allowing vehicles and men to escape.

As the German paratroopers moved into position to begin the breakout, Montgomery informed London that “all exits from the pocket are completely blocked and no further enemy will escape… I have issued a fresh directive” outlining future plans. The directive, M519, dated Aug. 20, stated “the destruction or capture of large bodies of enemy still fighting hard inside the Normandy ‘bottle’ was a first priority.”

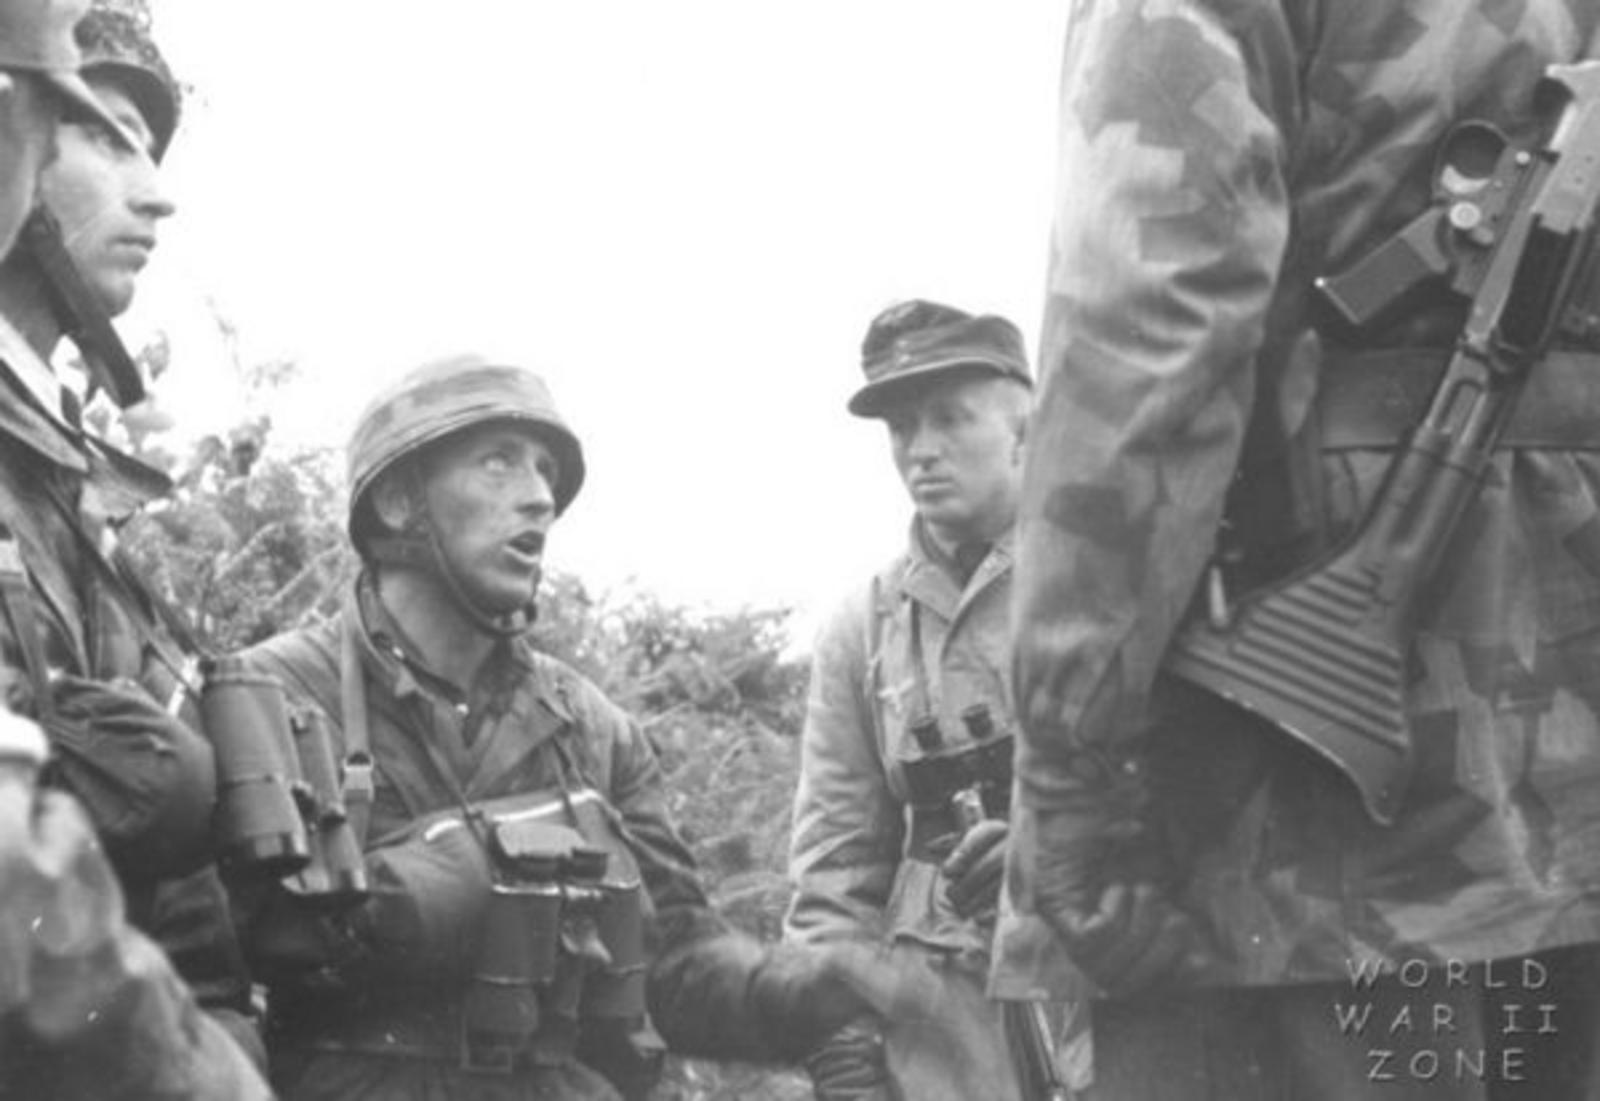
German paratroopers or "Fallschirmjager"

PNmxOWC.jpg


It was up to 1st Canadian Army, with the support of the American troops in place, to keep “the cork in position” while 3rd U.S. Army advanced along the south bank of the Seine “to cut off the retreat of enemy forces.” The rest of the directive dealt with plans for the advance to Germany.

The small groups of American, Canadian and Polish soldiers in position to hold the cork in the bottle knew nothing of these strategic visions. For them, Aug. 20 was a day of intense combat as the enemy fought with growing desperation. St. Lambert was inevitably a focal point because two roads led to its bridge over the Dives. At 5 a.m. Wotherspoon informed brigade about the situation, reporting that his troops were “much too thin on the ground” to stop the enemy advance. He asked for “all artillery support possible” but was told there was to be “no shooting southwest of River Dives unless definitely recognized enemy” as “12 British Corps was moving toward river.” This restriction, however, could only benefit the enemy because the leading British unit, 53rd Division’s recce regiment, was still well west of Trun.

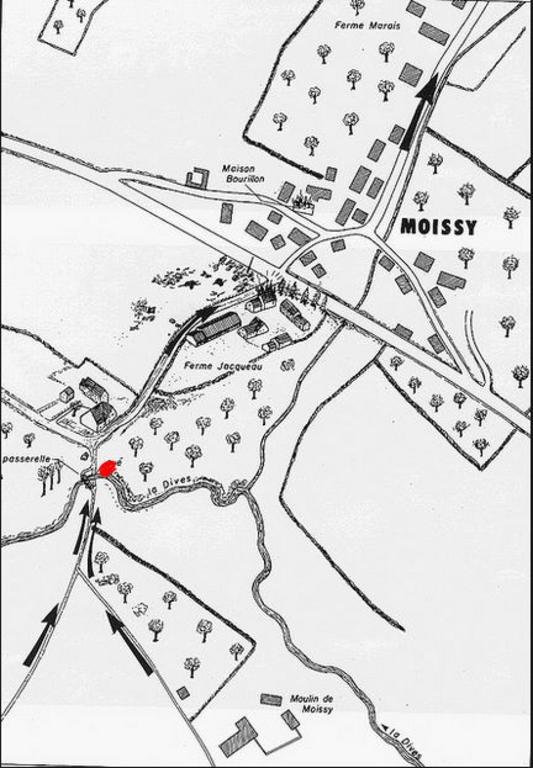
By mid-morning the Germans had forced the SARs and Argylls to withdraw to the western edge of St. Lambert. The Argylls, lacking explosives, had left the bridge intact when they were forced to withdraw in the face of infiltration across the entire front. The enemy also crossed at Moissy and at the edge of Chambois joining a flood of men and vehicles, including tanks, moving towards the Poles who were holding Point 262/Mont Ormel.

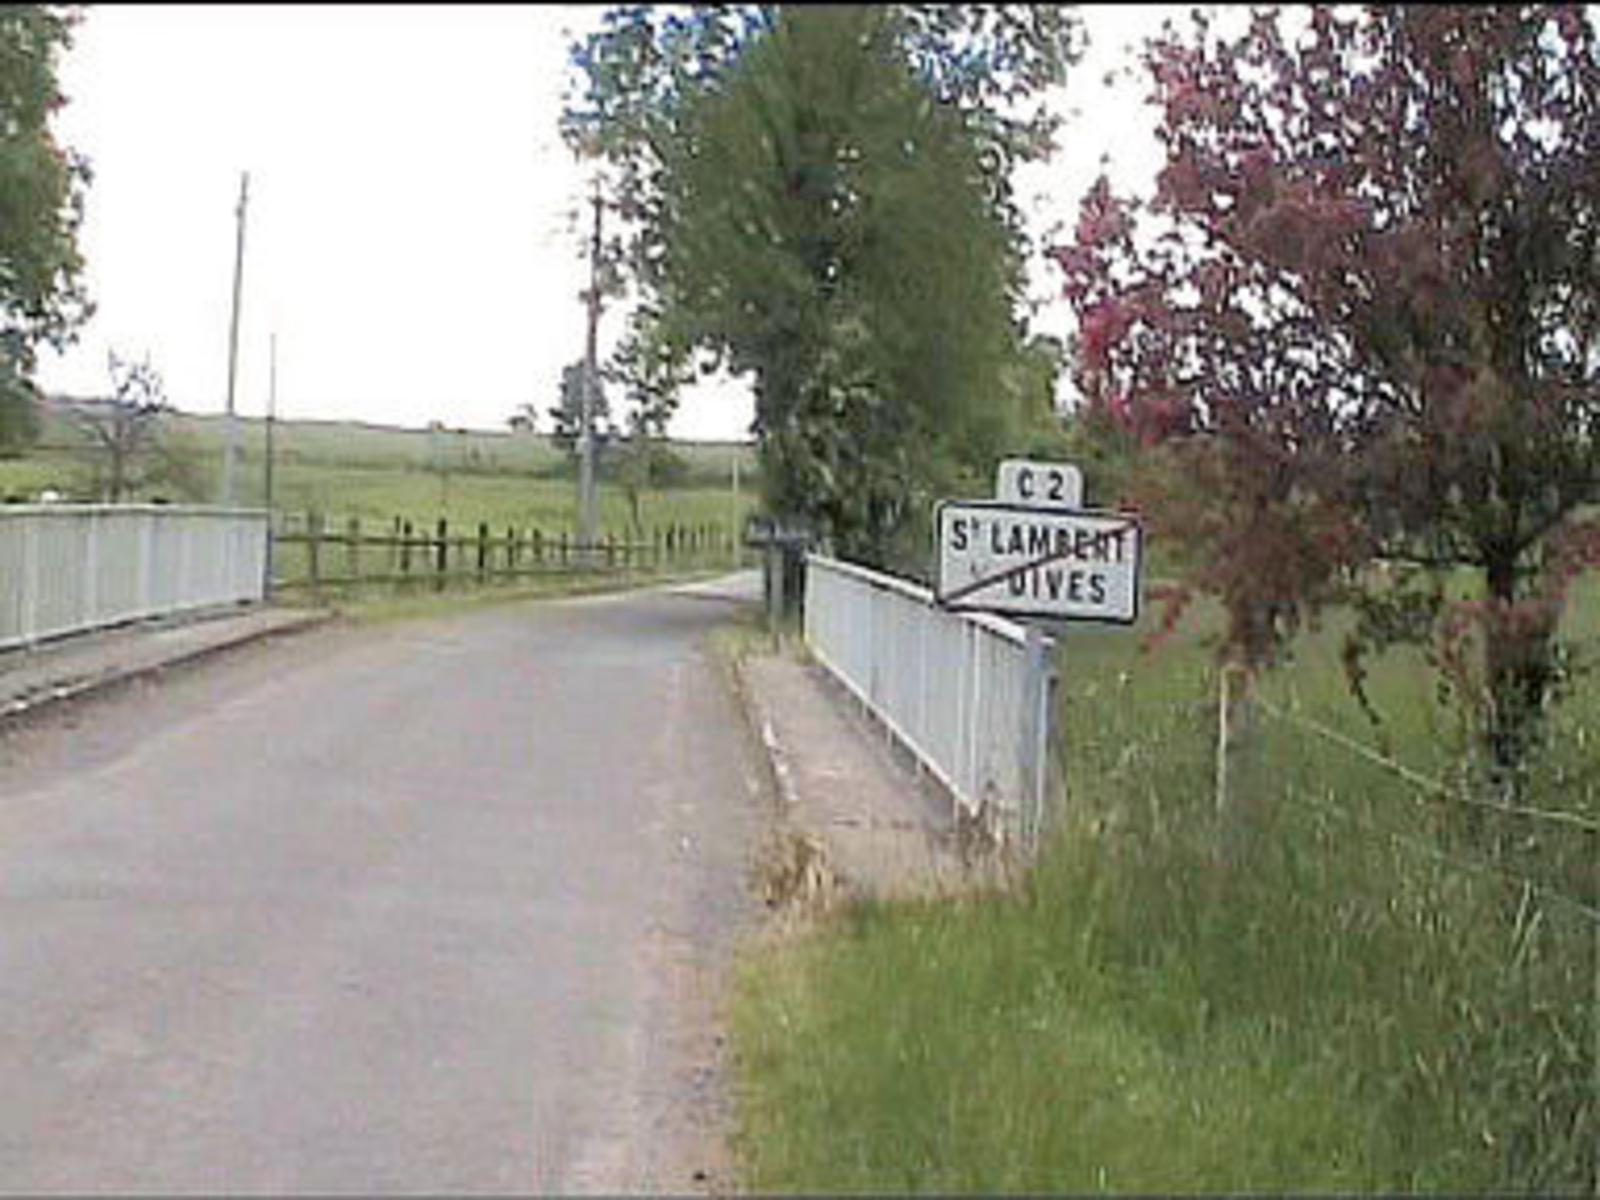
The bridge at St. Lambert-sur-Dives

MNY2bhw.jpg


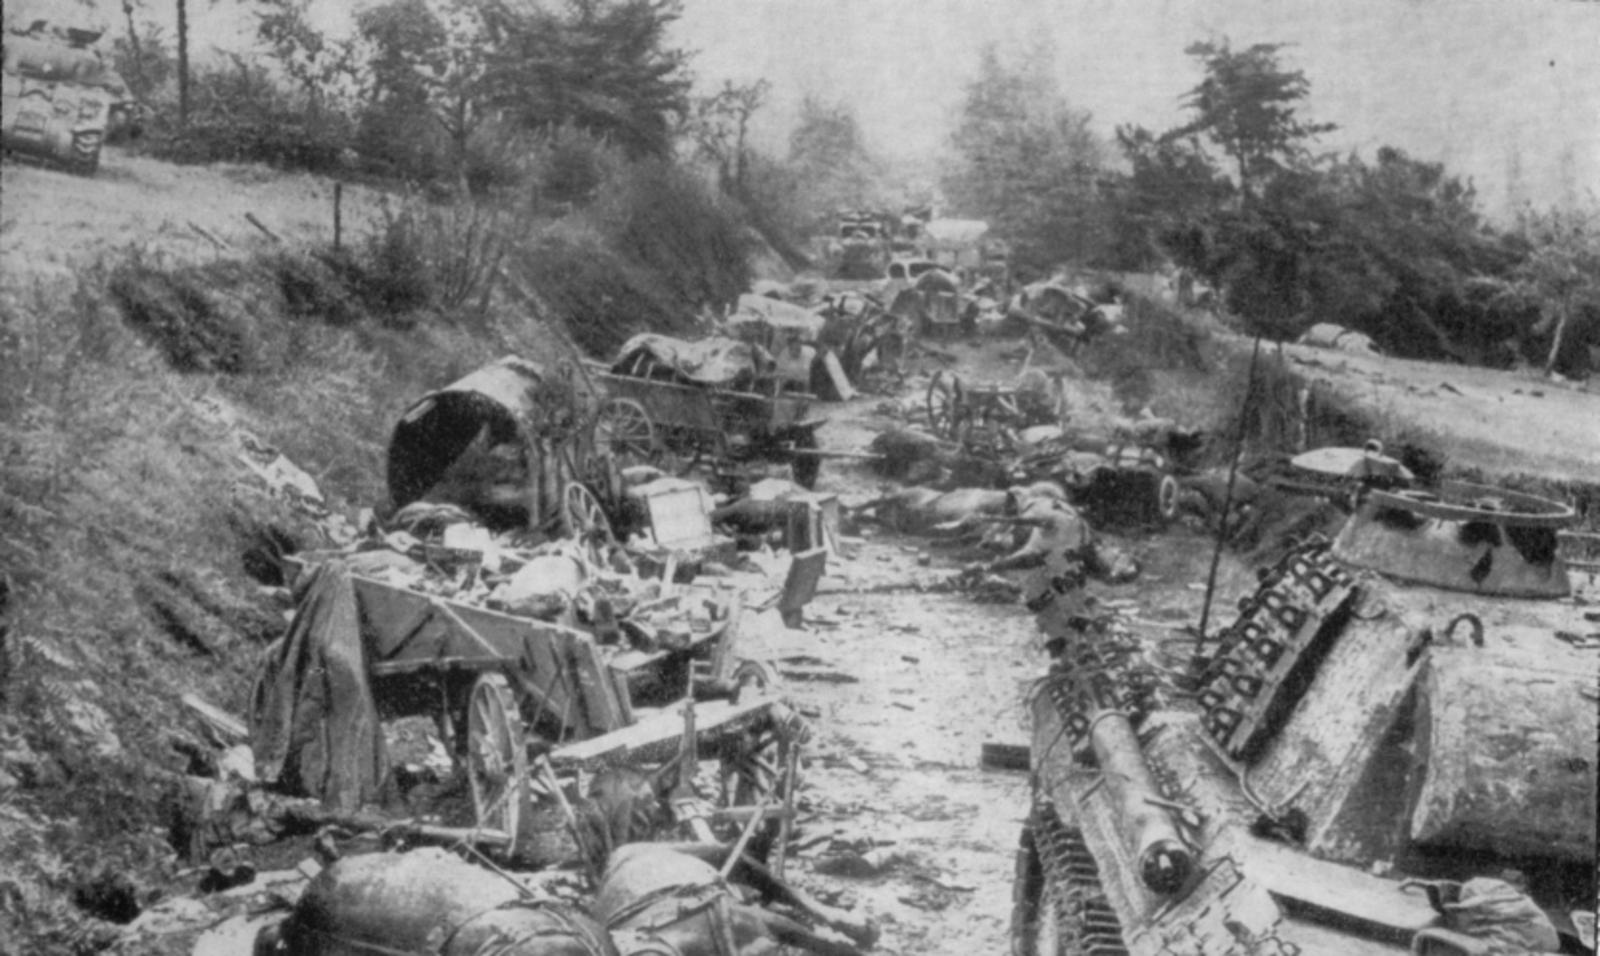
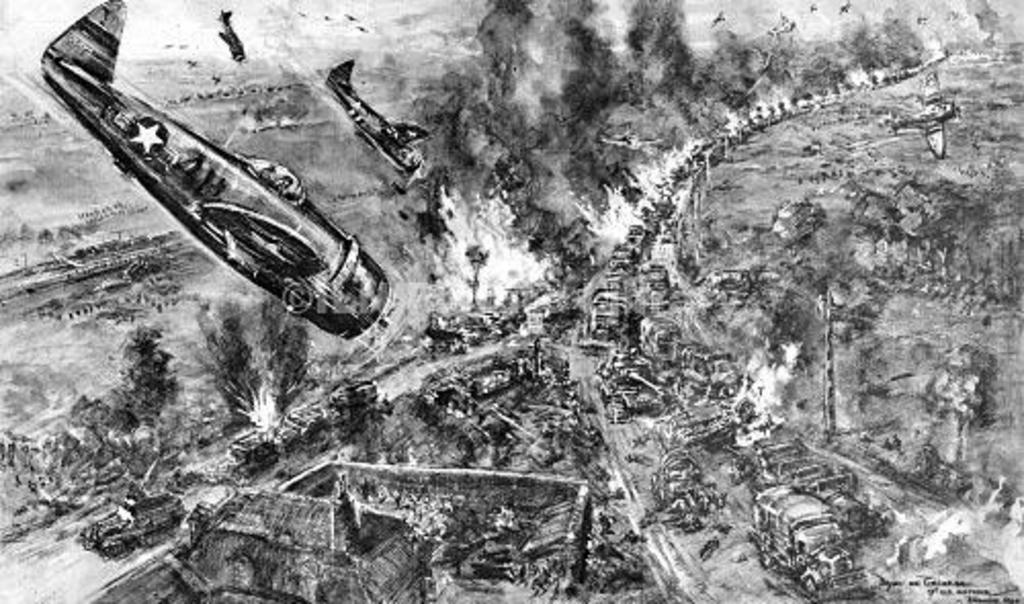
The corridor of Death

RVYmvQB.jpg


The arrival of 9th Canadian infantry brigade at Trun led Jefferson to order the remaining Lincs and Argylls to “get astride as many roads northeast of Trun as possible.” Kitching then ordered 4th Canadian Armd. Bde. to enter the battle, secure the high ground and contact the Poles. These moves had no direct impact on the situation in St. Lambert, where Currie was tirelessly encouraging his shrinking band of men to hold on and direct fire on the enemy.

Polish accounts of the fighting on Aug. 20 describe a battle which raged the whole day with Point 262, “the Maczuga,” under attack from all directions. The Poles could count on the support of the medium and field artillery, and the FOO from 4th Canadian Medium Regt., Captain Pierre Sévigny, who bravely called for repeated and varied concentrations of fire. The artillery, and the determination of the Polish soldiers, prevented the Germans from overrunning the fortress position but at least one escape route was kept open throughout the afternoon and into the night. It is impossible to say how many German soldiers escaped the net after midnight, Aug. 19, but the number was in the thousands.

The next morning the three Canadian armoured regiments encountered groups of enemy, including tanks, and it was mid-afternoon Aug. 21 before direct contact with the Poles was established and a supply route opened. The war diary of the Canadian Grenadier Guards offered a vivid description: “No. 1 Squadron led off at 0800 hours in the pouring rain. The road, as were all the roads in the area, was lined and in places practically blocked by destroyed German vehicles of every description. Horses and men lay rotting in every ditch and hedge and the air was rank with the odour of putrefaction. Most of the destruction was caused by the air force, but the Poles had done their share… No. 1 Squadron’s co-axes fired almost continually…until arriving at Pt 262 and the results were devastating… The picture at 262 was the grimmest the Regiment had so far come up against. The Poles had had no supplies for three days; they had several hundred wounded who had not been evacuated, about 700 prisoners-of-war lay loosely guarded in a field…unburied dead and parts of them were strewn about by the score… The Poles cried with joy when we arrived…”

The gap was now closed at Point 262 and the Dives. By the evening of the Aug. 21 all that remained was to round up stragglers. Evidence of the enemy’s crushing defeat astounded all those who arrived in the pocket. Among the observers were a team from 21 Army Group’s Operational Research Section on a mission to determine both the extent and causes of German vehicle losses. Their report divided the battlefield into four sectors: “The Pocket,” the area west of the Argentan-Falaise highway; “The Shambles,” between the highway and Vimoutiers; “The Chase,” from Vimoutiers to the Seine; and the “Seine Crossing.” Investigators counted more than 8,000 damaged, destroyed or abandoned vehicles, including 456 tanks and self-propelled guns, plus 367 lightly armoured vehicles. Their estimate of uncounted vehicles raised the total to 10,000 and a subsequent survey raised the figure to over 12,000. Their report was highly controversial because it attributed less than one third of the losses to air action and contradicted air force claims of the destruction of enemy armour. The operational research team also reported that as many as 20,000 motor vehicles and 250 tanks and self-propelled guns escaped across the Seine in the last two weeks of August, though many of these never made it back to defend Germany. Lacking good evidence, no attempt was made to calculate how many troops escaped across the river.

As the Allied armies moved towards Germany the controversy over the delays in closing the gap at Falaise-Argentan and at Trun-Chambois were forgotten in the euphoria of a victory Montgomery described as “definite, complete and decisive.” The Canadians and Poles who had, by strategic default, become the main instrument of the encirclement, took pride in their achievement and turned towards the Seine, confident they had done their duty and that the end of the war was in sight.
(September 16, 2013 by Terry Copp)

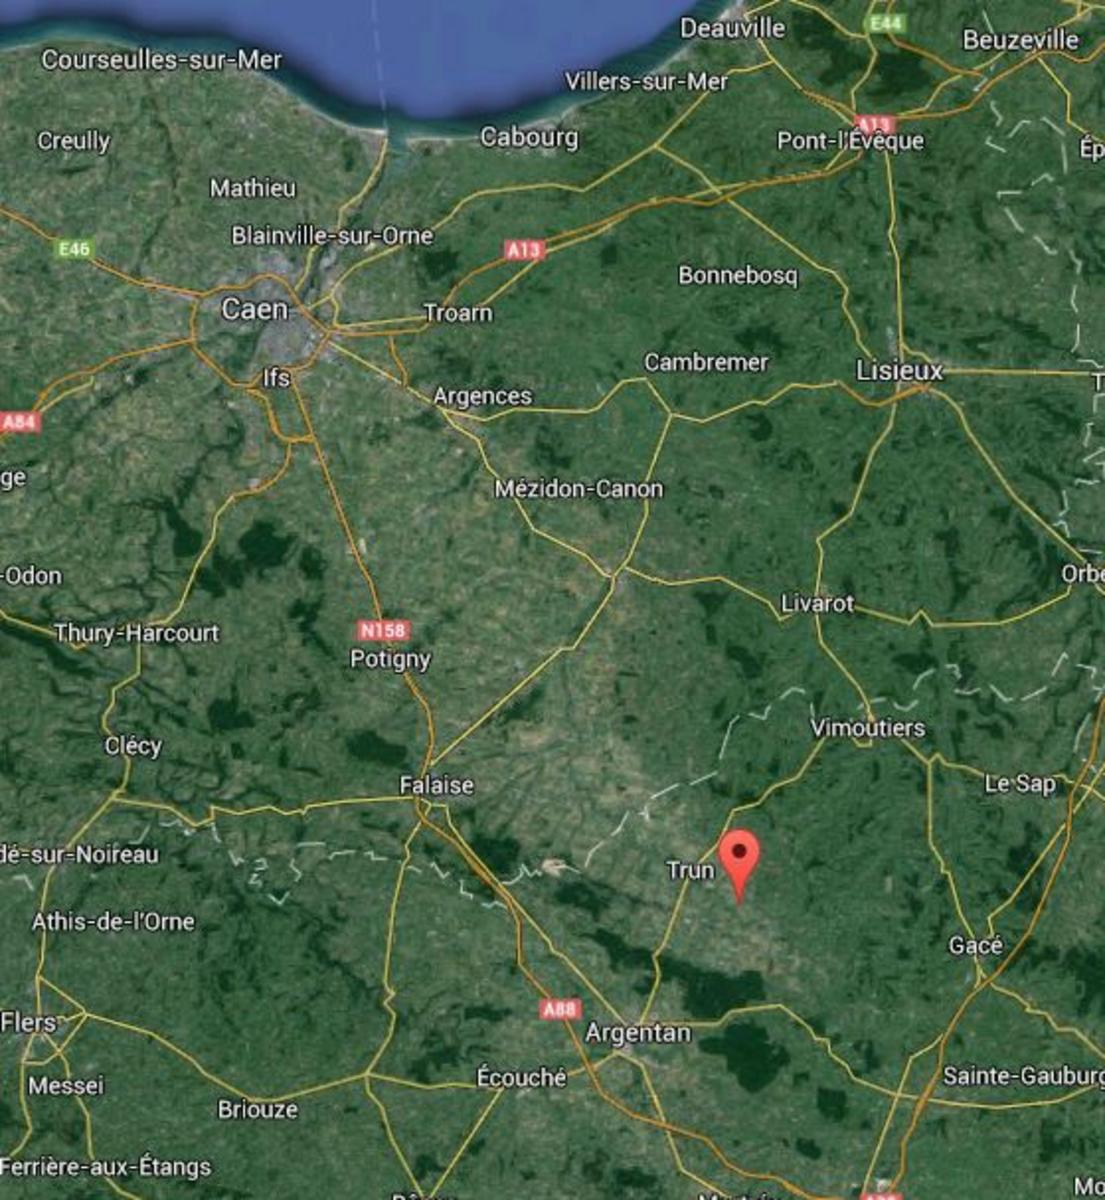
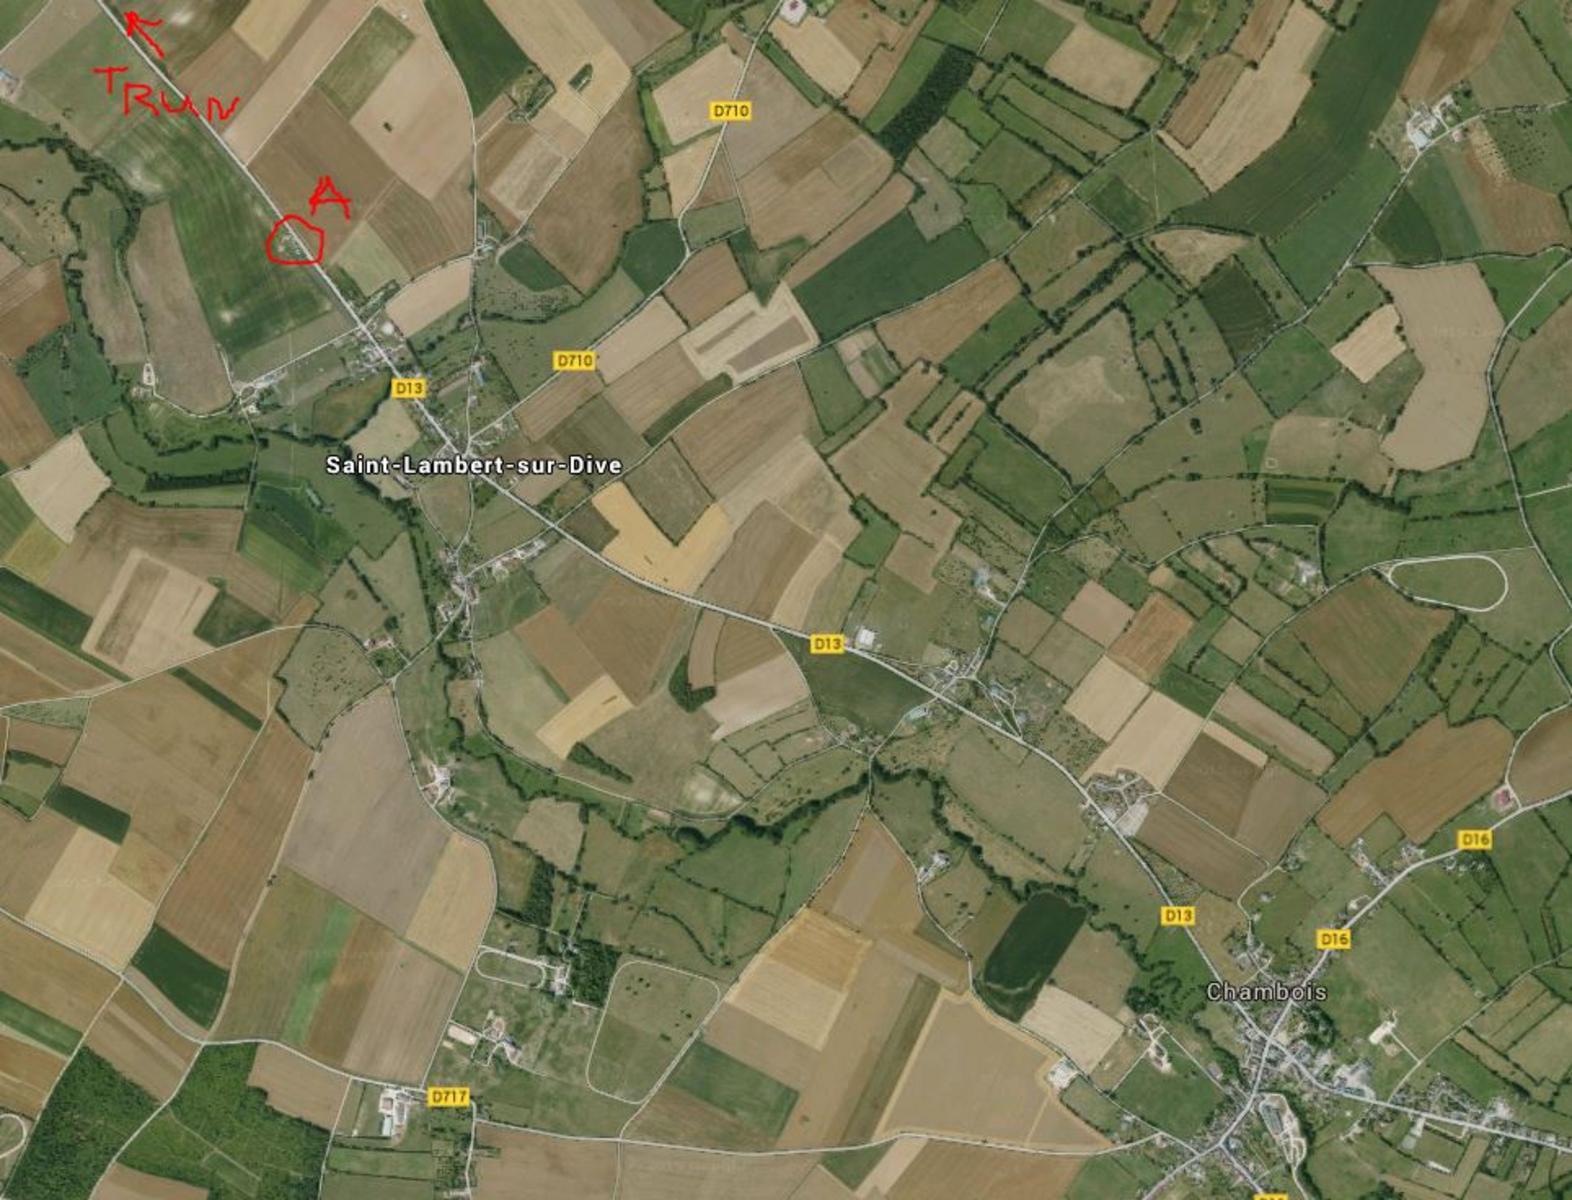
This is where we are now.
Just South and east of Trun:

Rh8sHZJ.jpg


The Gap between St. Lambert and Chambois.
"A" is where we stopped at an overlook and Canadian Memorial to view the battlefield.
(Notice the winding Dives river)

9nyAgVG.jpg


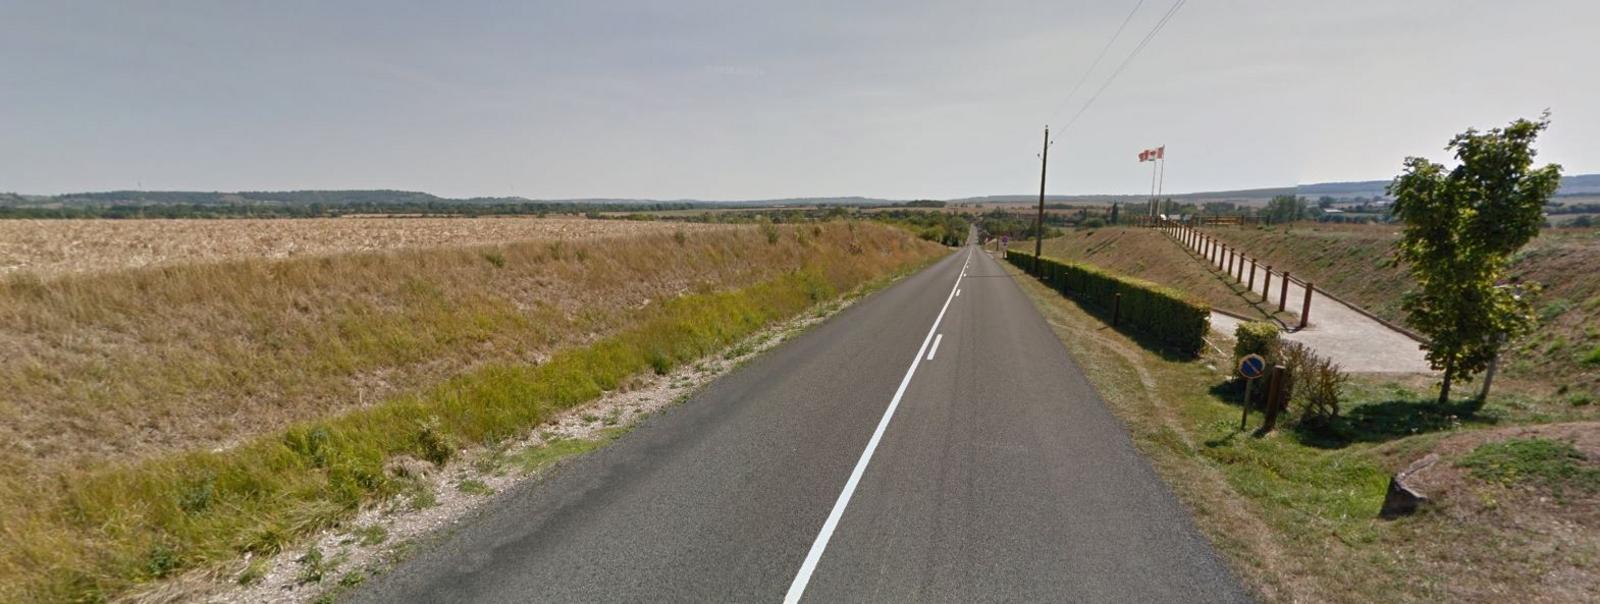
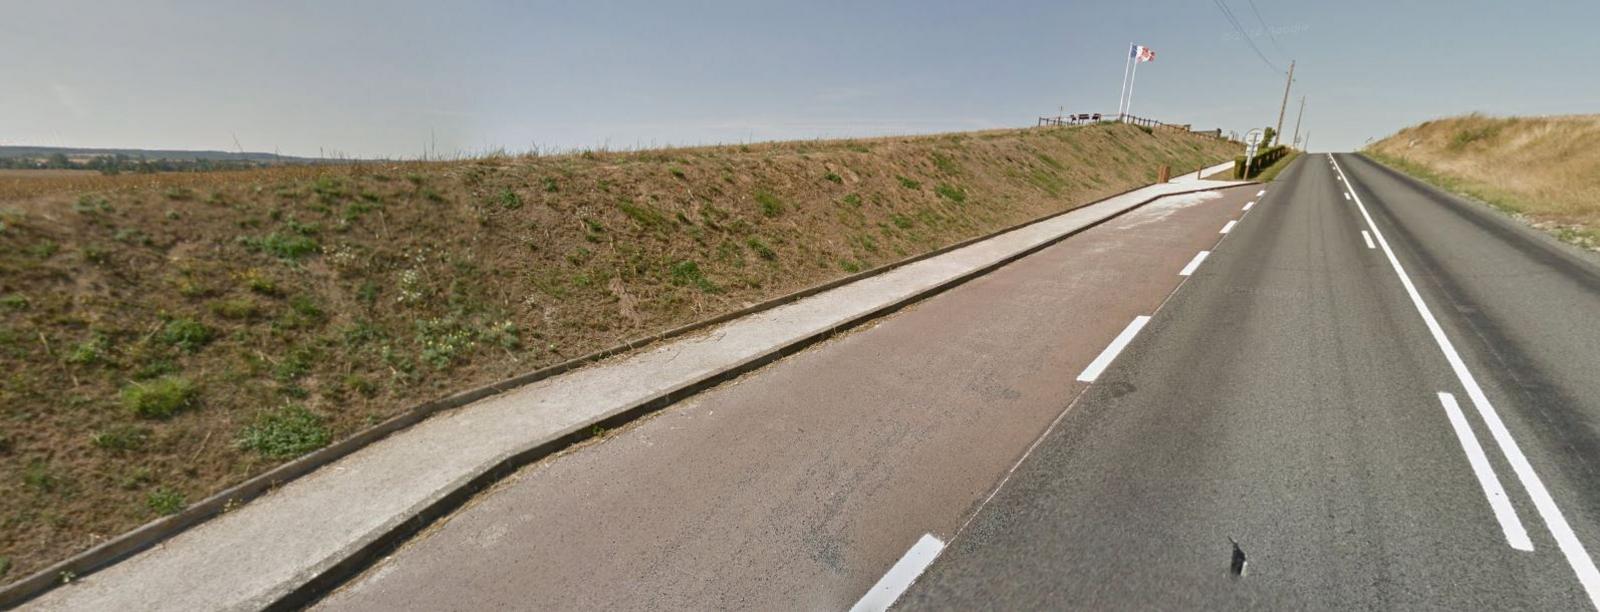
As you drive down the D13 you come over a rise and you can see down in to St. Lambert and practically the whole German planned breakout of the pocket area.
On the right, the Canadians put up this memorial as an overview of what happened here.

ncX4jHm.jpg


This a little turn out where you park and a path up to the overlook.

kpus3bQ.jpg


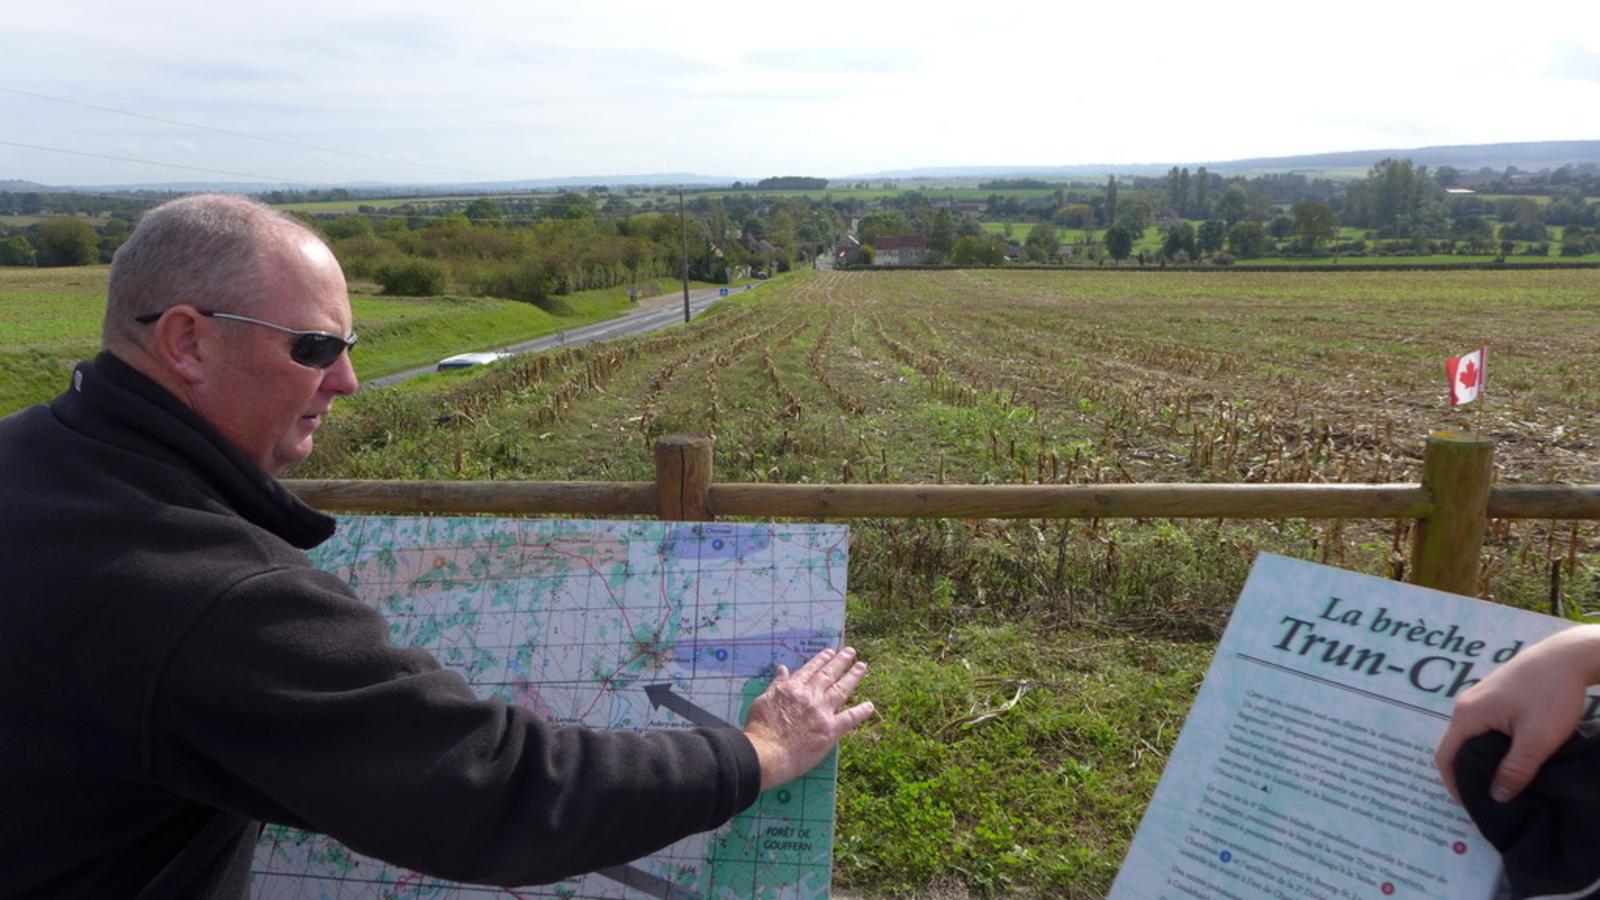
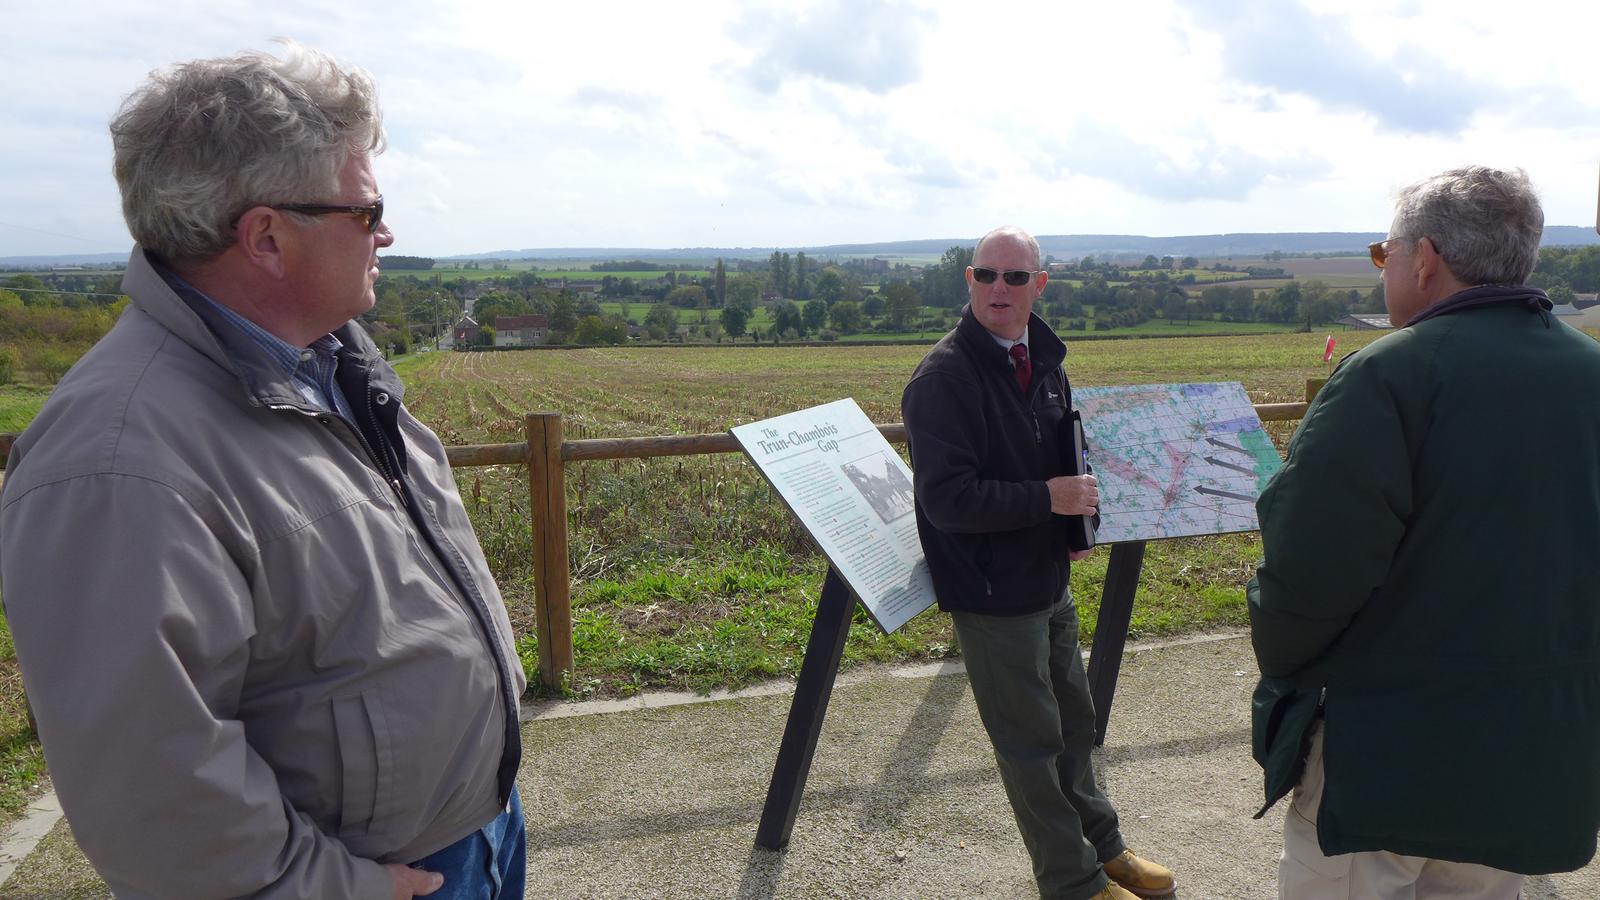
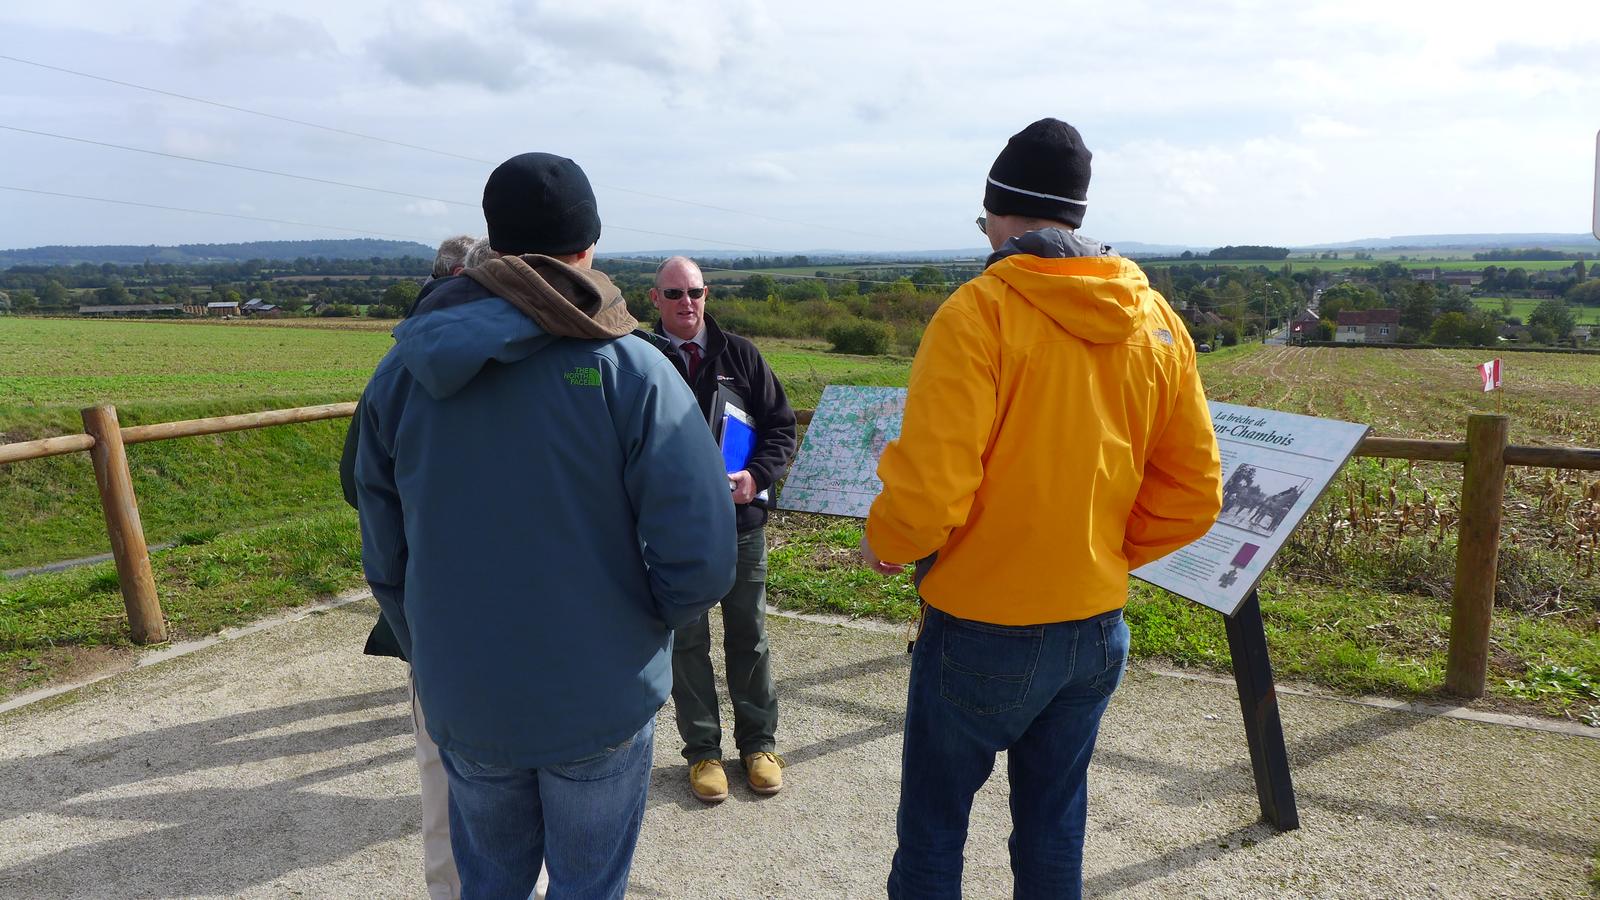
Here Gary (by now everyone should know he is our guide) is explaining, using the interpretative map that is part of this memorial, the combat that took place in the valley below.

dfuy5Mk.jpg


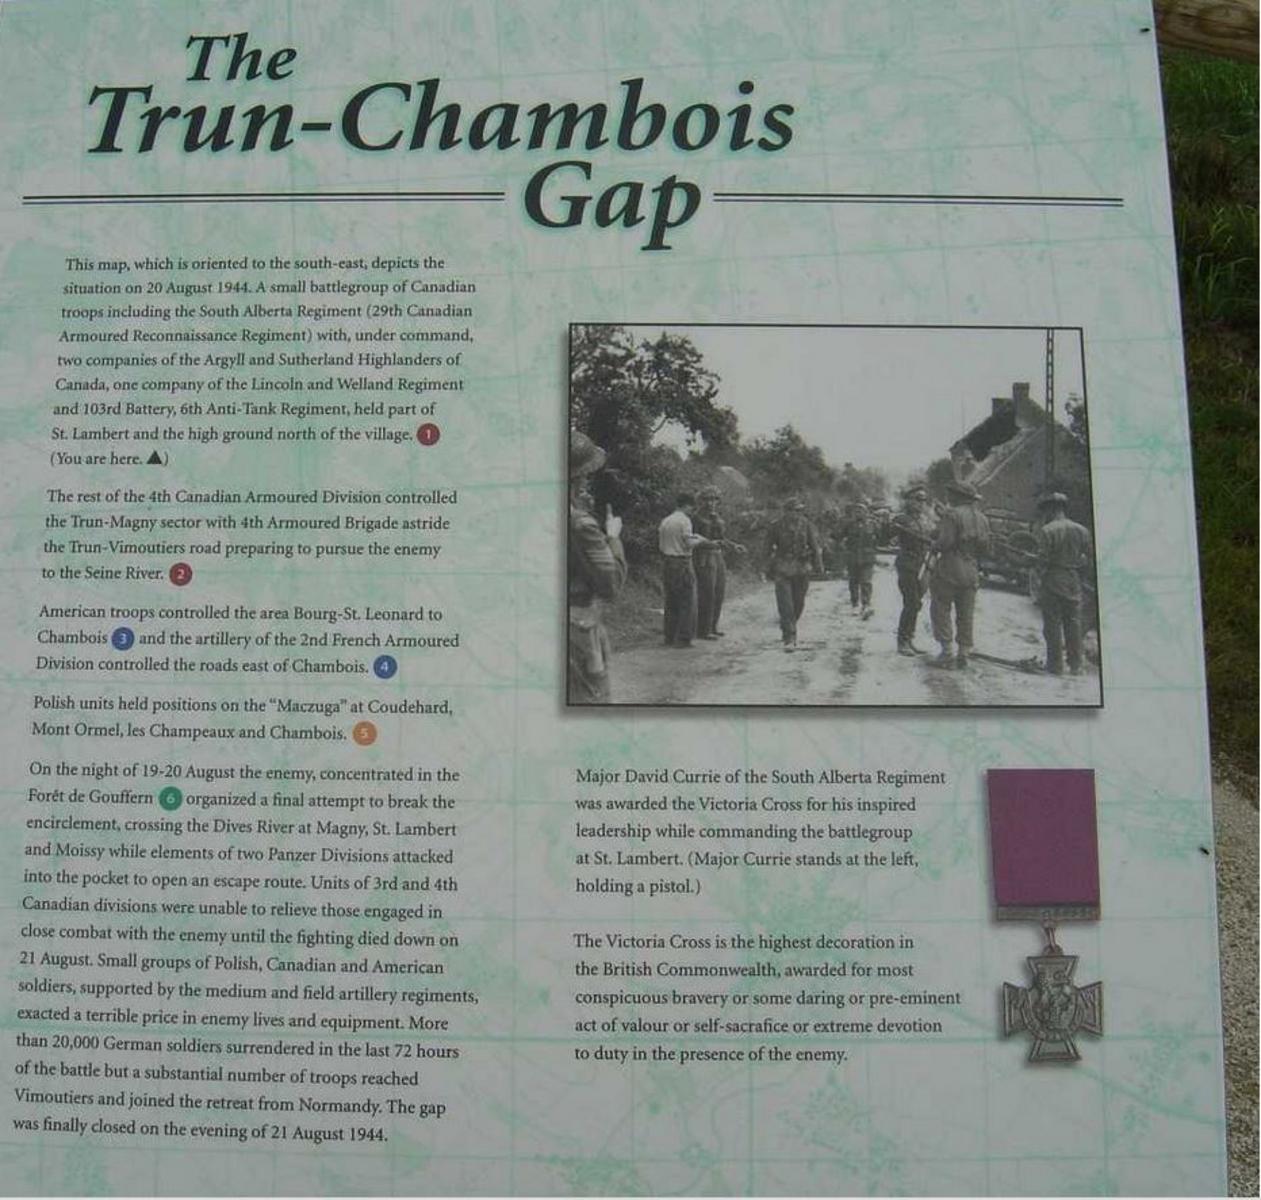
There is a description of the battle at the memorial....

NFgof3l.jpg


Gary answering all our questions, and I do mean all. The man was a fountain of information.
The ridge line in the distance were the American Lines.
The American artillery could range the whole valley.

0CaqKbB.jpg


The Canadians initially setup up on the ridge we are standing on and the little wooded hill closest to us looking down in St. Lambert.
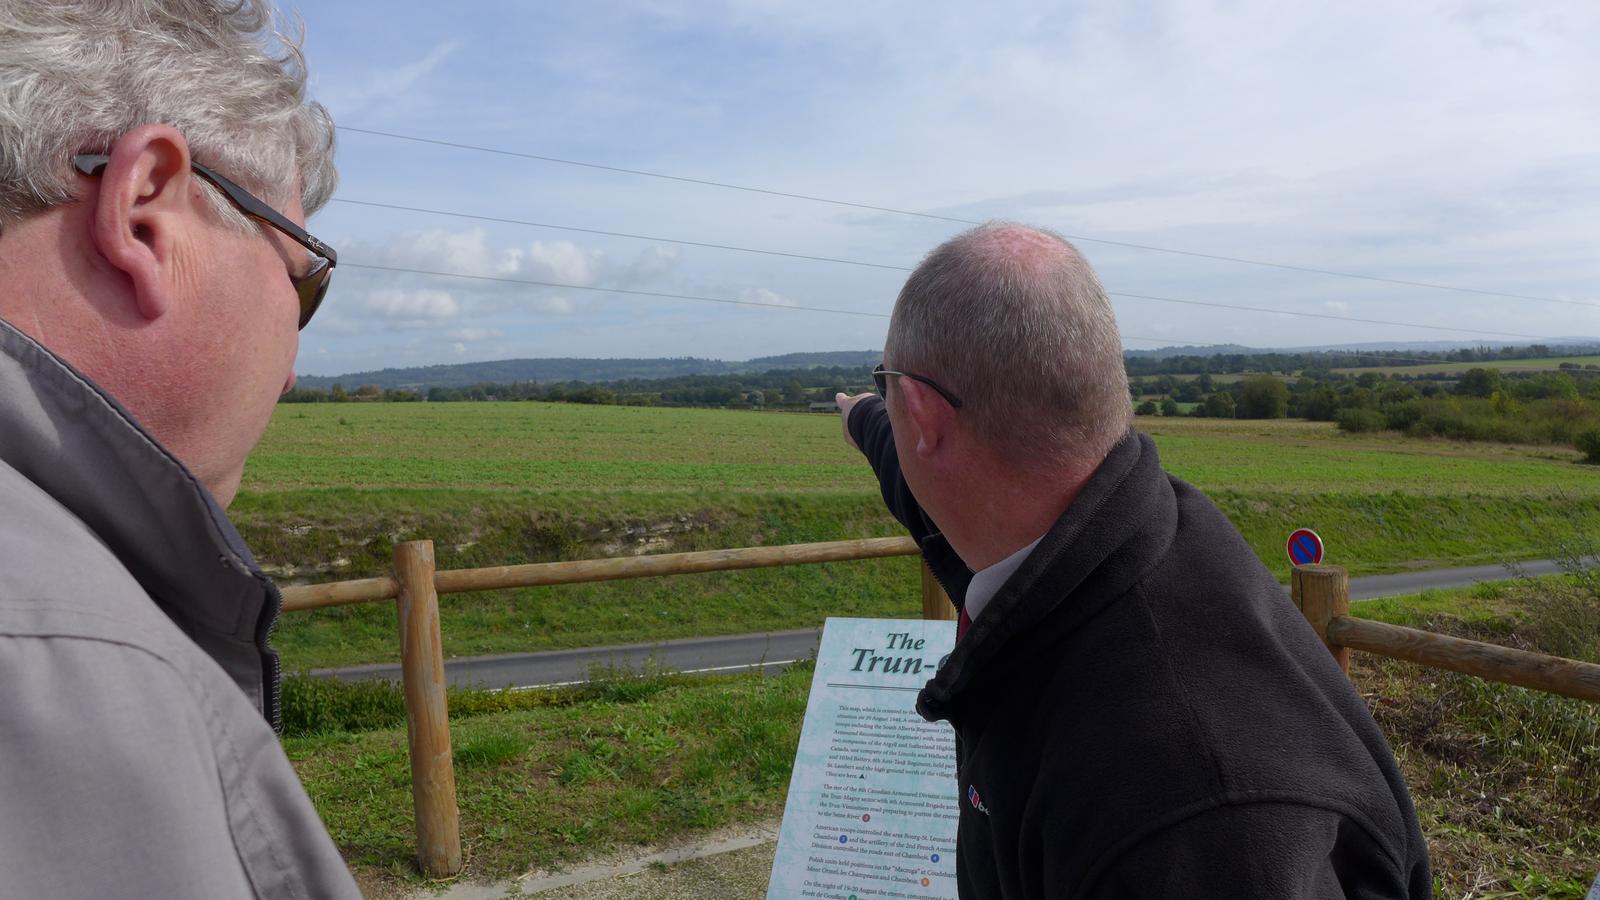
What Gary is pointing at is the gap in the ridge way off in the distance. That is where the all the Germans were heading for.
Once through that gap they would be out of the pocket and safe.

tjDXVPI.jpg


Just want to get a shot in of my nephews, Chris and Andy, for posterity and point out that where ever we stopped someone had put a personal touch of remembrance.
Notice the little Canadian flag stuck in the fence post.

abGJVbq.jpg


Also, about here is where I started to realized Chris and Andy, were still in the thought mode of the battles near the beaches where the fights had 10, 100, a couple of thousand fighting each other.
So I asked Gary how many men were fighting just in our view from this vantage point.
He, matter of factly, answered with a shrug "A couple of hundred thousand".
That opened Chris and Andy's eyes and I think gave them a whole new appreciation of what we were looking at.

kRv9Up6.jpg


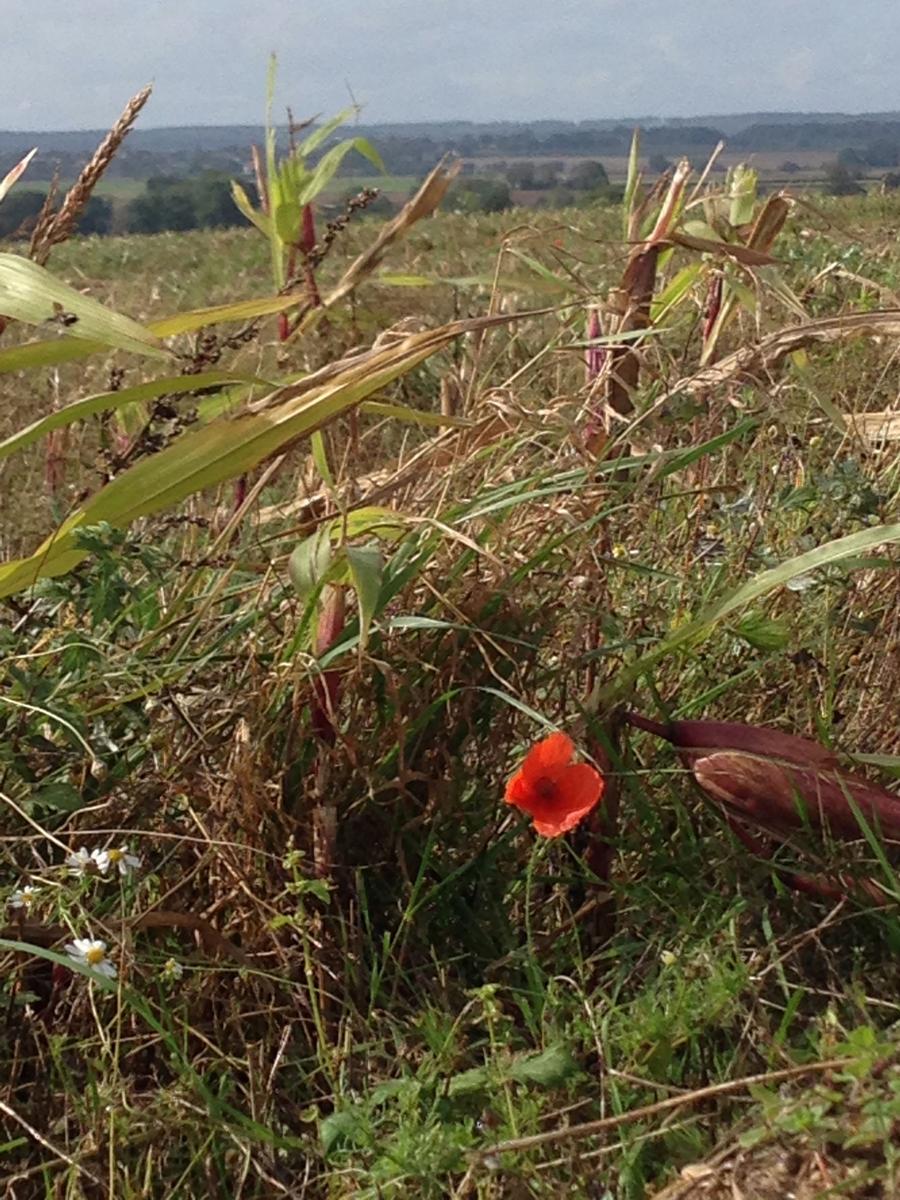
Finally, just a poppy overlooking the Falaise Pocket.

2bQt2Qg.jpg


From here we traveled down in to St. Lambert and learned of Major David Vivian Currie and how he earned the Victoria Cross.
 
Last edited:
We headed down the slope in to St. Lambert.
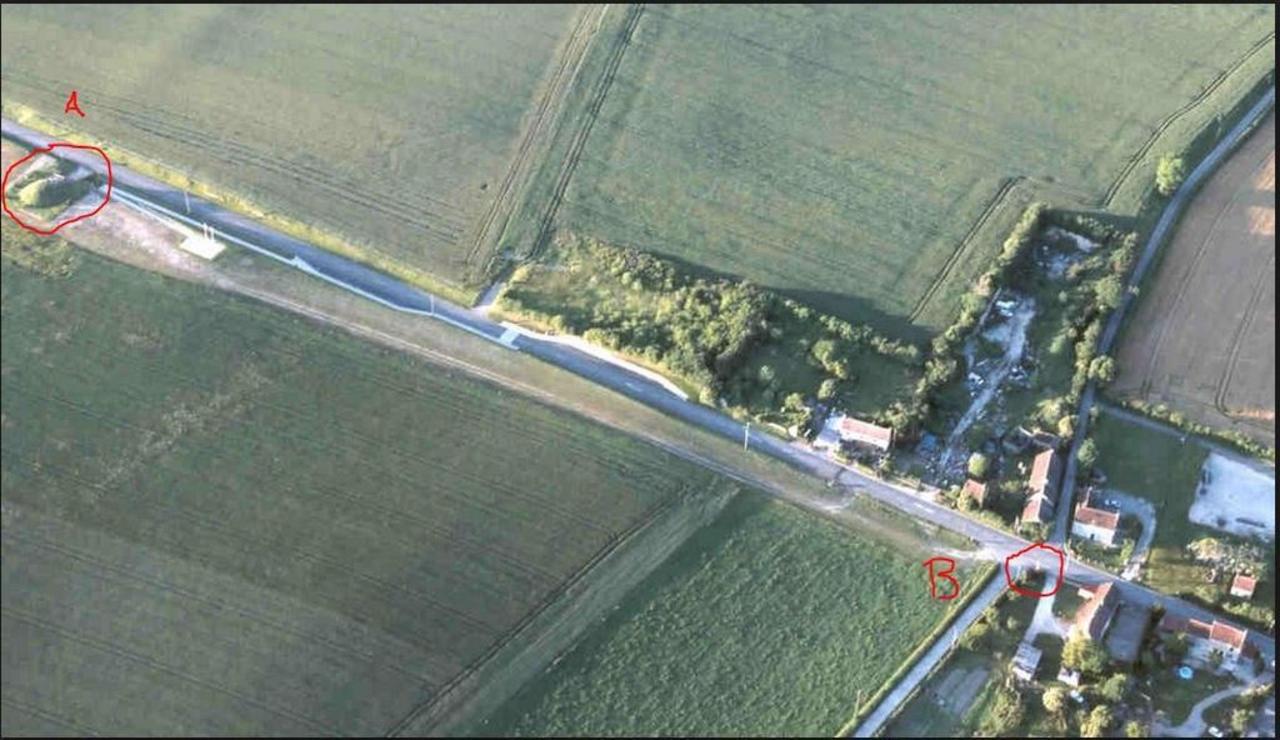
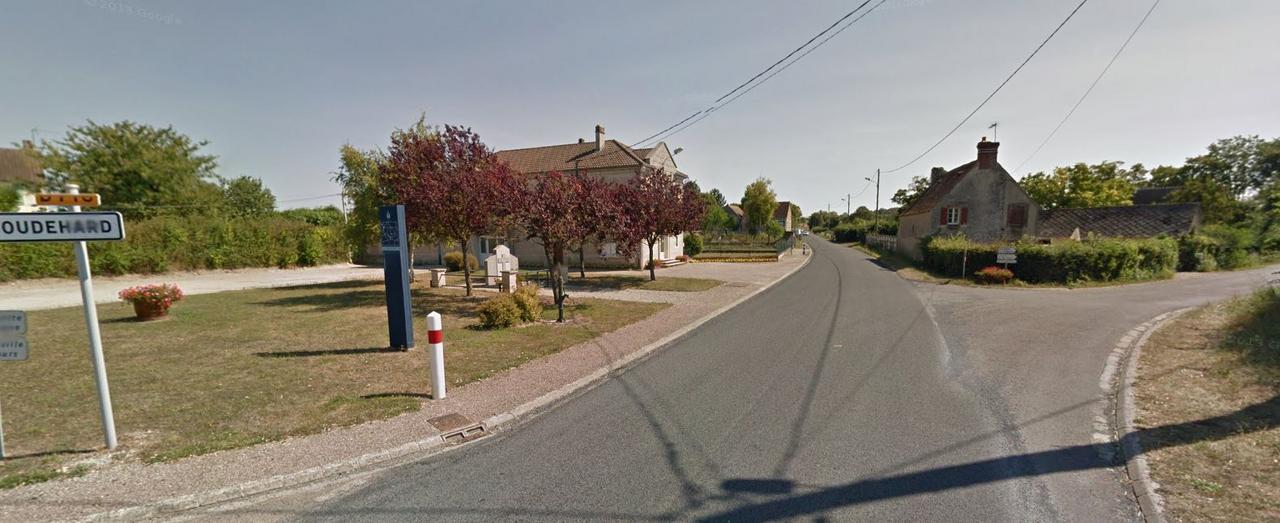
As you enter town there is a memorial to Major David Currie.

"A" is the overlook "B" is where the memorial to Currie is.

6ATso21.jpg


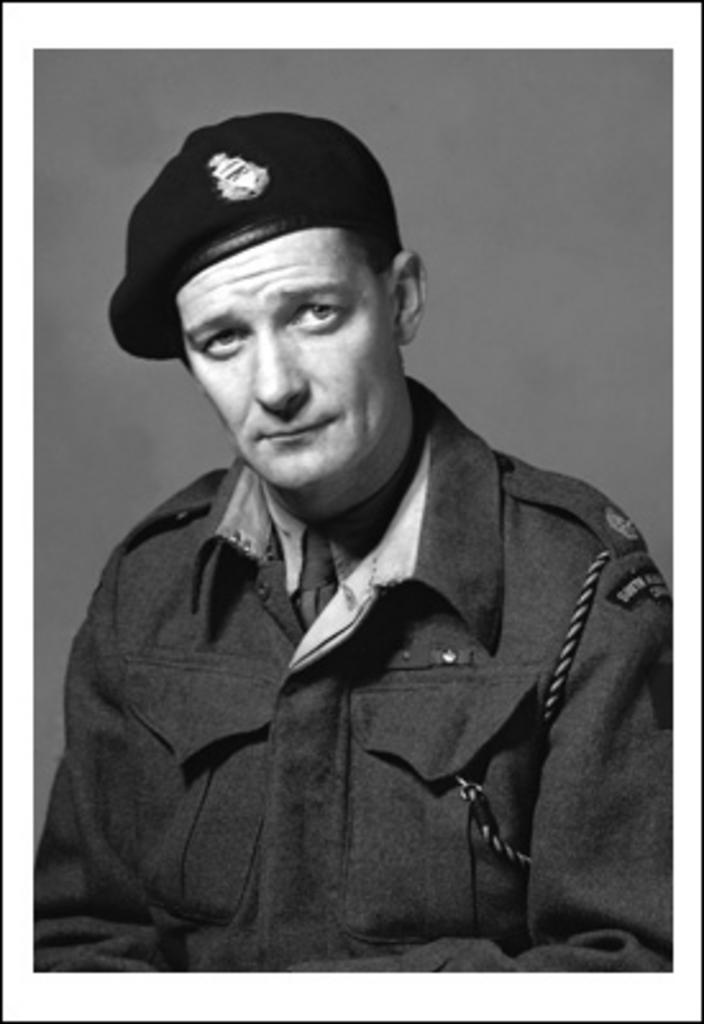
David Vivian Currie was born in Sutherland, Saskatchewan on 8 July 1912. Before the Second World War, he was a member of a Militia unit based in Moose Jaw, Saskatchewan. During the campaign in France following the D-Day landings in Normandy on 6 June 1944, Currie was serving with the 29th Armoured Reconnaissance Regiment (The South Alberta Regiment).

Currie was awarded the Victoria Cross for his actions in command of a battle group of tanks from The South Alberta Regiment, artillery, and infantry of the Argyll and Sutherland Highlanders of Canada at St. Lambert-sur-Dives, during the final actions to close the Falaise Gap.

zYZU0Xr.jpg


This was the only Victoria Cross awarded to a Canadian soldier during the Normandy campaign (6 June 1944 through to the end of August 1944), and the only VC ever awarded to a member of the Royal Canadian Armoured Corps.

The then 32 year-old Currie was a Major in The South Alberta Regiment, Canadian Army during the Second World War. During the Battle of Falaise, Normandy, between 18–20 August 1944, Currie was in command of a small mixed force of tanks, self-propelled anti-tank guns and infantry which had been ordered to cut off one of the Germans' main escape routes.

After Currie led the attack on the village of St. Lambert-sur-Dives and consolidated a position halfway inside it, he repulsed repeated enemy attacks over the next day and a half. Despite heavy casualties, Major Currie destroyed seven enemy tanks, twelve 88 mm guns and 40 vehicles, which led to the deaths of 300 German soldiers, 500 wounded and 2,100 captured. The remnants of two German armies were denied an escape route.

KTbArRl.jpg


Currie later achieved the rank of lieutenant colonel. After his military career, he served as Sergeant at Arms in the Canadian House of Commons from 1960 to 1978.

He died in 1986 and was buried at Greenwood Cemetery, Owen Sound, Ontario. The armoury in Moose Jaw, Saskatchewan has since been named the "Lt. Colonel D.V. Currie Armoury" in his honour. Currie Avenue in the Montgomery Place neighborhood of Saskatoon was named in his honor.


Citation:

“In Normandy on 18th August, 1944, Major Currie was in command of a small mixed force of Canadian tanks, self-propelled anti-tank guns and infantry which was ordered to cut one of the main escape routes from the Falaise pocket.

This force was held up by strong enemy resistance in the village of St. Lambert sur Dives and two tanks were knocked out by 88 mm guns. Major Currie immediately entered the village alone on foot at last light through the enemy outposts to reconnoitre the German defences and to extricate the crews of the disabled tanks, which he succeeded in doing in spite of heavy mortar fire.

Early the following morning, without any previous artillery bombardment, Major Currie personally led an attack on the village in the face of fierce opposition from enemy tanks, guns and infantry and by noon had succeeded in seizing and consolidating a position half-way inside the village.

During the next 36 hours the Germans hurled one counter-attack after another against the Canadian force but so skilfully had Major Currie organised his defensive position that these attacks were repulsed with severe casualties to the enemy after heavy fighting.

At dusk on 20th August the Germans attempted to mount a final assault on the Canadian positions, but the attacking force was routed before it could even be deployed. Seven enemy tanks, twelve 88 mm. guns and forty vehicles were destroyed, 300 Germans were killed, 500 wounded and 2,100 captured. Major Currie then promptly ordered an attack and completed the capture of the village, thus denying the Chambois-Trun escape route to the remnants of two German armies cut off in the Falaise pocket.

Throughout three days and nights of fierce fighting, Major Currie’s gallant conduct and contempt for danger set a magnificent example to all ranks of the force under his command.

On one occasion he personally directed the fire of his command tank on to a Tiger tank which had been harassing his position and succeeded in knocking it out. During another attack, while the guns of his command tank were taking on other targets of longer ranges, he used a rifle from the turret to deal with individual snipers who had infiltrated to within fifty yards of his headquarters. The only time reinforcements were able to get through to his force, he himself led the forty men forward into their positions and explained the importance of their task as a part of the defence. When, during the next attack, these new reinforcements withdrew under the intense fire brought down by the enemy, he personally collected them and led them forward into position again, where, inspired by his leadership they held for the remainder of the battle. His employment of the artillery support, which became available after his original attack went in, was typical of his cool calculation of the risks involved in every situation. At one time, despite the fact that short rounds were falling within fifteen yards of his own tank, he ordered fire from medium artillery to continue because of its devastating effect upon the attacking enemy in his immediate area.

Throughout the operation the casualties to Major Currie’s force were heavy. However, he never considered the possibility of failure or allowed it to enter the minds of his men. In the words of one of his non-commissioned officers, ‘We knew at one stage that it was going to be a fight to a finish but he was so cool about it, it was impossible for us to get excited’. Since all the officers under his command were either killed or wounded during the action, Major Currie had virtually no respite from his duties and in fact obtained only one hour’s sleep during the entire period. Nevertheless he did not permit his fatigue to become apparent to his troops and throughout the action took every opportunity to visit weapon pits and other defensive posts to talk to his men, to advise them as to the best use of their weapons and to cheer them with words of encouragement. When his force was finally relieved and he was satisfied that the turnover was complete he fell asleep on his feet and collapsed.

There can be no doubt that the success of the attack on and stand against the enemy at St. Lambert sur Dives can largely be attributed to this officer’s coolness, inspired leadership and skilful use of the limited weapons at his disposal.

The courage and devotion to duty shown by Major Currie during a prolonged period of heavy fighting were outstanding and had a far-reaching effect on the successful outcome of the battle.”

(London Gazette, no.36812, 27 November 1944)


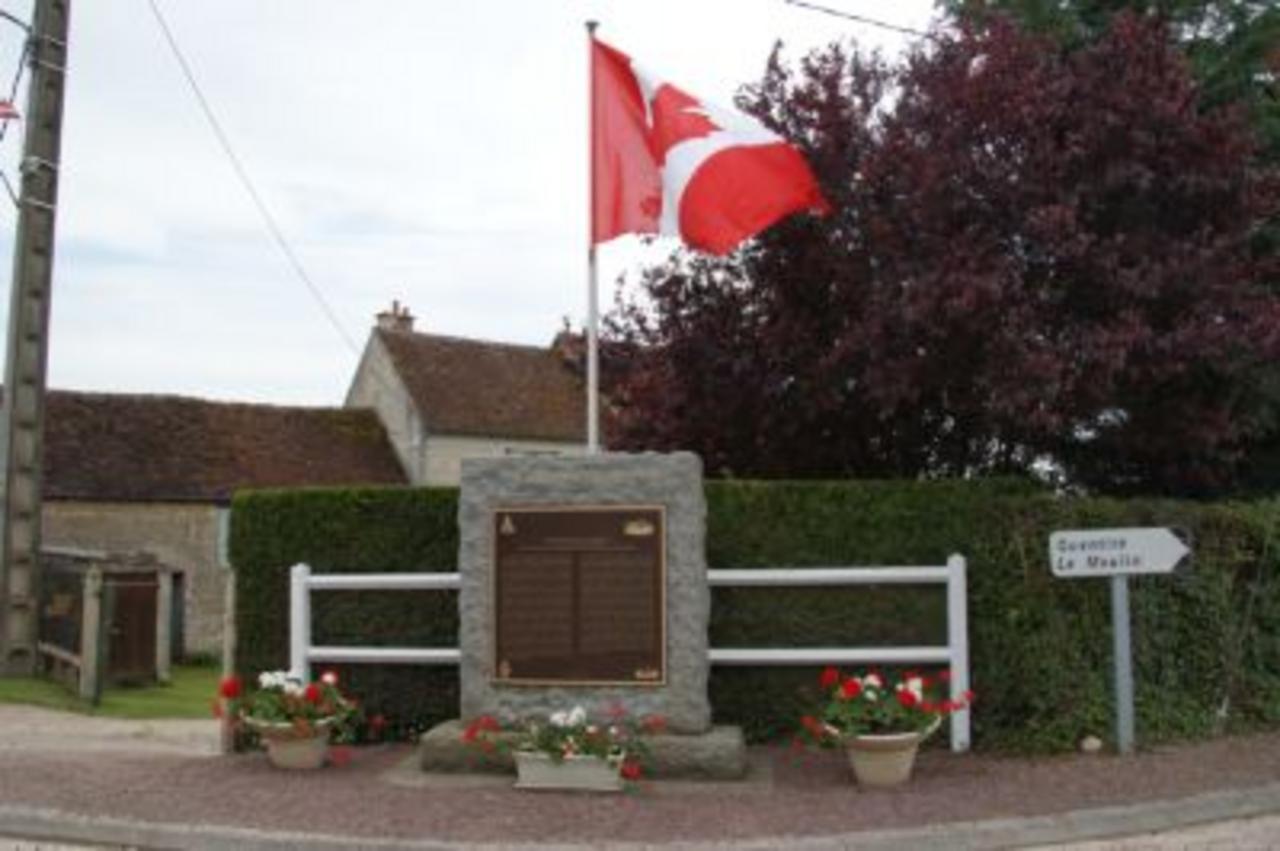
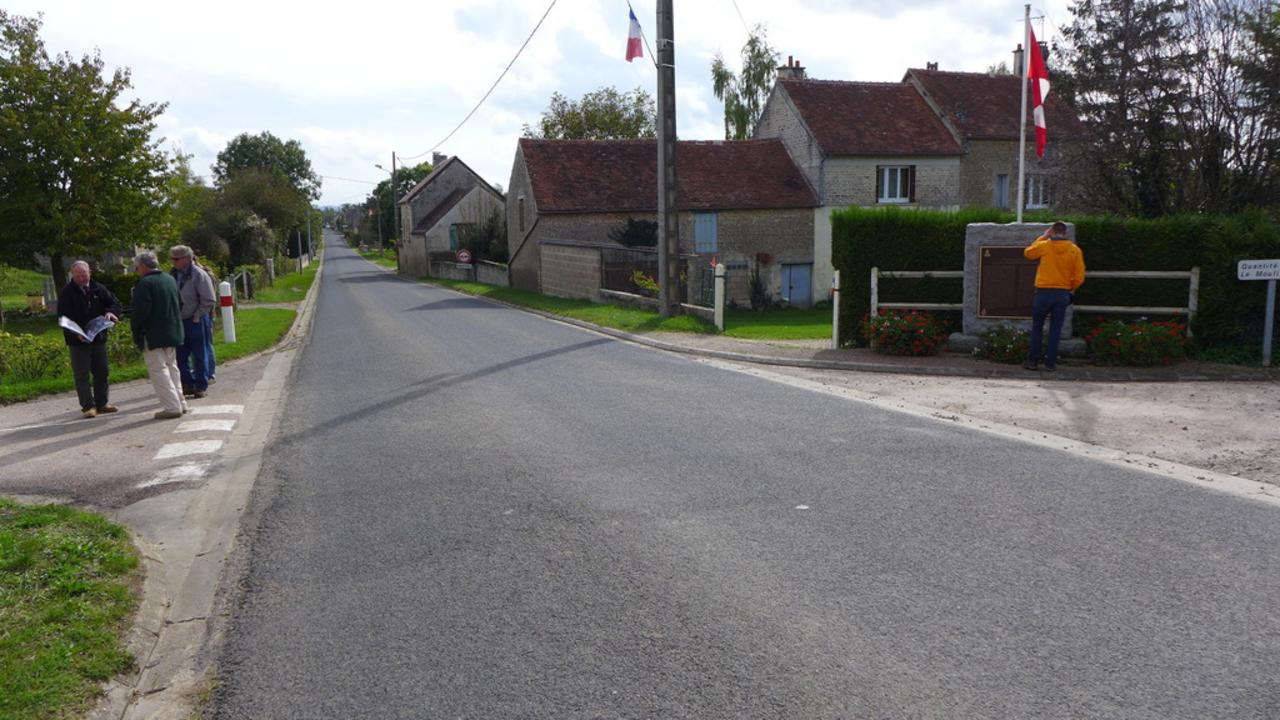
The Memorial to Major Currie:

8m8FMwQ.jpg


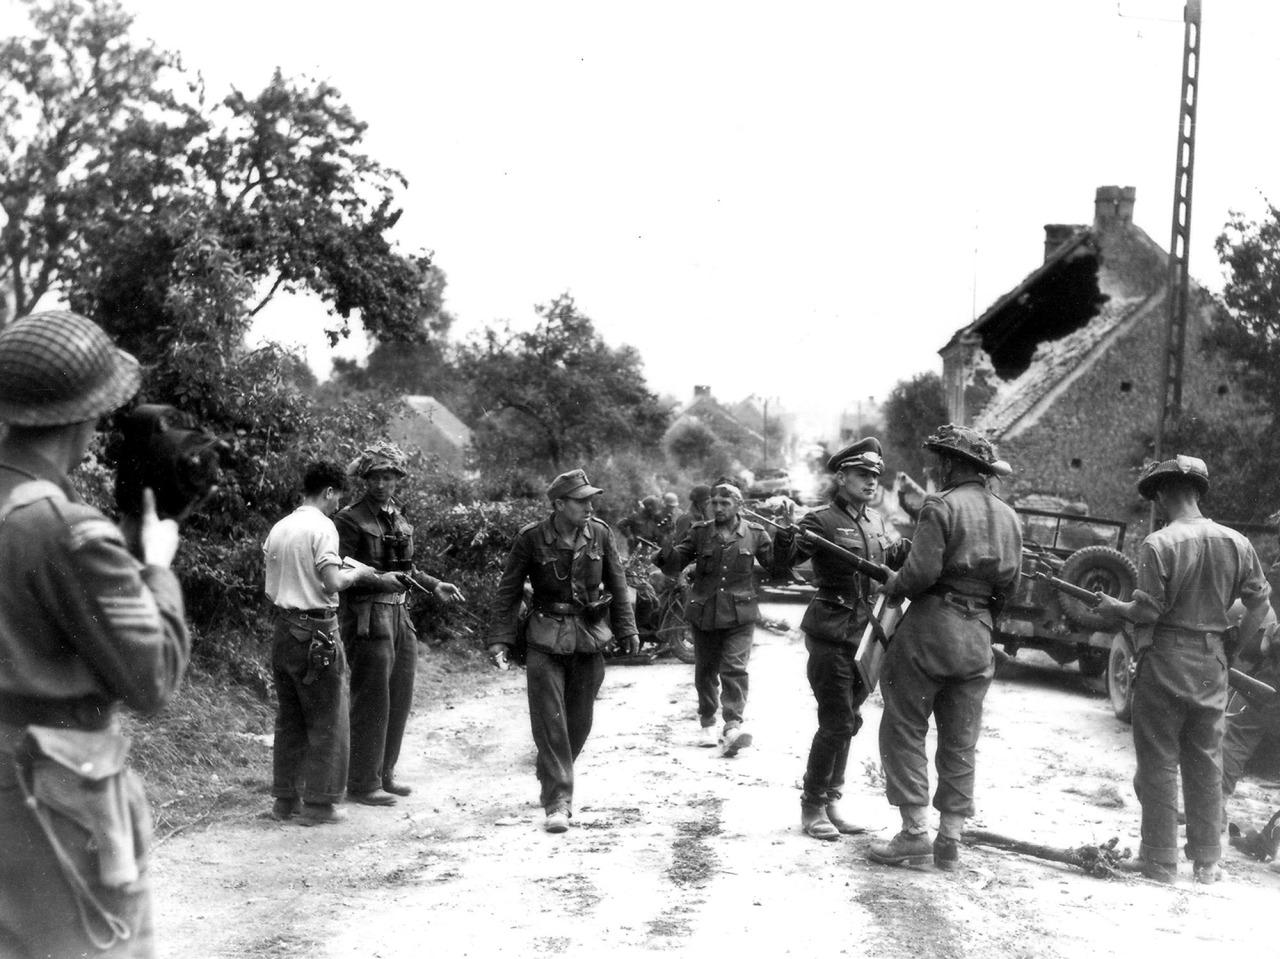
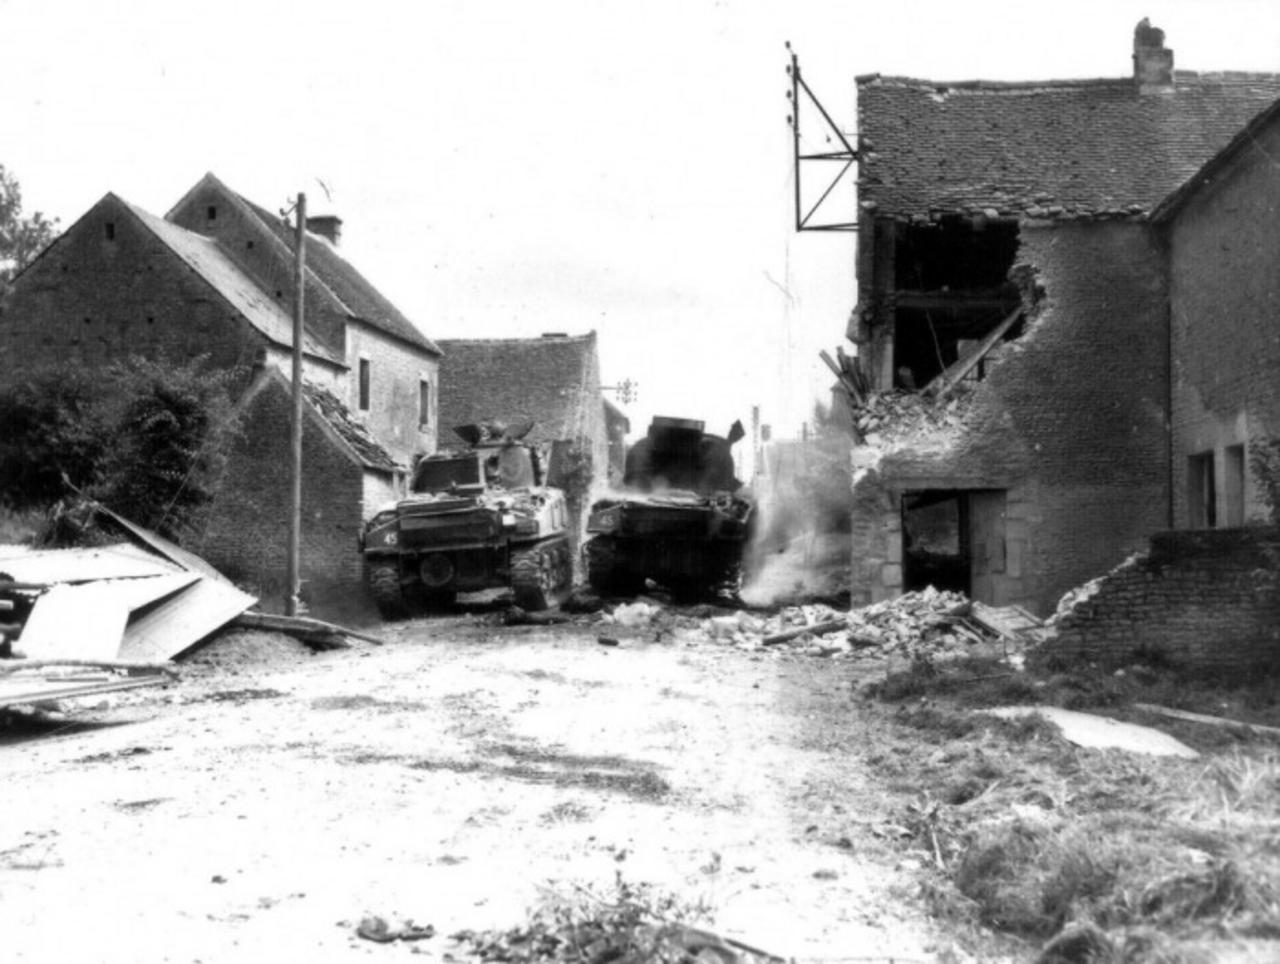
In these now and then photos I can understand why the Memorial is at this point.
The building on the right just past the sign with the red circle around it is the same one in the black and white photo.

dRQ471H.jpg


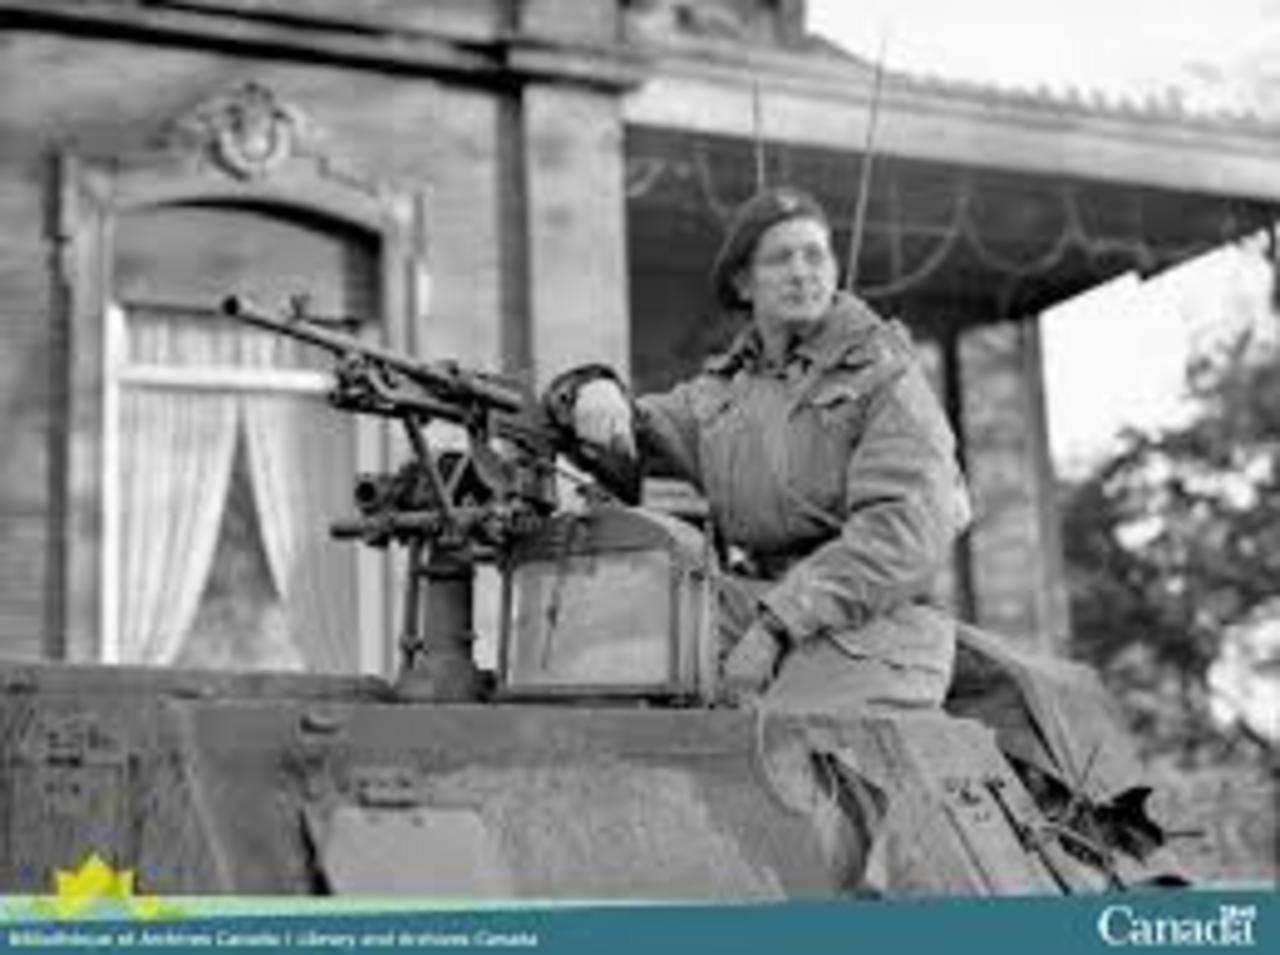
Major Currie is on the left in battle dress holding the revolver.

0eLUq2k.jpg


A view, a little further back, from a turret looking down the street:

VWuEtVs.jpg


St. Lambert sur Dives - Looking East, July 1948

qGdAAHN.jpg


On August 19, a German Tiger tank occupied the town intersection facing north holding open one of three escape routes for the defeated and surrounded German army in Normandy. As the Germans fled eastward along the road and neighboring fields and orchards the Allied airforce incessantly bombed and strafed. Canadian artillery added to the inferno. With the road from the north as its axis of advance B Company of the Argyll and Sutherland Highlanders (Canadian infantry) and C Squadron of the South Albert regiment (armored) took six hours to fight their way to the intersection and knocked out the Tiger tank. Canadian Commander Major David Currie (awarded the Victoria Cross) renewed the artillery fire to further help close the escape route successfully. The town was pulverized, the roadways were littered with hundreds of abandoned and destroyed vehicles and equipment. Hundreds of horses and thousands of German soldiers lay dead within the limits of this photograph.

This shows where "A" Currie's Memorial and "B" where I believe the Tiger was.

hc2ryBx.jpg


View looking up the road to the north west towards the memorial.
You can just make out the rise towards the overlook in the distance.
To the right is the escape road to the east.

ujdlfVr.jpg


If you turn around and you are looking towards Chambois.
The road to the right leads towards the Dives.
You can now see how critical this crossroad was.

pkRI49I.jpg


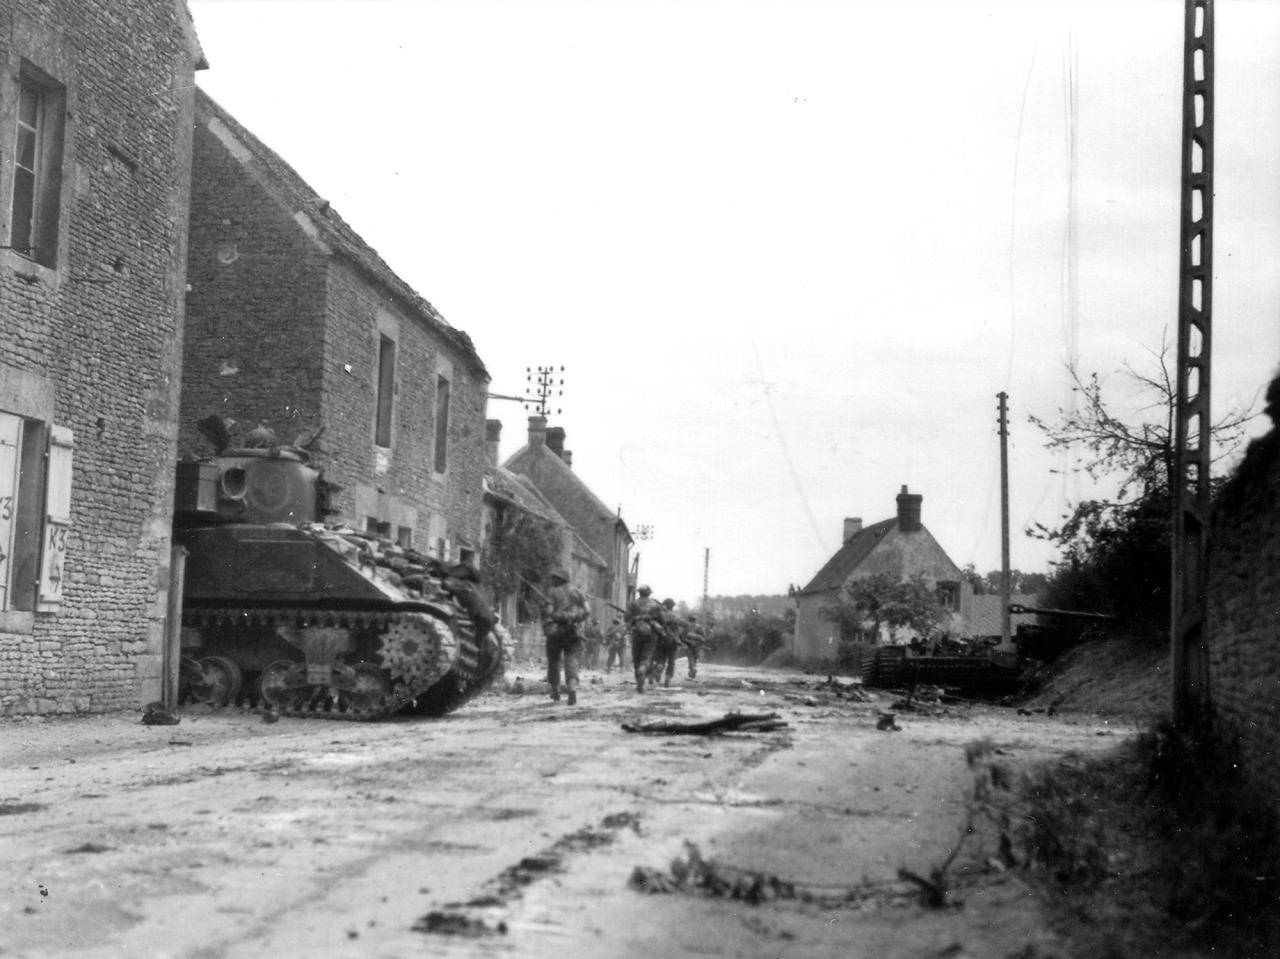
A Canadian Sherman passes a disabled tank in St. Lambert:

AM6OPjd.jpg


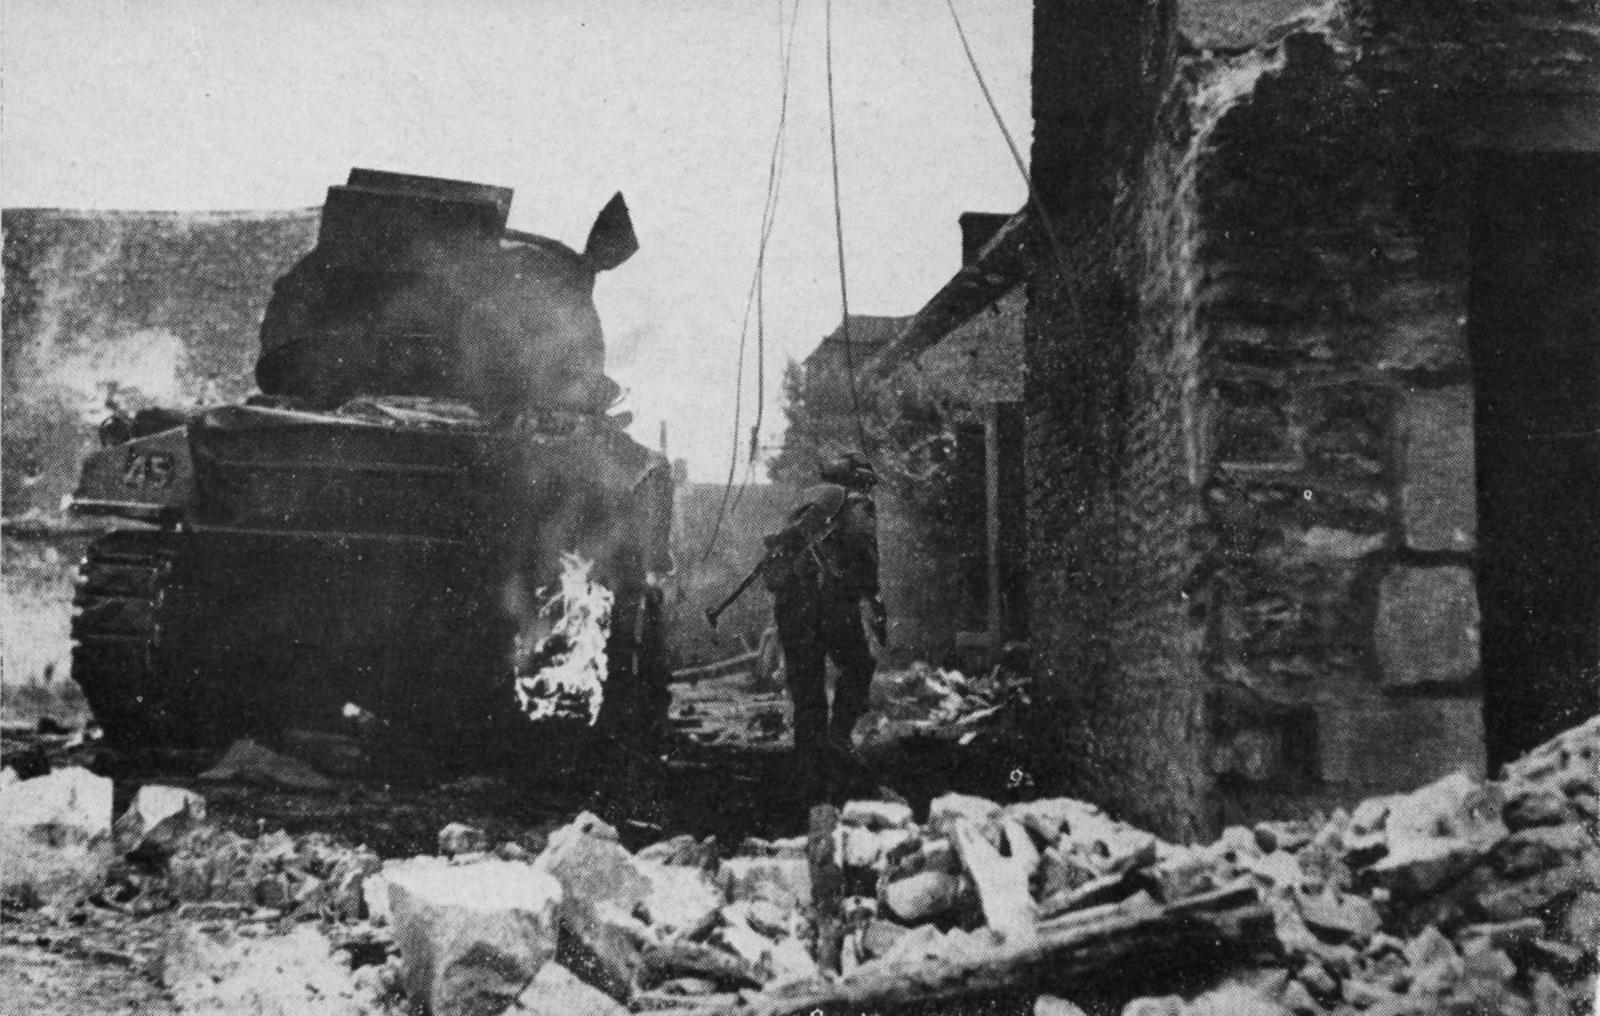
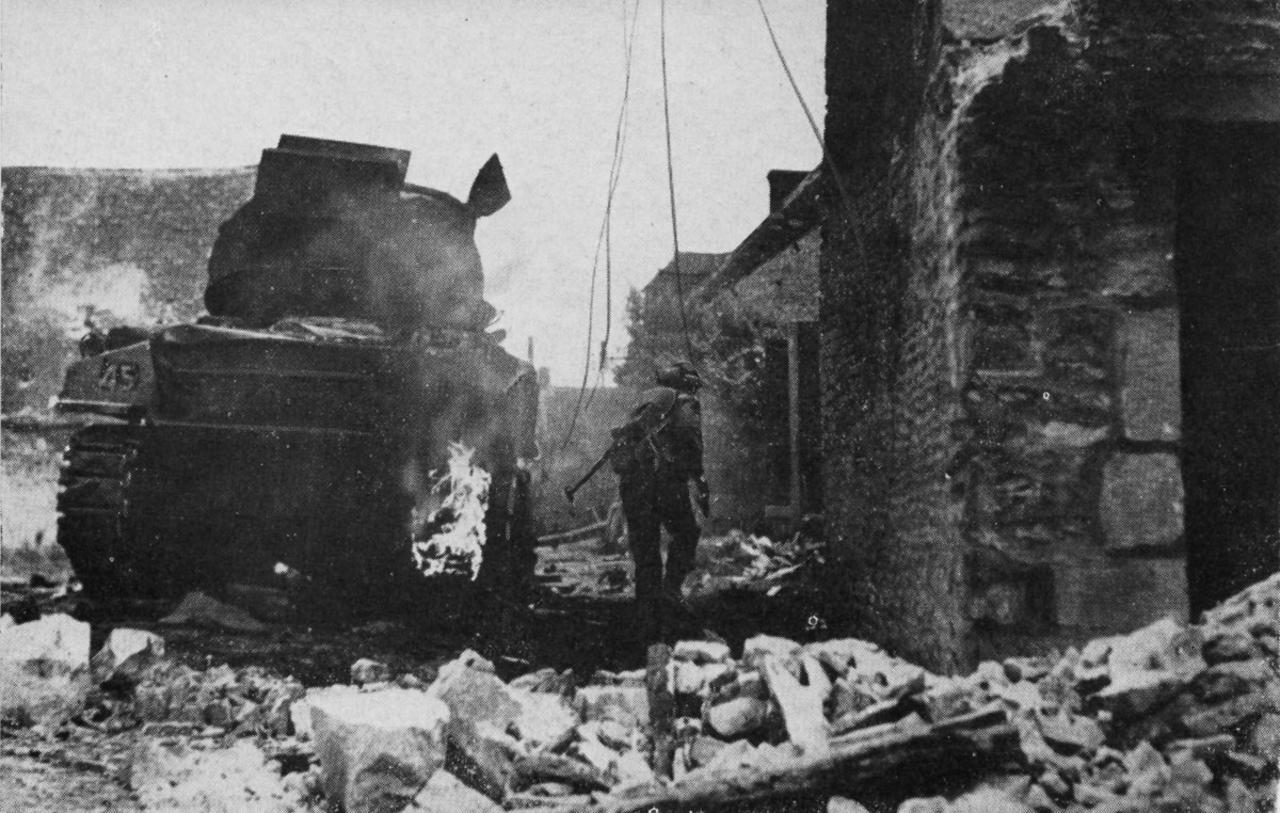
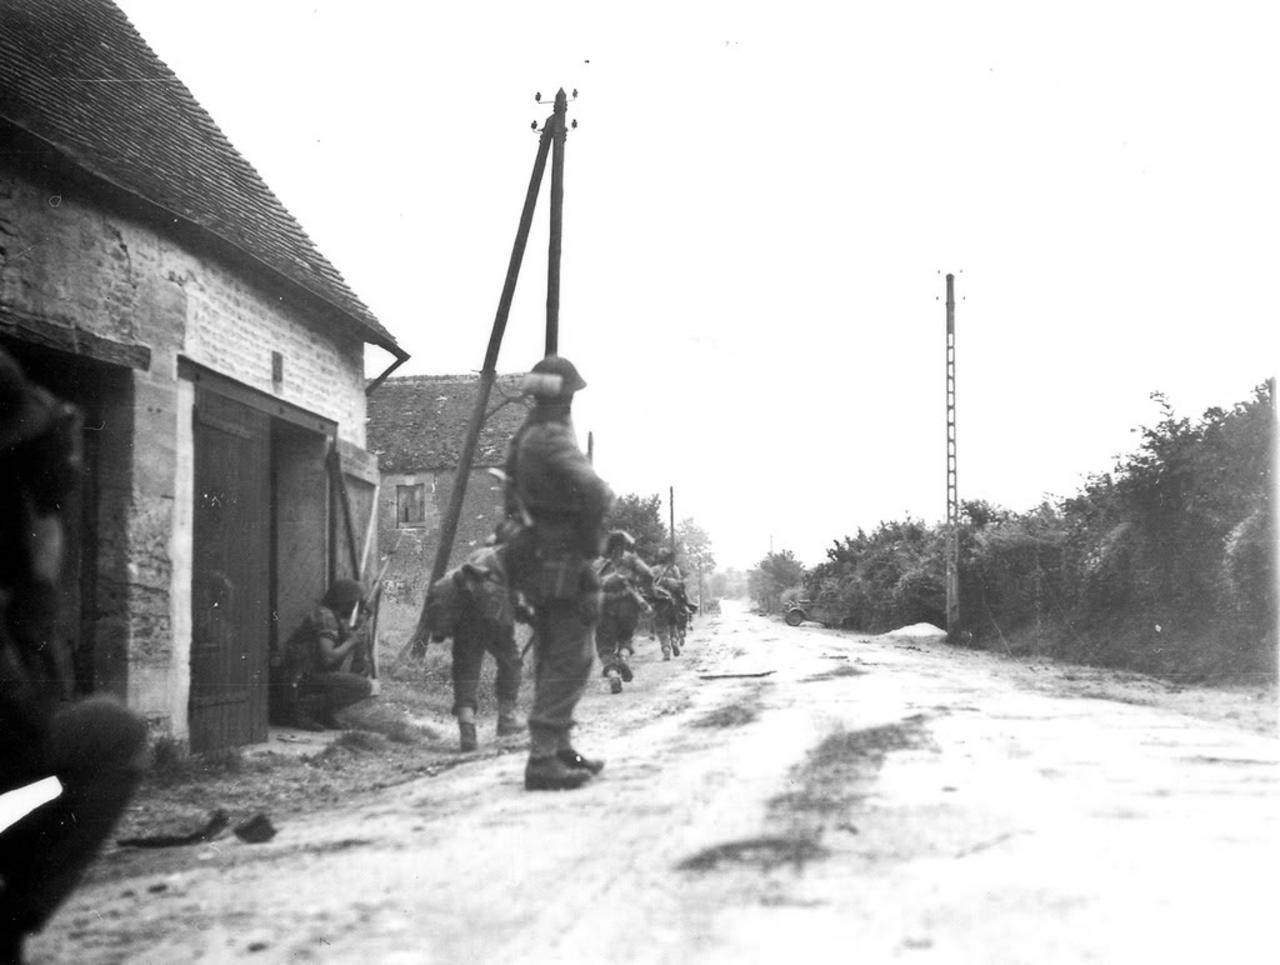
A soldier of the Argyll and Sutherland Highlanders of Canada, shovel on back, runs forward past a burning Sherman tank in the village street.

1mEhADp.jpg


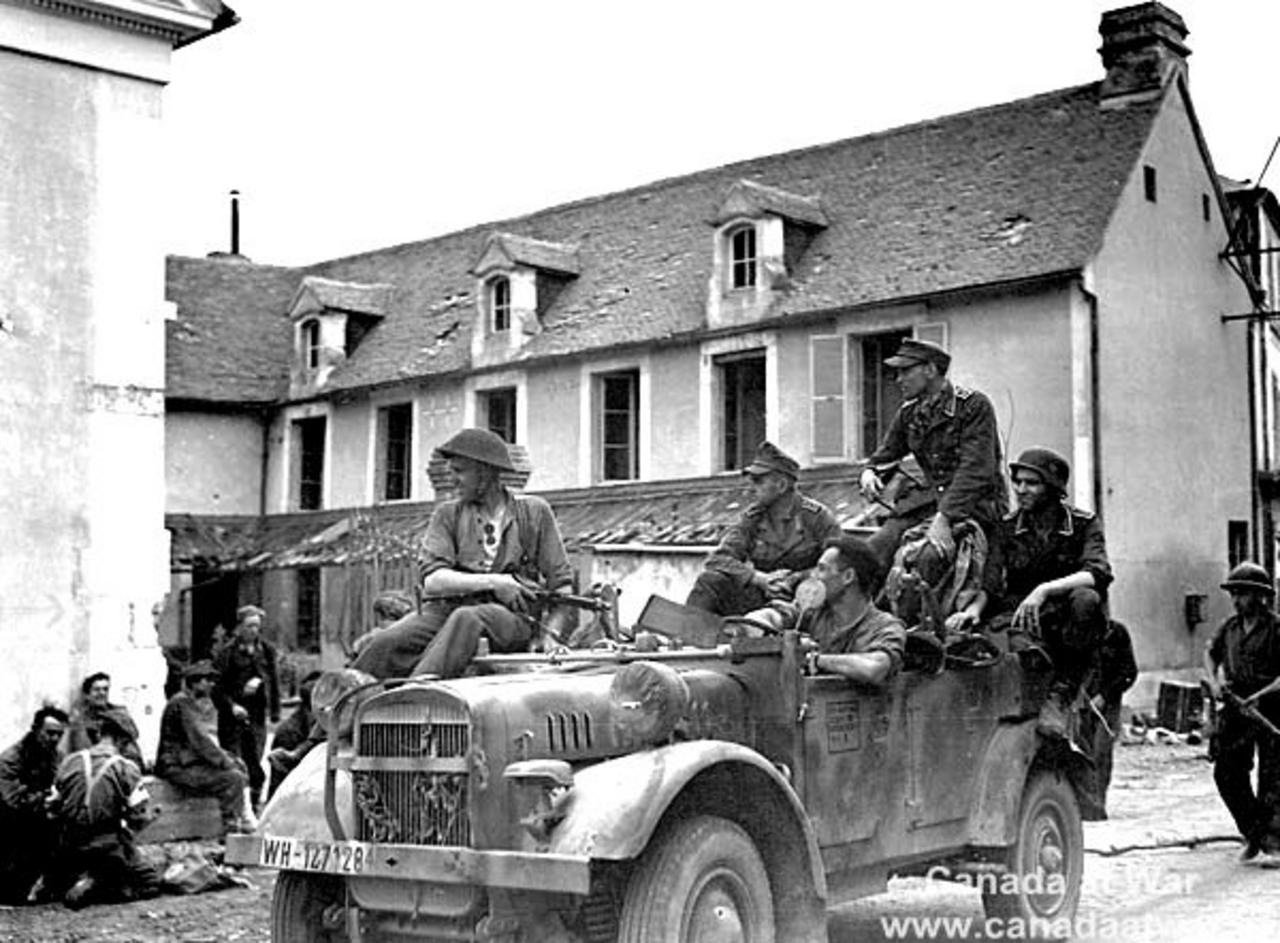
Infantrymen of "B" Company, The Argyll and Sutherland Highlanders of Canada, riding in a captured German truck with German prisoners, St. Lambert-sur-Dives, France, 19 August 1944.

1lNnBjU.jpg


Infantry moving in St. Lambert:
These guys were true heroes.

NDJdXrN.jpg


mhY1c2c.jpg


Here is a link to an interview with Major Currie when he returned to Canada.
http://www.cbc.ca/archives/categori...l-22/homecoming-of-major-david-currie-vc.html

In one part of the interview it was brought up that Currie at one point told his men over the intercom that he is going to stay there and is not going anyplace and will very likely be killed. The answer came back "OK boss".
Simple and to the point.

Lastly:

- Currie was praised for his bravery in the battle. The citation read "throughout three days and nights of fierce fighting, Major Currie's gallant conduct and contempt for danger set a magnificent example to all ranks of the force under his command."

- Currie had only 10 days of combat experience and two years of training as an armoured corps officer when the battle at St. Lambert-sur-dives began.

- The Canadian forces destroyed seven tanks and 40 vehicles. A total of 300 Germans were killed, another 500 were wounded and 2100 others were taken prisoner.

- Through the 76 days of the Normandy campaign, more than 18,500 Canadians were killed, wounded, or were classified as missing.

God bless them all.


Oh and to close,
My nephews, who are in their 20's, were unfamiliar with the details of WWII, let alone the battle for Normandy, didn't even realize that the Canadians fought in Normandy.

They do now.
 
Last edited:
Mark Zuehlke's Canadians at War series of books is well worth the read. Just have a map handy while doing so as he jumps around quite a bit and it's difficult to keep up with at some points. (Especially if you don't know the geography).
 
Thanks for the info, I'll look in to it.
The Canadians had their share of fighting during the war that's for sure.

One thing that bugs my head when reading a book on any campaign is a lack of maps.
Right now I'm reading a short book on the Battle of the Bulge called "11 Days In September" and there isn't one map in the whole book.
It takes you from jump off points to the northern shoulder, to the southern shoulder, to the furthest point of the break through and unless you are familiar with the area or have a map in hand you wouldn't have any clue where you are.

Actually, researching and writing about the tour here has helped me understand where I was and what I was seeing.
Now I read articles or watch documentaries and mostly I know where they're talking about :)

Next, it will be off to Moissy and the "Corridor of Death" for a bit of lunch. That's not much research, mostly pictures of destruction.
But then we visit the Poles at Chambois and Hill 262.
Books were written about these battles.

We're actually discussing another excursion to tour Market-Garden and the Bulge in '16.
I hope I'm done with this this thread before then ;)
 
Last edited:
Before leaving St. Lambert-sur-Dive, right by the side of the road, was a 20mm German AA gun.

kl3JgYU.jpg


Turns out one of Gary's friends has a whole collection of WWII things, one of which was thie 20mm. The towns people were nice enough to let this piece of German equipment sit on display for us to inspect.

This is original equipment and here Gary is showing us some battle damage done to the gun:

FO9Ztha.jpg


The Flak 30 (Flugabwehrkanone 30) and improved Flak 38 were 20 mm anti-aircraft guns used by various German forces throughout World War II. It was not only the primary German light anti-aircraft gun, but by far the most numerously produced German artillery piece throughout the war.[1] It was produced in a variety of models, notably the Flakvierling 38 which combined four Flak 38 autocannons onto a single carriage.

The Germans fielded the unrelated early 2 cm Flak 28 just after World War I, but the Treaty of Versailles outlawed these weapons and they were sold to Switzerland.

The original Flak 30 design was developed from the Solothurn ST-5 as a project for the Kriegsmarine, which produced the 20 mm C/30. The gun fired the "Long Solothurn", a 20 × 138 mm belted cartridge that had been developed for the ST-5 and was one of the most powerful 20 mm rounds in existence.

tNkFPQR.jpg


The C/30, featuring a barrel length of 65 calibers, had a rate of about 120 rounds per minute. Disappointingly, it proved to have feeding problems and would often jam, which was offset to some degree by its undersized magazine, holding only 20 rounds, which tended to make reloading a frequent necessity anyway. Nevertheless the C/30 became the primary shipborne light AA weapon, and equipped a large variety of German ships. The C/30 was also used experimentally as an aircraft weapon, notably on the Heinkel He 112, where its high power allowed it to penetrate armored cars and the light tanks of the era during the Spanish Civil War.

tpzgUsi.jpg


Rheinmetall then started an adaptation of the C/30 for Army use, producing the 2 cm Flak 30. Generally similar to the C/30, the main areas of development were the mount, which was fairly compact. Set-up could be accomplished by dropping the gun to the ground off its two-wheeled carriage and leveling with hand cranks. The result was a triangular base that allowed fire in all directions.

o0LaMKy.jpg


The main problem with the design remained the fairly low rate of fire which, at 120 rpm was not particularly fast for a weapon of this caliber. Rheinmetall[N 1] responded with the 2 cm Flak 38, which was otherwise similar but increased the rate of fire to 220 rpm and slightly lowered overall weight to 420 kg. The Flak 38 was accepted as the standard Army gun in 1939, and by the Kriegsmarine as the C/38.

It's hard to imagine the carnage and devistation that would have been going on all around me.
There would have been constant air attacks and if this gun was right on this spot in August of '44 it would have been working non-stop.

mD7fujh.jpg


In this shot you can see the holes caused by shot and shell:

U5oVvVo.jpg


Right on the side of the road, an AA gun on a concrete platform.
How cool is that.

uYcTHcP.jpg


Next stop, lunch at the Corridor of Death......


-
 
Last edited:
Lunch at the Moissy Ford, the last exit route.
Also known as "Couloir de Mort" or the "Corridor of Death".


We took a break for lunch after St. Lambert at a quaint little spot next to the Dives River and just south of Moissy.

qavaAIb.jpg


As it happens, on August 21, 1944, remnants of a German army once half a million strong attempted a headlong retreat from the encircling Allied armies.
At Moissy they headed into a one-lane road, both banks thick with bocage.

The map below shows Moissy right above where it says "Breakout attack by the Seventh Army".

gVnzJMv.jpg


zHv3u2M.jpg


This shows the last single road, across the Dives, through Moissy and out of the pocket.
(The red dot is where we had lunch)

qT3lctL.jpg


The Third Reich met its nemesis as much here as it had—albeit in far greater numbers—at Stalingrad. The Germans were forced into a pocket, the shape of a deflating balloon. Trying to break out into the open country beyond, they wheeled, unsuspecting, into the neck of the balloon—at the gates of Le Couloir de la Mort.

It was, literally, a dead end. They were strafed by rocket-firing Allied aircraft, aiming for the lead vehicles of the column so that the rest were trapped in the single lane. Men who broke into surrounding fields were cut down by Canadian gunners. “What a massacre” recorded one of the Canadians, “…terrified horses trying to break out of their harness, men trying to flee. It was useless.”

02Tm2BR.jpg


(An old illustration depicting Thunderbolts and Lightning of the US Air Force attacking a column of German vehicles attempting to escape from the Falaise Pocket, France, August 1944. The German Fifth Army and Seventh Panzer Army were encircled by Allied forces in the early part of August, then dealt a serious defeat as they attempted to escape. This illustration was drawn by the Illustrated London News artist, Captain Bryan de Grineau, was in France with the US Ninth Air Force at the time. An old illustration depicting Thunderbolts and Lightning of the US Air Force attacking a column of German vehicles attempting to escape from the Falaise Pocket, France, August 1944. The German Fifth Army and Seventh Panzer Army were encircled by Allied forces in the early part of August, then dealt a serious defeat as they attempted to escape. This illustration was drawn by the Illustrated London News artist, Captain Bryan de Grineau, was in France with the US Ninth Air Force at the time.)


On August 23, General Eisenhower arrived at the killing fields. He said it was a scene that only Dante could have described. A French historian did his best: “For hundreds of metres one could walk only on decaying human remains, in ominous silence, in luxuriant countryside which life had suddenly deserted…the trees had lost their leaves and branches and no bird sang….”

JJofqYs.jpg


Eisenhower next to an up turned Tiger II

3Lf1nOj.jpg


The 353d Division, under Generalleutnant Paul Mahlmann, had also executed a breakout attack as part of the II Parachute Corps effort. Assembled on the evening of 19 August in woods near Vorche, six miles west of the Dives, the division started its movement at nightfall. Meindl had instructed Mahlmann to make his main effort at St. Lambert on the left, while sending his vehicles through Chambois. A little later Mahlmann received information that both localities were in Allied hands. He therefore decided to make his main thrust across the Dives in the Chambois area to try to save his vehicles.

At Tournai-sur-Dives, about halfway to the river, the division came to a halt. The village was burning and its streets were blocked by wrecked vehicles, dead horses, and abandoned tanks. The terrain around Tournai did not permit bypassing the village, so a passage had to be cleared. This took three hours. Though the area lay under harassing artillery fire, the division suffered no losses from it.

Shortly before dawn Mahlmann, in the column on the right, was approaching Chambois. He made contact with a group of tanks, which, according to the officer in charge, had the mission of cleaning the enemy out of the Chambois area. But because this appeared impossible, the tank commander decided to cross the Dives River at Moissy. The tanks moved out around daybreak. Mahlmann and his column, along with stragglers from other units who had joined, followed them closely across the river. The tanks continued through Moissy and disappeared into the distance. Shortly afterward Allied tanks appeared in the vicinity and closed the gap. Their appearance was followed by an intense concentration of Allied artillery fire on the village jammed with German troops. Losses were high, and all semblance of organization vanished.

Mahlmann finally succeeded in bringing some order out of chaos. He organized a breakout attempt with the help of two stray tanks found in the village. The tanks had barely left the village when Allied fire knocked them out. Again, disorganization and apathy set in--spent, dispirited, resigned to their fate, men huddled under whatever cover they could find.

Taking a dozen stouthearted fellows, Mahlmann reconnoitered a concealed road leading to the east, receiving a light head wound in the process. The road enabled Mahlmann to get at least part of the men in Moissy out. Most of the wounded had to be left. All guns and vehicles, except two or three amphibious jeeps, along with part of the division staff, were lost.

Mahlmann headed for the southern eminence of Mt. Ormel, and that afternoon he and those who accompanied him began to climb the western slope of the hill. The whole area seemed covered with an amorphous mass of German soldiers hastening toward the ridge. An American observation plane circled leisurely, seeming to hang in the sky, as it directed artillery fire on the retreating troops.

------------

One look at this tiny ford cutting through the River Dives and it is hard to imagine, the tens of thousands of German troops and the hundreds of vehicles that crossed it in only a few days, trying to escape the Falaise pocket. It is also hard to imagine the death and destruction that reigned here.

Now....
rGOVW3w.jpg


Then....
EjqUbSA.jpg


Today it is a nice spot for a lunch....

XB2mSuA.jpg


bBoM4jV.jpg


There is a small interpretive sign that is the only clue as to what happened here.

6jyNsVE.jpg


TbpBuD7.jpg


And what happened here is nearly impossible to imagine....

2ki0zlR.jpg


eDdqKIw.jpg


This is a now and then.
The houses are just up the road past the brick wall (was added much later).

xcGP4PG.jpg


RWaPj33.jpg


Shots from the air show the many burned out wrecks...

fTuVR3g.jpg


KizrANe.jpg


Finally this shot gives a good idea on how clogged the road was in spots.
(Is that a truck stacked up on the debris?)

WYmCvil.jpg


Next we move on to Chambois and start to fight with the Polish 1st Armored Division.....


.
 
Last edited:
Back
Top Bottom