Learn stunning paint and color schemes for your Death Korps of Krieg models using grey and weathered effects for simple steps to achieve a realistic look!
Updated from 2018 on January 15th, 2025, by Rob Baer with new information and links for painting Death Korps of Krieg models.
When it comes to painting Death Korps of Krieg models, getting that grim, battle-hardened look isn’t just about slapping on some grey paint and calling it a day. It’s about making those overcoats look like they’ve weathered endless wars, trudged through mud, and faced the horrors of the 41st Millennium—all while keeping the process simple and manageable.
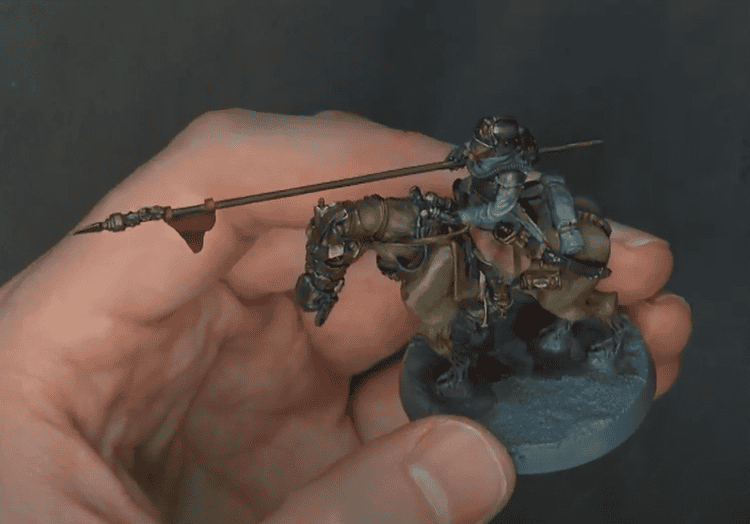
In this guide, we’ll show you how to nail the perfect Death Korps of Krieg paint schemes, focusing on realistic grey tones and gritty weathering effects. If you are looking for a paint guide on Death Riders, click here for our tutorial on painting horses!
From choosing the right paints to easy techniques for adding depth and detail, you’ll have your troopers looking ready for battle faster than you can say “For the Emperor!” So grab your brushes, and let’s give these stoic warriors the finish they deserve.
A Guide to Greys and Blues That’ll Turn Heads
Let’s talk Death Korps of Krieg paint schemes, specifically focusing on those sleek grey overcoats that scream grim, determined soldiers of the Imperium. This guide will help you make your models stand out on the tabletop while keeping the process simple and enjoyable.
Choosing the Perfect Grey: Breaking Down the Options

If you want to change any of the colors in this DKoK painting guide or use paints from other manufacturers, be sure to check out our massive article with paint color conversion charts for Citadel, Army Painter, Vallejo, and more.
- Army Painter Blue Greys: Gorgon Hide (Frost Blue), Wolf Grey, Uniform Grey
- Army Painter White Greys: Stone Golem (Company Grey), Ash Grey (Brigade Grey), Uniform Grey
- Army Painter Metals: Plate Mail Metal
- Vallejo White and Neutral Greys: Stonewall Grey, Cold Grey,
- Vallejo Blue Greys: Sombre Grey, Wolf Grey
- Vallejo Browns: Beasty Brown, Charred Brown
- Citadel White Greys: Ulthuan Grey, Celestra Grey
- Citadel Neutral Grey: Mechanicus Standard Grey
Getting Started: Priming the Model

If you’re working with an airbrush, Vallejo Stonewall Grey makes an excellent first layer, giving your model a pre-shaded look that adds depth. We did the models above using both techniques, and it’s very hard to see the difference!
Step 1: Base Coat

For metals, apply a basecoat of Plate Mail Metal and hit the straps with Beasty Brown, followed by the darker Charred Brown for the boots.
Step 2: Add Contrast
Pro tip: any gloss varnish via aerosol or airbrush (affiliate link- thanks) proves invaluable for washing models. A quick aerosol or airbrush spray of nearly any gloss varnish prepares the surface, allowing washes to settle correctly without running amok.
Here’s where the magic happens. Using a wash like Citadel’s Nuln Oil Gloss, mixed 50/50 with Vallejo Flow Improver, creates a beautiful contrast in the fabric folds. The Flow Improver prevents the dreaded “coffee stain” effect, ensuring a smooth finish.
For the metals and browns, wash them with an equal 50/50 blend of Strong and Dark Tone (or Nuln and Agrax from Citadel.) This adds a touch of character to the finished armor. You can see more here on how to paint metals and weathering effects for the Death Korps.
Apply the wash generously, but watch for pooling—no one wants their troopers to look like they just crawled out of a swamp. Let gravity do the work by washing from top to bottom, and your model will thank you with folds and creases that pop.
Step 3: Highlights and Hyper Highlights

For an extra punch, add hyperhighlights using Stonewall Grey. This brighter tone goes on the sharpest edges and areas that would catch the most light. It’s subtle but transformative.
Why Greys Work for Death Korps of Krieg
The muted tones of greys perfectly suit the stoic vibe of the Death Korps of Krieg. These aren’t flashy soldiers—they’re grim survivors of endless wars. Grey conveys their story: no-nonsense, cold, and ready for battle.
And if you’re feeling adventurous, you can tweak the tones to include a touch of blue for a frosty look or warmer greys for a dustier battlefield aesthetic.
Adding a Weathered Touch with Reaper’s Harvest Brown

To achieve a weathered look, lightly airbrush (or drybrush) Harvest Brown around areas like the hems of the coats, boots, and lower folds of fabric. Focus on places where mud and muck would realistically accumulate—these troopers aren’t strolling through pristine cathedrals, after all.
Don’t have an airbrush? No problem! A sponge or stippling brush works great for creating a similar effect. Just dab lightly and build up the layers gradually to avoid overdoing it. The result? A rugged, worn-in vibe that looks right at home on the 40k tabletop.
If you want to see a more in-depth look at weathering (and how to do the mortar), be sure to read this tutorial!
Bonus Tips for Painting Death Korps of Krieg
- Experiment with washes: A touch of sepia or blue in your wash can give the fabric unique undertones.
- Weathering: For added realism, stipple on small amounts of brown or black around hems and boots to simulate mud and grime (see a more in-depth tutorial here).
- Highlight details: Once the overcoat is done, shift your focus to accessories like masks and weapons to complete the model.
Wrap-Up Death Korps of Krieg Paint Schemes
Paint and color schemes for the Death Korps of Krieg don’t have to be intimidating. With just a few greys, some washes, and a little patience, you can bring your models to life. From cold grey overcoats to sharp highlights, these techniques will ensure your troopers look incredible whether they’re on display or leading a charge in battle.
What are your favorite paints and techniques for getting that perfect Krieg look? Let’s hear it—your models deserve all the compliments they can get.
See Our Favorite Airbrushes For Painting Miniatures Here!
Will you be using these Death Korps of Krieg paint schemes when painting your new army?


