Hand Sewing Holes for Buttons, Lacing, and More
Do you need to add a buttonhole to a garment, but don’t own a sewing machine? Are you trying put buttonholes on a period-accurate garment that requires everything to be hand sewn? Do you want to make a laced garment (such as a corset) but hate grommets with the passion of a thousand burning suns? Then this tutorial is for you.
@starsandsilmarils came to my friend @ambrorussa asking how to hand sew buttonholes. Since I recently finished a costume that uses over 50 hand sewn holes for various things, that request was forwarded on to me. I therefore created this tutorial, showing how it’s done.
What you will need:
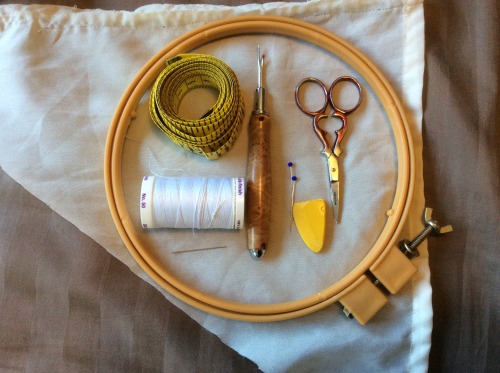
– The garment you want to add buttonholes to
– A needle (I like to use a thin embroidery needle)
– Thread
– Something to measure the hole with (like a tape measure)
– Something to mark the hole with (I use pins and tailor’s chalk)
– A sharp seam ripper
– Small, sharp embroidery scissors (optional, but will make a cleaner hole)
– An embroidery hoop, if your garment is made of thin or delicate fabric (not generally needed for thick brocade or canvas)
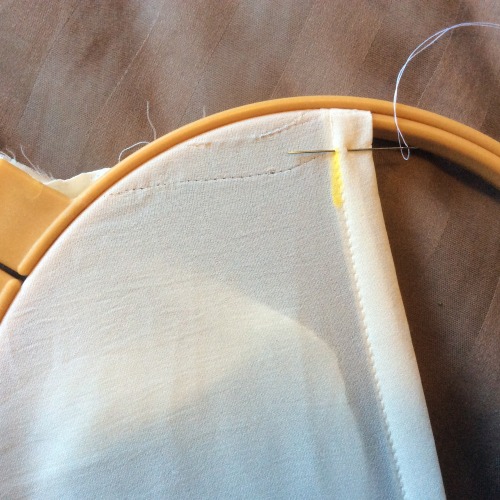
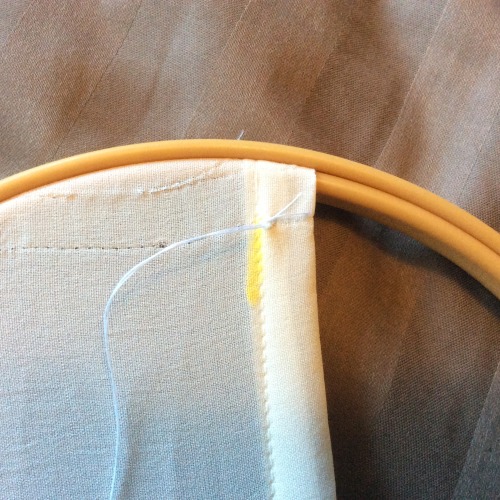
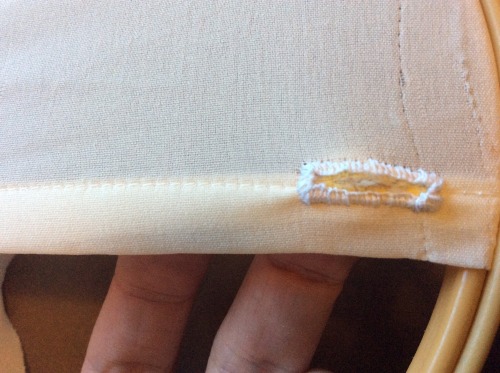
Step 1: Measure and mark where your hole will go.
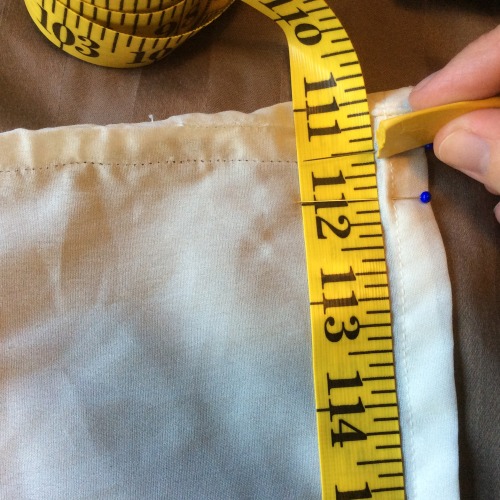
Make sure the resulting mark is the correct length and location, and can easily be seen, like the one below. Also make sure it is made of something you can wash or brush out, since it may show on the finished garment otherwise.

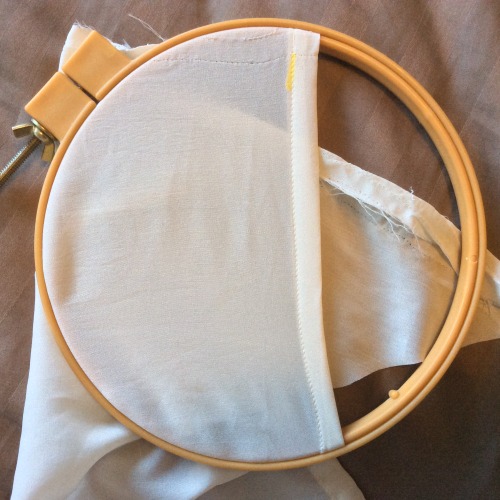
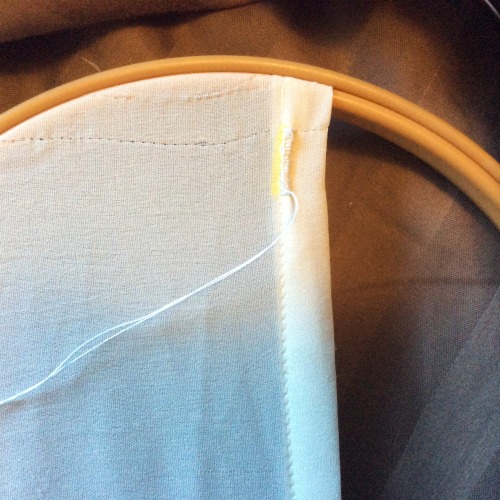
Step 2: If your fabric is not very stiff, stretch it over an embroidery frame. This will make it easier to keep your stitches neat and ensure that you don’t cause the fabric to wrinkle excessively.
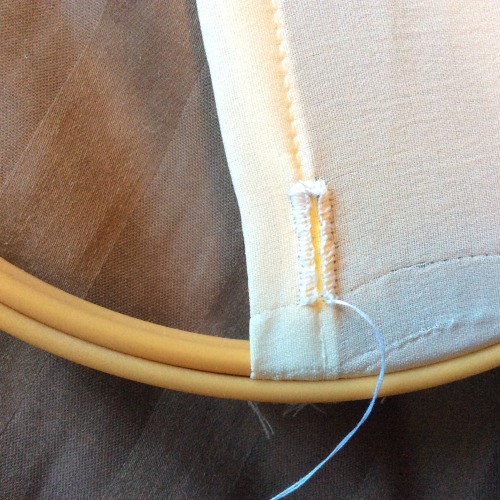
Step 3: Thread your needle and tie off the end. Then put your needle through the fabric perpendicular to your hole marking, with the tip touching the line.
Pull the needle through the fabric, and put it between the strands of thread next to that knot at the end.
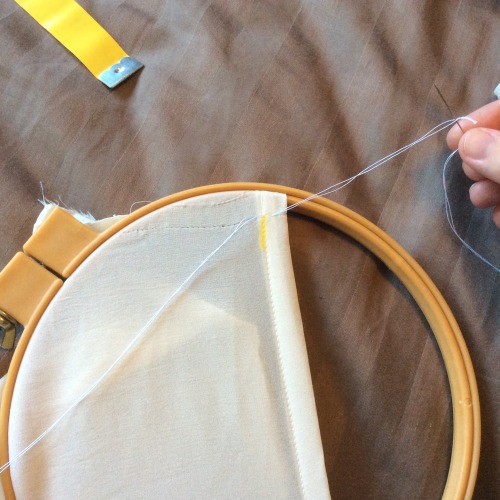
Pull the thread snug (though not so tight that the fabric puckers). You now have a secure knot at the beginning of your buttonhole.
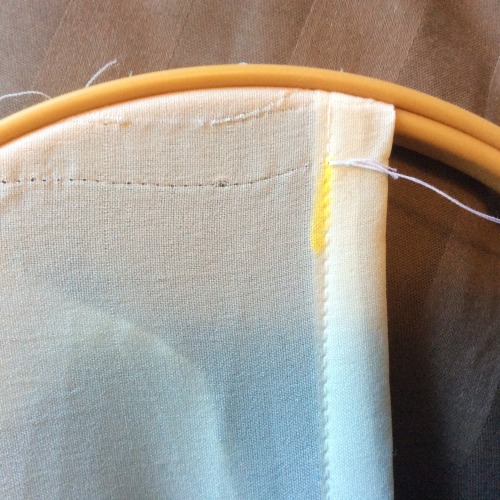
Step 4: Directly next to the stitch you just made, put the needle through the fabric again, still parallel to the hole mark with the tip just touching the line. Make sure the end of the the thread is tucked under the tip of the needle.
Pull the thread snug. This is called a blanket stitch, and will be the stitch you will use for the entire rest of the buttonhole.
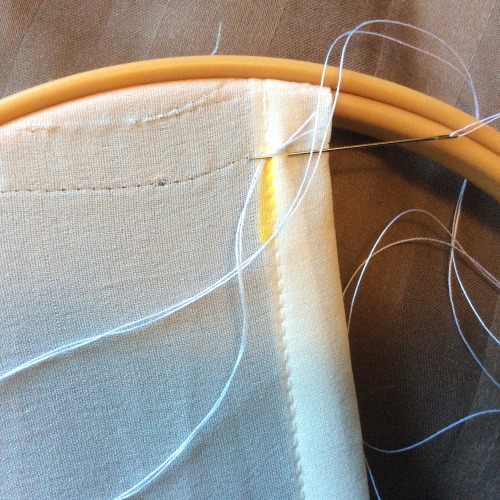
Step 5: Repeat step four until you reach the end of your buttonhole mark. You should have a solid-looking stripe of blanket stitches.
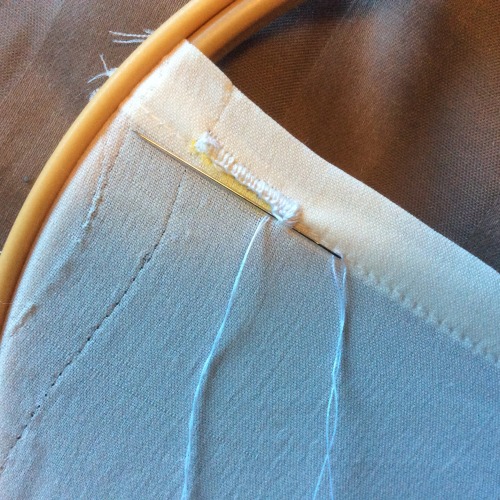
Step 6: To turn a corner, you will keep making blanket stitches. However, instead of being parallel to the stitches you have made previously, all the stitches around the corner will end with the tip of the needle going into the same inner corner hole.

You will keep doing this until your needle is parallel to the buttonhole mark. It will look something like this.
You will then do a stitch or two like you did on the long side, and turn the corner again.
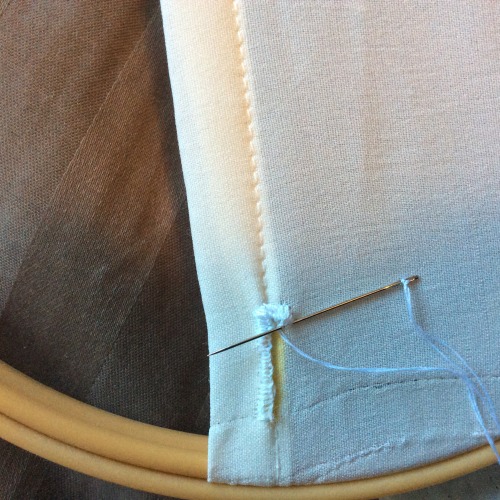
Step 7: Do another set of blanket stitches down the second long side, like you did on the first.
Step 8: Complete the final short end like you did the first one. Knot your thread securely, and cut the excess off, tucking the free tail of thread under your existing blanket stitches.
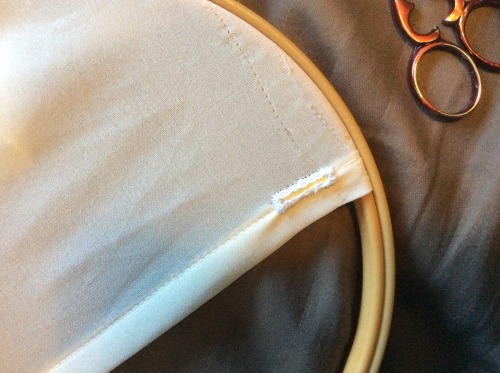
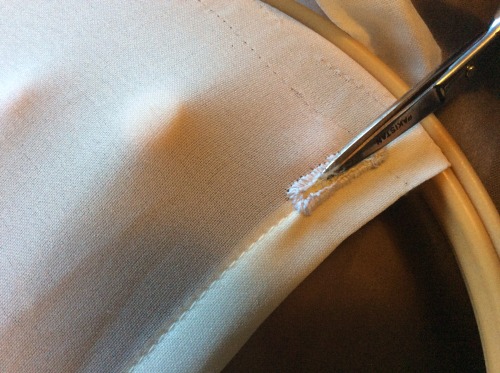
Step 9: Using your sharp seam ripper, poke a hole in the fabric in the middle of your rectangle of blanket stitches. Be careful not to pierce your blanket stitches when you do.
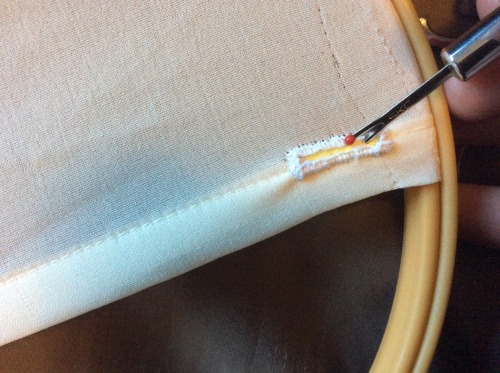
Use the seam ripper to cut down the length of the button hole. Again, be careful not to cut any of your blanket stitches.
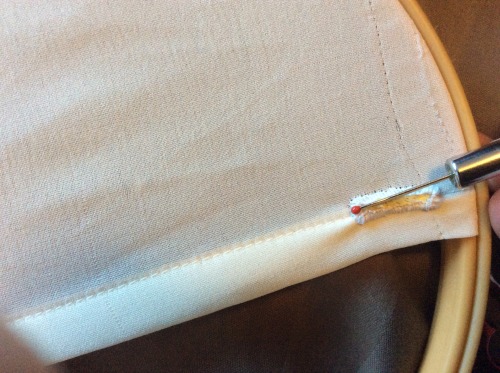
Step 10: Using your finger, open up your new buttonhole and take a look at it. It may cut perfectly cleanly (especially if you are using a thick, heavy fabric.) It may, however, have some fuzz and spare threads like the one shown here.
You can remove these by taking your sharp embroidery scissors and carefully cutting that fuzz and spare thread free.
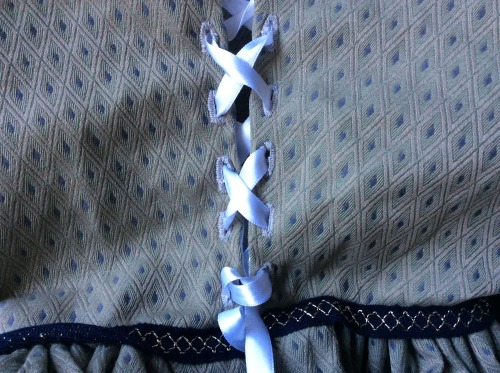
And you’re done! You now have a sturdy hand sewn hole, ready for use with buttons or lacing
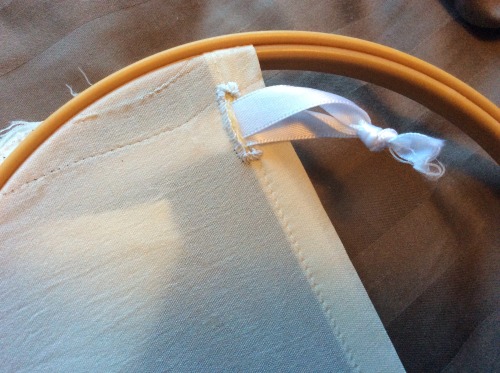
Some notes about these: As long as you use good thread, are careful with your scissors and seam ripper, and place your stitches close together, these are INCREDIBLY sturdy. I used these on a steel-boned renaissance corset, which I have laced and unlaced many times, and have never had any rippage. They also have nice smooth action for lacing and tightening garments. If you want to use them for something laced with round laces or leather thongs, you might consider blanket stitching around a circular mark, instead of a rectangular one.
And that’s all! Hand-sewn holes are really not difficult. They are mostly just tedious and very time consuming. But if you lack a machine or want to give your garment that hand-crafted touch, they are unbeatable.
gosvinta liked this
 lawlietisawesome liked this
  hello-goodbye-77 reblogged this from the-dragongirl
 edenfire liked this
lucaswrites liked this
luminousrot reblogged this from fulminata2
 sabre-for-the-soul reblogged this from fulminata2
 uodsalmonella reblogged this from tsuitenaii
anyatinaganmoboi liked this
tsuitenaii reblogged this from learning-to-sew
glitterfrogz liked this
 phantombluecosplay-blog liked this
 thataveragejo liked this
i-tinathefatlard liked this
cosrefforme reblogged this from the-dragongirl
 thenoodlemel liked this
 - gwyns-reference-blog reblogged this from allora-the-booty-slayer
cake-lawliet liked this
the-prince-of-videogames reblogged this from the-dragongirl
ladyoftheforestrain liked this
secretcherimaybe liked this
toswimamongthestars reblogged this from the-dragongirl
saya-cosplays reblogged this from sayaka-hime
 mayanwitchcraft liked this
 theannoywonderlandchild liked this
boofandtoof reblogged this from the-dragongirl
 whistlesdowns liked this
  nerdatlas5 reblogged this from the-dragongirl
 - nerdatlas5 liked this
eeveebattler reblogged this from the-dragongirl
 catangos reblogged this from the-dragongirl
 phantomthief-link reblogged this from eikhaer
cephetacean liked this
serenityinwaiting liked this
themistwolf-blog reblogged this from the-dragongirl
 bellathemyth liked this
 time-lady-of-the-opera reblogged this from the-dragongirl
 the-dragongirl posted this
 - Show more notes
