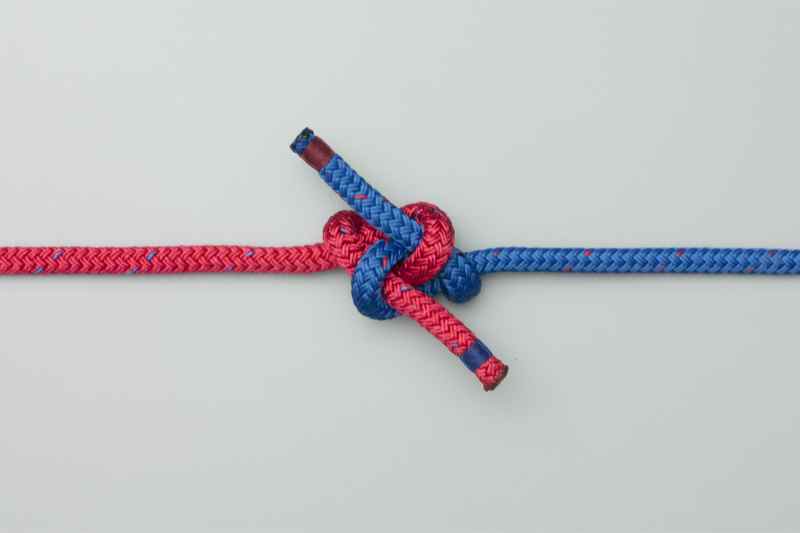
Secure rope join, readily untied even after a heavy load.
Carrick Bend
Secure rope join, readily untied even after a heavy load.
 |  |

 |  |  |  |  |
To Step use Arrow Keys (
Uses: The Carrick Bend (ABOK # 1439, p 263) joins two ropes together. Ashley describes it as “the bend commonly tied in hawsers and cables.” It is also makes the center of the very decorative Lanyard Knot.
Warning: For the Animation, the ends were left short. For critical loads, e.g., when Climbing, the ends must be left much longer.
Structure: The Carrick Bend curls up under strain and the attractive, mat-like appearance vanishes. It is important that the tails lie diagonally opposite each other; if tied incorrectly, an intermittent pull will gradually work the knot towards the tails until it is undone!
Place: Because the Carrick Bend is reliable and has the enormous advantage of being easy to undo, it probably deserves to be used more often. However, it is slightly awkward to assemble and it is easy to make a mistake: you can have both tails on the same side of the knot; or one of the crossings may be incorrect. These other versions of this knot perform far less well.
Knots for Making a Net: Making a Cargo Net is tedious, time-consuming, and only to be undertaken out of necessity or by the enthusiast.
The image on the left shows the two knots that are most commonly used at each junction when making a net. The Carrick Bend has been used in the upper row and the Sheet Bend has been used in the lower row.
Suggested Scheme for Making a Climbing Net: In case you ignore this excellent advice, and proceed to make your own net, the image on the right shows a method using the Carrick Bend.
- Size: In practice many more vertical ropes will be used to make it wider, and it will be longer as well. In this picture, colored rope has been used to make it easier to follow the path.
- Verticals: Six verticals have been used. In practice, half the number of ropes will be used, each twice as long, as though neighboring pairs had been joined at the top.
- Rope Length Needed: It is worth making a test with a short length of rope to determine how much rope is consumed making each square. The two side ropes consume less because they do not pass around any squares.
- Top Ropes: At the top, each loop of rope can be left long – to hang down from a pole, or left short so that each alternate square has a double top border.
- Side Ropes: Here each side shows that alternate squares have twin ropes – lying beside each other. It is preferable to twist them around each other in a spiral before starting the knots in the next row. This same treatment can be applied to the double rope at the top.
- Bottom Ropes: The bottom ropes are shown left hanging. In practice, each one can be tied to its neighbor to make a neat bottom row. As with the top and sides, the ends can spiral around the bottom line before being tied together.


