Felted Fabric: A History
Felting predates the creation of woven fabric, and is still used in some cultures for the basics of living, most notably Central Asia, The Himalayas, and Baltic Countries. It is a low-tech solution for creating very warm and heavy fabrics for the creation of housing and clothing (Mongolian Yurts, Nepalese clothing, felt rugs, etc.).

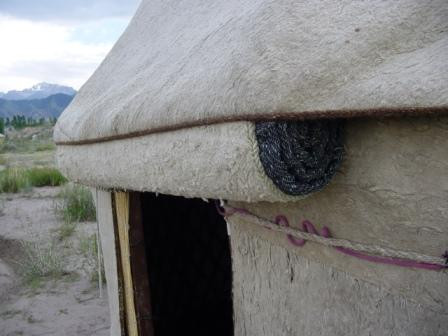
A Traditional Yurt with felted walls & Roof

Yurt close-up to show the thick and coarse texture of the felted material


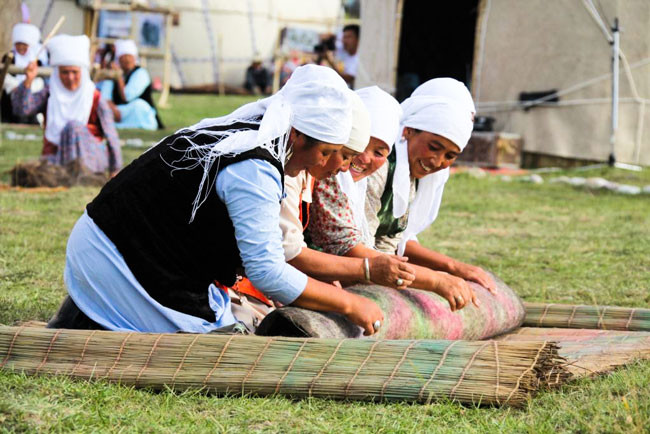
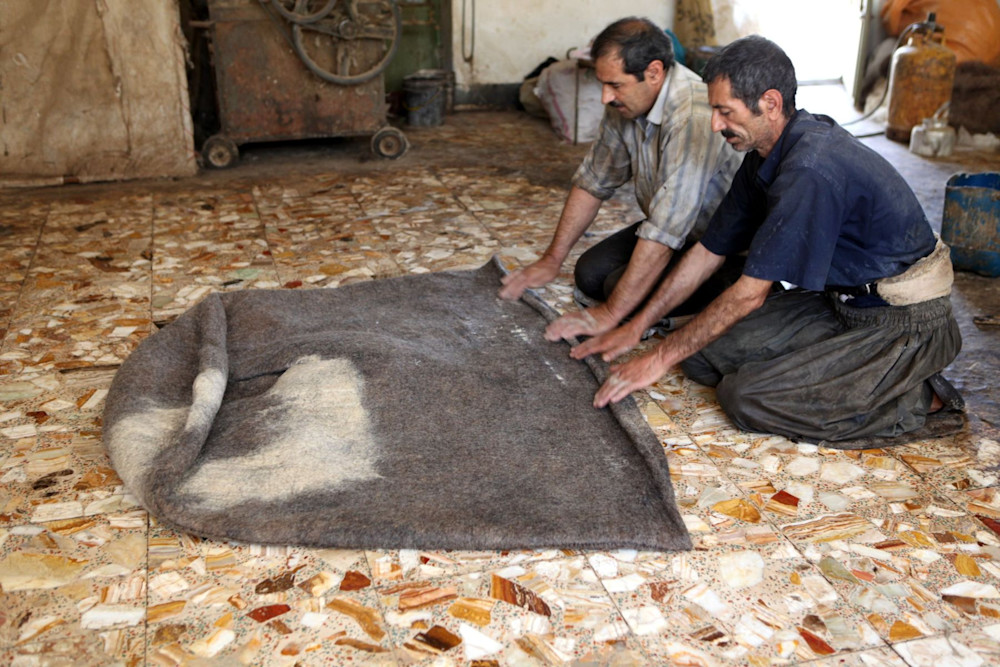
Village women and men rolling the felted fabrics. It is usually a community effort.
Felted fabric was made by layering fibers into a mat and beating the matting fibers with sticks, pounding, or using animals to apply pressure while the fibers were damp or wet. Often this would be done in a stream and running animals over the matt of hairs to compress the wet fibers together causing them interlock into an ever increasingly denser mat of fabric while then gradually squeezing the water out of the material as the fibers bound together.
Because it is such a large project, in small communities a group or the entire community get involved in making felt fabric for homes, wedding attire, shoes, hats and other essentials.

Village women rolling felted fabric
However, since it is difficult to keep a herd of camels or horses at the ready to compress the fibers, our artists use their own body weight to roll the fiber hundreds of times in different directions to obtain the desire results, while making adjustments between each rolling to coax fibers into positions that meet their artistic vision.
Felting as fashion and art is now evolving into different techniques adapted to other climates, cultures and uses, and is becoming more evolved and common in places such as New Zealand, Australia, Baltic States, Eastern Europe and gaining popularity in the United States as a form of craft, but also as fashion and art.
Felting Art pieces can incorporate multiple methods and techniques, but primarily focus on the ancient art of wet felting and fabric-felting while using other techniques to embellish the primary creation in order to create a lighter and more flowing work of art. Our primary style is under the umbrella of Wet Felting, which is the traditional technique.
This is the term used to describe the traditional form of making felt usually creating a thick fabric by using water to wet and build up many layers of individual fibers. The felt can be formed into shapes such as bowls or shoes, made into clothing, rugs or any other number of functional pieces.
Traditional wet felting techniques result in a very thick, heavy, warm fabric. In the 1990’s a fiber artist from Australia developed a technique and coined the term “nuno felting” (Nuno being the Japanese word for “cloth”) This is a form of wet felting where fibers are bound to a lighter woven fabric such as a sheer silk gauze as a substrate, in order to create a less dense, and a more fluid and free-flowing form of felt. This also results in more suitable fashion pieces in warmer climes, and creating a breezier feel and diaphanous appearance. This contrasts with the thick, traditional mats of fabric created for warmth. Also, because the wool and oither natural fibers shrink in the wetting and rolling process, and the silk does not, it creates a binding or puckering effect to the woven substrate.
To the many people into “crafting” are most familiar with needle felting. This is a technique of repeatedly poking a needle through fibers to bind them into cutesy little toy figurines. This technique can also be used to bind together two other felted pieces in a form of appliqué work.

Raw fibers getting felted by needle.

Figure taking shape as fibers bind.

What a finished craft needle-felted figure looks like.
Natural fibers are used almost exclusively. Synthetics simply will not shrink or bind together to create felt, so if used at all, have to be bound within natural fibers. Our artists have been known to regularly use raw fibers such as:
| Wool |
Buffalo |
Chincilla |
| Silk |
Guanaco |
Mink |
| Angora |
Paco-Vicuna |
Pygora |
| Alpaca |
Qiviut |
Yak |
| Llama |
Goat |
Camel |
| Cashmere |
Cotton |
Mohair |
NOTE: to aquisition of fibers is either via combing or shearing the animals. It is never necessary to skin an animal to obtain fibers used for this process. On the contrary, the better the animal has weathered a winter, it creates a different hair character that can be beneficial to the felting process.
Not only does the type of fiber determine the ease of difficulty of felting, but even the variety of animal can make a difference. Certain breeds of sheep, for instance produce fibers that easier or more difficult to felt. Factors such as fineness, fiber length, sheen, and shrinkage are just a few considerations taken into account with fiber selection.
Some pieces are embellished with organic or man-made items such as: seashells, beadwork, coins, silk cocoons, and other items to enhance the look and accuentate the themes of the artwork.
Natural animal hairs have different properties, thicknesses, and degrees of roughness. Under a microscope, they appear barbed to various degrees. The goal of felting is to place the fibers in different directions in relation to each other, and agitate them and apply pressure until these microscopic barbs interlock with each other for form a mat or felt cloth.

Some Natural Fibers and Animal Hairs magnified to show textures

Magnified Felted wool hat fabric.
Step 1: Layout
A few fibers are pulled from a bat of fibers that all run in the same direction. These are then laid out at various angles with just a few strands at a time over the surface of the piece. This process can take many hours and there can be no breeze present or the fibers will be blown off or moved from their intended position. Even someone walking by too close or too fast can result in a major disruption of this process which can typically take from 2 to 10 hours.
In the case of Nuno Felting, this process takes place on top of thin silk gauze, or gauze can also be laid on top and more fibers added atop the fabric.
Felters always face the challenge of shrinkage. A felted piece, because of the nature, directions, and types of fibers use can cause a piece to shrink 10% to 50% in either direction. Just think of that lovely wool sweater you ahd that ended up in the dryer by accident. This creates a challenge when trying to create a piece to fit a frame or a space with tight tolerances.
Step 2: Wetting
A mild natural soap solution is made up and gently sprayed over the entire fiber surface to saturate it. This helps hold the fibers together better, and allows for some delicate manipulation and repositioning.
Step 3: Rolling
Although rolling is not the most time consuming process, but it is the fussiest and most demanding. It involves rolling up the felting piece with a mat material (reed, bamboo, bubble wrap, rubber no-skid rug pad, etc.) anything that will hold the materials together without allow them to stick, and will allow the excess water to flow out. The piece is rolled in one direction, them removed and wound in the opposite direction and this is repeated so that the piece is rolled evenly in all directions. In between rolls, it is unrolled flat and adjusted to make sure the fibers had not shifted and there are no creases or wrinkles. Each piece, depending on the types of fiber and material, can be rolled hundreds of times or even over two thousand times. Additional hand agitation and pressure is often applied to areas where fibers can take a little more attention, or are of a smoother variety that require more work to be coaxed into binding.
Step 4: Shocking
Once it is verified that all of the fibers are adequately bound together (felted), the next step is to wad the fabric and repeatedly slam it with force onto a hard surface such as a steel table or concrete slab. This process allows the fibers to fully lock into place more thoroughly and maximize the shrinkage to make sure the finished piece has more stable dimensions.
Step 5: Rinsing
The fabric is now rinsed to neutralize and remove all soap residue sometimes in a mild vinegar bath to neutralize the soap and clean water bath to remove the acidity of the vineagar.
Step 6: Blocking
There are several techniques for blocking and drying. A common one is to use an clothes iron to shape and dry the piece, which can also give some materials an added sheen. Some wearable pieces can be blocked on a tailor’s mannequin, or hung and adjusted on a line or hanger.
Many of these processes have to be completed and cannot be set aside and continued. So it can take a minimum of 6 hours of continuous work up to several days to complete a single piece.
Embellishing Techniques
There are quite a lot of techniques that can be added as an embellishment. Other felted pieces can be needle felted together. Beads can be sewn in, or certain techniques can allow for non-fiber objects to be worked into pockets of felt, like coins, shells, and other lightweight enhancements.
Some artists use quilting stitching to enhance or add texture and style while some incorporate other items like netting or patches of woven fabric. Our primary artist Jennifer, is constantly on the lookout to find special “found objects” in her travels throughout the world to give a sense of depth and uniqueness to her work.
For more understanding of other types of felting here is an interesting article on industrial felt manufacturing.
We hope that this brief description gives you some insights as to the process and an appreciation of the amount of time, energy and artistry that goes into each piece of our artwork and clothing.


