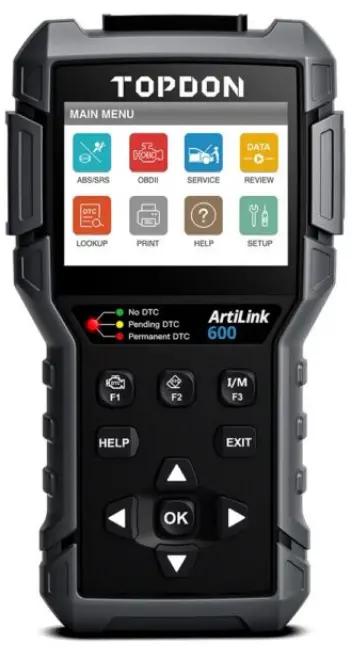
 TOPDON ArtiLink 600 Diagnostic Scanner
Overview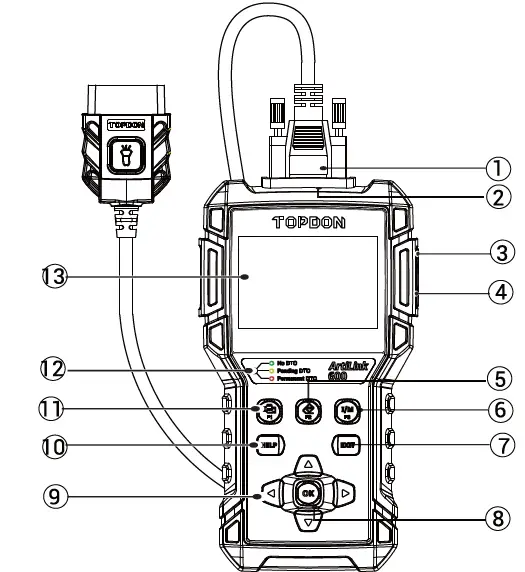
- Diagnostic Cable with LED
- DB-15 Diagnostic Connector
- USB Port
- TF Card Slot
- Erase DTC Shortcut
- I/M Shortcut
- EXIT Button
- OK Button
- Selection Button
- Help Buttons
- Read OTC Shortcut
- LED for Different DTCs
- LCD Screen
Preparation
- The ignition is turned on
- The vehicle battery voltage is 9~ 18 volts.
- The throttle is in the closed position.
Start Diagnostics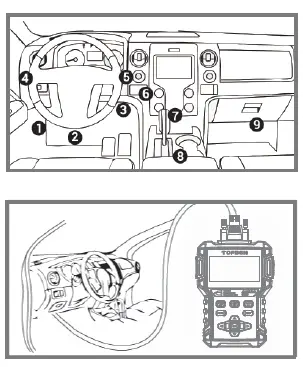
- Locate the vehicle’s DLC port for the OBDII connection
- Connect Artilink600’s OBDI I cable to the vehicle’s DLC port. Artilink600 will power on automatically, and be ready to use
Register & Upgrade
The registration and upgrade is not necessary procedure for Artilink600’s normal use.
- Go to https://www.topdon.com/products/artilink600 to download, decompress and install TOPDON Update Tool on Windows XP, 7, 8 & 10.
- Connect Artilink600 to the computer via the USB cable. Enter main menu ->HELP -> Tool Information to get the Serial Number and Register code for later use. Disconnect Artilink600.
- Remove the TF card in ArtiLink600. Insert the supplied adaptor with the TF card into the USB port of the computer.
- Run the TOP DON Update Tool. Follow the prompts, and input the information required to finish the registration. Click Submit.
- Select the updates you desire, and download the update package into the memory card.
- Insert the TF card with the downloaded update package into ArtiLink600.
- Power up Artilink600 via the USB cable. Artilink600 will automatically start updating if a newer version is detected in the memory card.
IMPORTANT: Read the instruction carefully before operating. Failure to do so may cause damage and/or personal injury.
NOTE: This Quick Start Guide is subject to change without written notice.
IF YOU HAVE QUESTIONS OR COMMENTS, CONTACT US.
Documents / Resources
 |
TOPDON ArtiLink 600 Diagnostic Scanner [pdf] User Guide ArtiLink 600 Diagnostic Scanner, ArtiLink 600, ArtiLink 600 Scanner, ArtiLink Scanner, Diagnostic Scanner, Scanner |

